Broke Gmoccapy trying to enable Tool Measurement
for sure you do not need to reinstall linuxcnc, this is linux not windoof
")
I do recommend to take the sim/gmoccapy folder, copy it and start from there.
Attached I cleaned up for you, so you can begin with a 3 axis machine with tool change set up.
Please copy the complete folder in the config dir (should be home/<your user name>/ linuxcnc/ configs)
and start the config.
Let us know if that works, if so, begin replacing one item after the other, so you will learn and understand what you are doing. If not, ask
")
Norbert
Please Log in or Create an account to join the conversation.
I appreciate you putting that together for me! I got the testconfig.zip gmoccapy_tool_sensor configuration to open in Gmoccapy, though it took a few tries since I basically have no idea what I'm doing. I'm far from certain I did it correctly. Once it opened, I got the errors:
! "can't open ../../nc_files/gmoccapy_2_tool_with_cutter_radius_compensation.ngc"
! "Unable to open file <../../nc_files/gmoccapy_2_tool_with_cutter_radius_compensation.ngc>"
The location of my nc_files folder is:
home/<my_user_name>/linuxcnc/nc_files
The folders in it are:
"examples", "gmc_lib", "gladevcp_lib", "ngcgui.lib", "remap_lib", and "readme.ngc".
Sounds like there's something missing.
Just to check if I understood your directions, here's what I did:
1. unzipped "testconfigs" and put it here: home/<my_user_name>/linuxcnc/configs/testconfig
2. On the desktop, I right clicked and selected "Create Launcher", gave the launcher a name, and selected LinuxCNC from its "Command:" menu.
3. Clicked on the new launcher, browsed to and highlighted gmoccapy_tool_sensor, then clicked OK.
Gmoccapy launched, and the errors came up immediately.
Regarding your suggestion the "take the sim/gmoccapy folder, copy it and start from there", do you mean to try to fix my old files by re-coppying from there, or is there something I should have done with it? In the Gmoccapy documentation about the Automatic Tool Measurement, the only bit I saw about the sim/gmoccapy folder had to do with the "python" and "macros" folder. There are several files in the testconfigs folder that I don't recognize from the instructions.
Again, thanks for the help.
Please Log in or Create an account to join the conversation.
Please Log in or Create an account to join the conversation.
please open the file gmoccapy_tool_sensor.para and look for the line
open_file = ../../nc_files/gmoccapy_2_tools_with_cutter_radius_compensation.ngc
Just erase that one, and the error should be gone. That path point to my file, so it may not be on the same path on your PC. I missed that one.
Norbert
Please Log in or Create an account to join the conversation.
The error did go away once I removed that line of code. I then tried a homing operation on all three axis. None of my motors actually turned, but the screen showed the axes moving. X and Y axes finished their homing operation at 10.000, but the Z axis looks like it basically timed out at -200.000 and would not home, and I was unable to test the (virtual?) tool sensor. Closing my actual tool sensor did not change the state of the virtual tool sensor LED.
I haven't tried anything else, it's been a pretty busy week! Suggestions? Thanks!
Oliver
Please Log in or Create an account to join the conversation.
T note that you have very low knowledge of linuxcnc.
Yes it is a simulated machine.
Open that config with the config picker.
Press the estop button
Press the machine on button
Press the home button to show all hominv button
Press the home all button.
Do the dro get green?
Do not jog before homing, as in sjm that could cause problems.
Report and we go to the next step.
Norbert
Please Log in or Create an account to join the conversation.
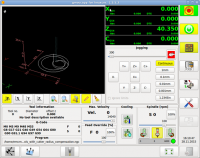
Good news, the testconfig gmoccapy_tool_sensor works! The axes all make it home, and the automatic tool measurement simulation does its thing. Simulated success!
I may have found a glitch. I originally tried to home the axes sequentially: X then Y then Z. Only X and Y would "get green", the Z axis looked like it was trying to find a home switch that wasn't there. It would "go" all the way to -210.000, give the error "! end of move in home state 5", and stay red. Later, I found that using the "Home All Axis" button worked, as did homing the axes sequentially if I started with Z.
I'm going to create a copy of my original config, put in new copies of the "macros" and "python" folders, and make sure the macros are all listed in my .ini file. Then I'll try moving in some files that are missing, like "tool_sensor.hal" and "tool_sensor.glade". I don't see them covered in the linuxcnc.org/docs/html/gui/gmoccapy.html documentation, guess I'll find out if they're necessary!
Thanks again for your help.
Please Log in or Create an account to join the conversation.
This is only in sim mode, So not realy problematic. In live it will work.I may have found a glitch. I originally tried to home the axes sequentially: X then Y then Z. Only X and Y would "get green", the Z axis looked like it was trying to find a home switch that wasn't there. It would "go" all the way to -210.000, give the error "! end of move in home state 5", and stay red. Later, I found that using the "Home All Axis" button worked, as did homing the axes sequentially if I started with Z.
That is the correct way to do it, but you will not need the glade file, that one is only to be able to simultate the probe contact!'m going to create a copy of my original config, put in new copies of the "macros" and "python" folders, and make sure the macros are all listed in my .ini file. Then I'll try moving in some files that are missing, like "tool_sensor.hal" and "tool_sensor.glade". I don't see them covered in the linuxcnc.org/docs/html/gui/gmoccapy.html documentation, guess I'll find out if they're necessary!
I would recommend:
- copy you org folder to a new name.
- commend out in your INI as much hal files as possible.
I spilt big hal files in several smaler ones, so I do have one for limits, one for coolant, one for spindle etc. at the beginning it is a little bit more complicated, because sometimes you will have to look for components loadid in prior hal files, but at the end it is much easier to find errors and mantain.
- Change the GUI according to the documentation
If all that works, then begin to integrate the tool sensor part.
And!
Don't forget to ask if you need help
Please do not forget to add your config files in that case.
Norbert
Please Log in or Create an account to join the conversation.
z home should be at the top not bottom ,
you need to know sure dro's increase and decrease the correct way etc
and then dont forget to set your work toucvh off 0.0 correctly to the top surface of the work in the case of z , , then the probe will work fine.
Please Log in or Create an account to join the conversation.
When trying a tool change on my real machine, the error I'm getting is: "! Named parameter #<_ini[change_position]z> not defined".
I do have "[CHANGE_POSITION], X = 10, Y = 5, Z = -1" included in my .ini file (as you can see in my attached files), and don't know where else I could look for the source of the problem. I have also modified the change.ngc file by un-commenting the two lines as instructed in the documentation.
At the same time I get the Operator Message: "Important Warning, GCode Error in change.ngc, Near line 76 of /.../macros/change.ngc, File ended with no percent sign or program end"
This is after I've replaced the "macros" and "python" files and again edited the "change" file as instructed.
Question: what part of the code determines that the [1] at the end of change.ngc (instead of a percent sign or an M2) ends the program and returns a positive value?
I've decided to use stepconfig to generate a new configuration (Taig-02), and to start trying to modify the fresh config for tool measurement. We'll see how it goes!
Please Log in or Create an account to join the conversation.