Retrofitting a CharlyRobot 3 axis CNC

More
6 years 4 months ago #171159 by RacingMat
Hi everyone!

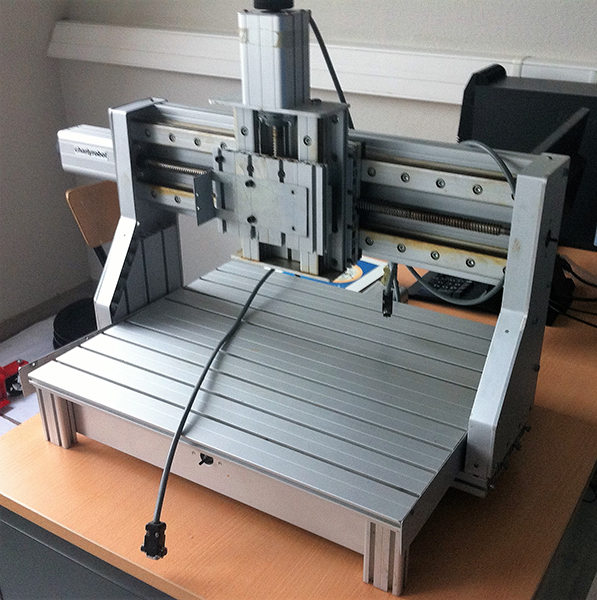
I'd like to show you my project
And if I need your help, you will know my setup :-)

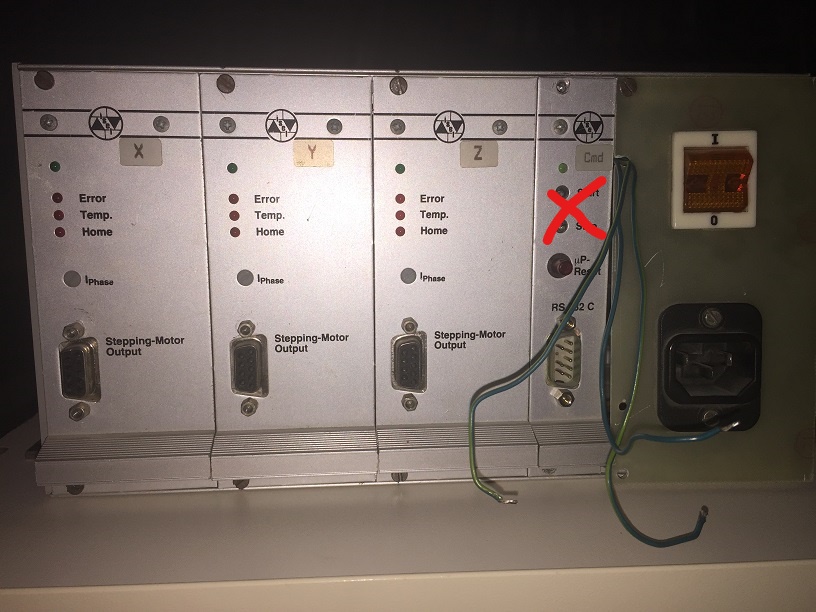
I remove the proprietary µcontroller board (because I haven't the related software)
but I have kept the 3 drivers.

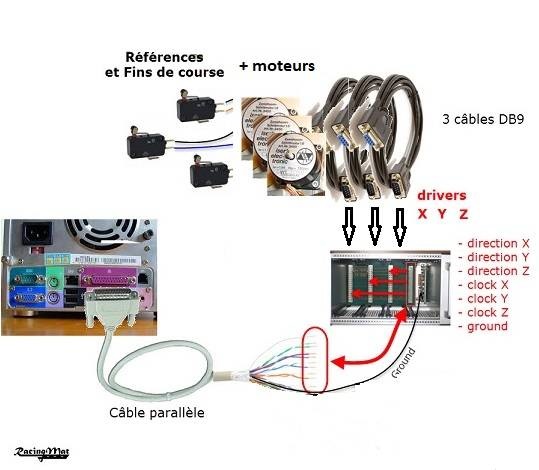
I want to drive the 3 drivers with LinuxCNC via the parallel port

yours
Mat (from France)


Please Log in or Create an account to join the conversation.
More
6 years 4 months ago #171220 by bbsr_5a
if you trell us the manufactuer of the machine we can help
if you open up the case and tell the PCB reding of the parport Interface we may find the PINout of this

if you alredy got the pinout then you just need to run STEPCONF wizard and the machine will run

is this a ISEL M4030 V1
The following user(s) said Thank You: RacingMat

Please Log in or Create an account to join the conversation.

More
6 years 4 months ago #171243 by RacingMat
Hi!

the manufacturer is ISEL/Charlyrobot
reference is unclear maybe PM1 30 with a command control unit C10

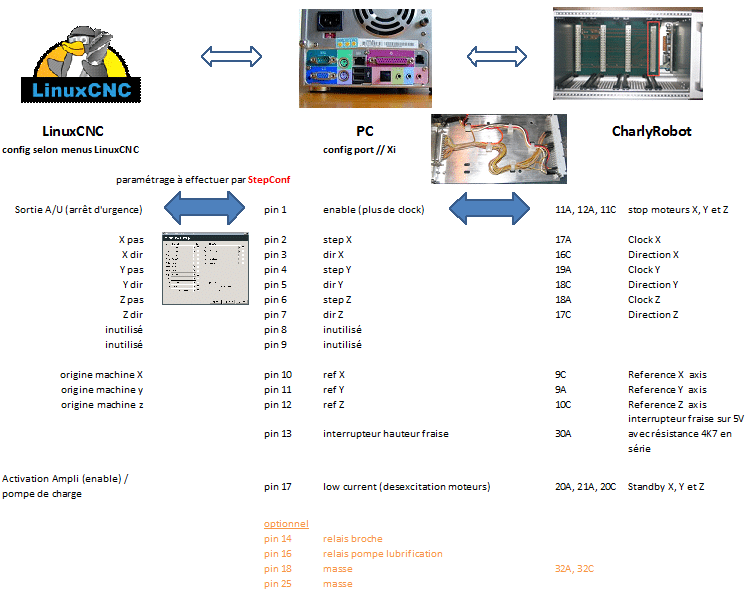
Thanks for your offer, but I have sort out the pinout! And last night, I just connected my parallel port straight to the 3 drivers pins.
And I can move the motors :woohoo:


I may have some questions now:
my Z axis can go down but not really up :-(
moving it by hand, the feeling is really fine (smooth, no hard point, no extra effort)

I used an existing similar Charlyrobot setup
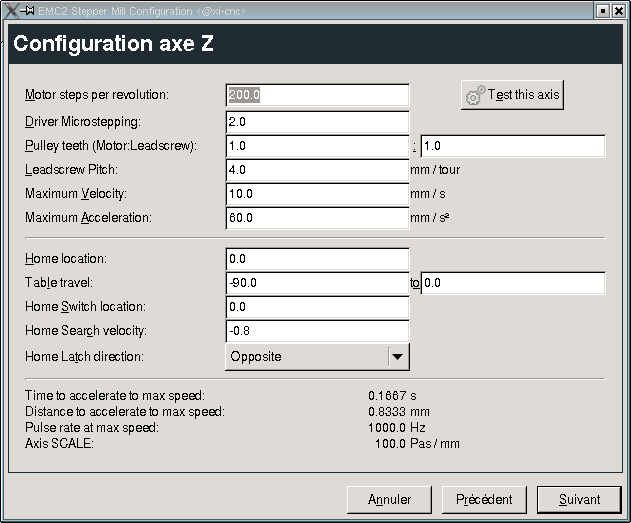
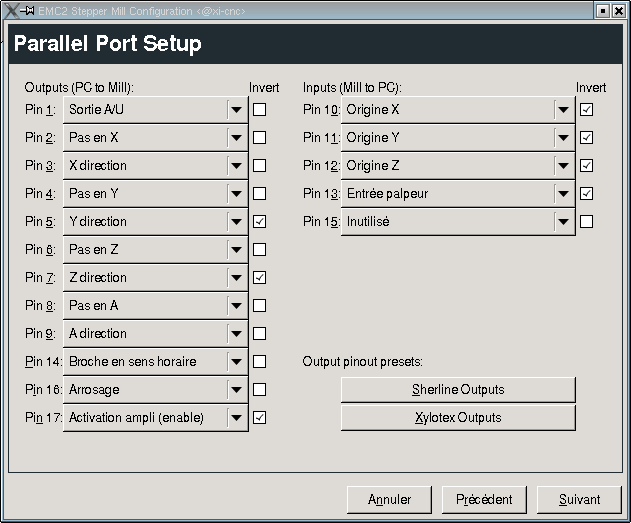
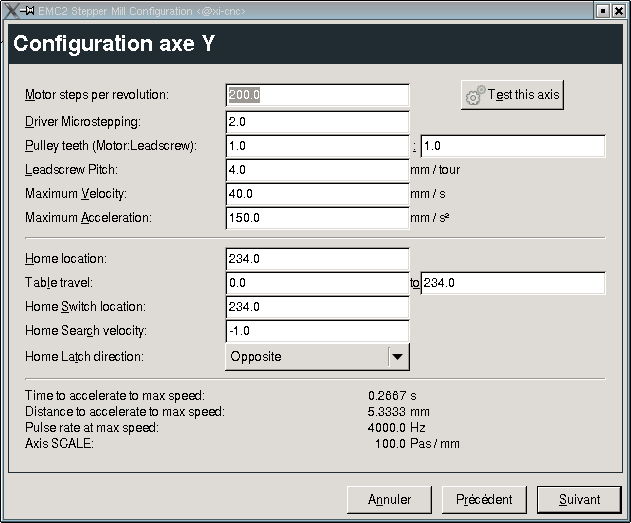
here is the Stepconf setup


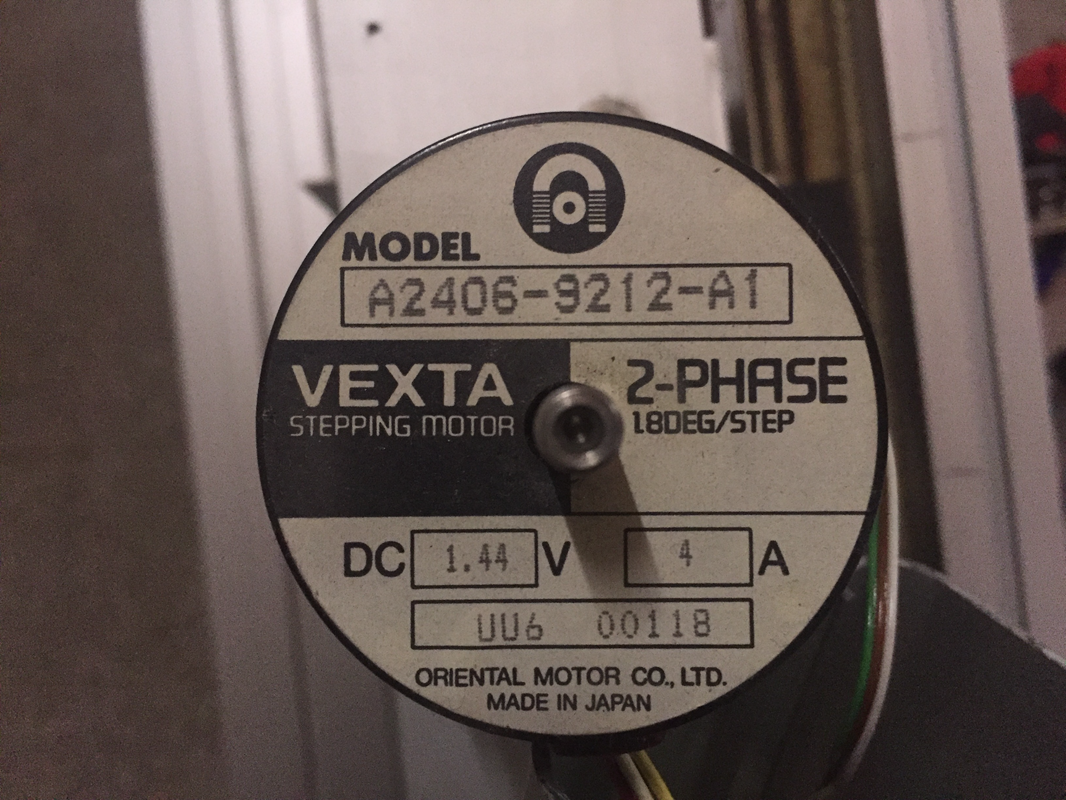
and here is the motor for Z axis:


but maybe it's not suitable with my motors?

Please Log in or Create an account to join the conversation.

More
6 years 4 months ago #171245 by tommylight
The step timing is to short, so might want to raise that, try 5000.
The following user(s) said Thank You: RacingMat

Please Log in or Create an account to join the conversation.

More
6 years 4 months ago - 6 years 4 months ago #171254 by bbsr_5a
the isel always use a charge pump
in education center i got the same version 2 with Z break
idid get rid of the C10 and went to a standard 5USD Mach3 5Axis bob
this benefits the full RPM controll of the Spindle the extra controll of the CASE Frame Version2

and ofcause the option to go ETH with the 7i92
fast cabeling as plugs to fit isolated cables not the junk of the isel internal


!! ATTANCIAN!!
the isel V1 uses the H-brige as a GND so the motors 8wire got +24V/48 fixed and the drivers pull them down for a step

MAKE shure you are handeling this
Last edit: 6 years 4 months ago by bbsr_5a. Reason: motor
The following user(s) said Thank You: RacingMat

Please Log in or Create an account to join the conversation.
More
6 years 4 months ago - 6 years 4 months ago #171277 by RacingMat

tommylight wrote: The step timing is to short, so might want to raise that, try 5000.

Thanks, step timing value was given by L297 choice.
I tried with custom choice and I had a go at 5000.
Unfortunately, the behaviour is the same... weak Z axis.

I tried the 3 axis with different results:
the Z and X axis are both weak :(
but gantry Y axis is really beaffy (I can't stop it by hand) :)

With 500 or 5000, it's the same.

I have to be optimistic if 1 axis is good.
By the way, I have checked the coupling: motor and screw are well linked

bbsr_5a wrote: the isel always use a charge pump
in education center i got the same version 2 with Z break
i did get rid of the C10 and went to a standard 5USD Mach3 5Axis bob
this benefits the full RPM controll of the Spindle the extra controll of the CASE Frame Version2

and of cause the option to go ETH with the 7i92
fast cabeling as plugs to fit isolated cables not the junk of the isel internal

Thanks for your help !
I have no budget for MESA conversion.
I have a 5€ BOB but I haven't find any tutorial to use it with ISEL drivers. I made a search into the forum but it doesn't show up your topics, only yours messages...

bbsr_5a wrote: !! ATTANCIAN!!
the isel V1 uses the H-brige as a GND so the motors 8wire got +24V/48 fixed and the drivers pull them down for a step
MAKE sure you are handeling this

I'm not aware of this, nor the consequences... I just plugged the parallel port to the pins of the 3 drivers via the back PCB and socket.
Last edit: 6 years 4 months ago by RacingMat. Reason: english translation

Please Log in or Create an account to join the conversation.
Time to create page: 0.226 seconds
Powered by Kunena Forum