Engraver/Router Retrofit
- thadwald
- Offline
- Premium Member
-

Less
More
- Posts: 111
- Thank you received: 10
12 Jul 2019 19:49 - 12 Jul 2019 19:50 #139203
by thadwald
Engraver/Router Retrofit was created by thadwald
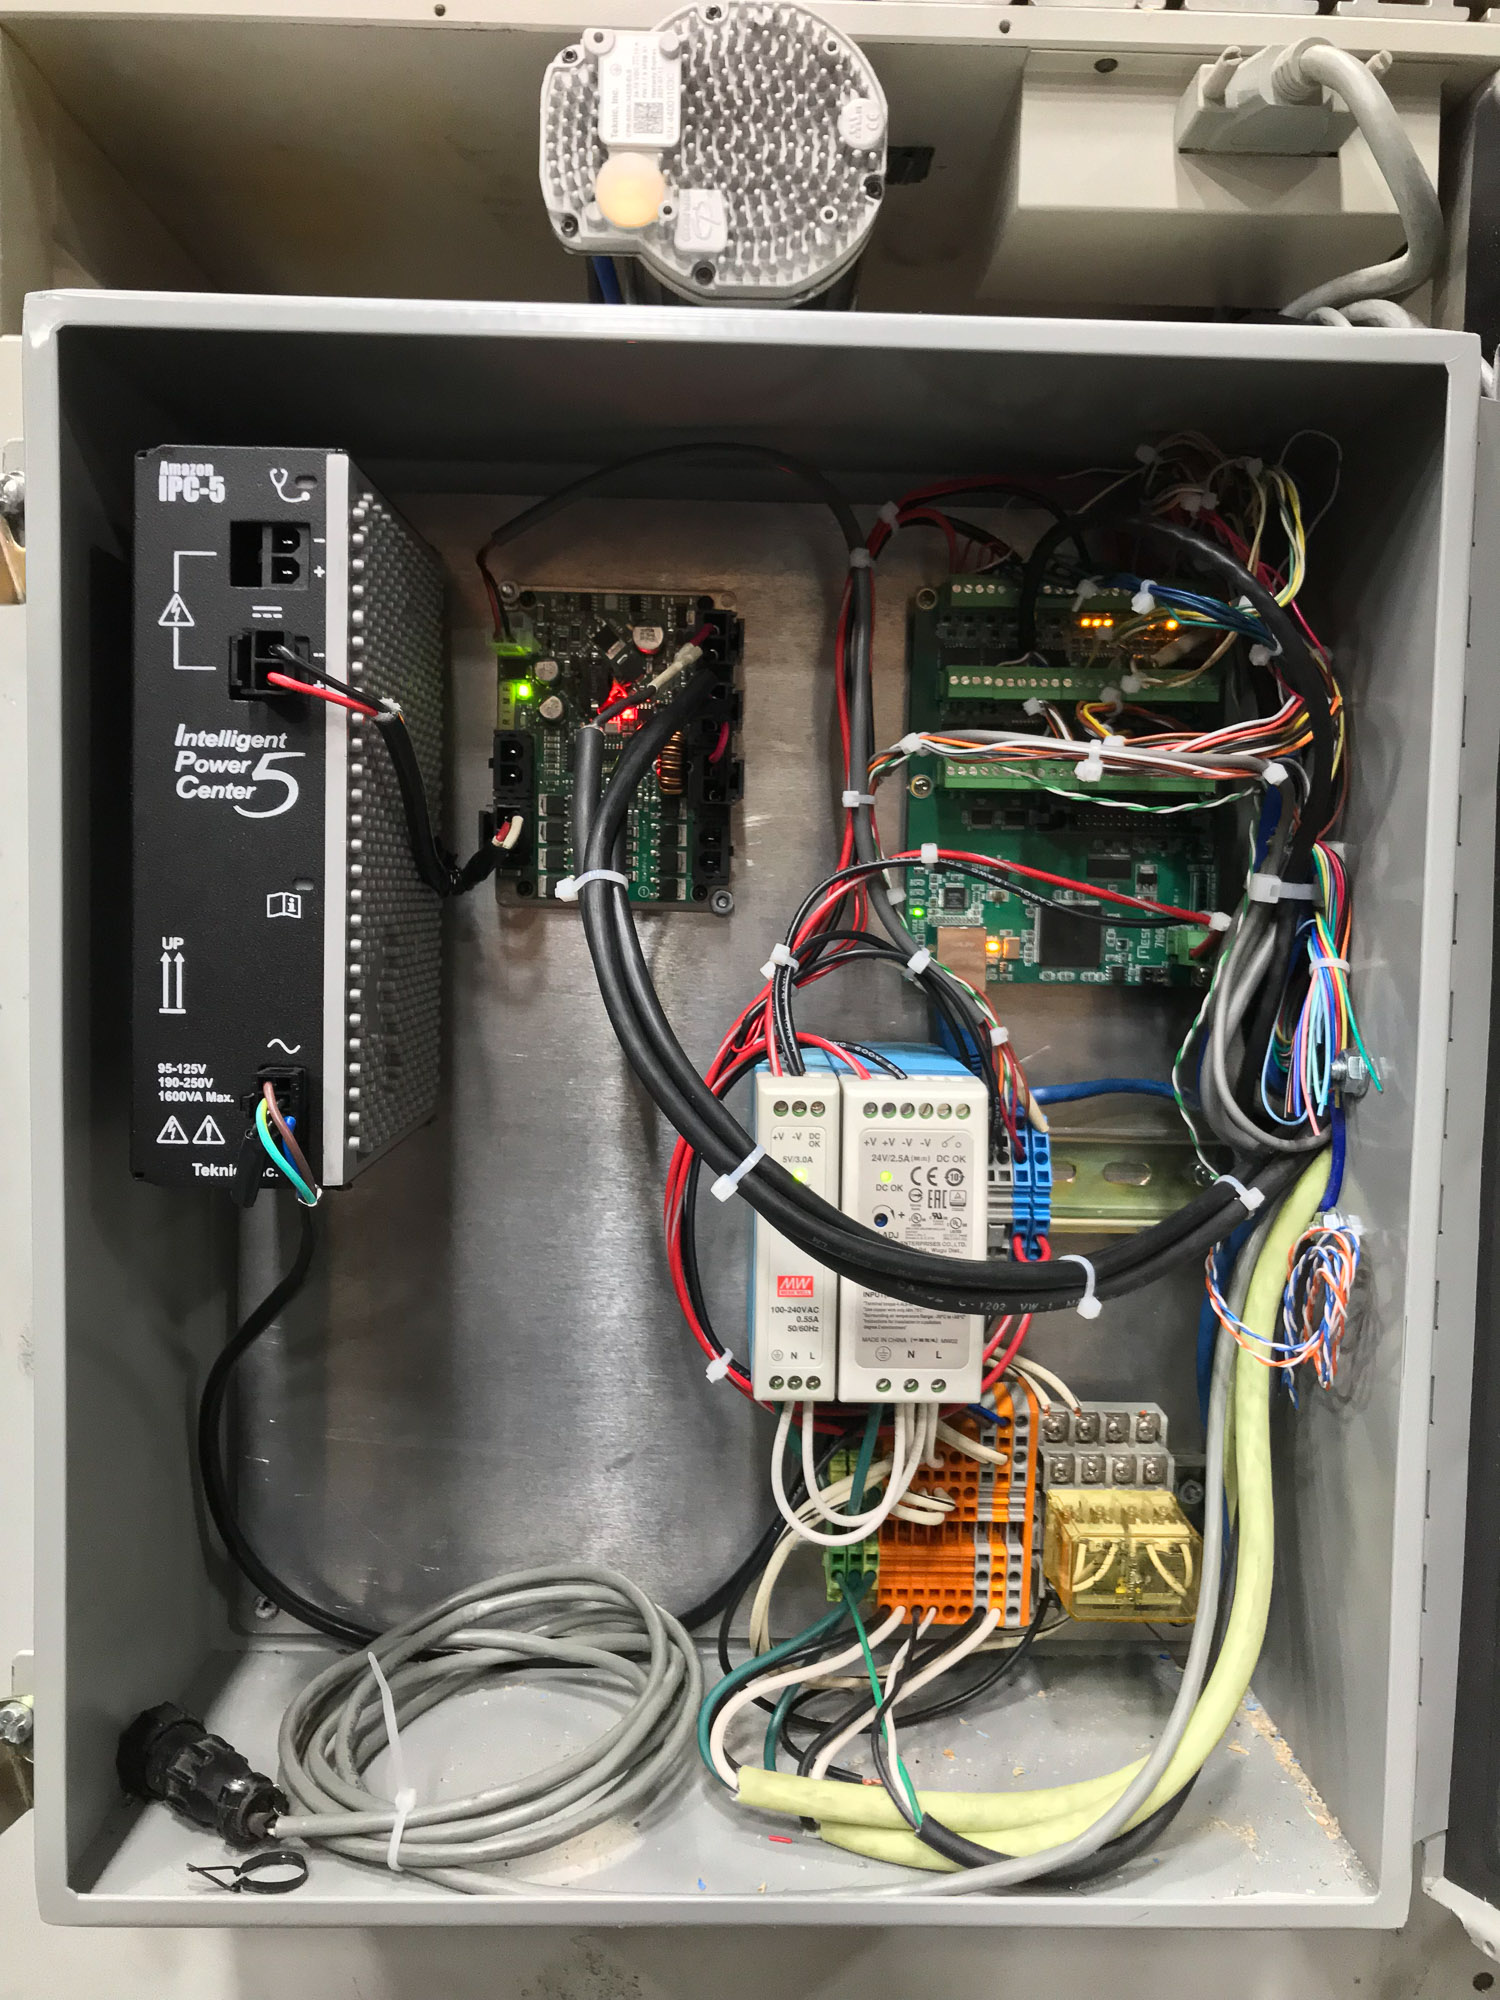
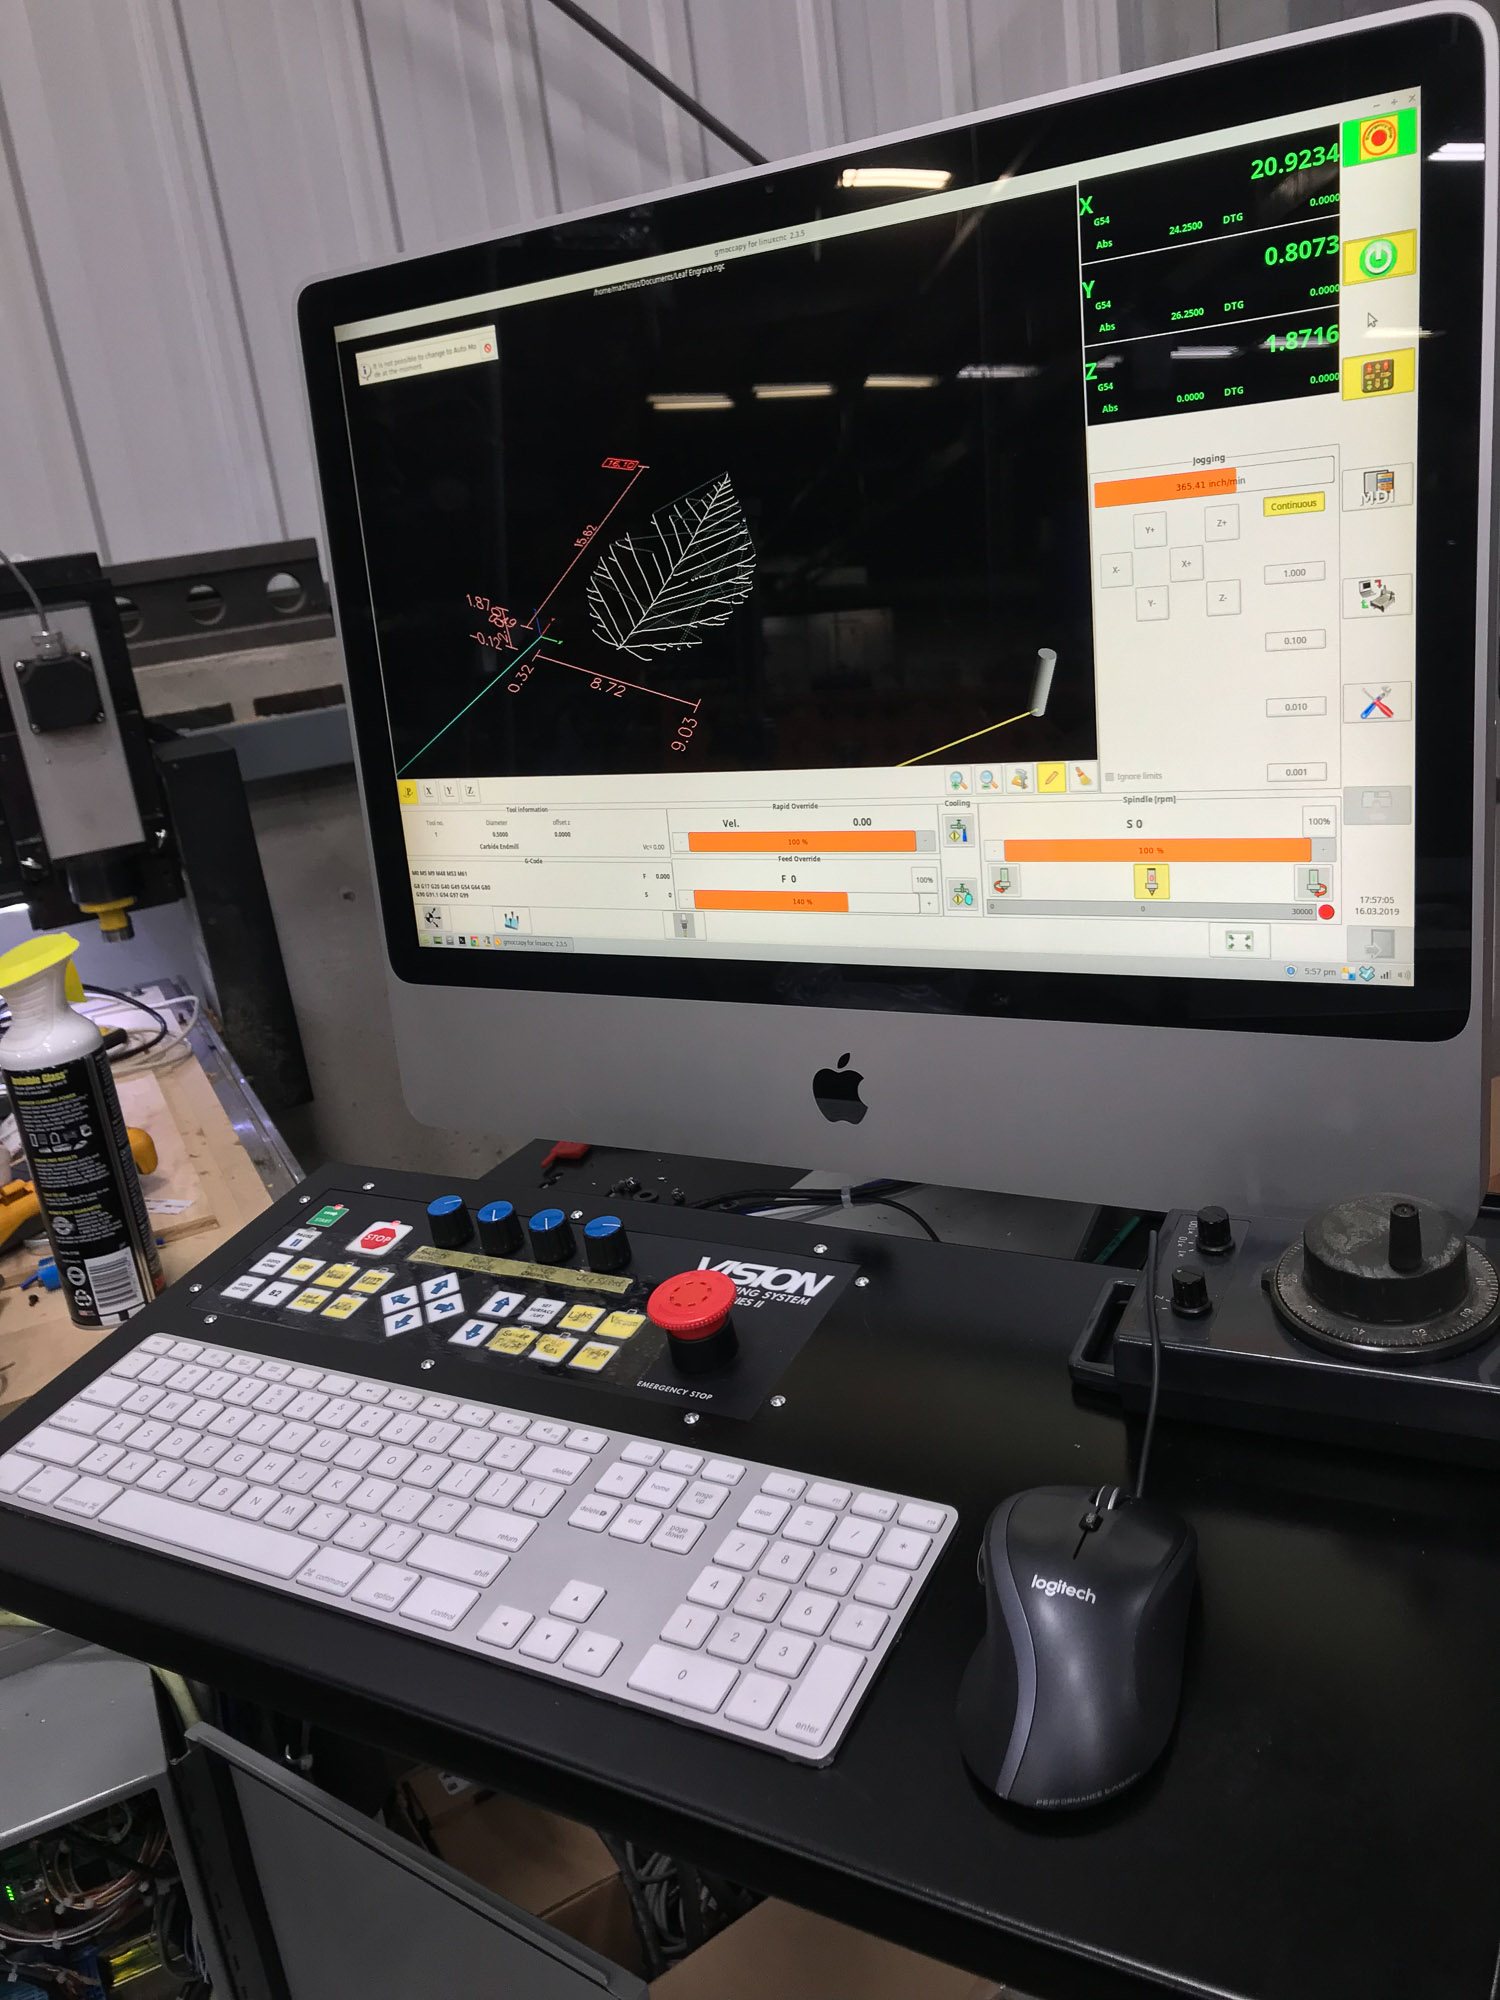
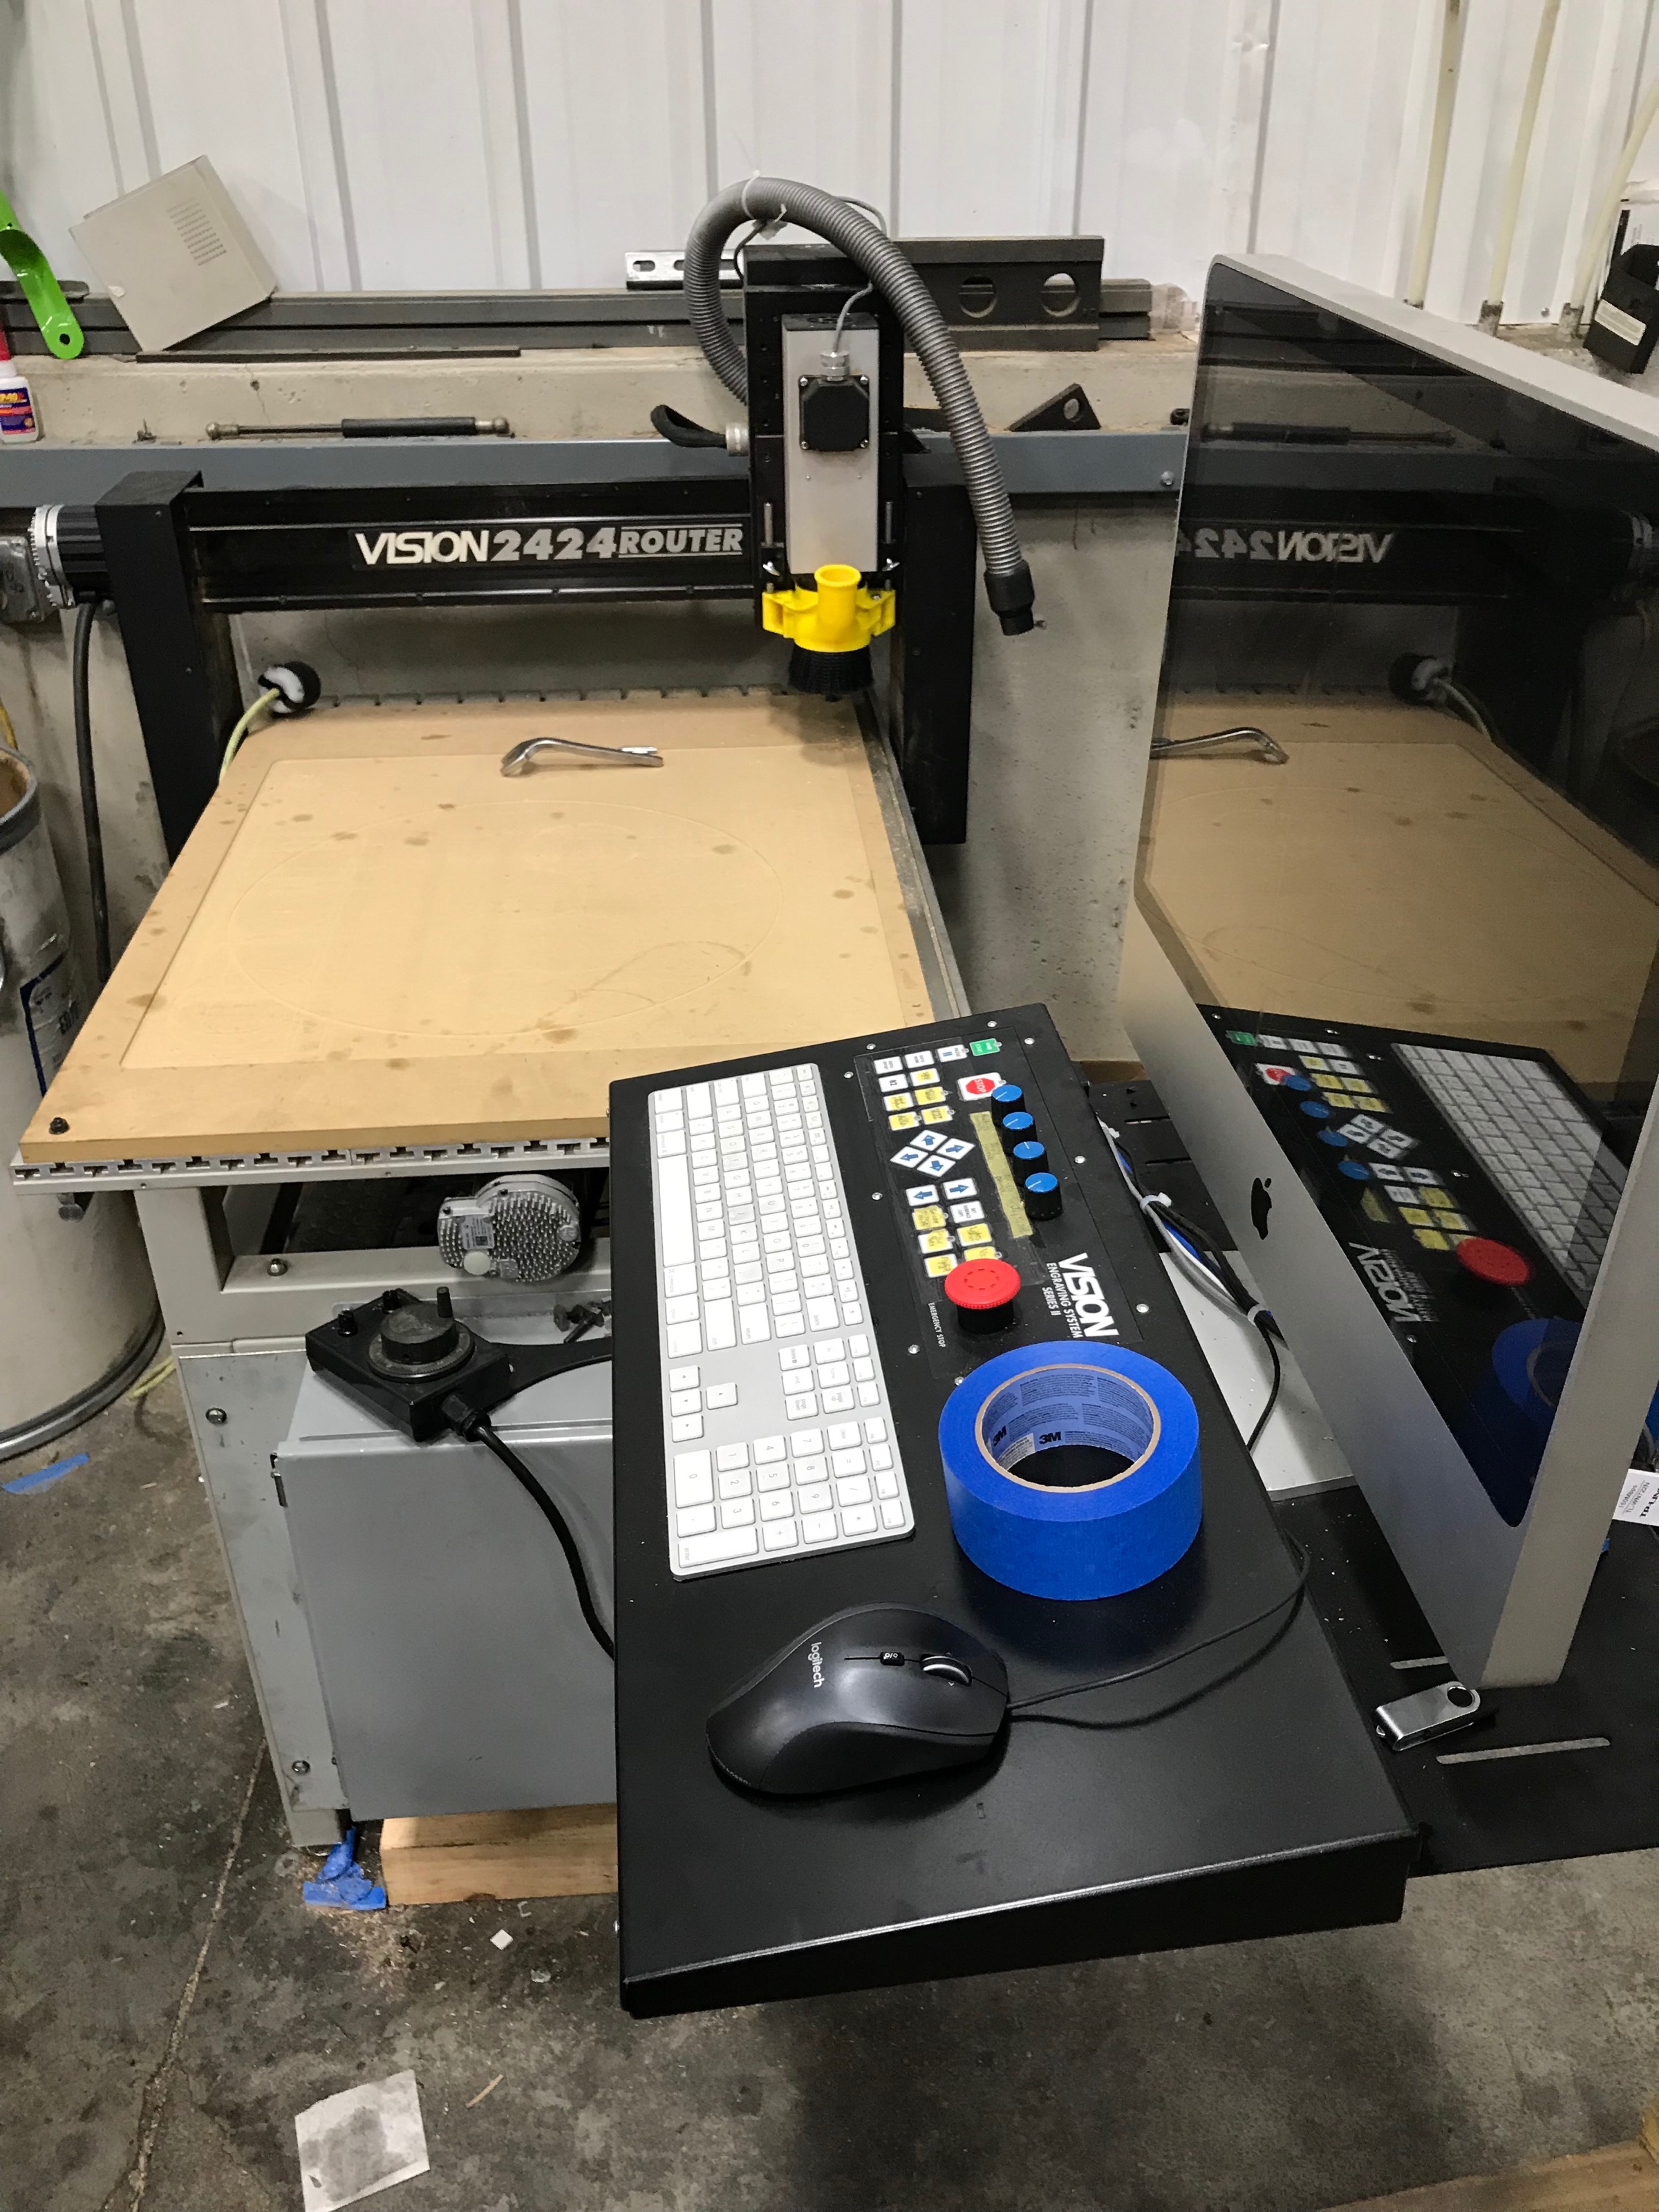
This machine was originally run by some sort of printer driver for engraving. In hopes of turning it into a useful g-code CNC machine for our school, I retrofitted it with LinuxCNC using a 27" iMac for the main computer and a MESA 7i96 as the main i/o hardware.
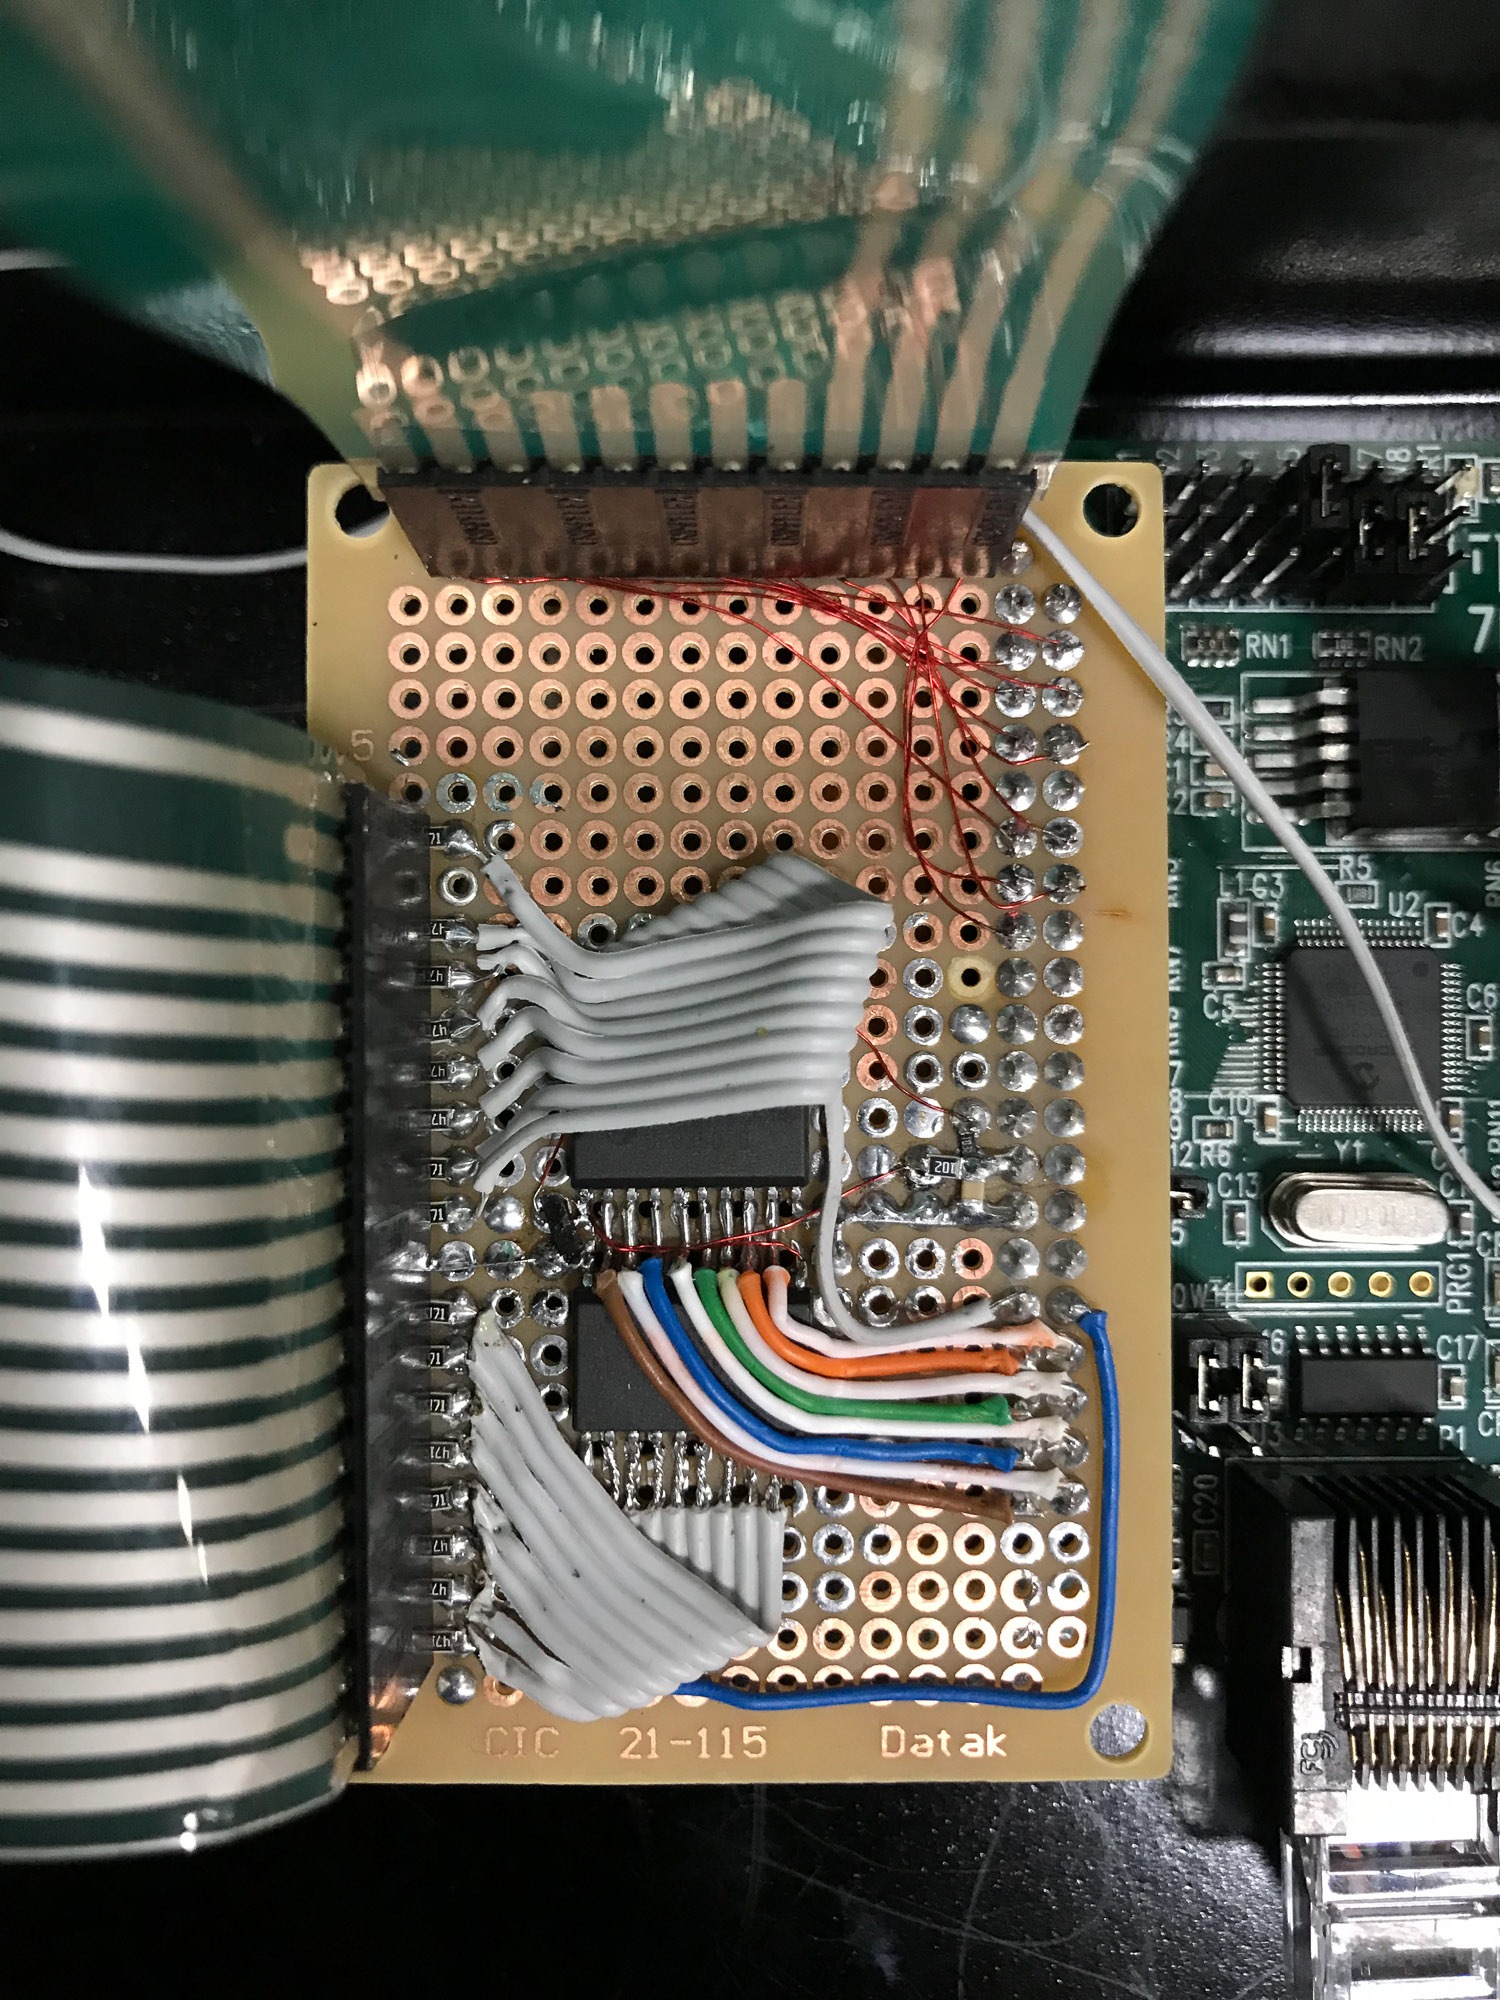
Since I also wanted to reuse the original physical user interface which involved 20-some membrane buttons in a matrix arrangement and about as many LED lights, I added a MESA 7i73 pendant card. One additional hardware component is a pair of latching buffers, which I needed to handle current through the LEDs, and also used as multiplexing outputs. I ran out of outputs and didn't feel like adding another card, hence the need for multiplexing outputs.
The multiplexing logic is handled in HAL, which is something I don't necessarily recommend even though it was an interesting experiment.
I manufactured a custom panel for mounting the keyboard and manual controls. The panel also houses the 7i73 pendant card, as well as a USB-RS232 converter. The main i/o card is mounted inside the main enclosure, along with all the power supplies and e-stop relays.
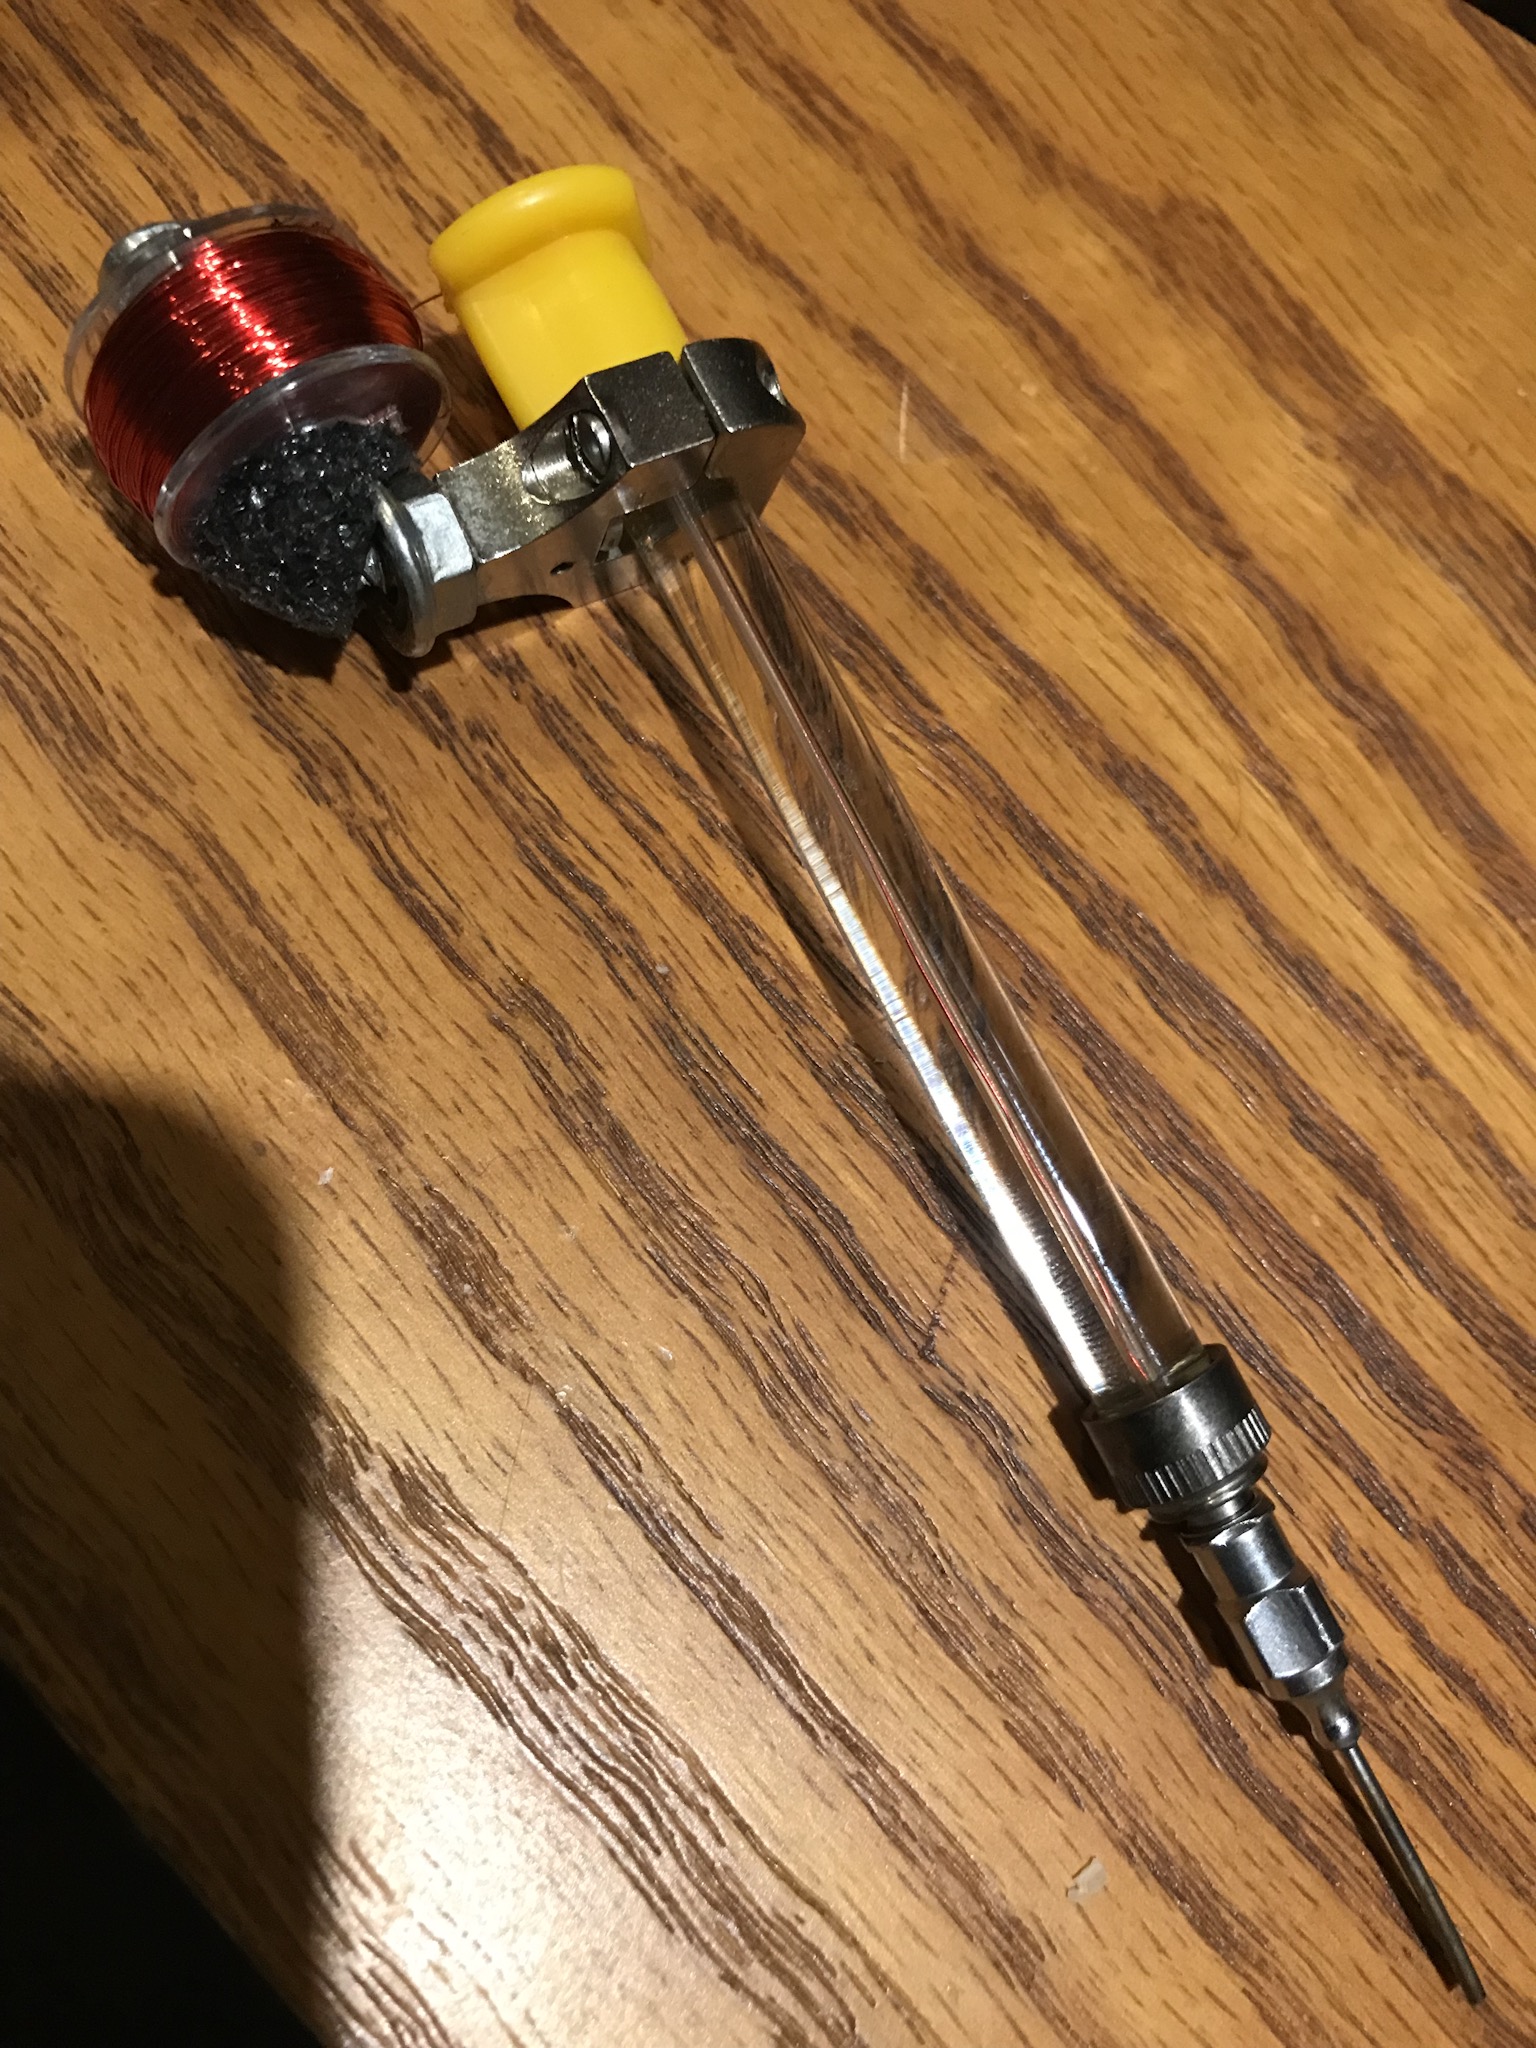
Another interesting experiment was to use smt components on a single-sided perf board. This is done by splitting each pad under the smt component in half, which works out perfectly for .05" pitch components. Interestingly enough, smt resistors and capacitors are easier to install on perf board than the thru-hole variety. For wiring I tried a bunch of different methods but settled on using thin enameled magnet wire.
The spindle was originally run off a Toshiba vf-9, which I wanted to use but doesn't communicate via MODBUS, so I replaced it with an Automation Direct GS2.
The original axis motors were steppers, which I replaced with Teknic Clearpath SKSD integrated servo motors. These motors are intended to be drop-in replacements for steppers, and work using a step-direction signal. This turned out to be the most expensive part of the retrofit but the speed and smoothness is quite impressive.
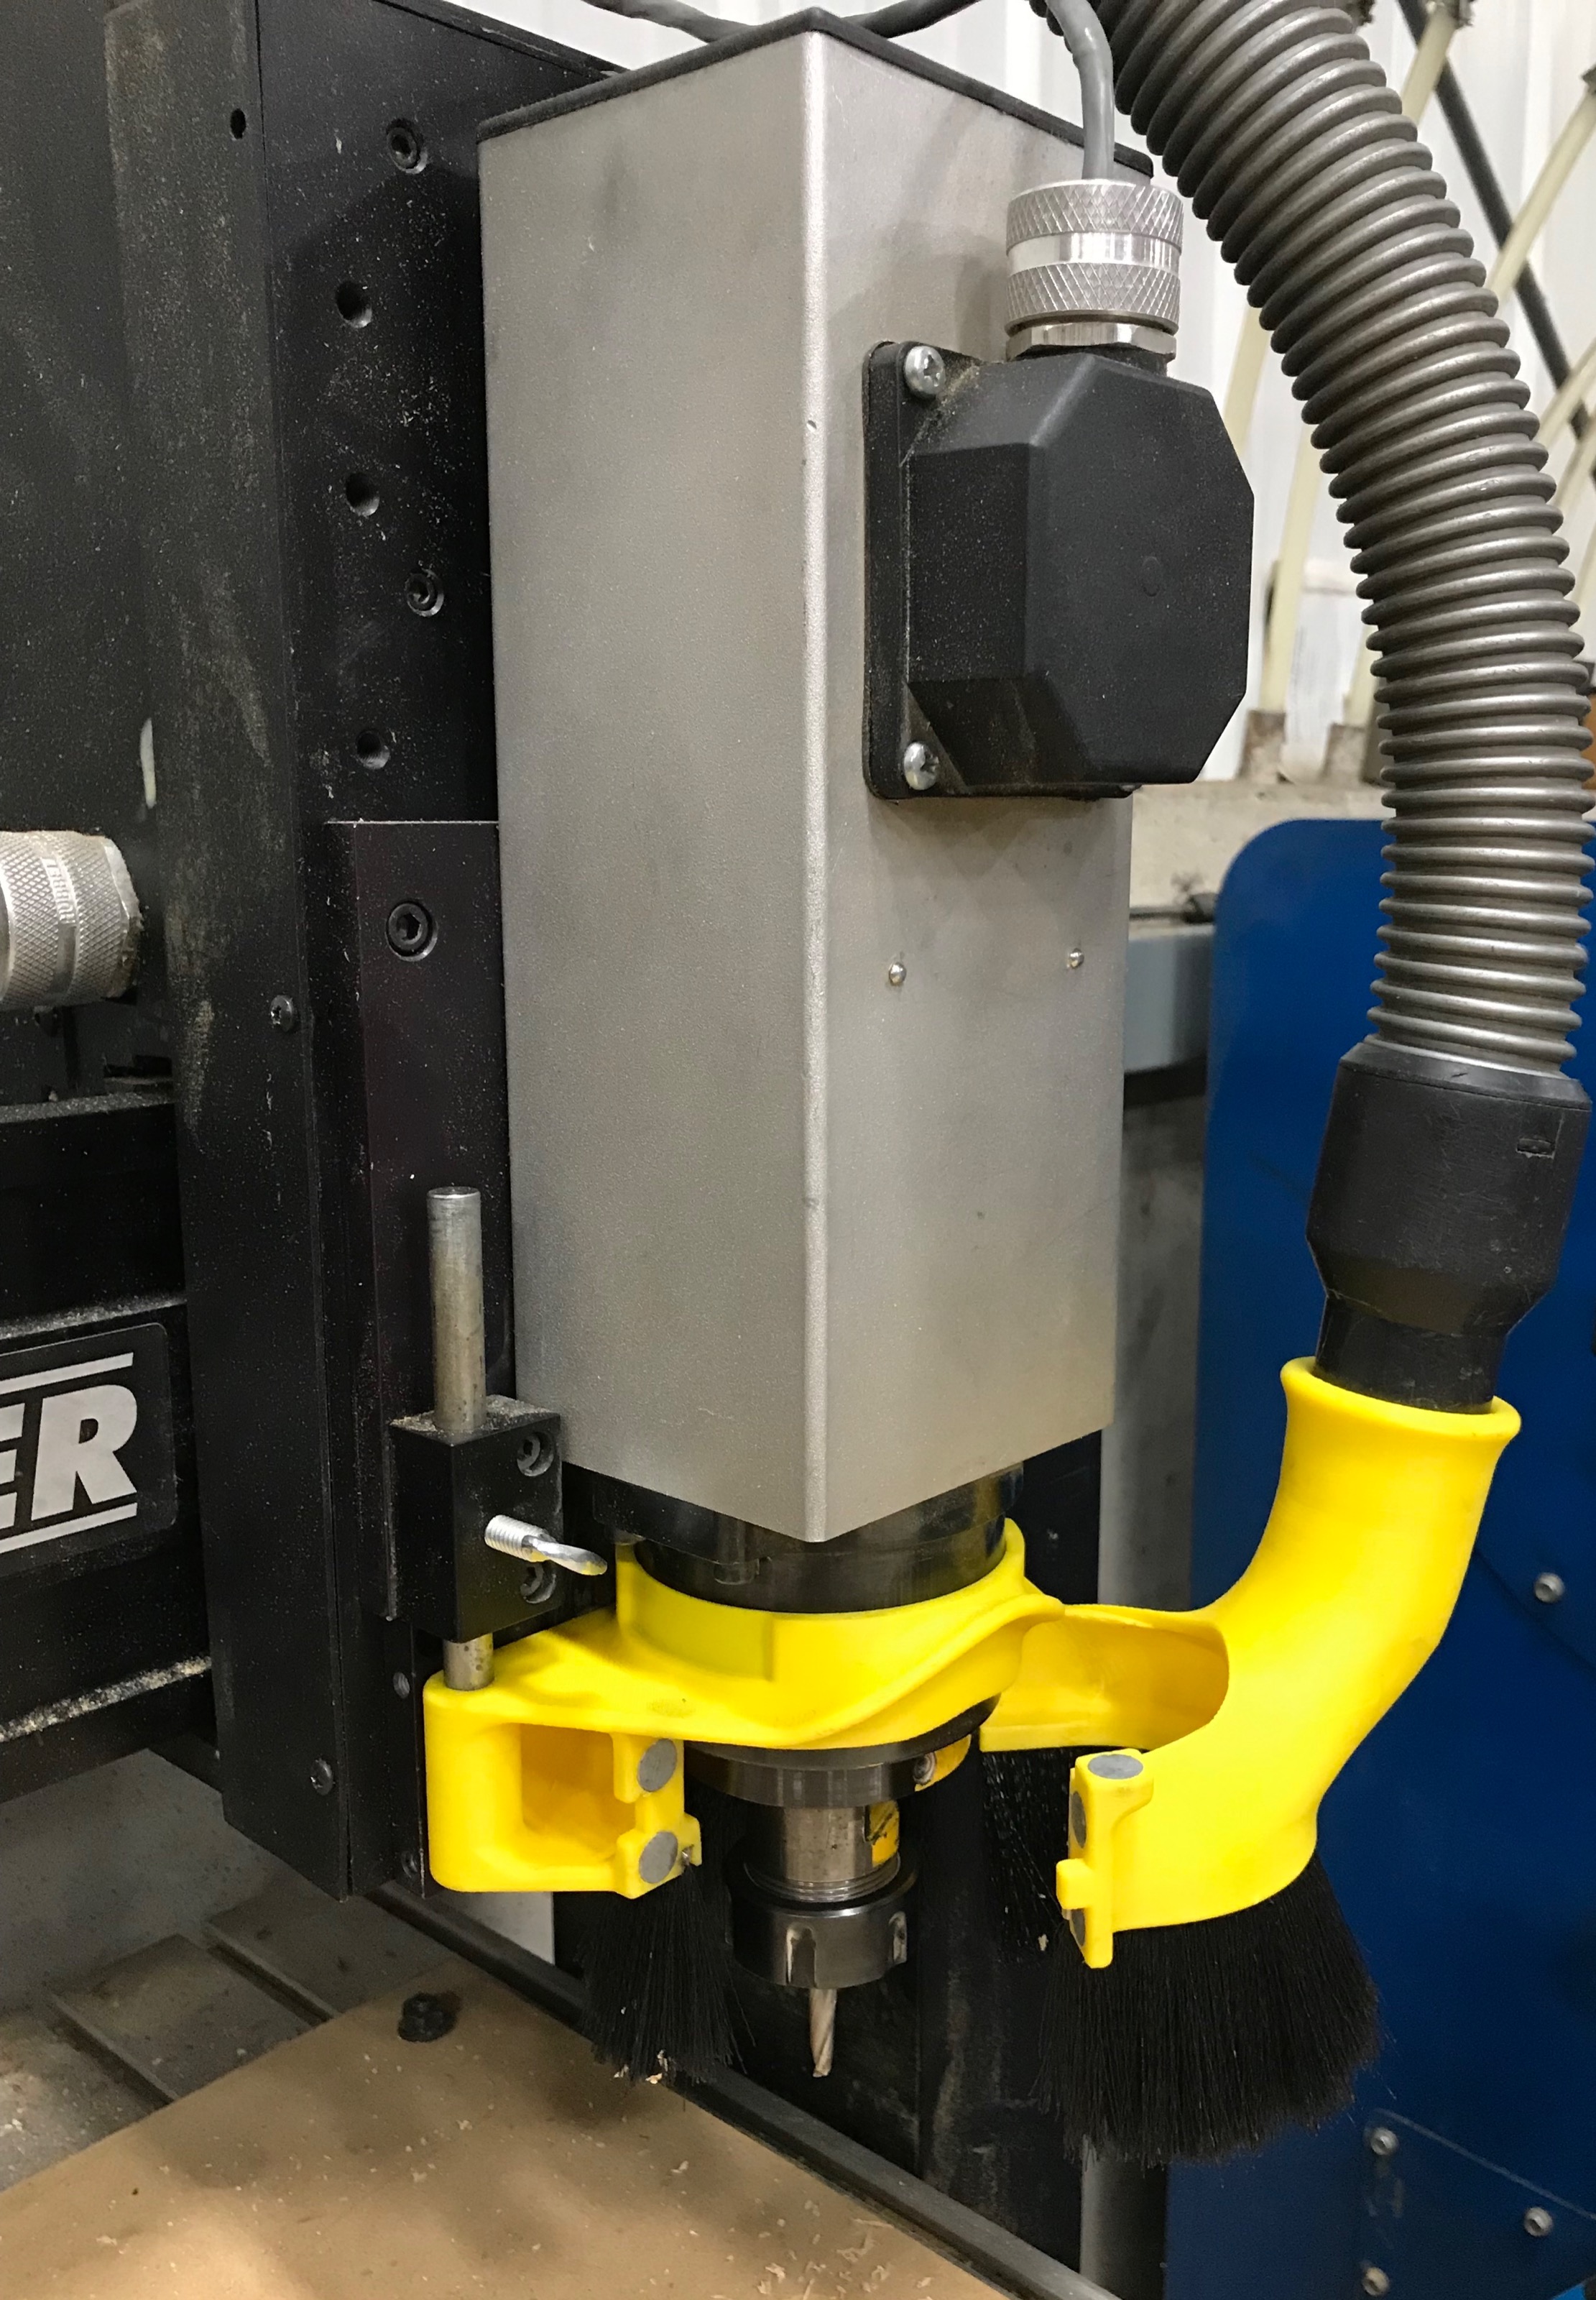
Attached are some pictures of the final product. This project turned out to be more involved than I anticipated but it appears to be a nice little router now.
Included here are my .ini and .hal files. Feel free to ask questions or to provide suggestions.
Thanks to the many people on this forum and in the mailing list who helped me.
Attachments:
Last edit: 12 Jul 2019 19:50 by thadwald.
The following user(s) said Thank You: chimeno, tommylight
Please Log in or Create an account to join the conversation.
- tommylight
-

- Away
- Moderator
-

Less
More
- Posts: 21310
- Thank you received: 7278
12 Jul 2019 20:00 #139204
by tommylight
Replied by tommylight on topic Engraver/Router Retrofit
Ummm one small problem.......i see no router ! 
Please Log in or Create an account to join the conversation.
- thadwald
- Offline
- Premium Member
-

Less
More
- Posts: 111
- Thank you received: 10
13 Jul 2019 02:41 #139223
by thadwald
Replied by thadwald on topic Engraver/Router Retrofit
The following user(s) said Thank You: tommylight
Please Log in or Create an account to join the conversation.
- pl7i92
-

- Offline
- Platinum Member
-

Less
More
- Posts: 1872
- Thank you received: 358
13 Jul 2019 07:10 #139234
by pl7i92
Replied by pl7i92 on topic Engraver/Router Retrofit
nice done
is this a ballscrew system or a belt driven mashine
is this a ballscrew system or a belt driven mashine
Please Log in or Create an account to join the conversation.
- tommylight
-

- Away
- Moderator
-

Less
More
- Posts: 21310
- Thank you received: 7278
13 Jul 2019 09:24 #139240
by tommylight
Replied by tommylight on topic Engraver/Router Retrofit
Looks nice. Elte spindle ? 0.8 KW one ?
Please Log in or Create an account to join the conversation.
- thadwald
- Offline
- Premium Member
-

Less
More
- Posts: 111
- Thank you received: 10
13 Jul 2019 11:19 #139243
by thadwald
Replied by thadwald on topic Engraver/Router Retrofit
Leadscrews and round recirculating ball ways. This is the weakest part of the system but its design intent is is engraving and light wood routing.
Please Log in or Create an account to join the conversation.
- thadwald
- Offline
- Premium Member
-

Less
More
- Posts: 111
- Thank you received: 10
13 Jul 2019 11:25 #139244
by thadwald
Replied by thadwald on topic Engraver/Router Retrofit
Elte, yes. Air cooled, 2kw, 18,000 rpm, integrated ER 32 collet.
Please Log in or Create an account to join the conversation.
- andypugh
-

- Offline
- Moderator
-

Less
More
- Posts: 19798
- Thank you received: 4608
15 Jul 2019 14:05 #139431
by andypugh
Replied by andypugh on topic Engraver/Router Retrofit
Magnet wire prototyping is a thing I use quite often:
www.instructables.com/id/PCB-Prototyping-With-Verowire/
www.instructables.com/id/PCB-Prototyping-With-Verowire/
Please Log in or Create an account to join the conversation.
- Mike_Eitel
-

- Offline
- Platinum Member
-

Less
More
- Posts: 1052
- Thank you received: 183
15 Jul 2019 16:04 #139451
by Mike_Eitel
Replied by Mike_Eitel on topic Engraver/Router Retrofit
A good trick if you have problem with the plastic pin of your wirring-pen is to take apart a cheap ballpen refill and use the brass pin after you got rid of the ball. I always fix the brass by winding some wire over the plastic.
Hope I expressed clear enough ;-(
Mike
Hope I expressed clear enough ;-(
Mike
Please Log in or Create an account to join the conversation.
- thadwald
- Offline
- Premium Member
-

Less
More
- Posts: 111
- Thank you received: 10
16 Jul 2019 03:03 #139535
by thadwald
Replied by thadwald on topic Engraver/Router Retrofit
Please Log in or Create an account to join the conversation.
Time to create page: 0.197 seconds

