Optimum Optimill MH50V CNC conversion

12 Nov 2023 15:41 #285169
by zmrdko
Replied by zmrdko on topic Optimum Optimill MH50V CNC conversion
Hello,
i'm probably trying to do the same configuration like you.
My intention is to somehow preserve correct position in linuxcnc based on encoder position.
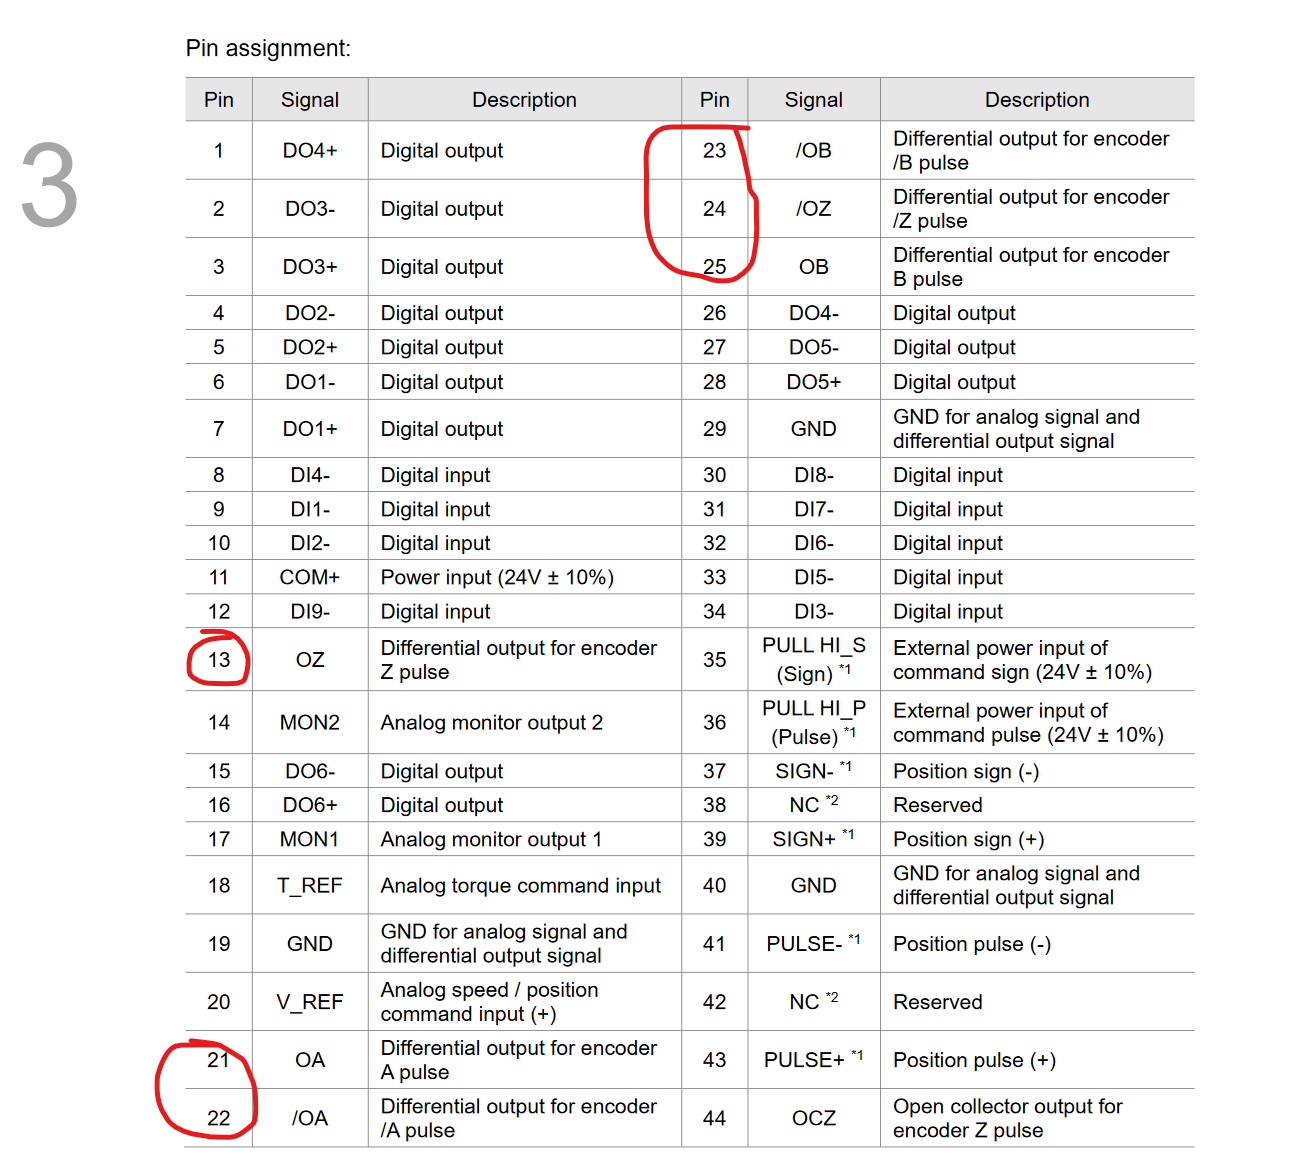
Did you try this with running linuxcnc? Because video only shows, that driver keeps the position after alarm is cleared.
My question is what needs to be done in hal file to make it work.
Also would you mind sharing your config?
i'm probably trying to do the same configuration like you.
My intention is to somehow preserve correct position in linuxcnc based on encoder position.
Did you try this with running linuxcnc? Because video only shows, that driver keeps the position after alarm is cleared.
My question is what needs to be done in hal file to make it work.
Also would you mind sharing your config?
Please Log in or Create an account to join the conversation.
14 Nov 2023 12:58 #285375
by Unlogic
Replied by Unlogic on topic Optimum Optimill MH50V CNC conversion
I'm just getting started with LinuxCNC so I haven't gotten the servos mounted on the machine yet. I'm currently making the control panel and ball screw mounts.
When testing on the bench LinuxCNC seems to keep the position just fine but in practice when there is some inertia involved you'd most likely need to hookup the encoder outputs from the drives back to LinuxCNC in order to be able to use this functionality to it's full potential. As without them LinuxCNC doesn't know if the servos have actually kept moving a bit after an e-stop was triggered.
These servo drives have a lot of features which I'm not using and it's probably gonna take a while before I even scratch the surface of their potential.
My HAL file is completely standard at the moment, the servos are configured as normal steppers as the loop is closed in the drives. I'll post the complete HAL setup as soon as everything is up and running. I'm afraid I'd post something completely incorrect if I uploaded my current configuration as it has not been run on the actual machine yet.
Attachments:
The following user(s) said Thank You: zmrdko
Please Log in or Create an account to join the conversation.
17 Nov 2023 12:58 #285739
by timo
Replied by timo on topic Optimum Optimill MH50V CNC conversion
That looks all very organized and clean. What is the trick for keeping the electric cabinet organized?
Did you figure out all the components in advance and plan according to their size?
Do you have any prior experience with electrical cabinet planning?
Really impressive: An electrical panel that does not look "hobby".")
Did you figure out all the components in advance and plan according to their size?
Do you have any prior experience with electrical cabinet planning?
Really impressive: An electrical panel that does not look "hobby".
Please Log in or Create an account to join the conversation.
18 Nov 2023 08:51 #285803
by Unlogic

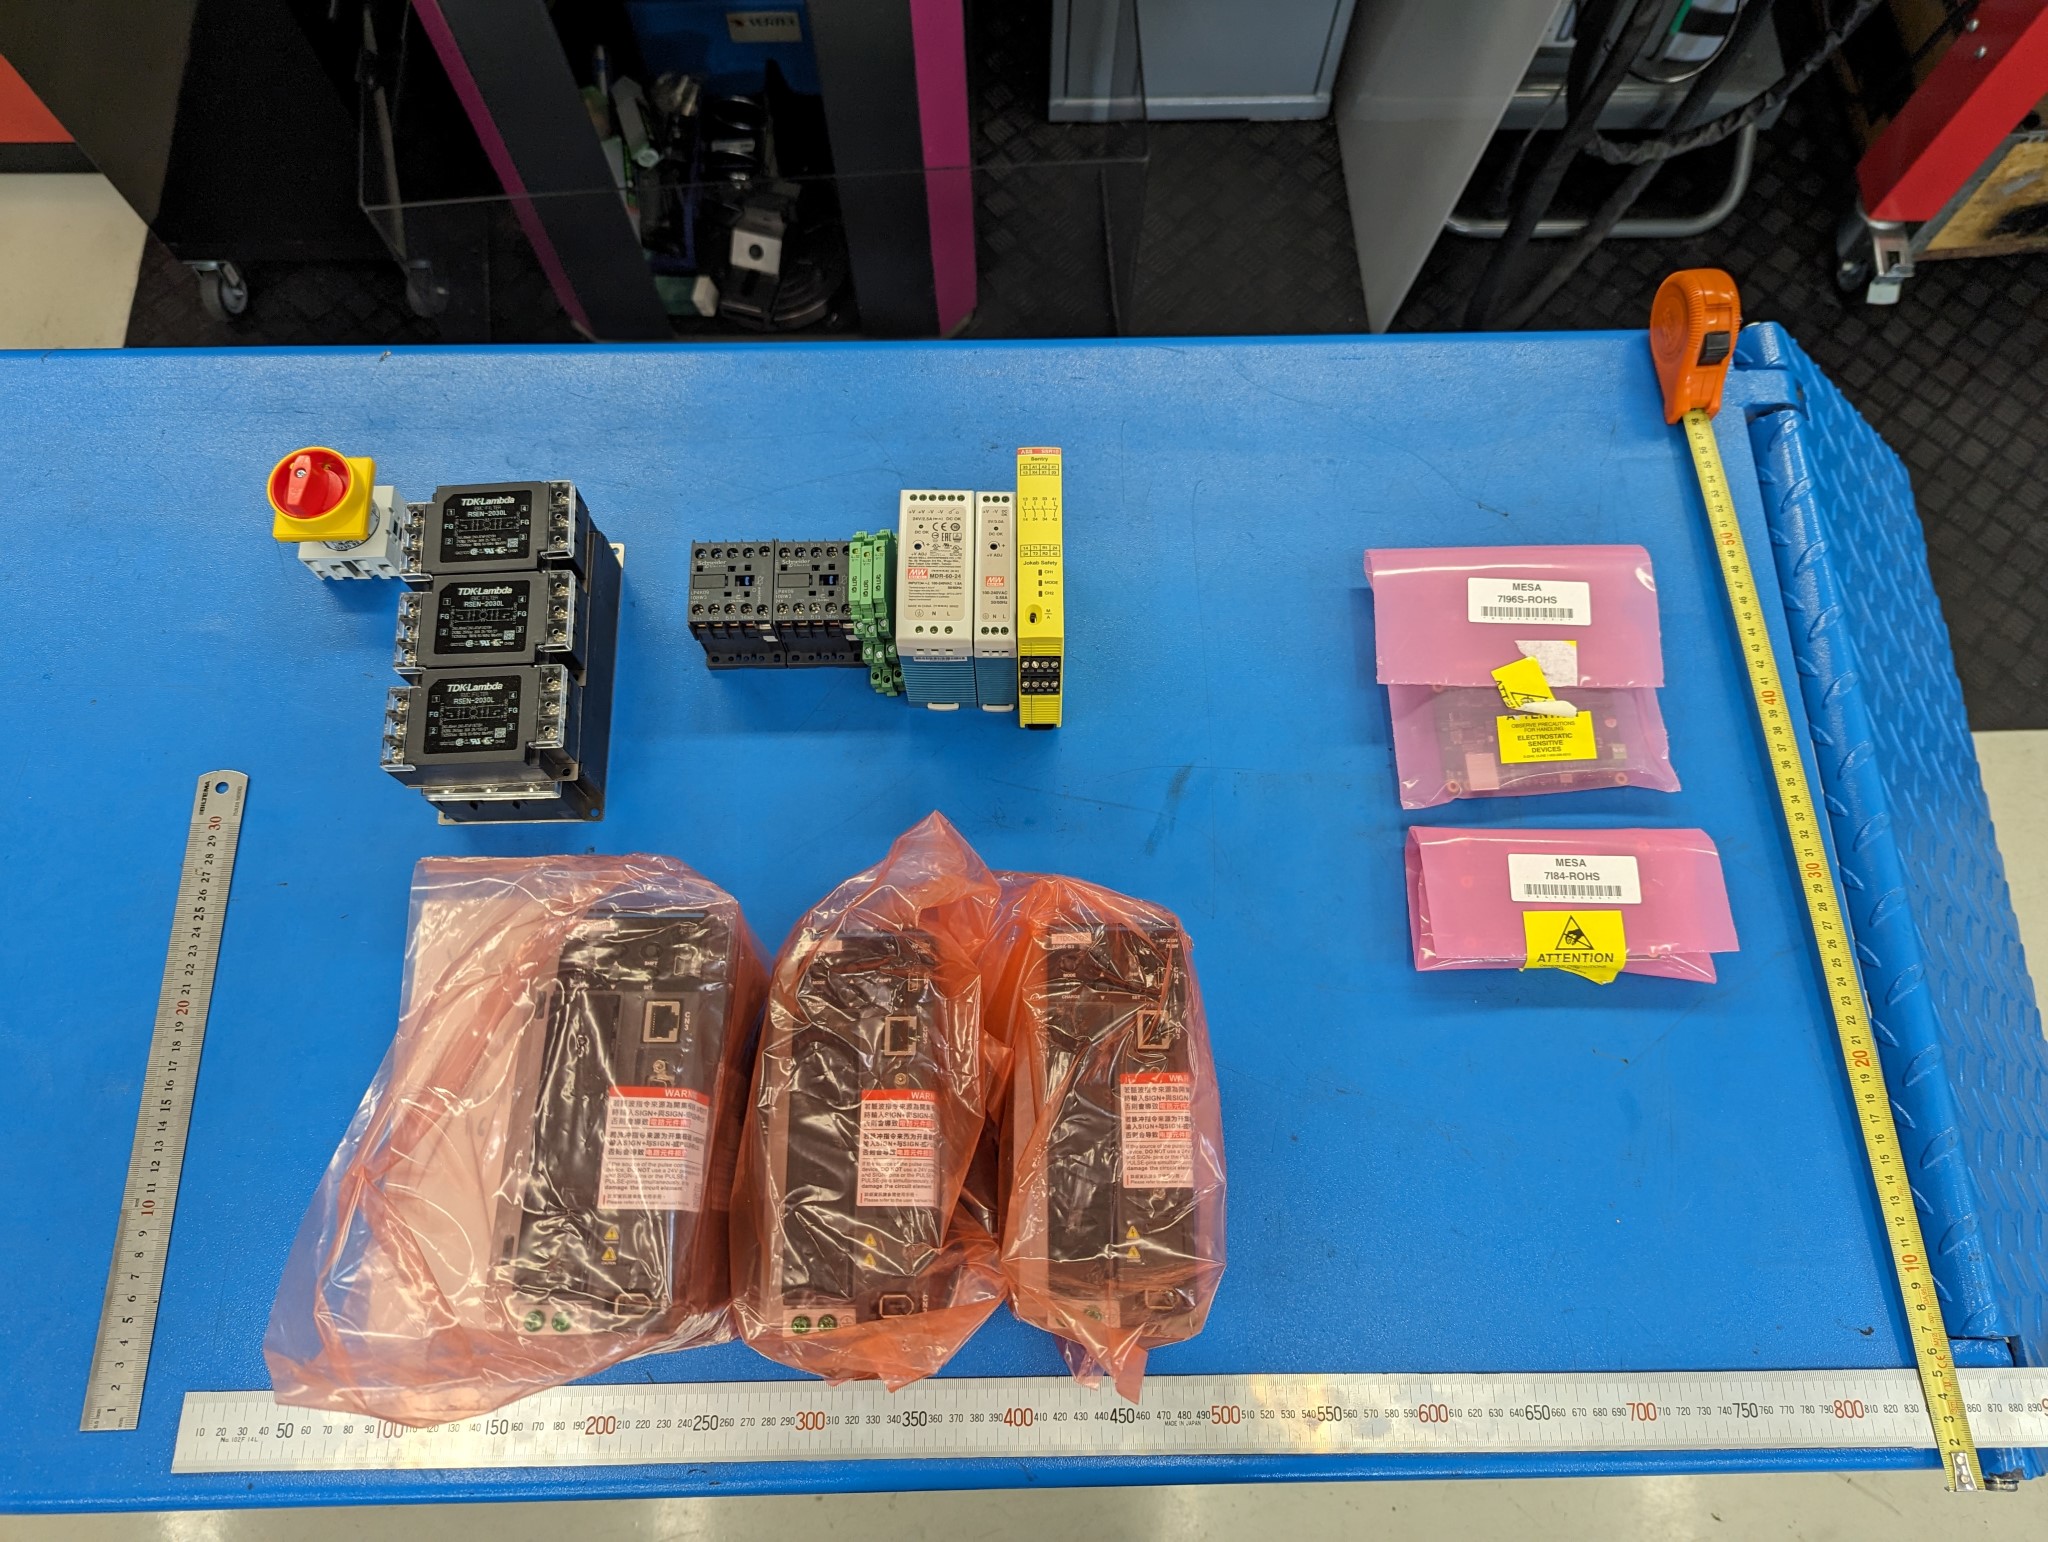
I started by selecting the components based on the capabilities I was looking for focusing particularly on the FPGA/controller, servos and low noise. When I had figured out the recipe I ordered everything almost at the same time to make sure nothing went out of production before I could finish the build.
When the parts arrived I laid them out on a flat surface, measured everything and ordered the metal enclosure I thought would be the best fit
I have no prior experience with electrical cabinets. My profession for the last 20 years was building large enterprise/government IT-systems from scratch and my hobby has been building/racing my own car. But I guess both my work and hobby has required good planning and a lot of attention to detail from start to finish so it's probably something I've carried over from those experiences.
Replied by Unlogic on topic Optimum Optimill MH50V CNC conversion
Thank you, I think the trick is good planning, good attention to detail and a bit of OCDThat looks all very organized and clean. What is the trick for keeping the electric cabinet organized?
Did you figure out all the components in advance and plan according to their size?
Do you have any prior experience with electrical cabinet planning?
Really impressive: An electrical panel that does not look "hobby".
I started by selecting the components based on the capabilities I was looking for focusing particularly on the FPGA/controller, servos and low noise. When I had figured out the recipe I ordered everything almost at the same time to make sure nothing went out of production before I could finish the build.
When the parts arrived I laid them out on a flat surface, measured everything and ordered the metal enclosure I thought would be the best fit
I have no prior experience with electrical cabinets. My profession for the last 20 years was building large enterprise/government IT-systems from scratch and my hobby has been building/racing my own car. But I guess both my work and hobby has required good planning and a lot of attention to detail from start to finish so it's probably something I've carried over from those experiences.
Attachments:
Please Log in or Create an account to join the conversation.
18 Nov 2023 09:09 #285806
by Unlogic
Replied by Unlogic on topic Optimum Optimill MH50V CNC conversion
By now I was planning to be customizing the Probe Basic UI in order to remove the buttons for jogging from the UI and remapping the jog speed and jog step size controls so that they control those values for the physical jog buttons instead.
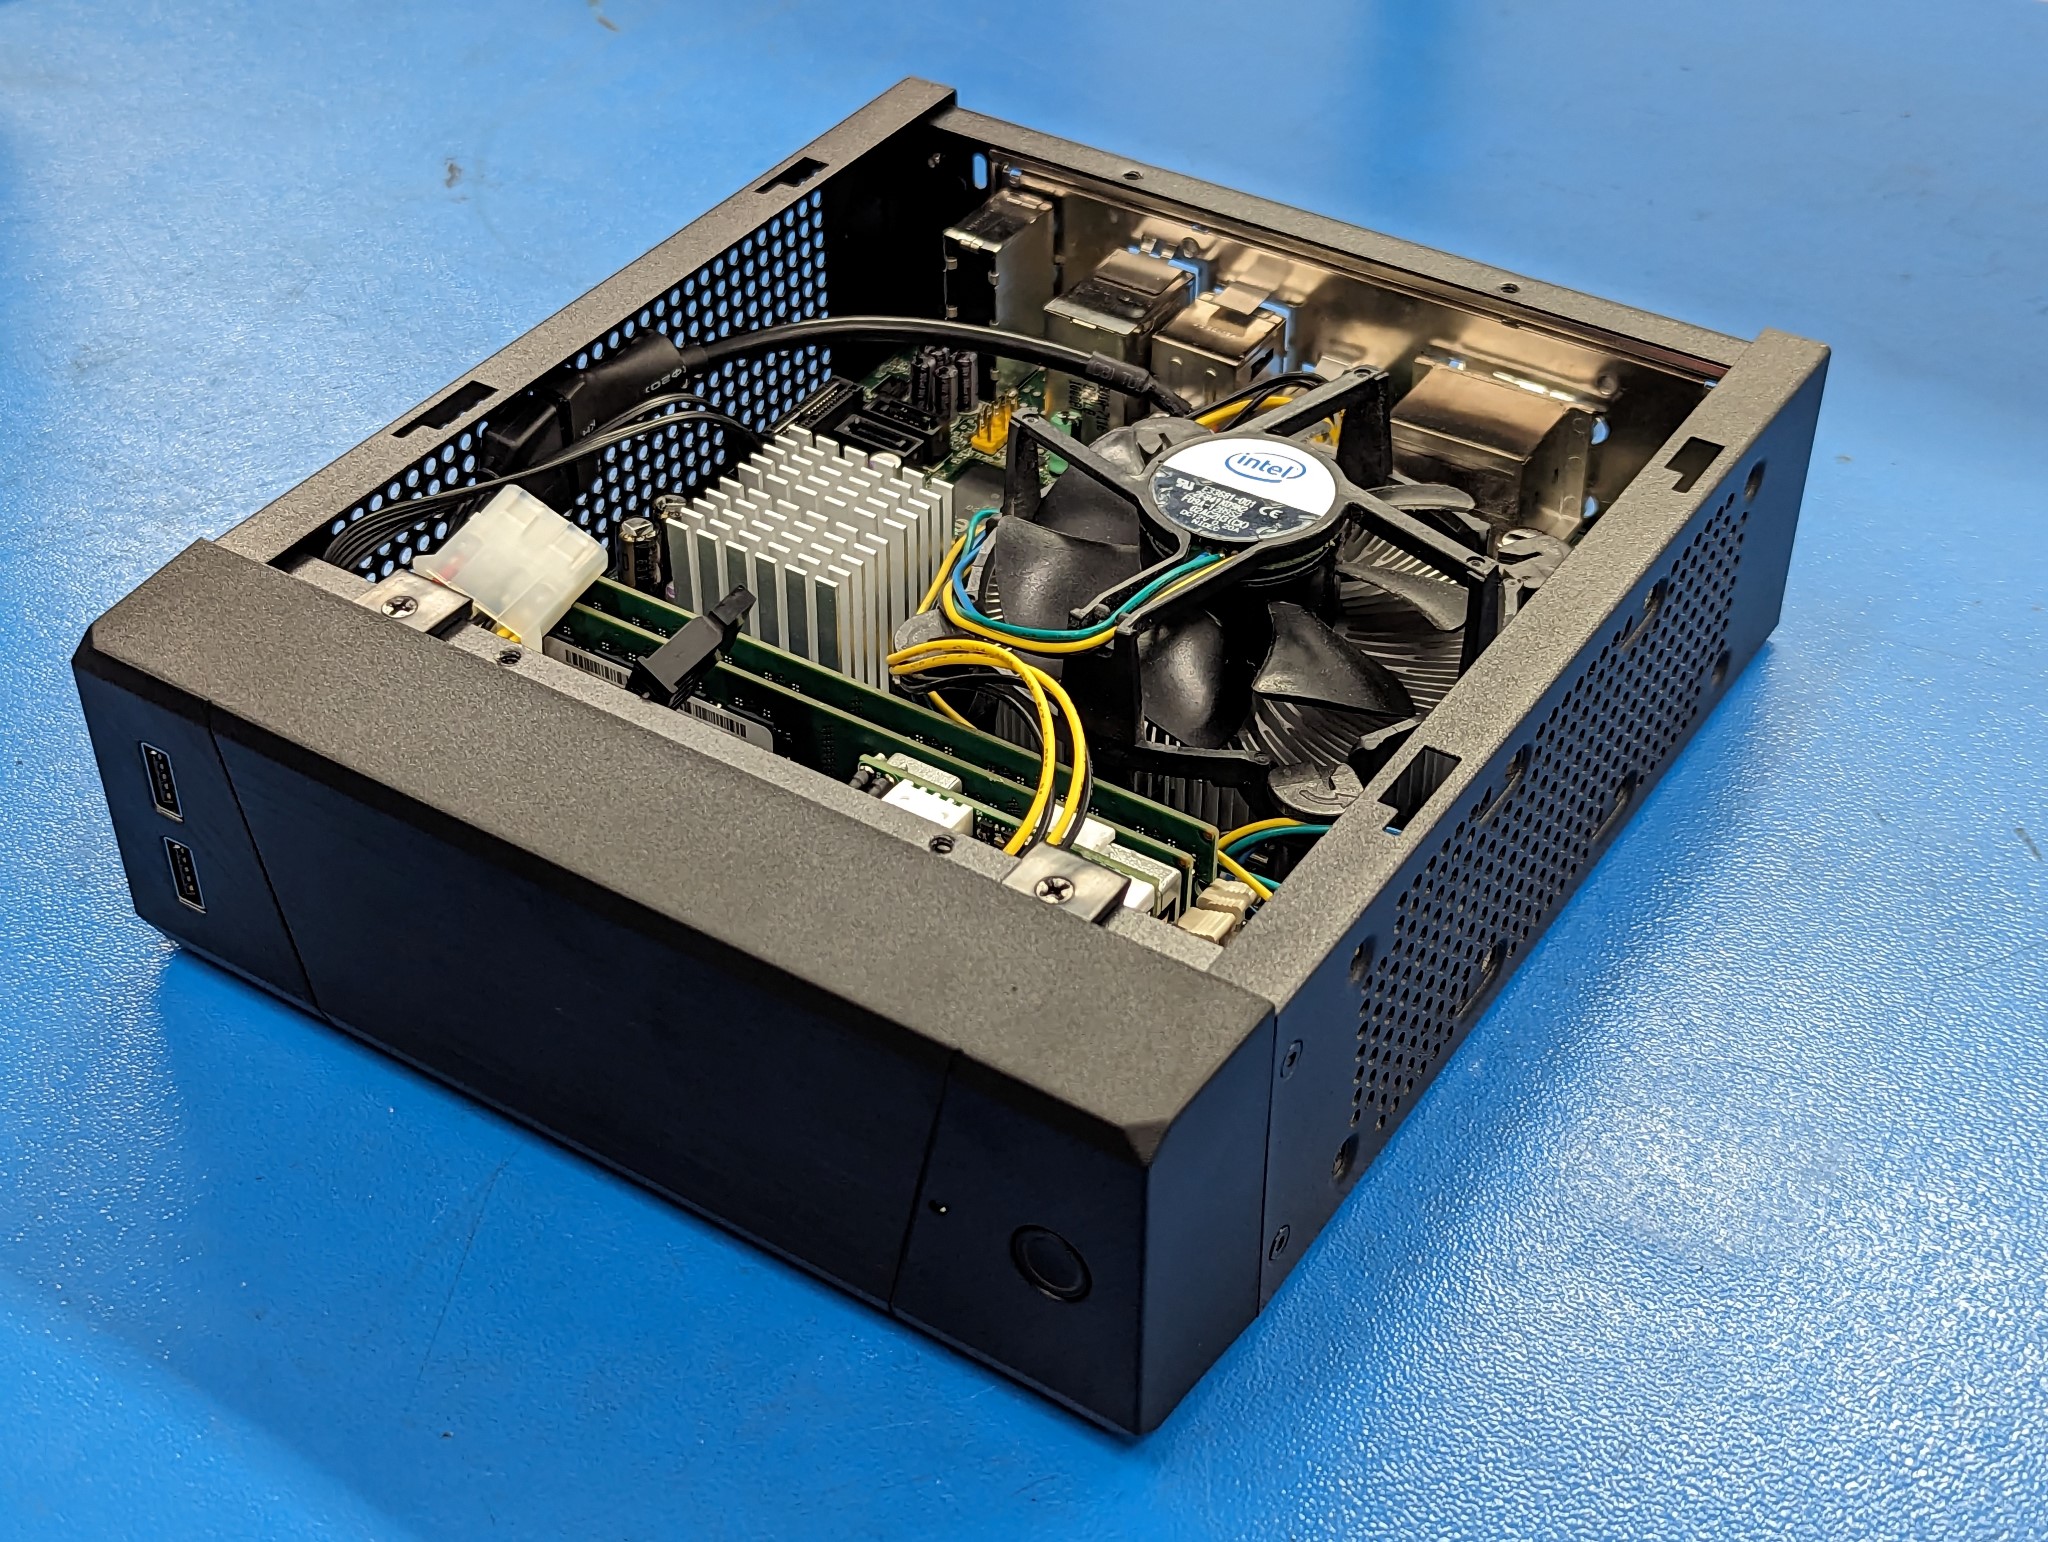
However as I previously mentioned the nice looking HP Elitedesk 800 G2 Mini that I had purchased for this build proved to be a bit problematic due to a bug in the kernel affecting the network card with the current version of Debian stable and also the latency wasn't stellar at 50000 - 75000 with all the tricks in the book applied in BIOS, grub parameters, network card tweaks etc.

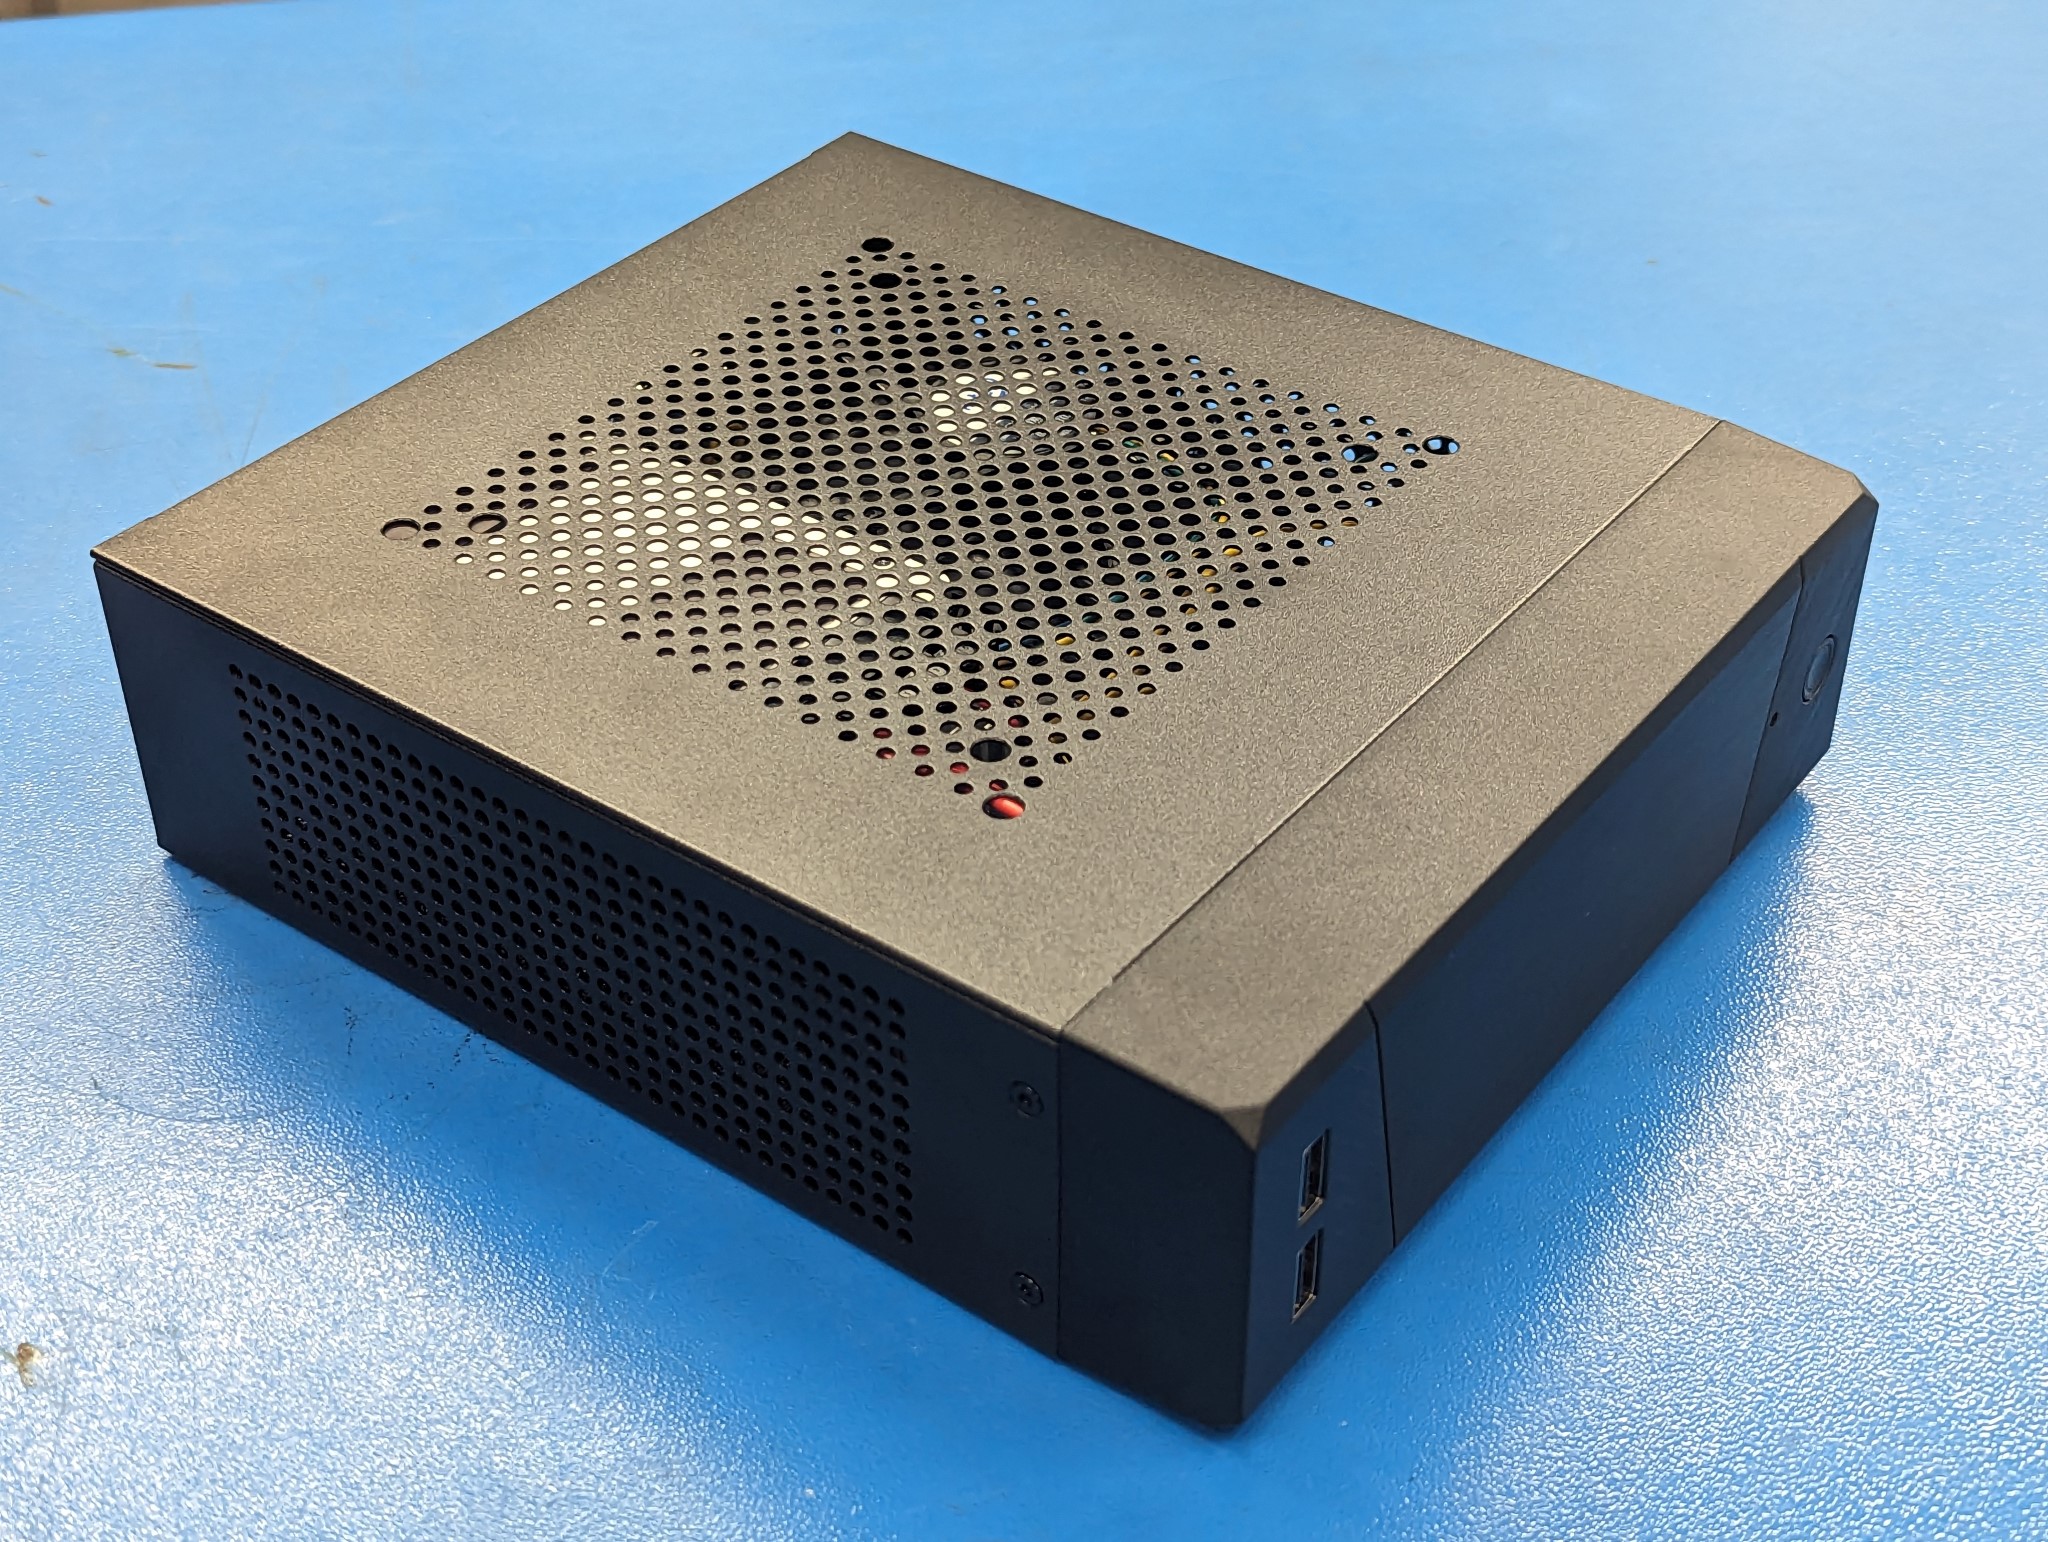
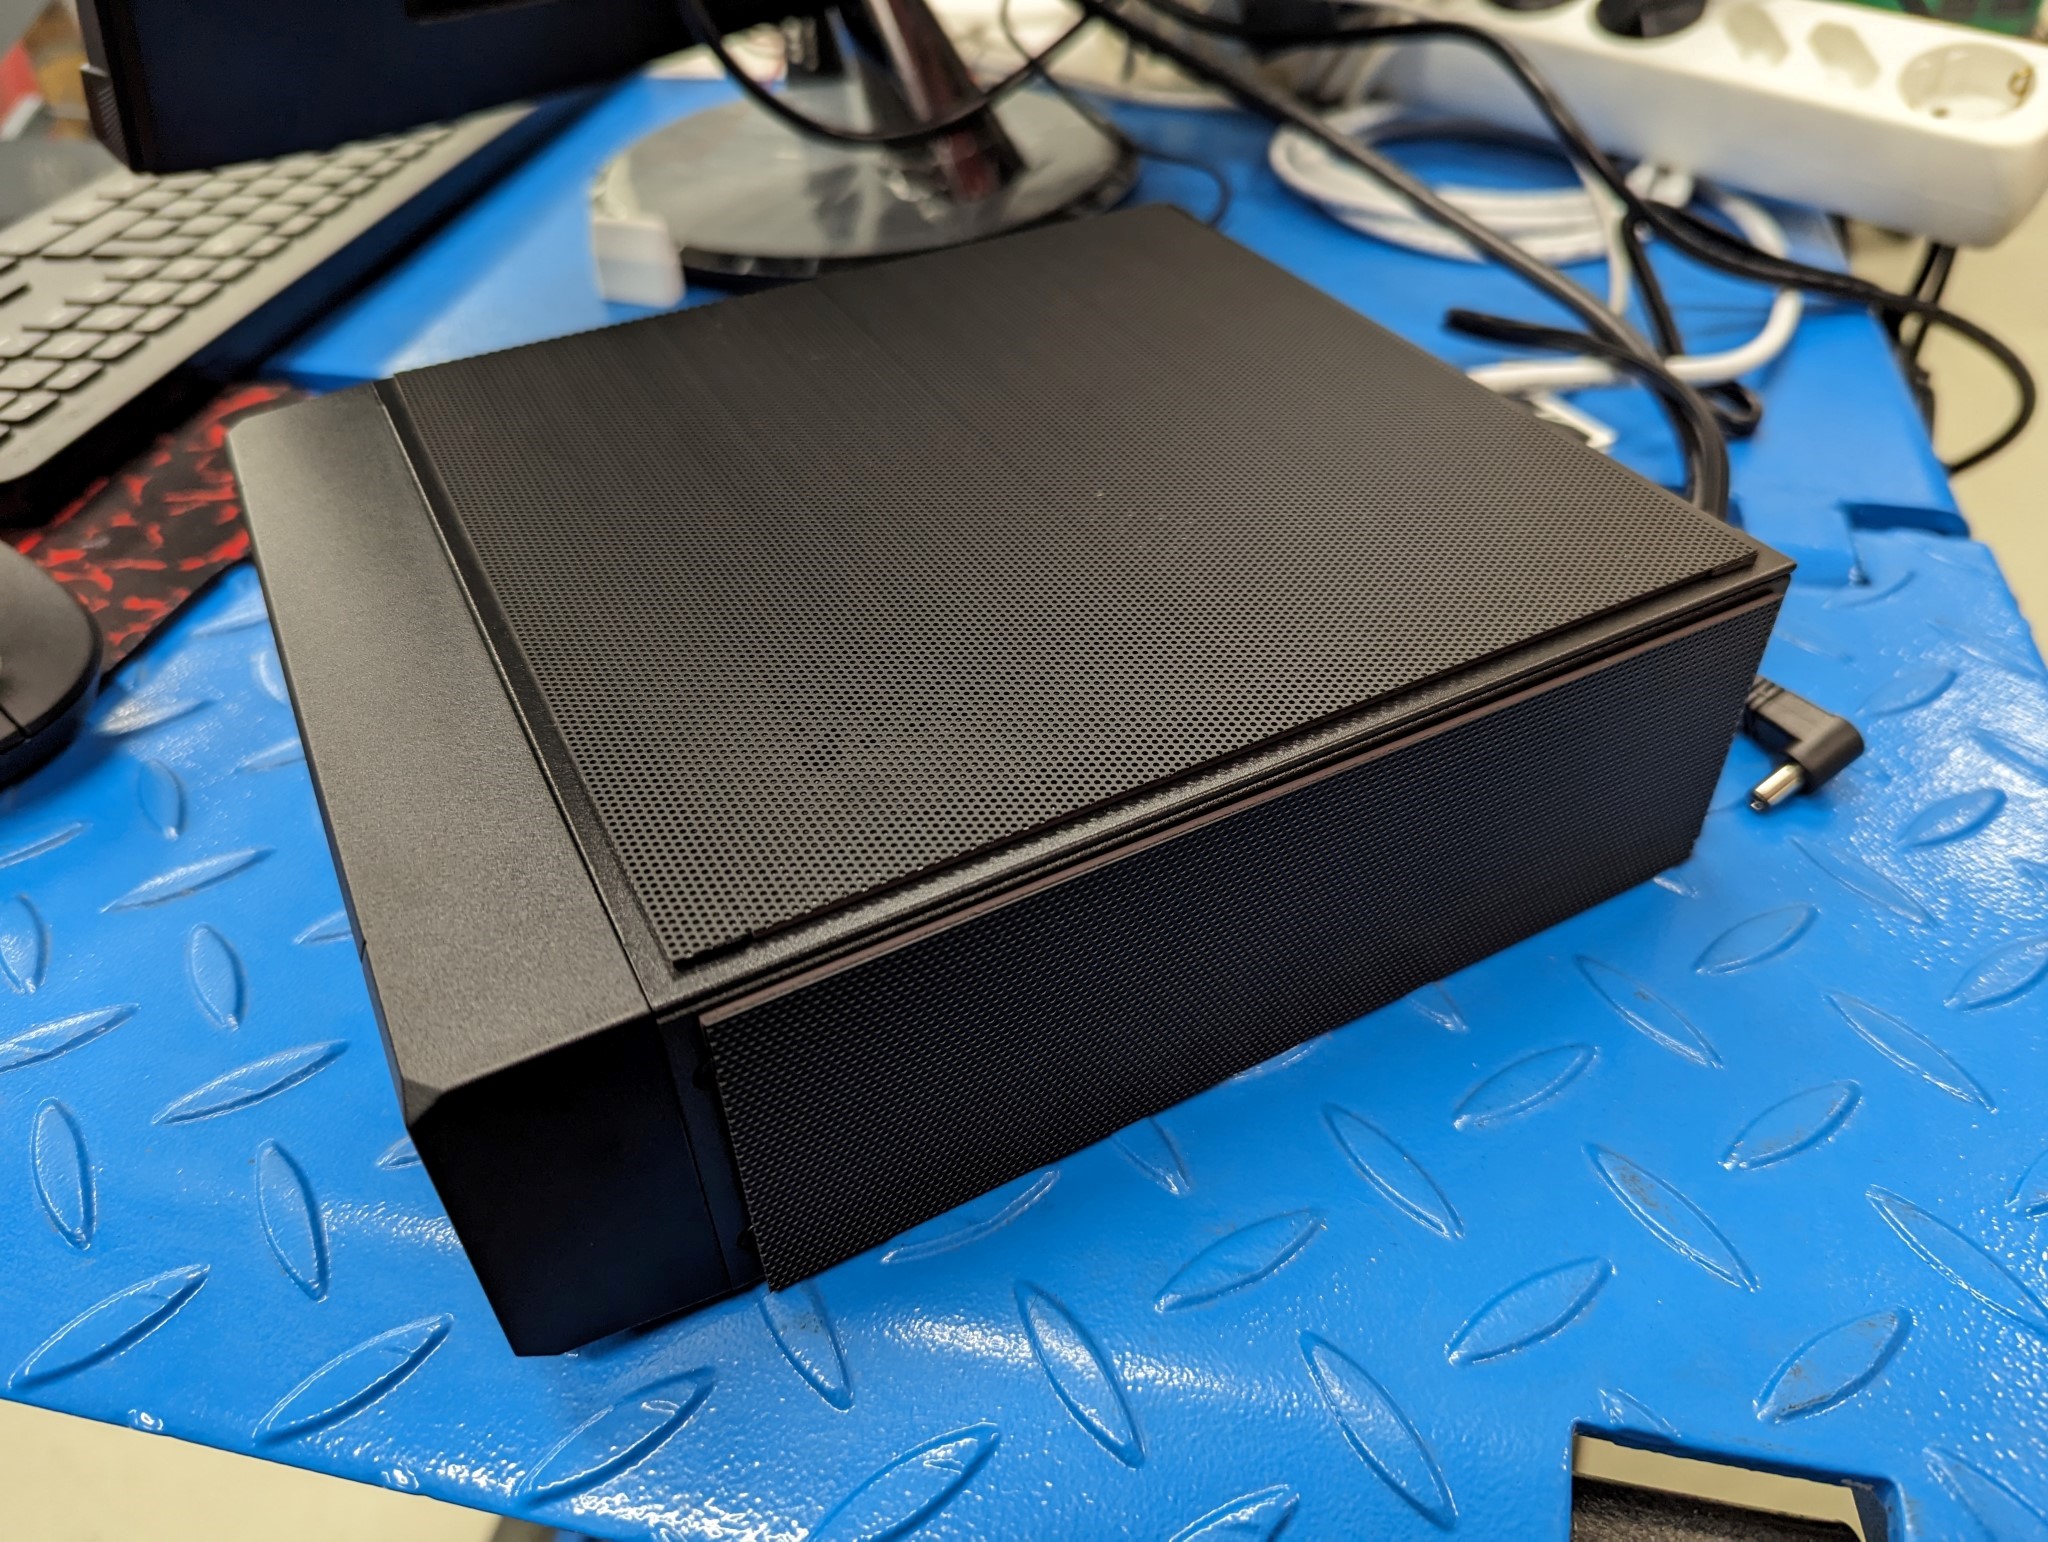
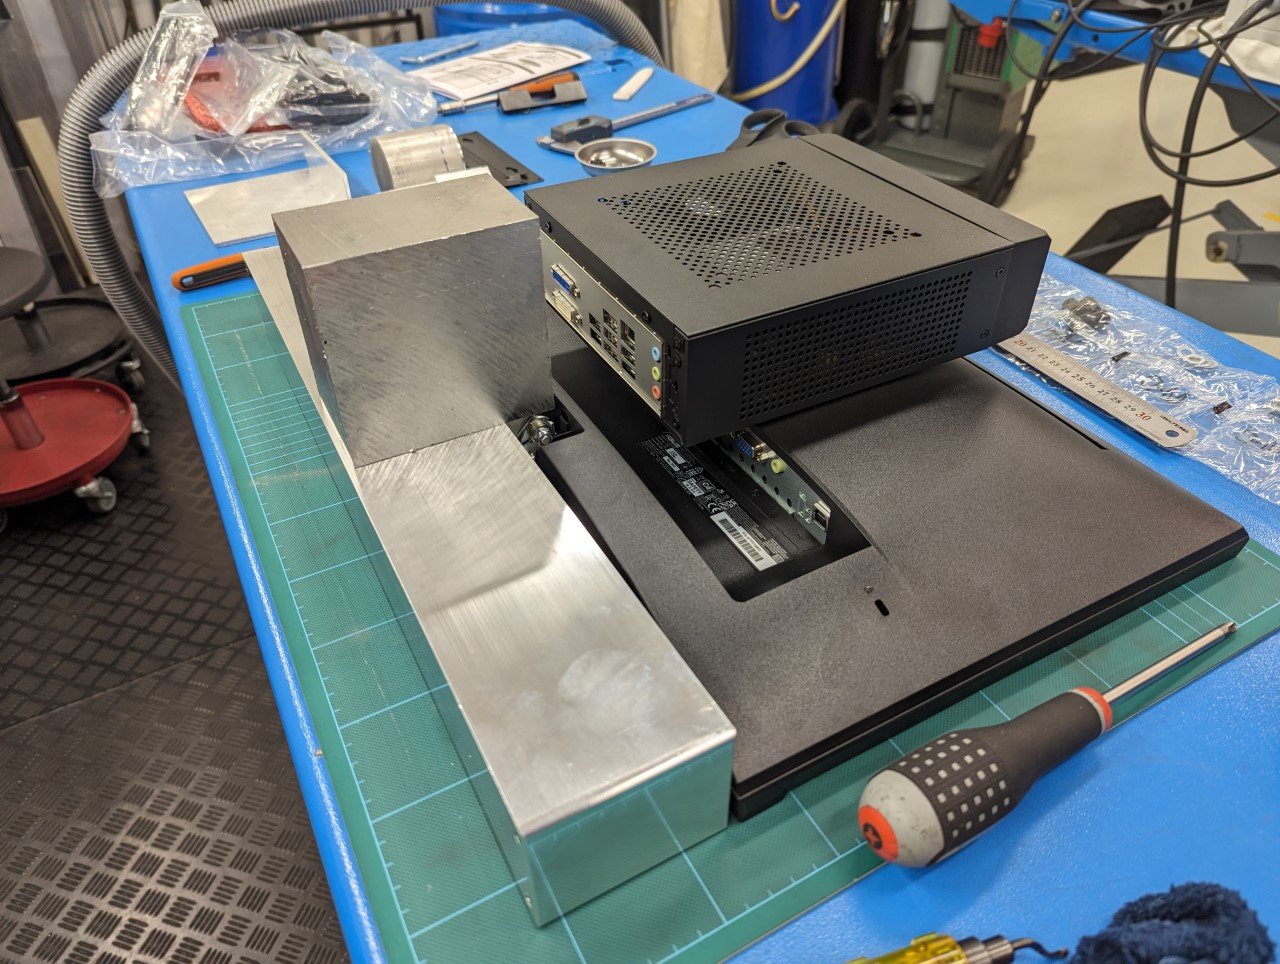
So as a plan B I pulled out an old Mini-ITX setup I had laying around with a Intel DQ45EK motherboard and a Q9550S low voltage quad core CPU. However I had no case for this setup so after a bit of research I settled on a Silverstone SST-ML10B Milo case and a 150w Pico PSU.
The case comes with two different size of top and front covers. The photos below show the larger covers.
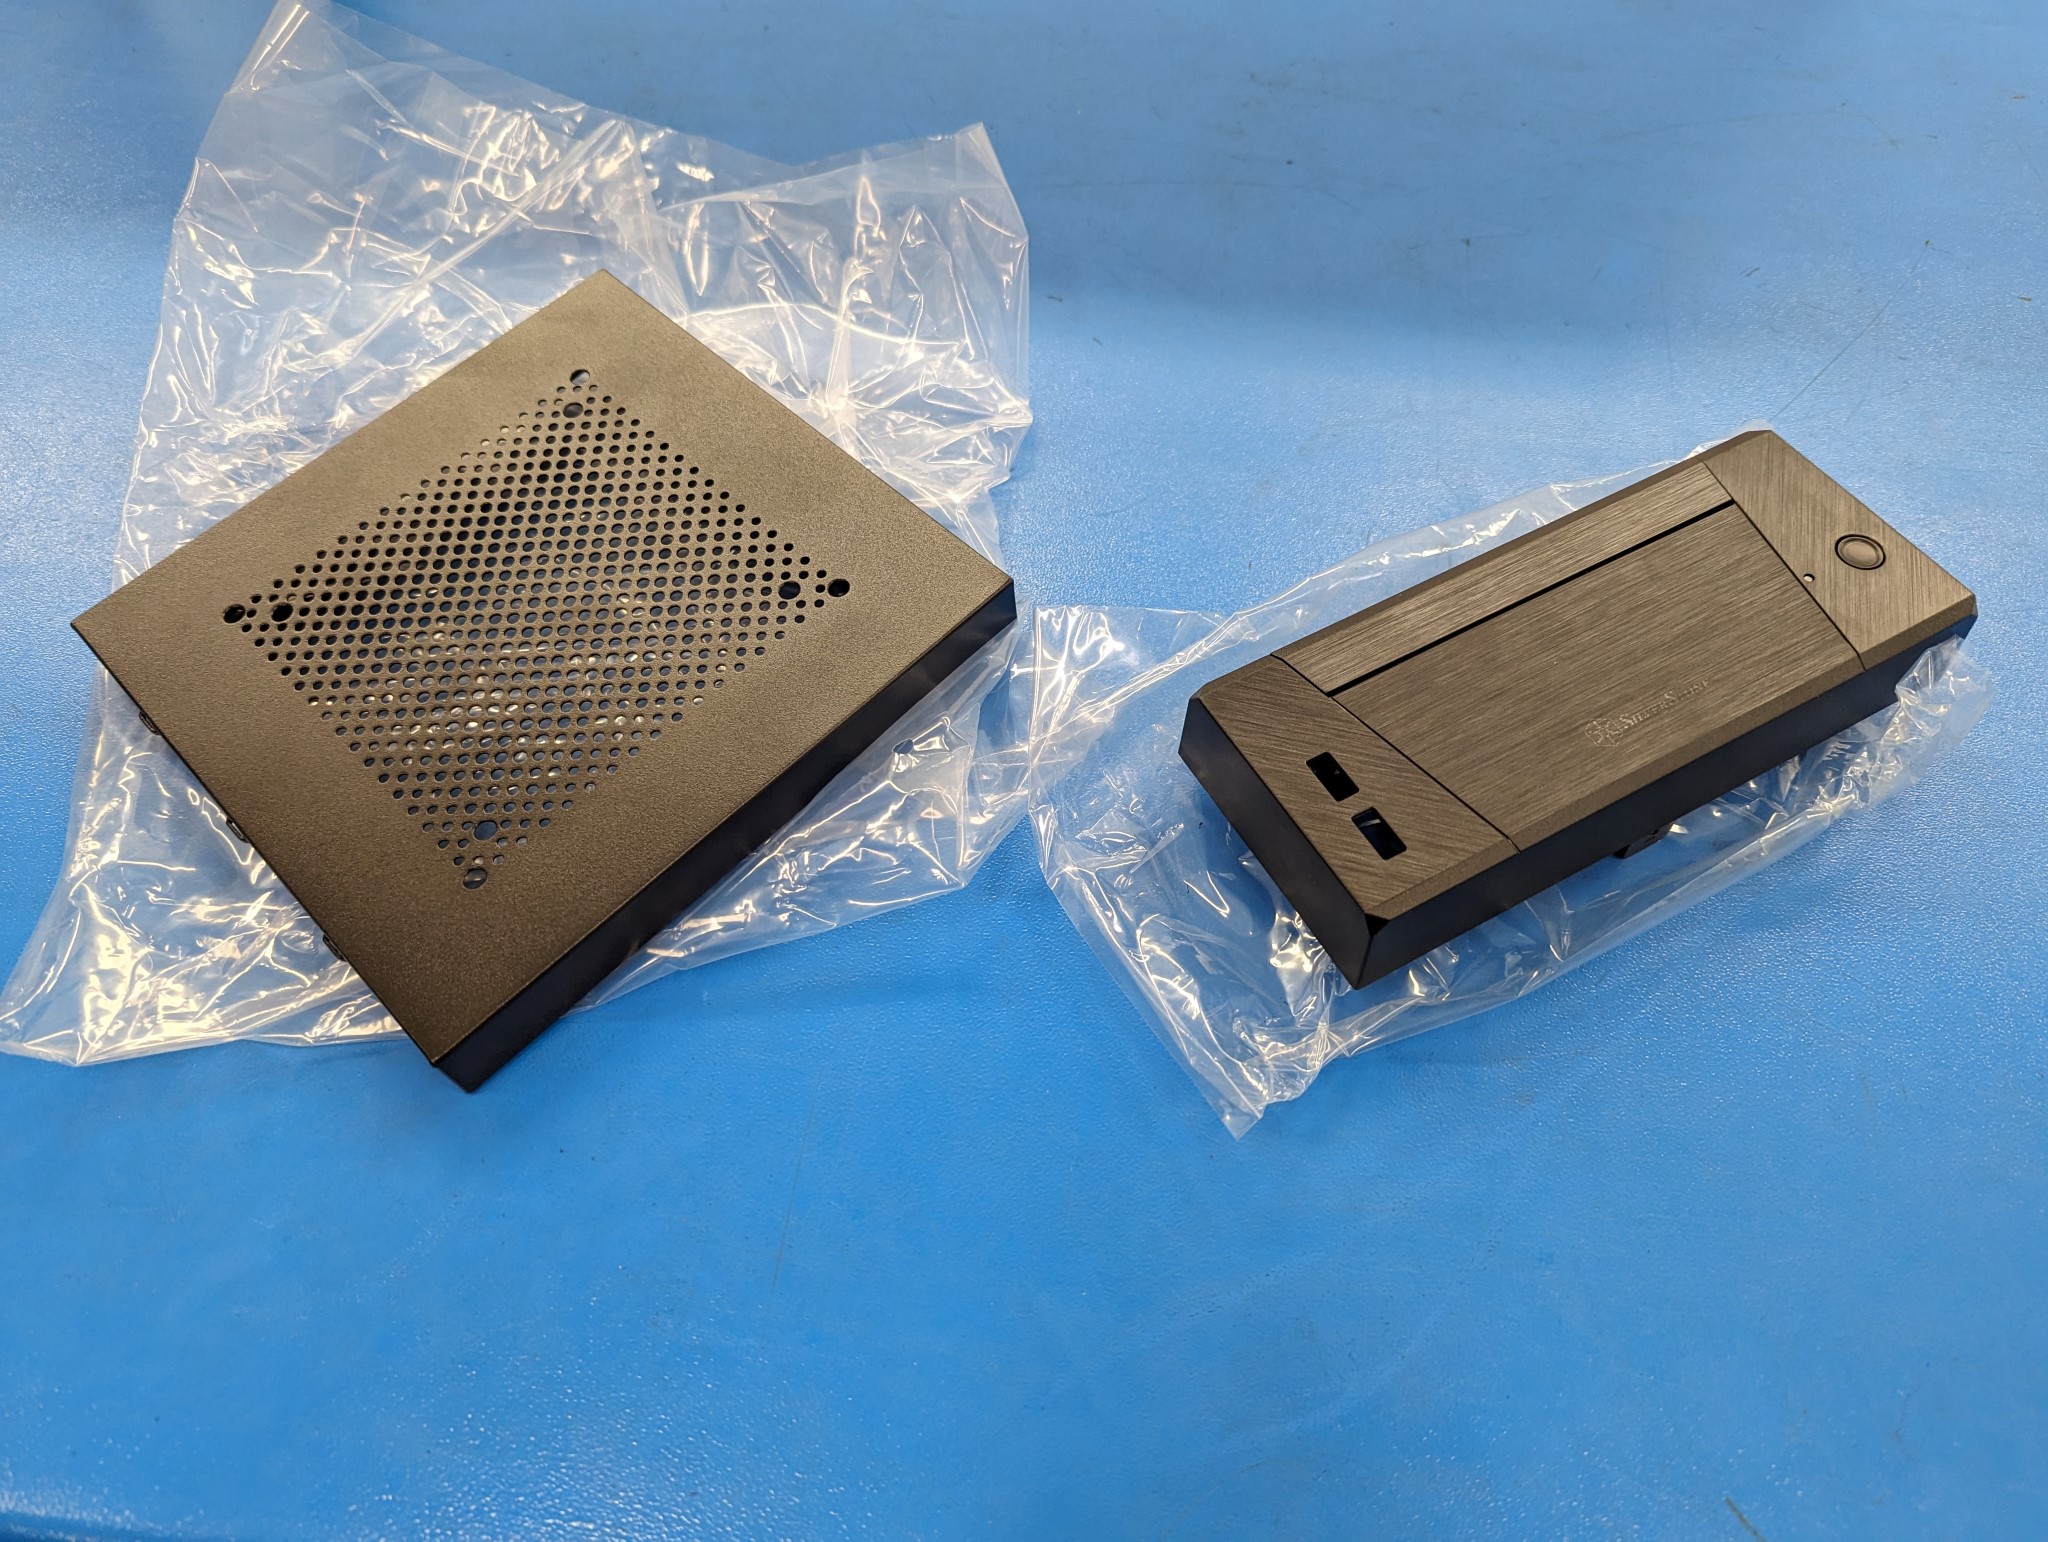
I opted to use the slimmest cover to keep the overall size down as my plan is to mount the PC behind the Asus VT229H touch screen. However even with the slim cover on the ITX setup is more than twice the volume of the Elitedesk 800 G2.
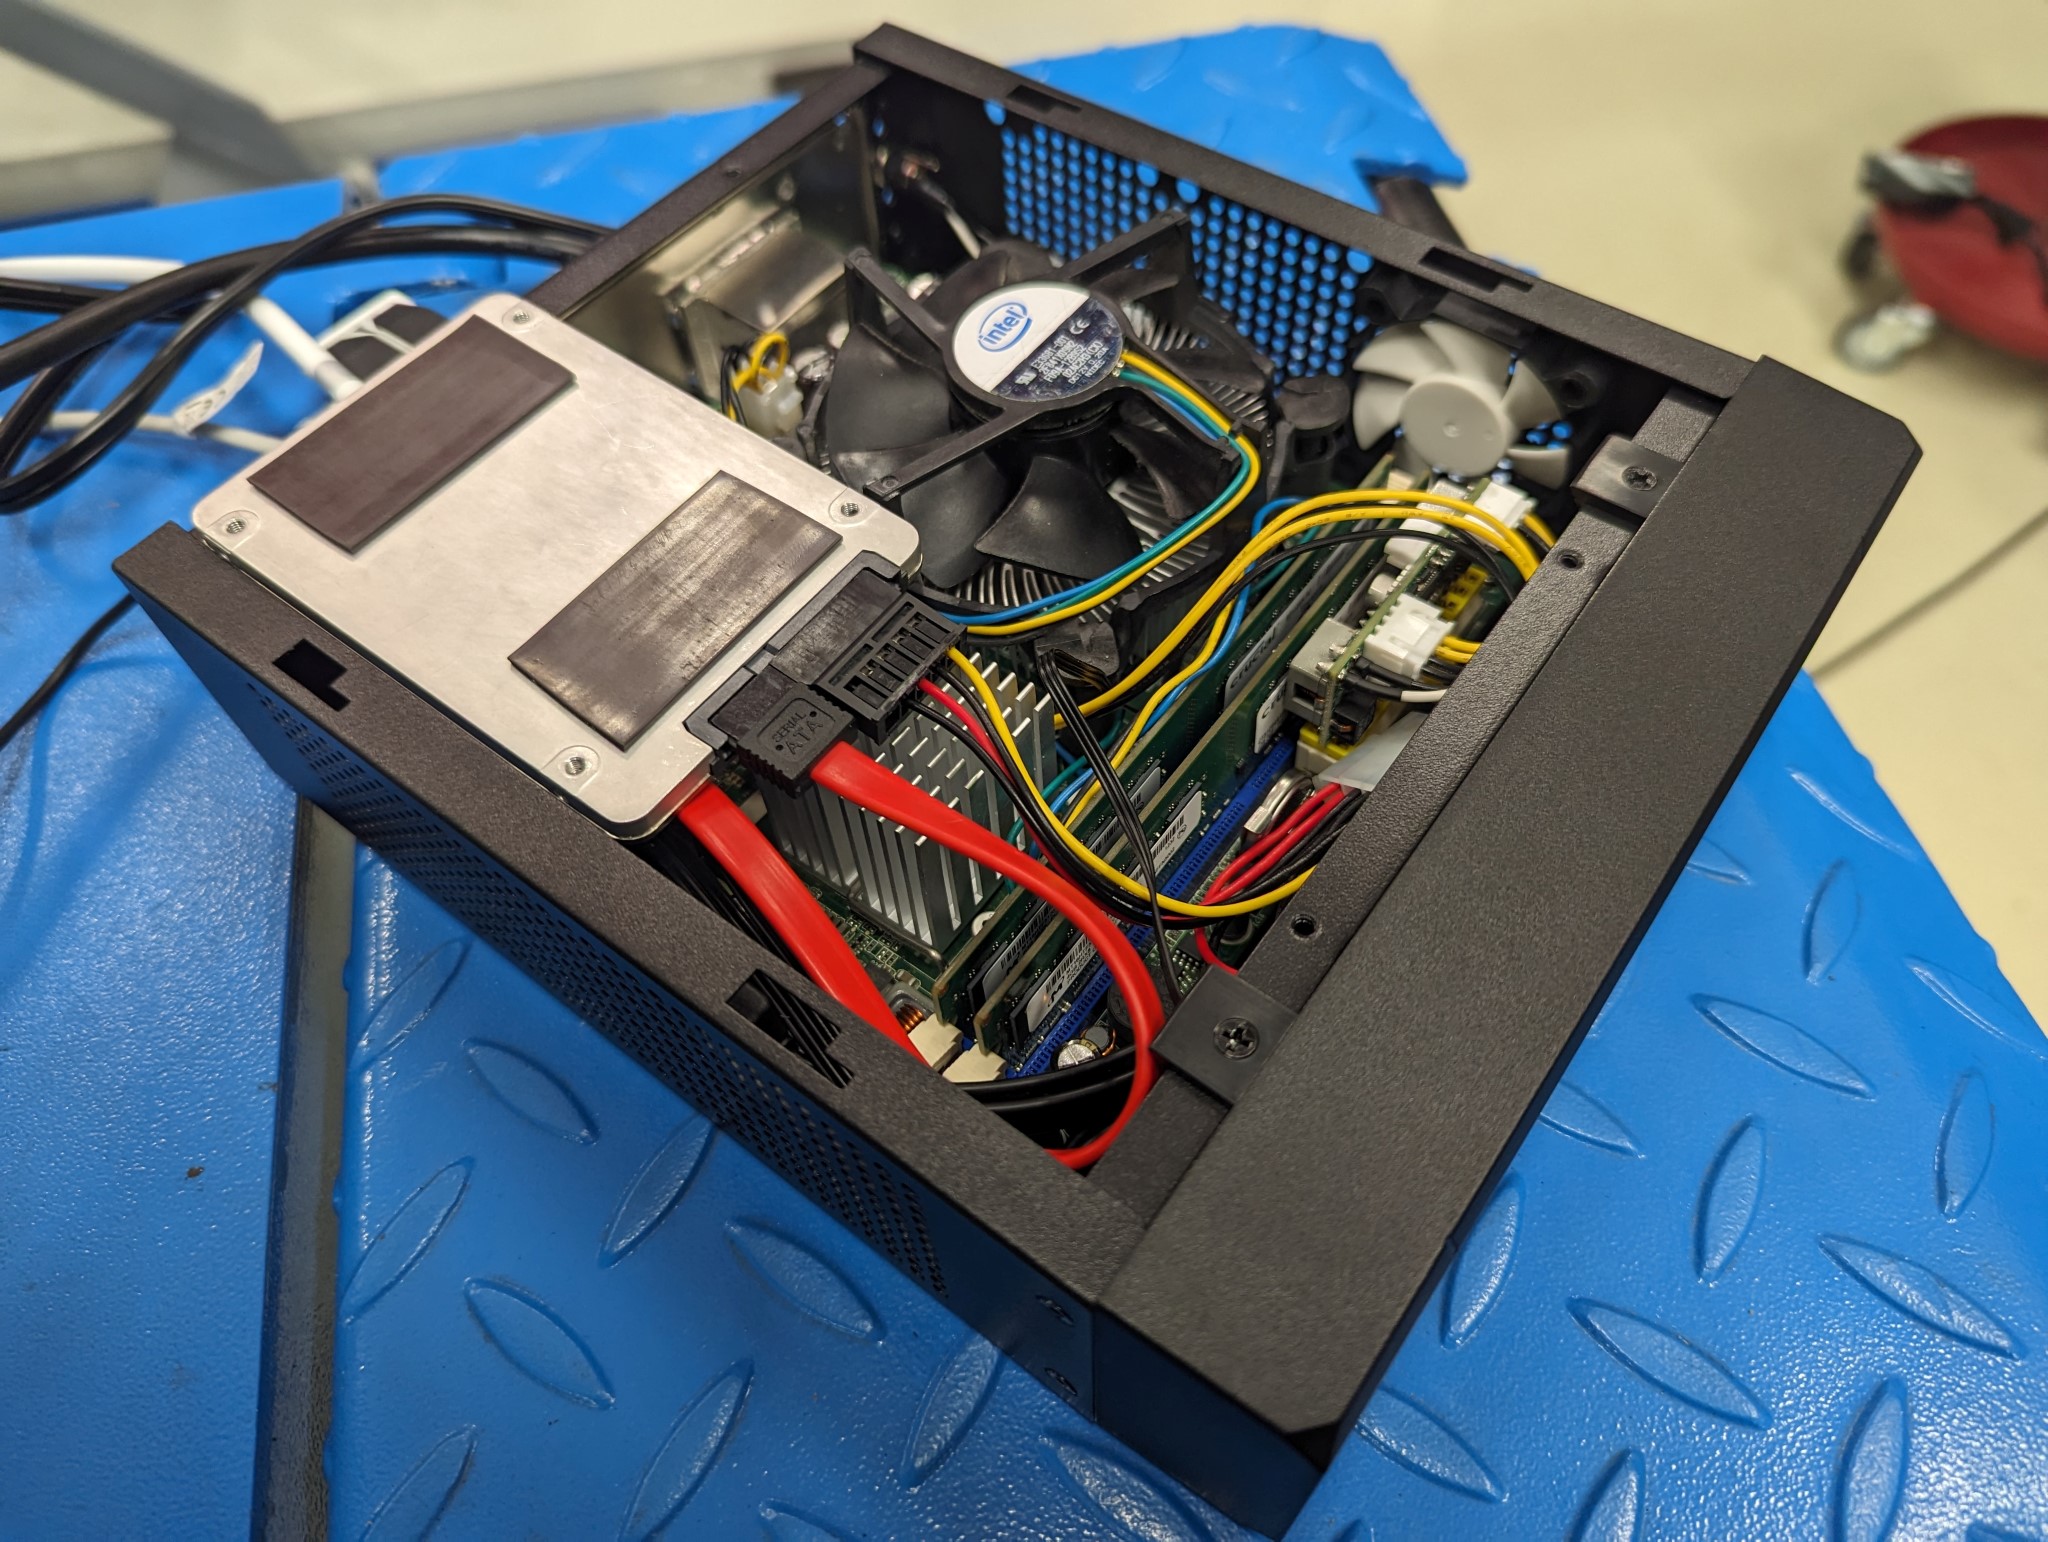
With the slim cover on the was no way to attach the decade old 2,5" Intel SATA SSD I'm using (most modern builds probably use NVMe) so I took a shortcut here and used some magnetic tape on the bottom of the SSD to keep it attached to the top cover over the case. It may look a bit crude but it works surprisingly well.
However as I previously mentioned the nice looking HP Elitedesk 800 G2 Mini that I had purchased for this build proved to be a bit problematic due to a bug in the kernel affecting the network card with the current version of Debian stable and also the latency wasn't stellar at 50000 - 75000 with all the tricks in the book applied in BIOS, grub parameters, network card tweaks etc.
So as a plan B I pulled out an old Mini-ITX setup I had laying around with a Intel DQ45EK motherboard and a Q9550S low voltage quad core CPU. However I had no case for this setup so after a bit of research I settled on a Silverstone SST-ML10B Milo case and a 150w Pico PSU.
The case comes with two different size of top and front covers. The photos below show the larger covers.
I opted to use the slimmest cover to keep the overall size down as my plan is to mount the PC behind the Asus VT229H touch screen. However even with the slim cover on the ITX setup is more than twice the volume of the Elitedesk 800 G2.
With the slim cover on the was no way to attach the decade old 2,5" Intel SATA SSD I'm using (most modern builds probably use NVMe) so I took a shortcut here and used some magnetic tape on the bottom of the SSD to keep it attached to the top cover over the case. It may look a bit crude but it works surprisingly well.
Attachments:
Please Log in or Create an account to join the conversation.
18 Nov 2023 09:26 #285807
by Unlogic
Replied by Unlogic on topic Optimum Optimill MH50V CNC conversion
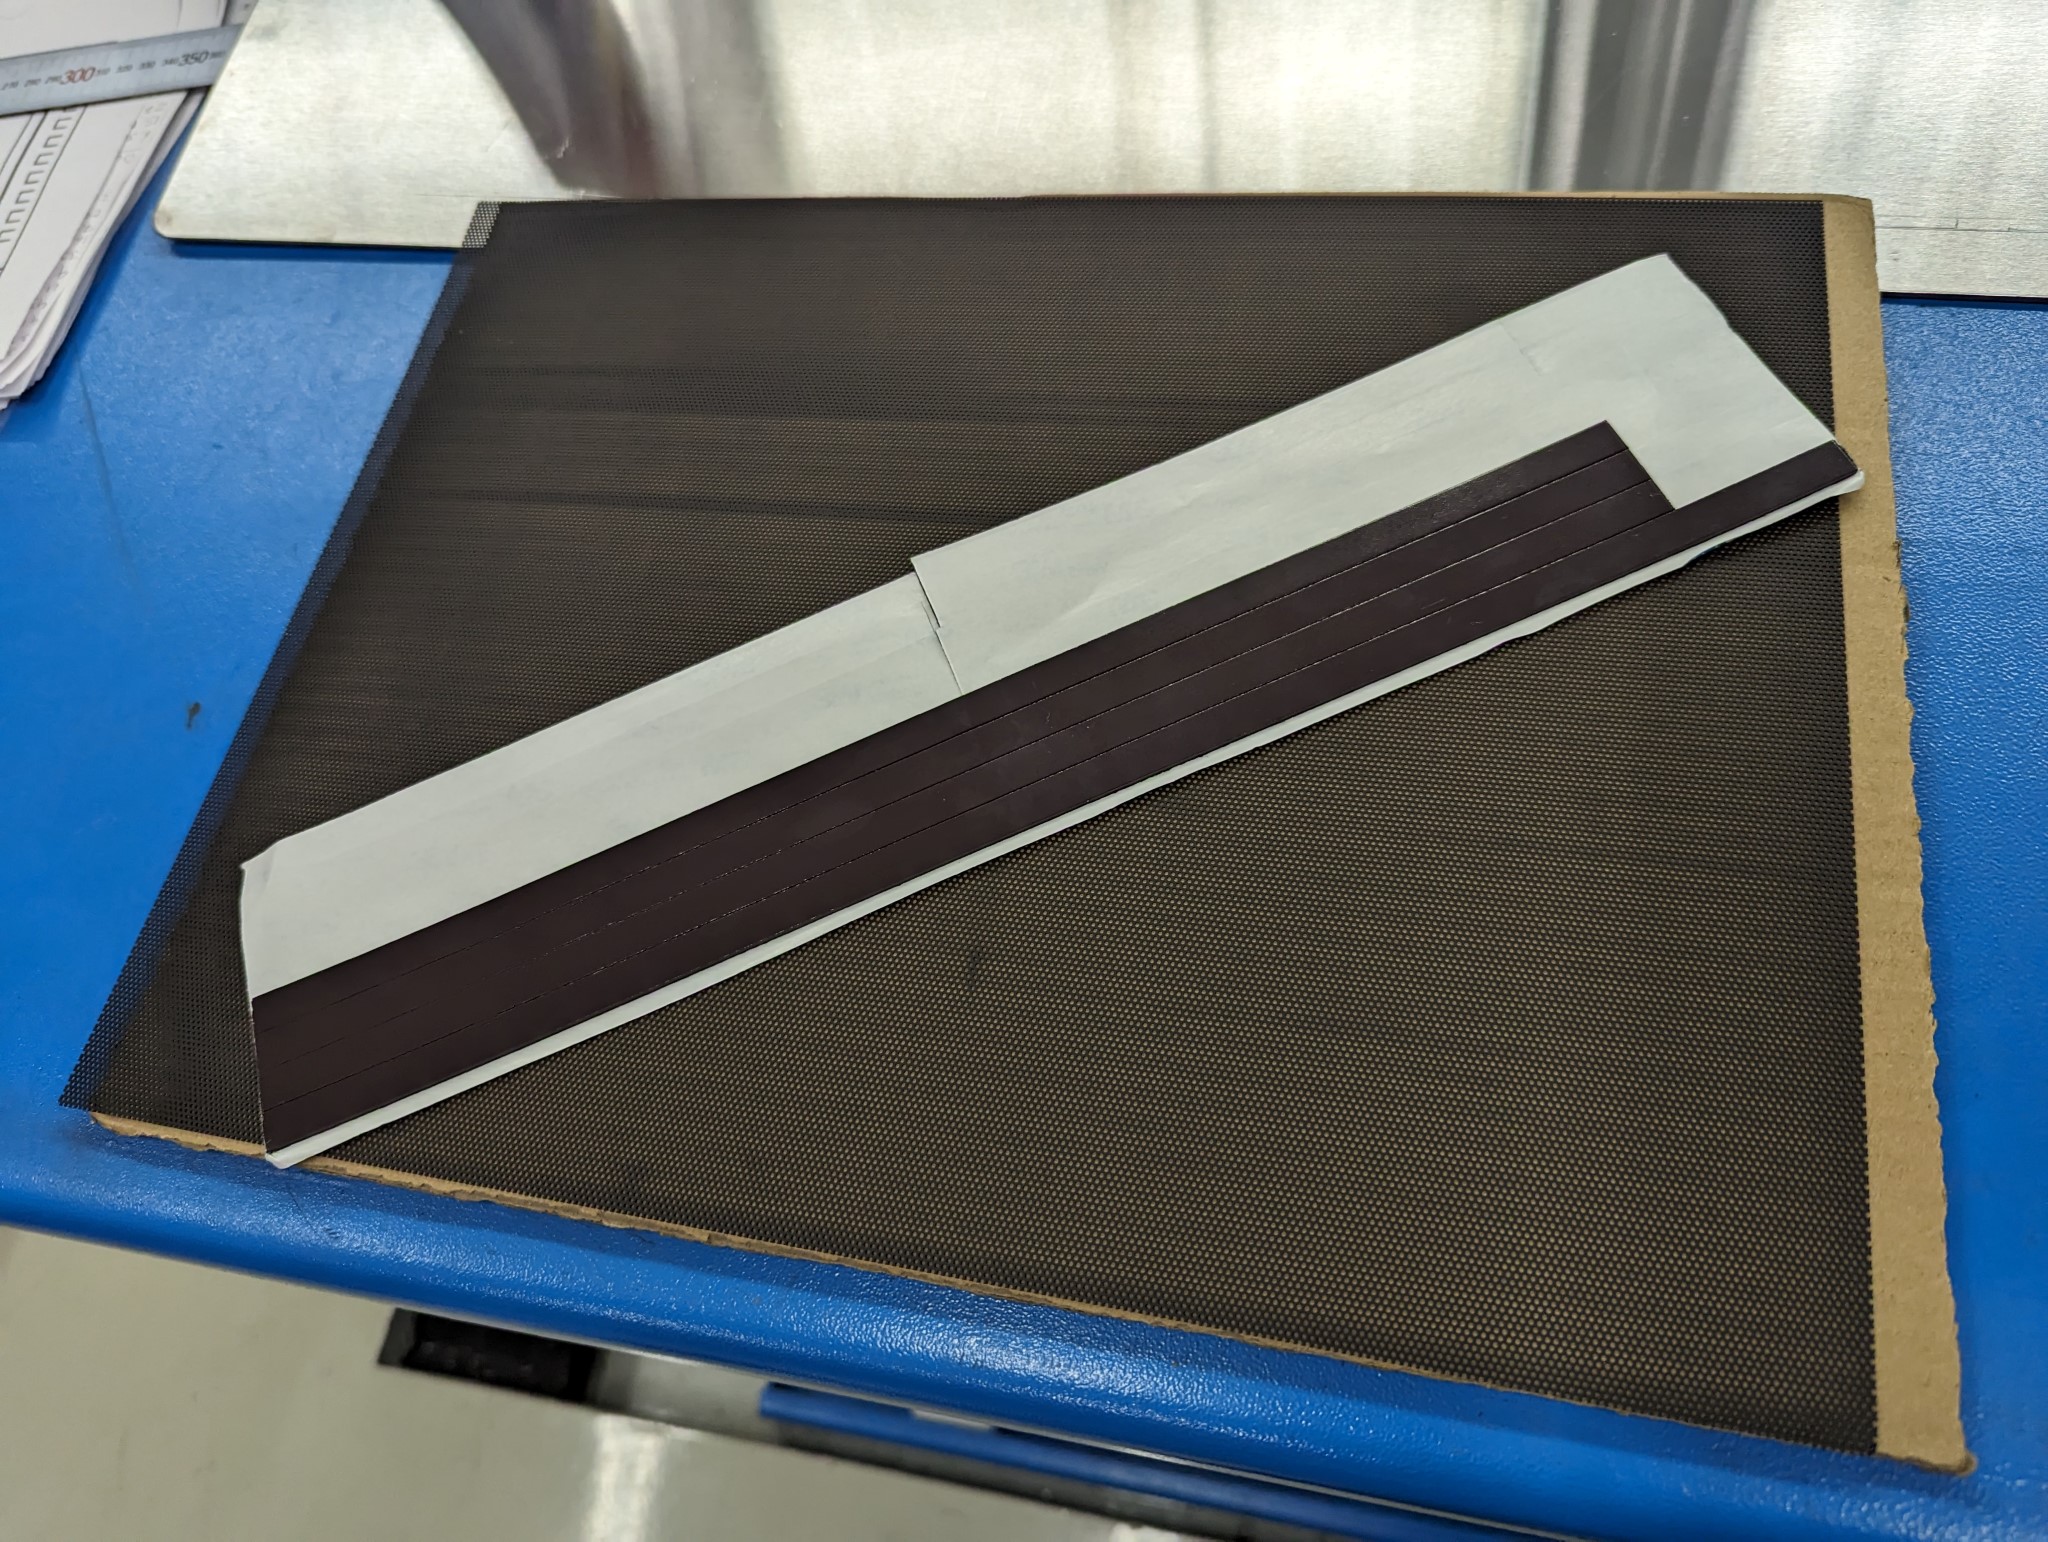
My milling machine isn't fully enclosed instead I use large polycarbonate chip guards but this means that inevitably some dust and chips escape into the area surrounding the machine. The Silverstone case is very well ventilated so I opted to buy thin plastic fan grills which can be cut to size with a scissor and attached using magnetic strips in order to cover all the openings on the case.
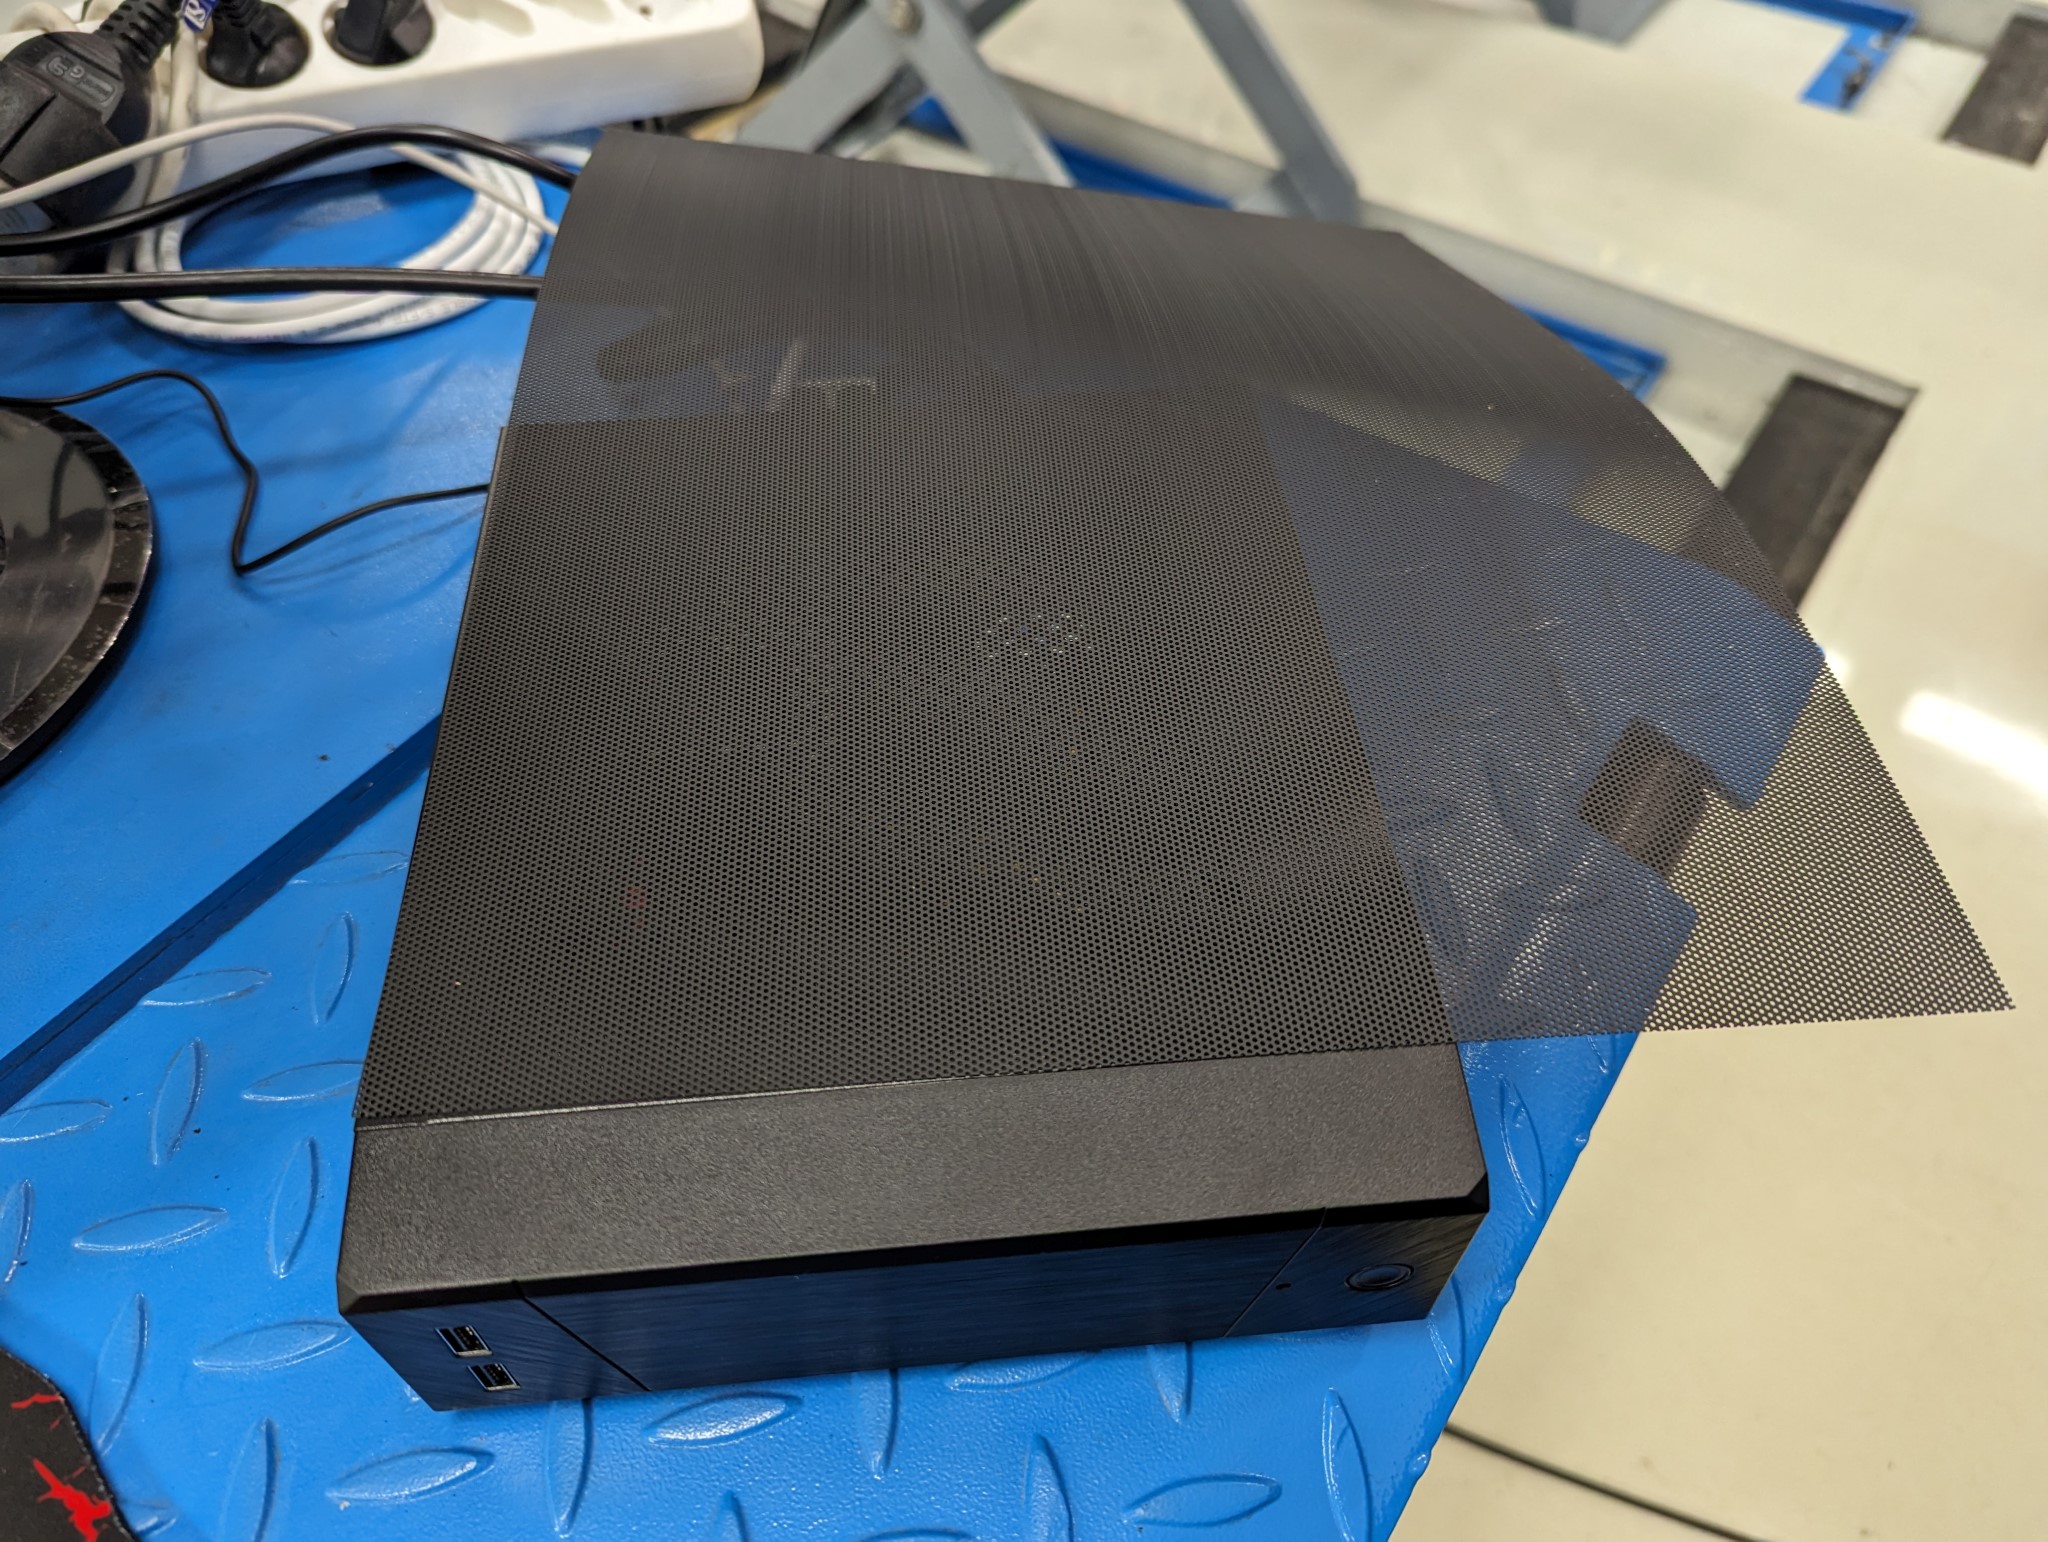
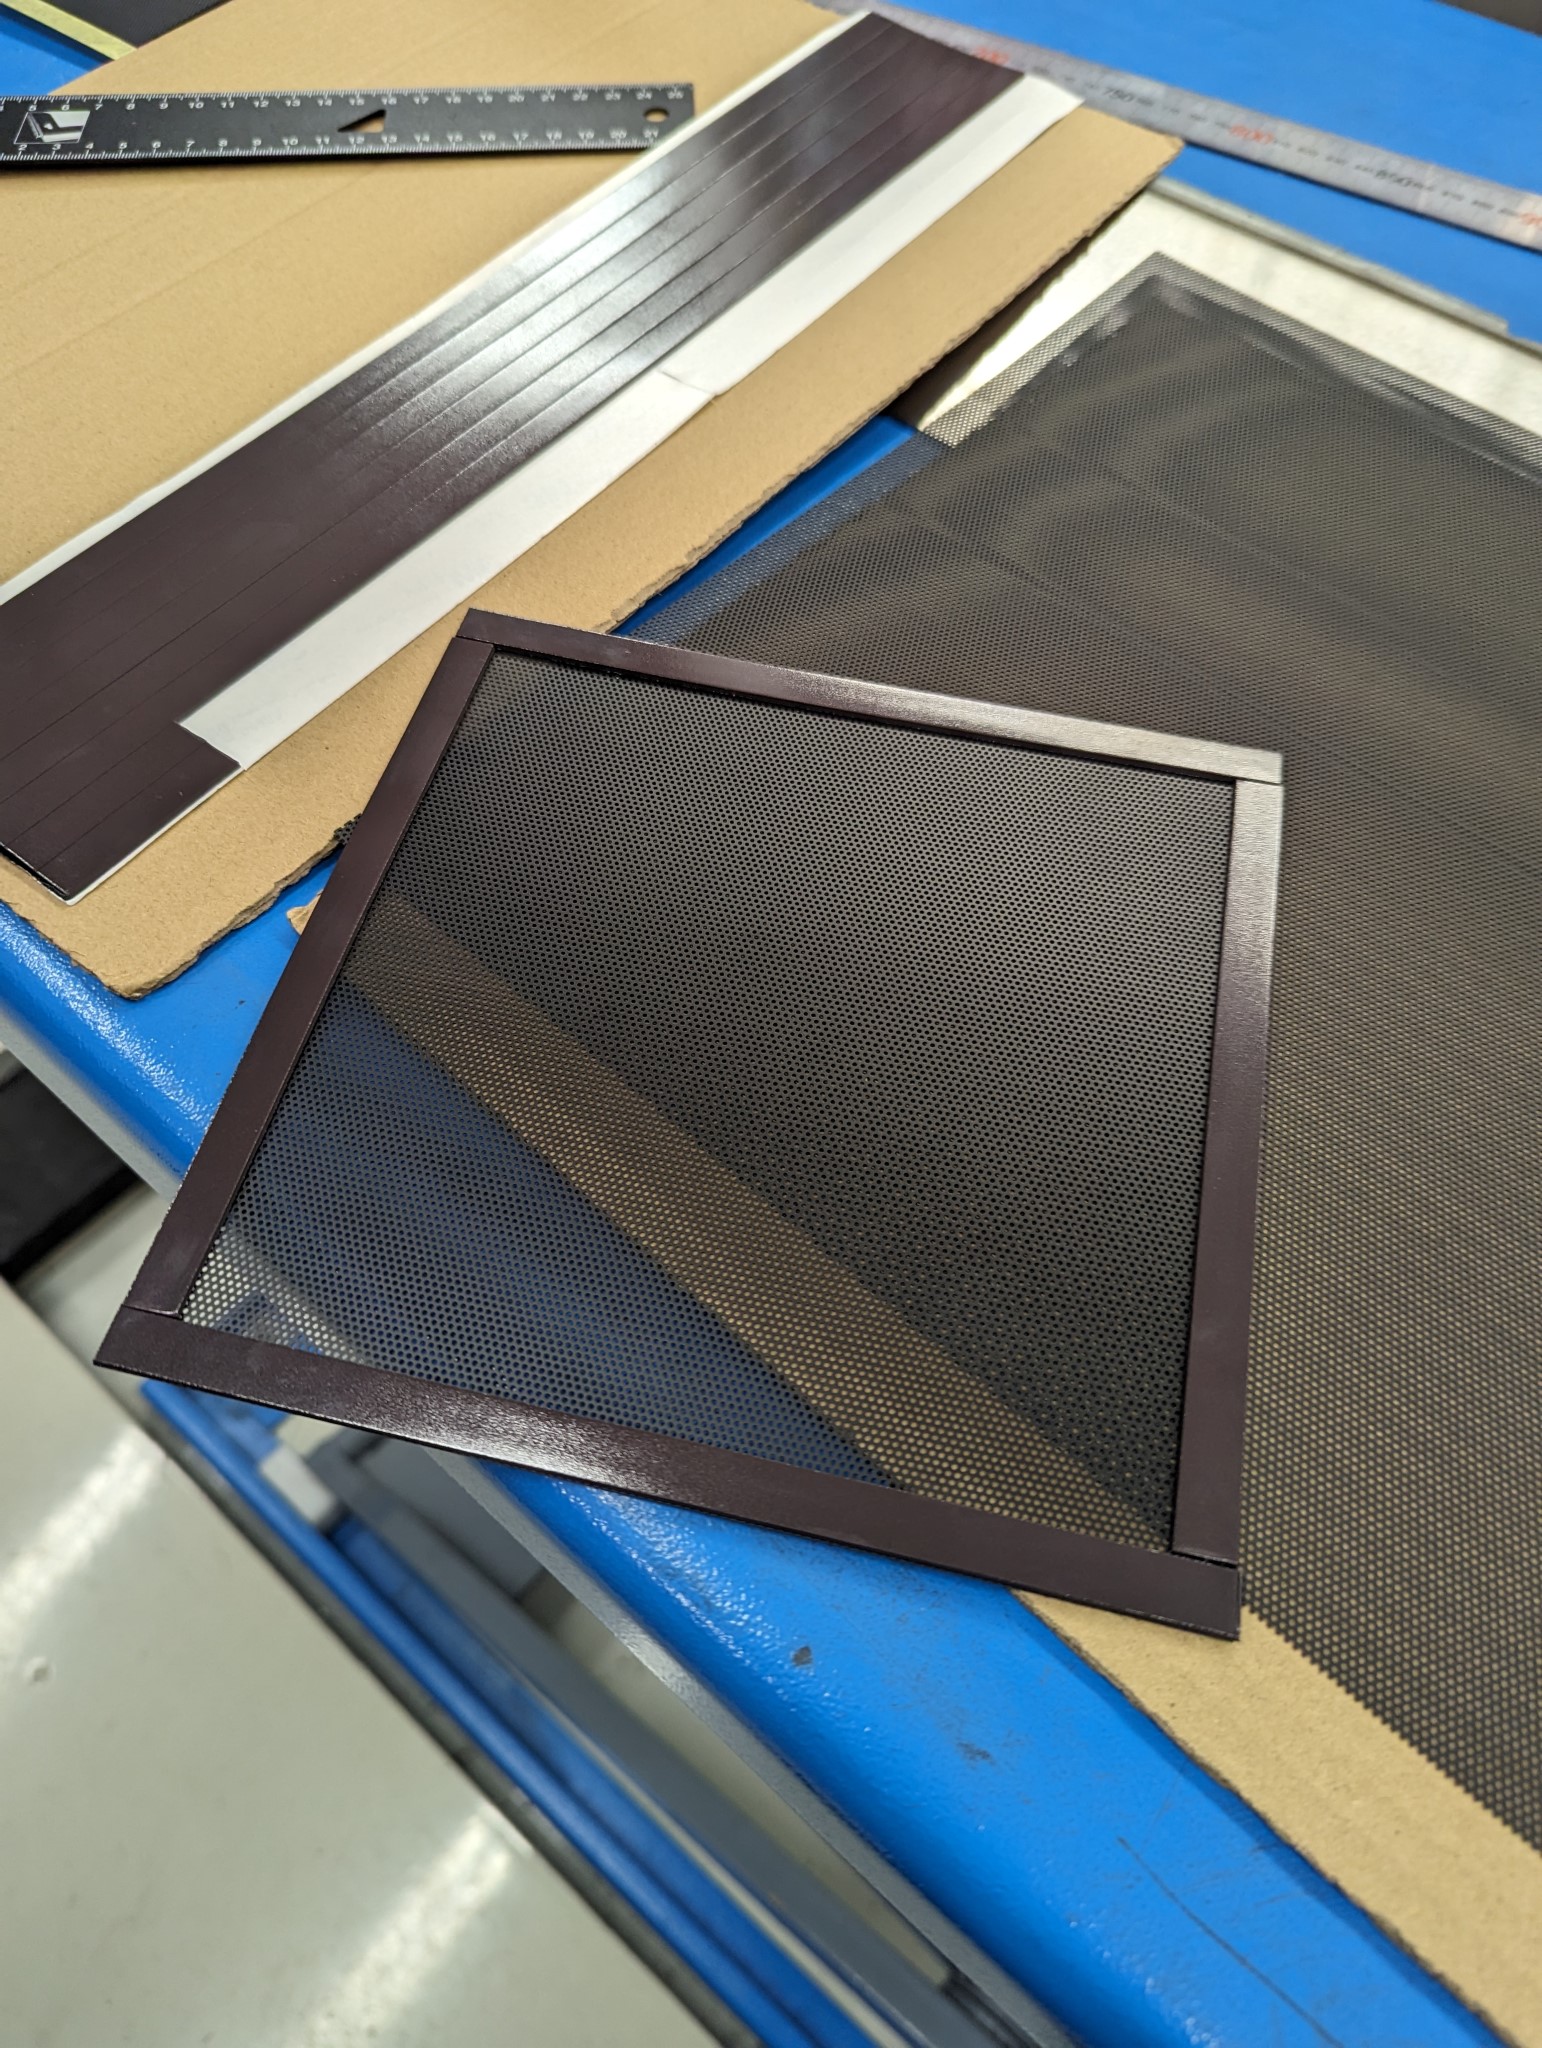
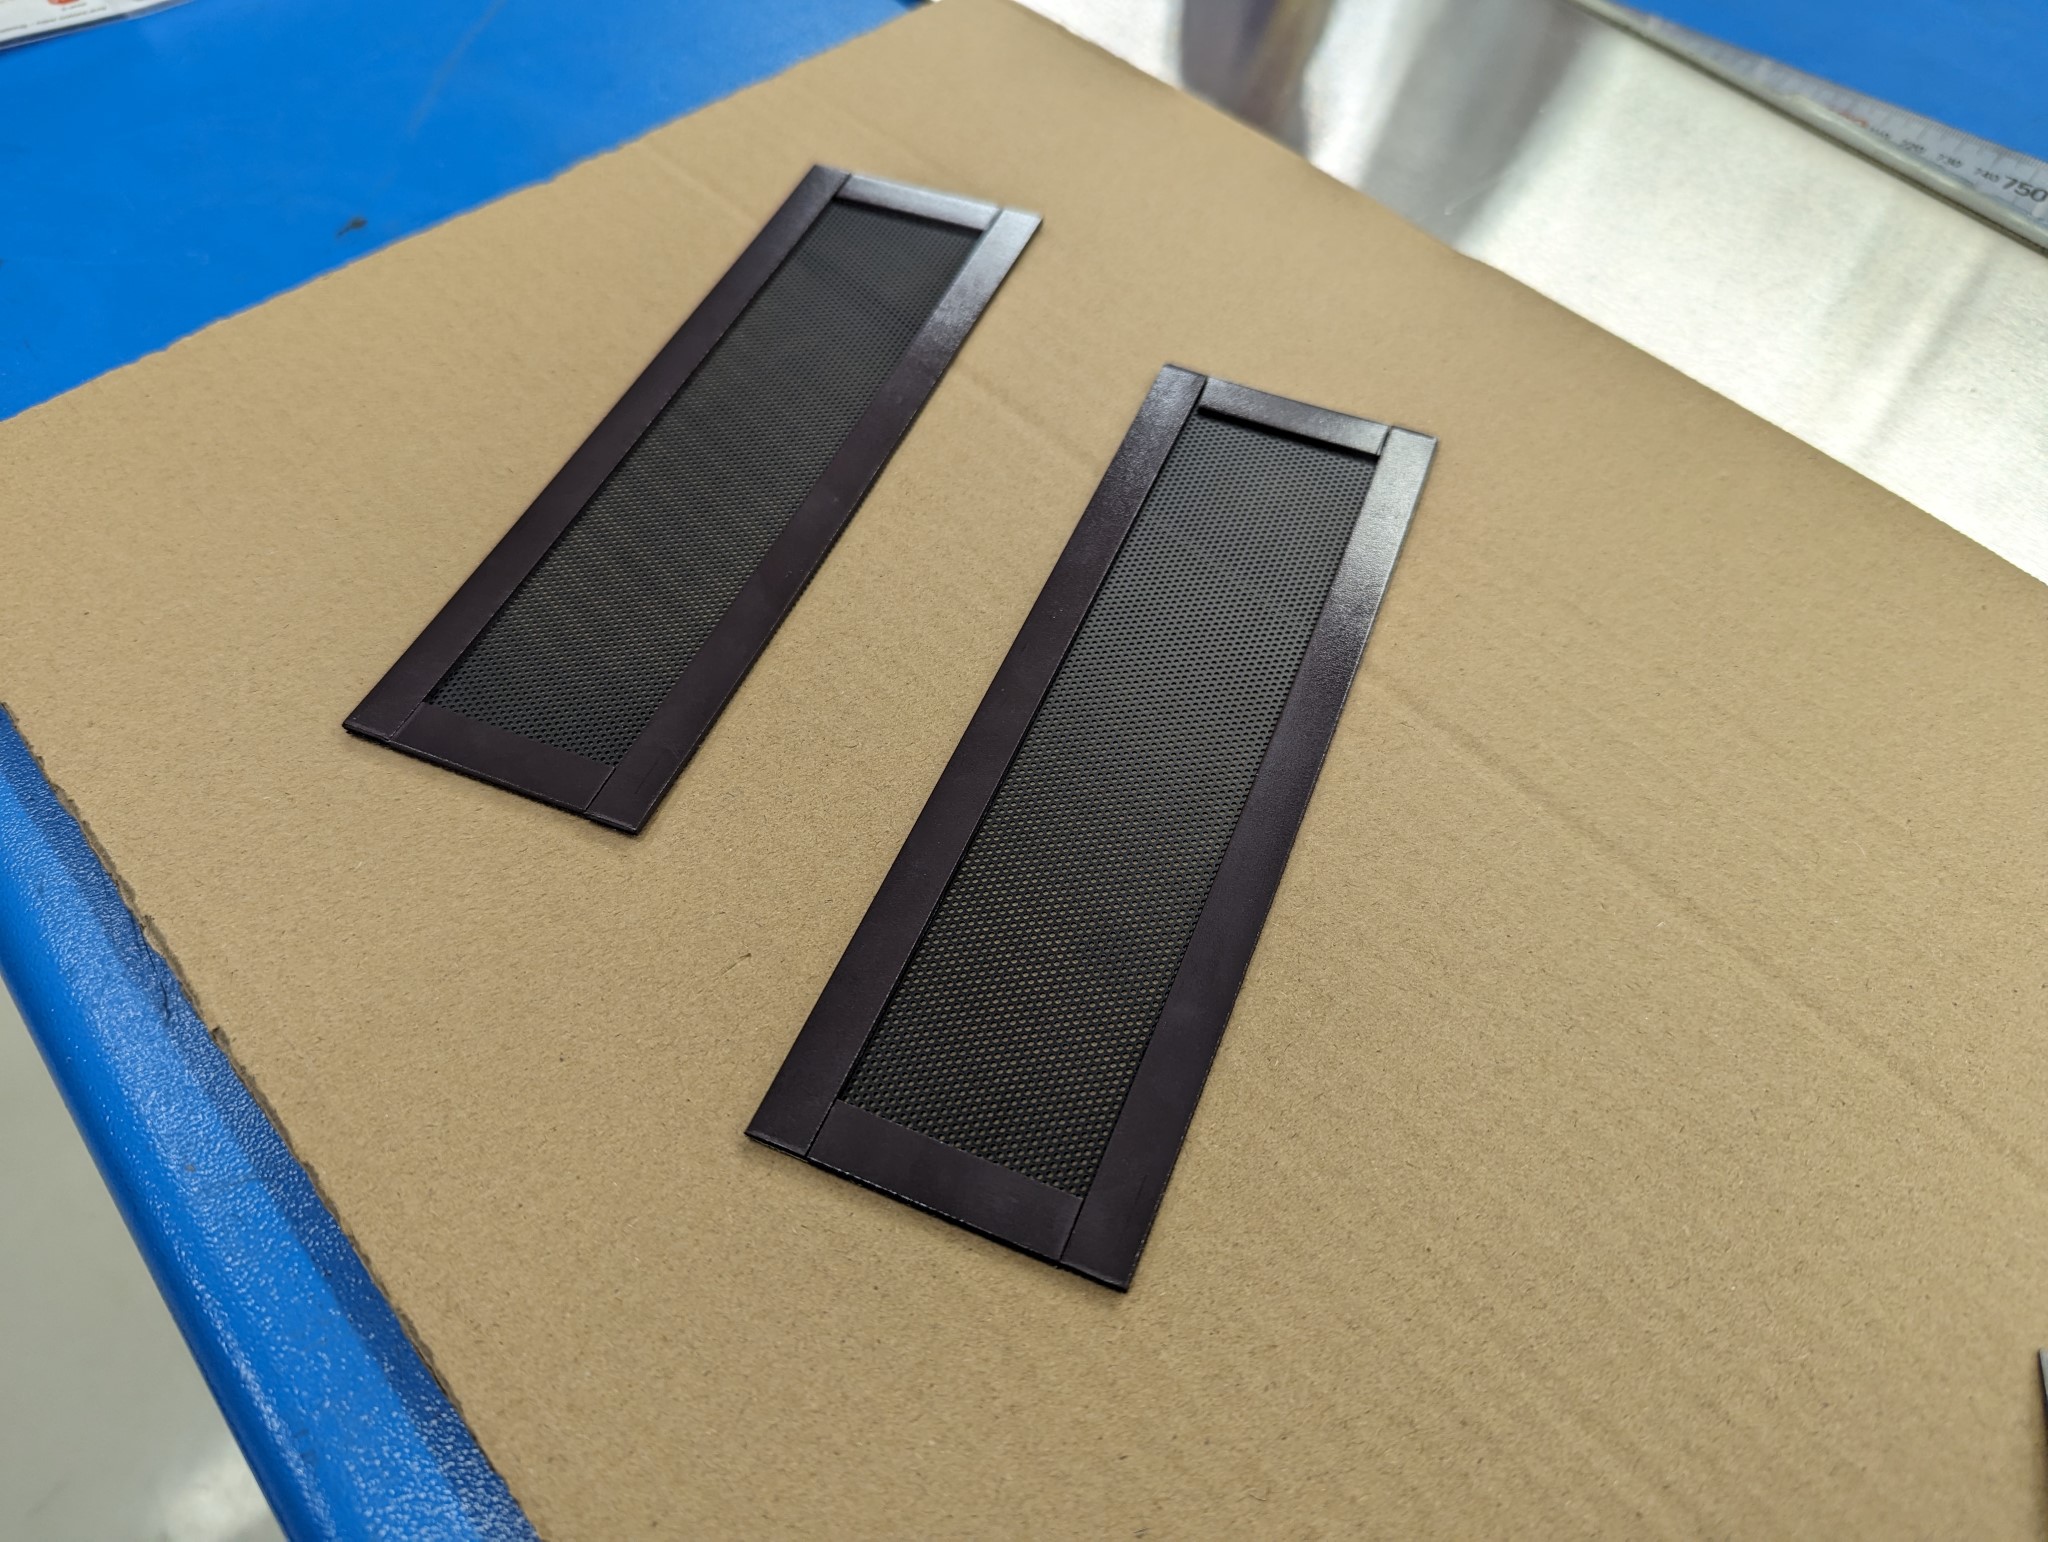
The looks of this setup can be discussed but it should at least significantly reduce the amount of chips which can make their way inside the case. I'm probably gonna tape over the front USB ports too as they will be pointing upwards.
Further along the road I'll most likely have to revisit this setup and make something a bit more sturdy but that's something I can work on later when the machine is fully up and running.
Attachments:
The following user(s) said Thank You: tommylight
Please Log in or Create an account to join the conversation.
18 Nov 2023 10:20 #285811
by Unlogic
Replied by Unlogic on topic Optimum Optimill MH50V CNC conversion
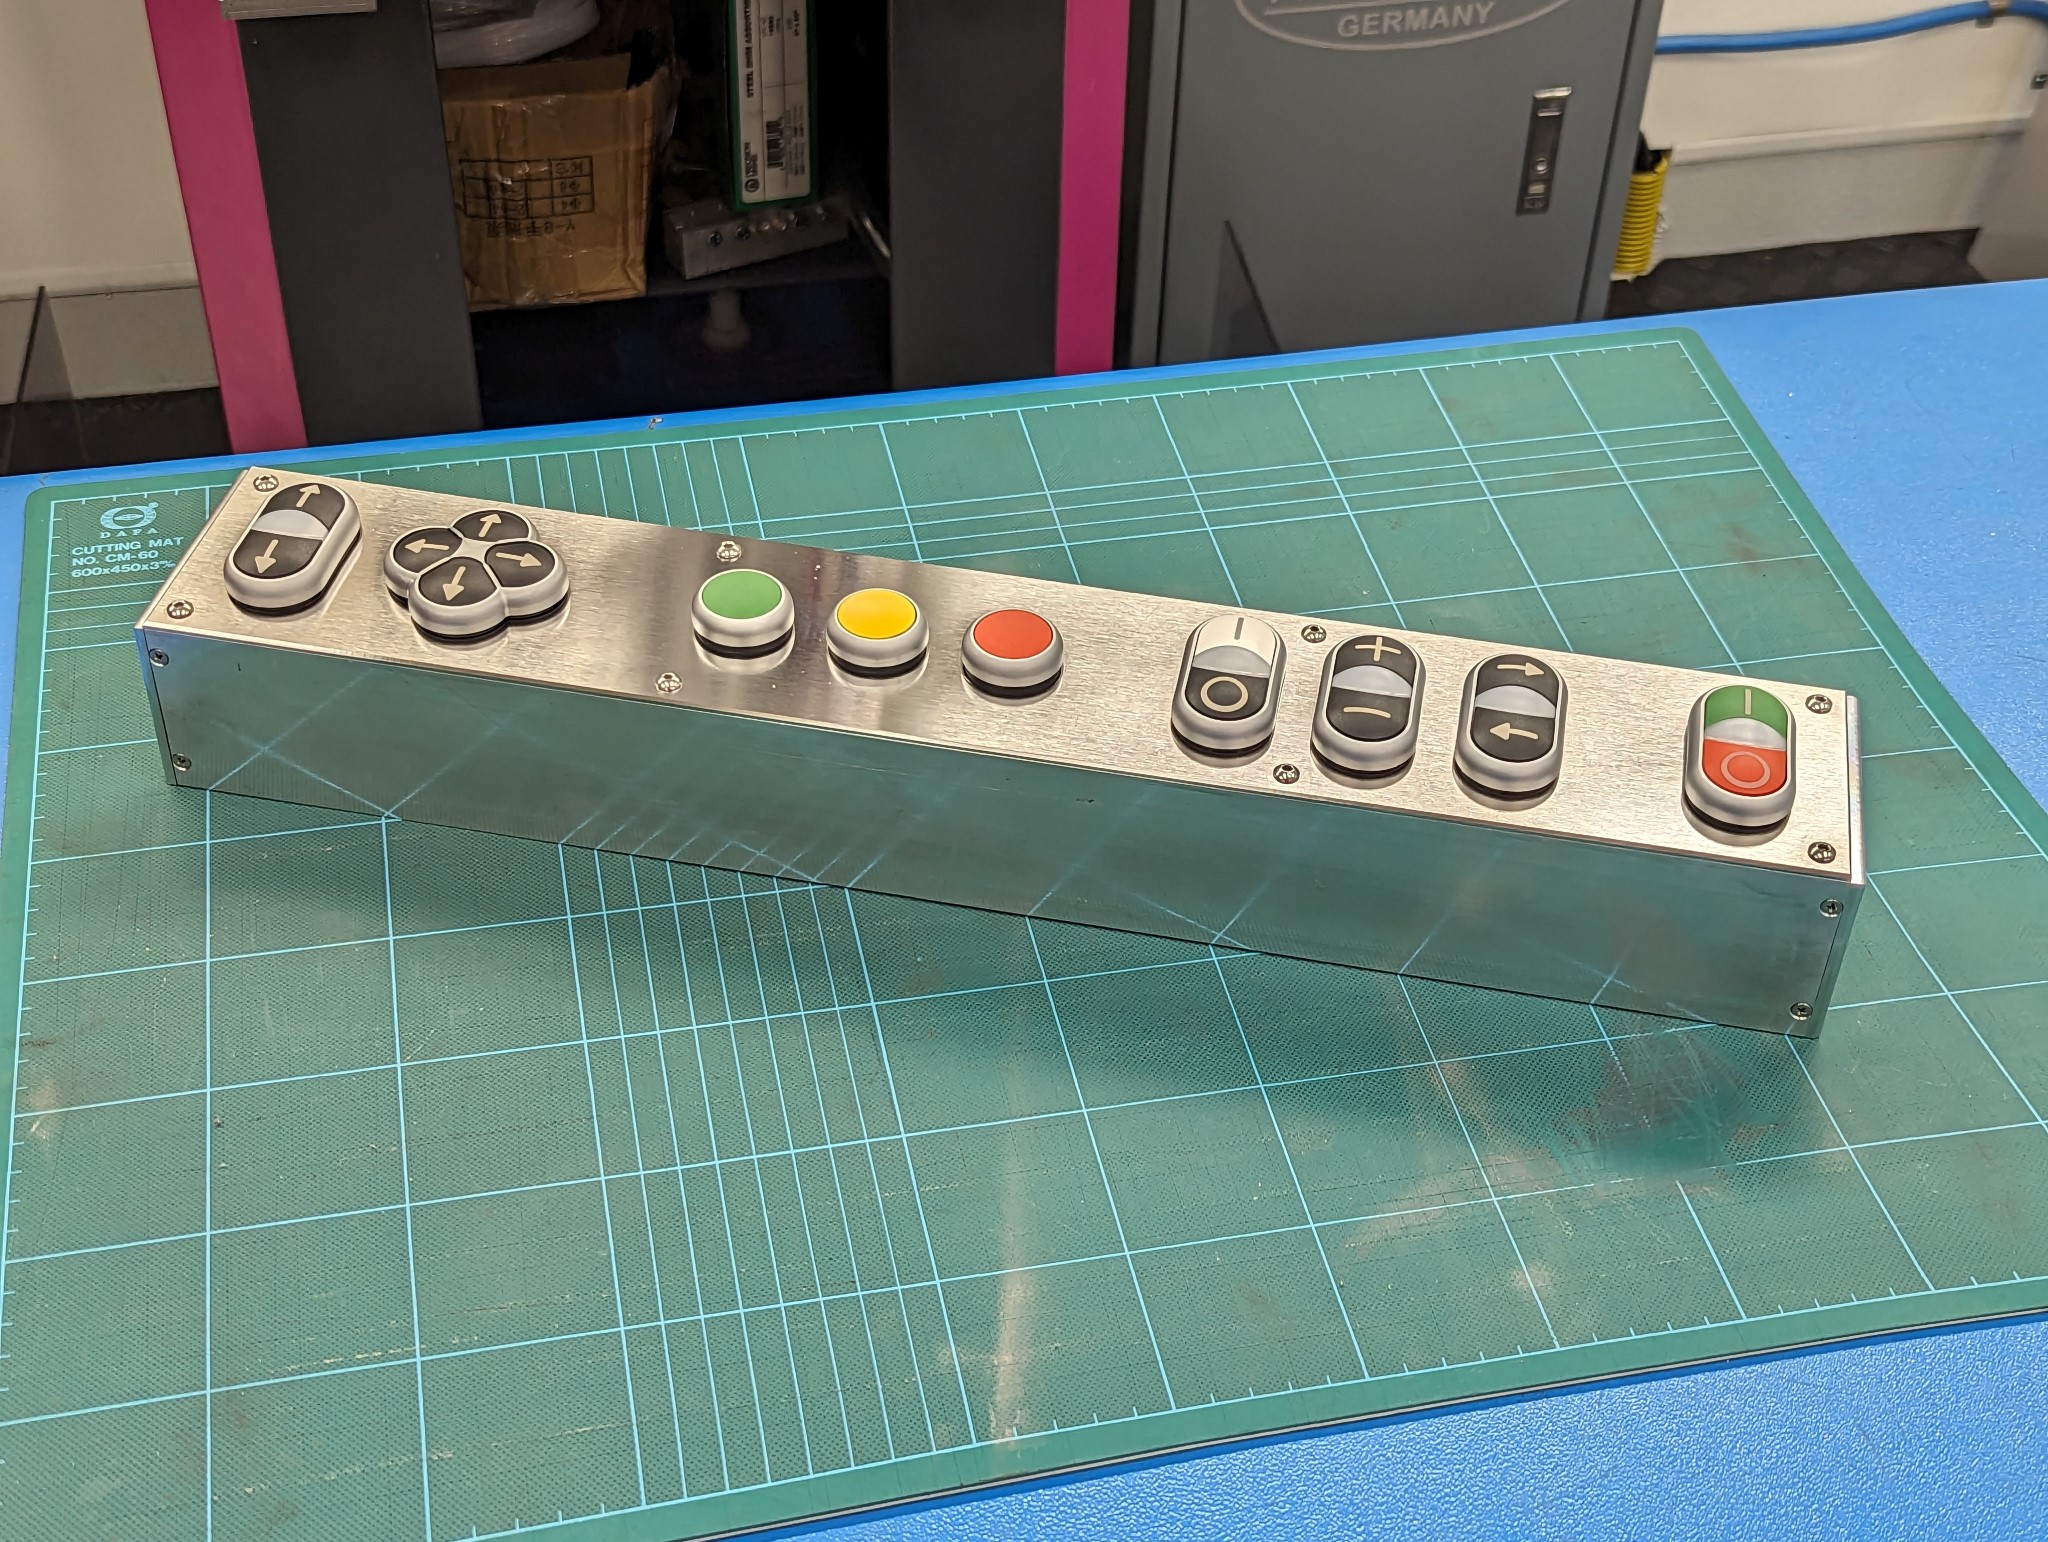
With the PC for the mill sorted for now I could focus on the build again continuing with a small control panel for the physical buttons.
My plans were to use a few physical buttons for the most essential stuff like e-stop and jogging. But after using the Axis UI to get my HAL file setup and trying all the various features I realized that physical buttons which can be felt and pressed without having to look at them is going to add a lot of value on a machine like mine which still has a quill and probably well be used in semi manual mode at least to some degree.
So I scaled up my plans for physical buttons and decided to make a sturdy panel to be mounted underneath the monitor and which can be safely operated with dirty gloves without causing any issues.
I did a rough sketch in Visio as I haven't had time to fully master FreeCAD yet.
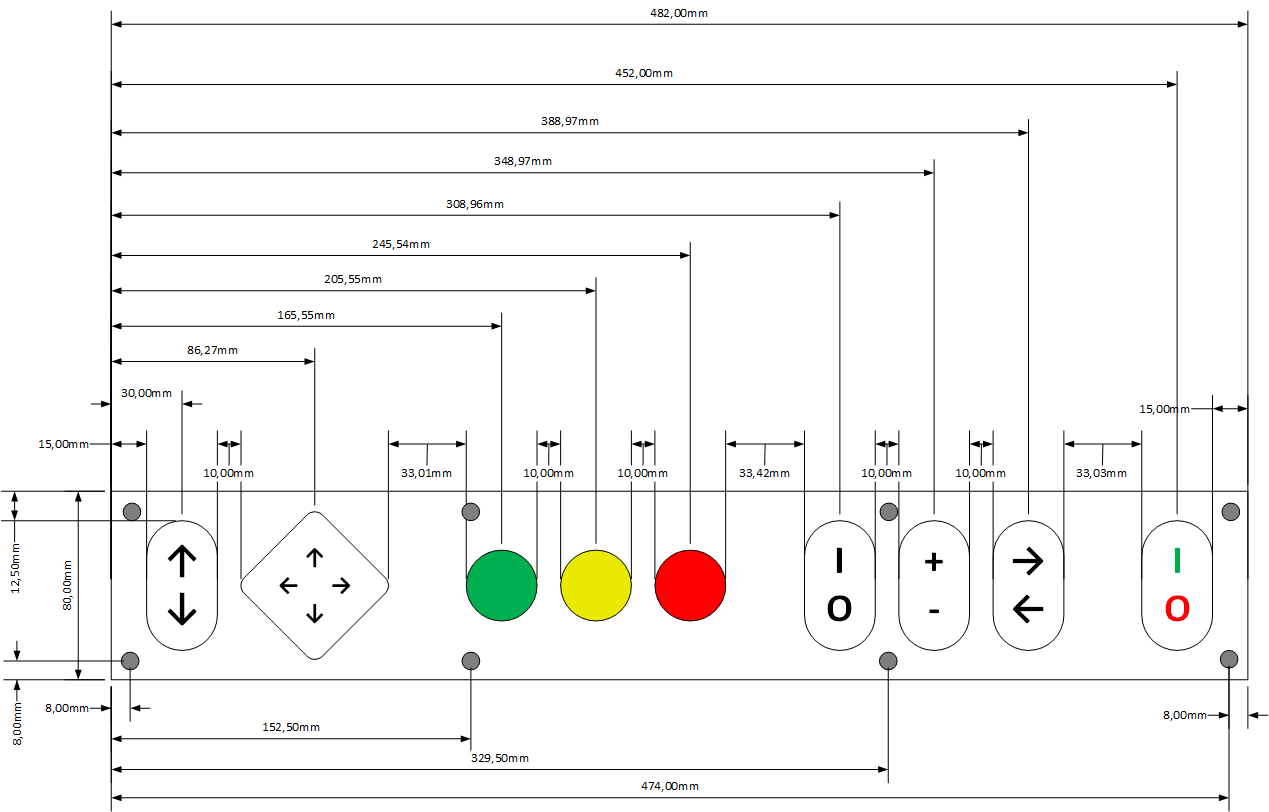
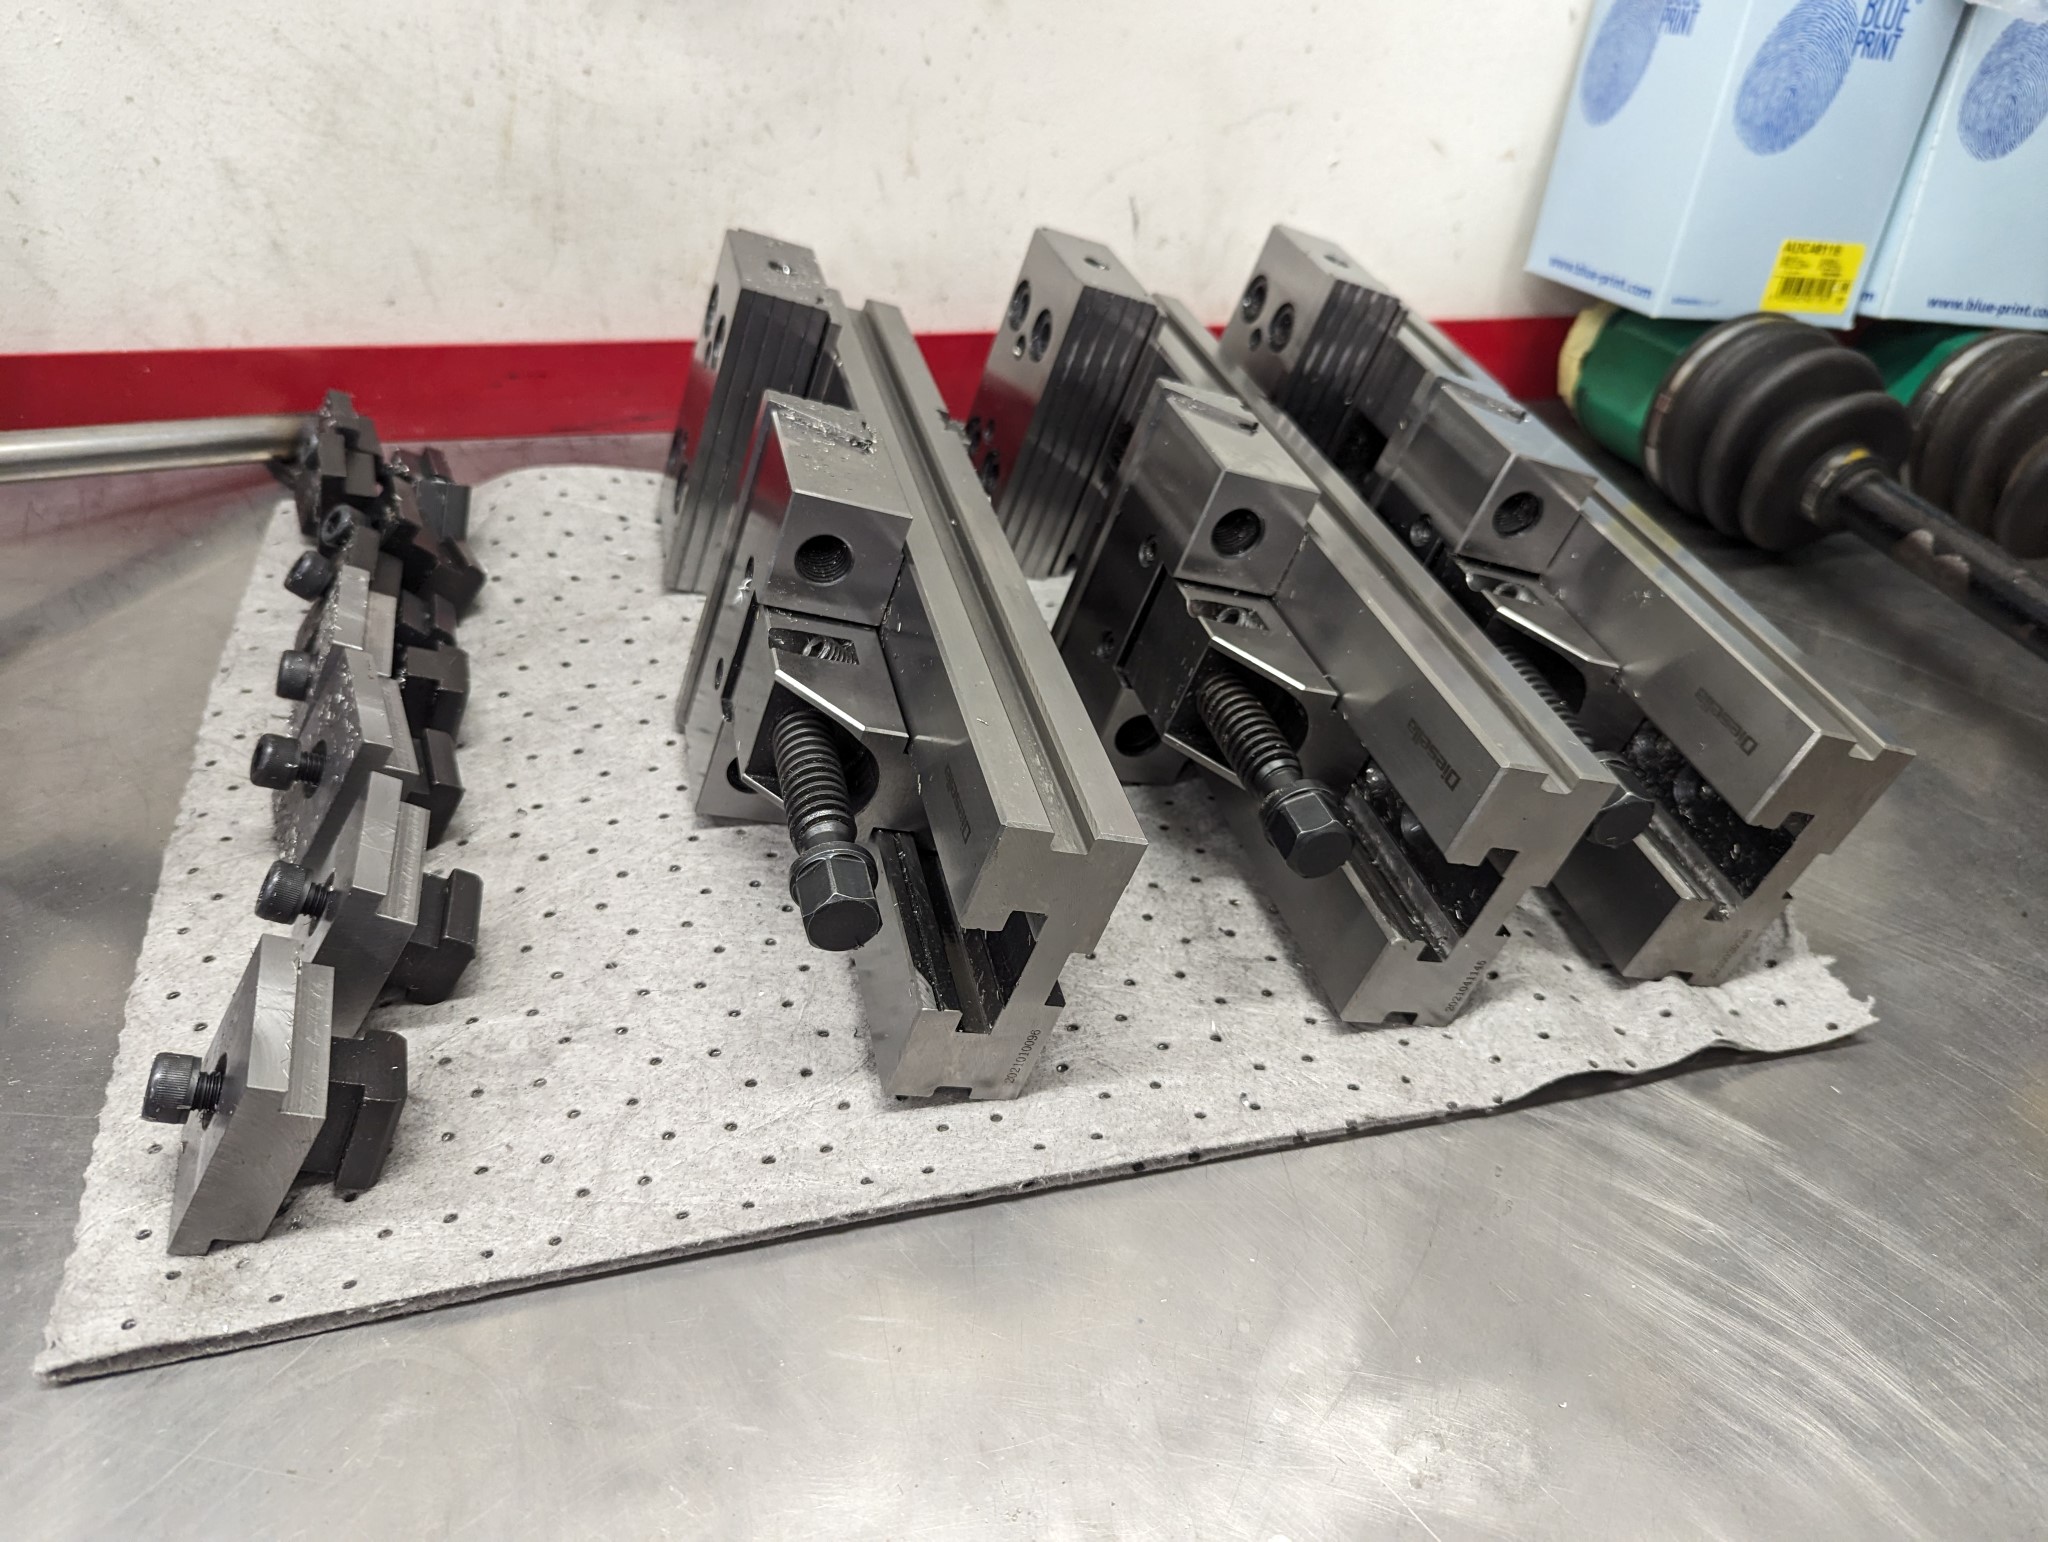
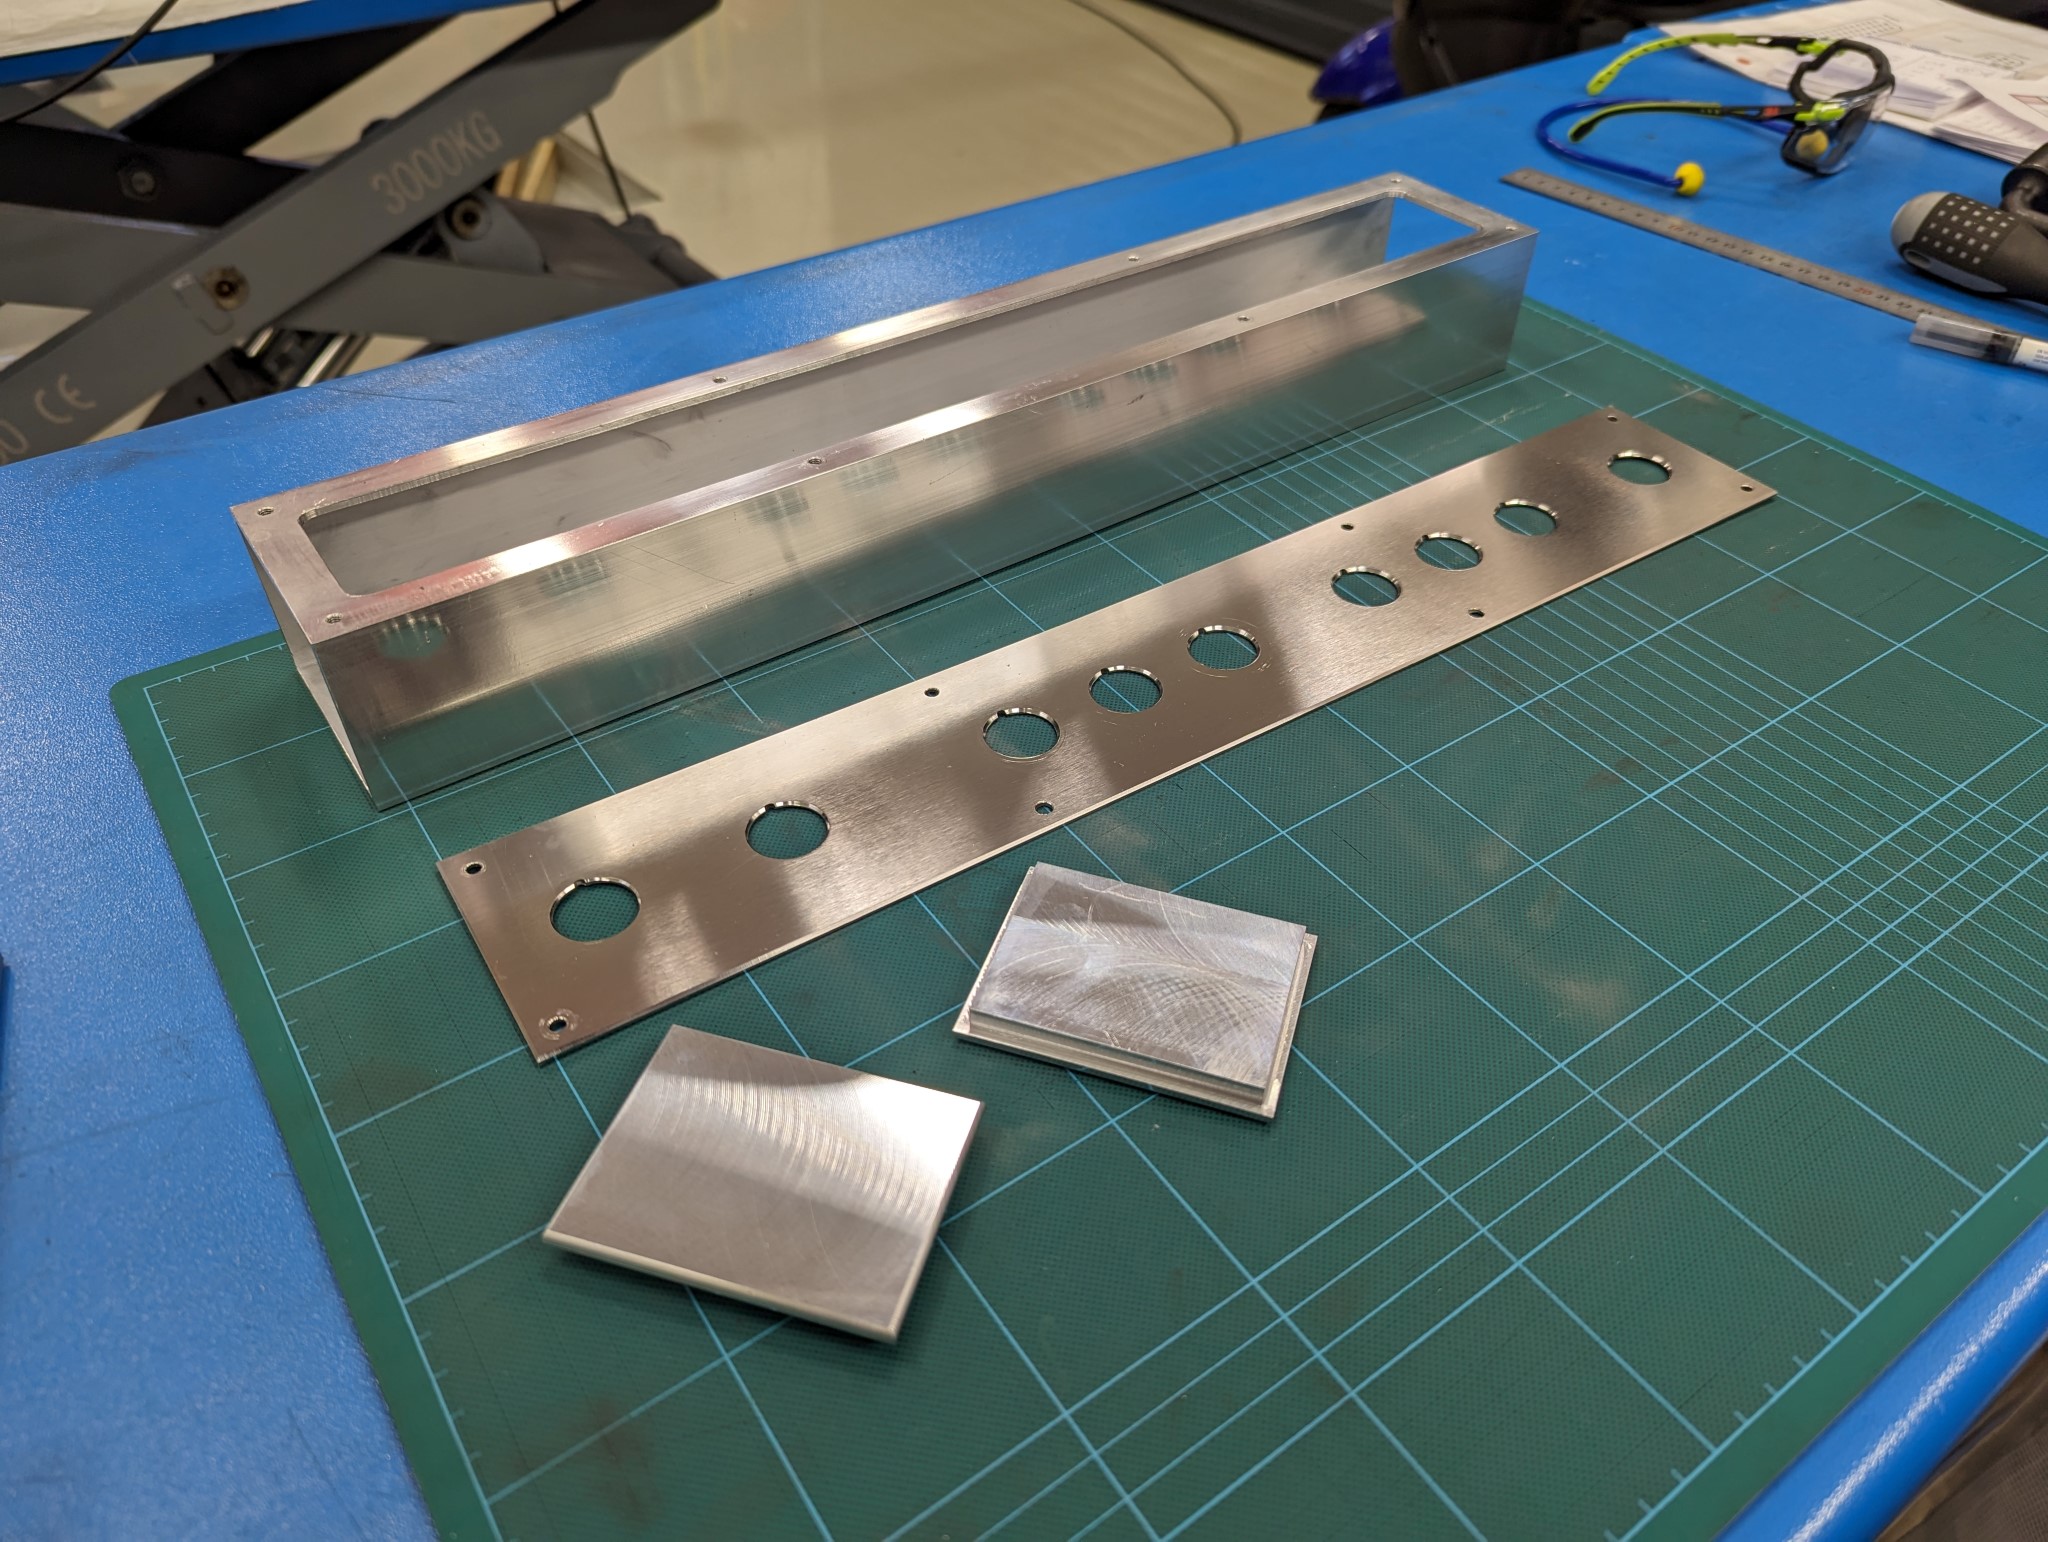
Next I purchased an 60x80 mm aluminum extrusion with 3 mm thick walls and milled it to length
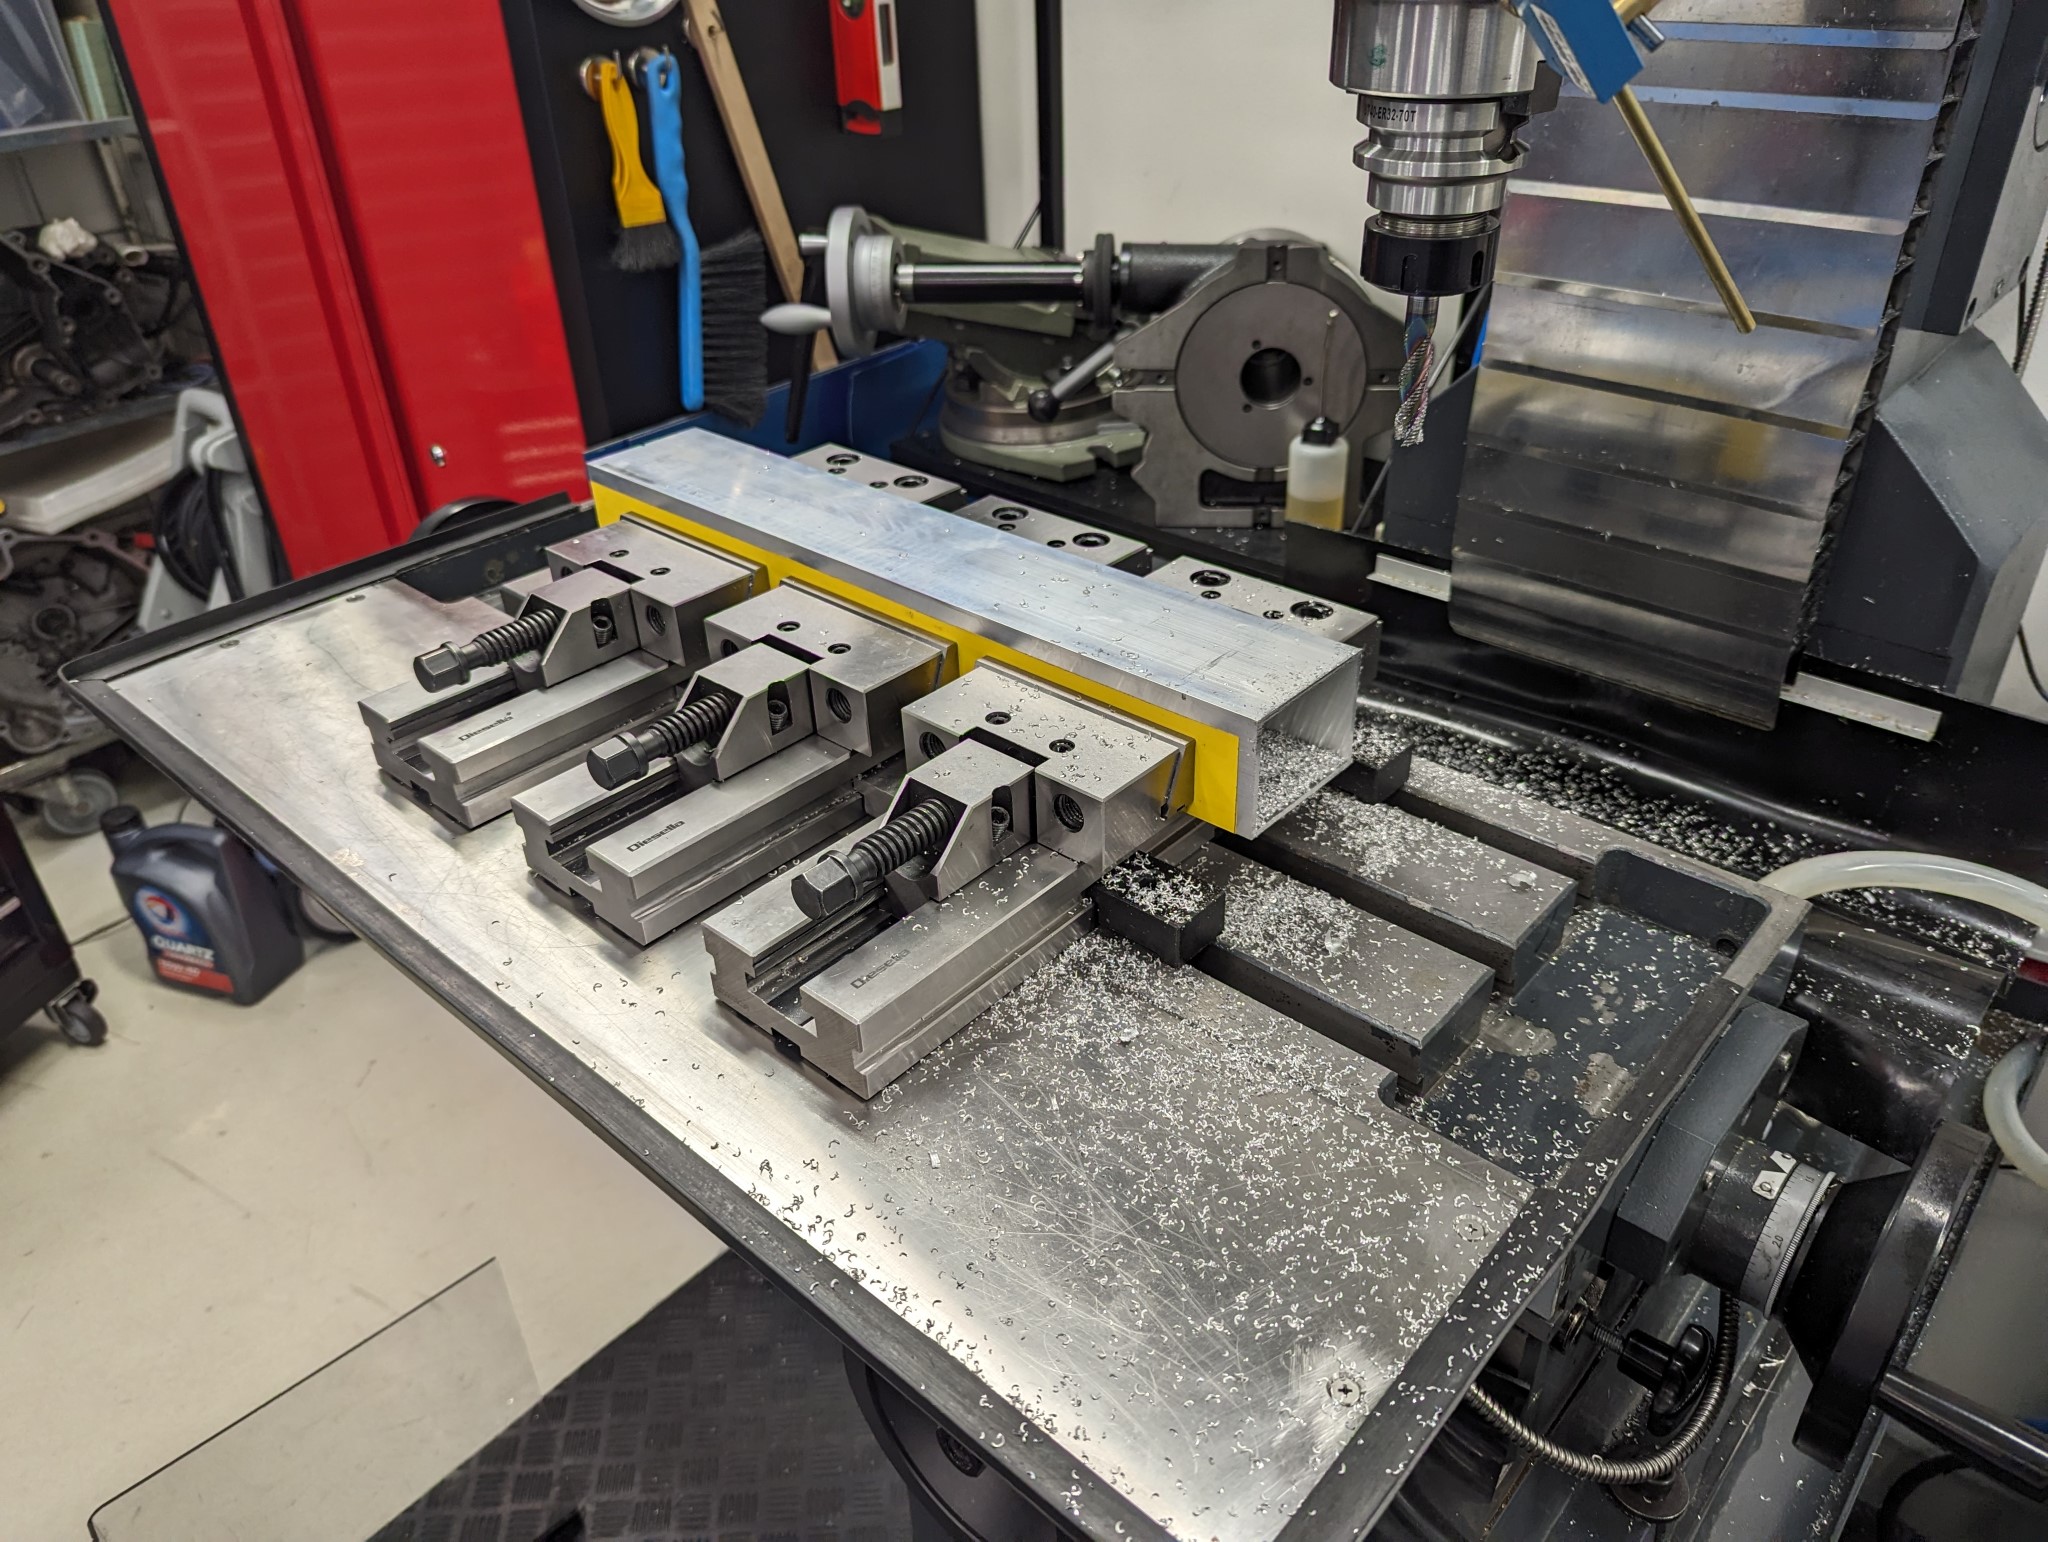
I then used double sided floor tape to glue a leftover piece of 2 mm stainless I had laying around from my previous milling machine table extension.
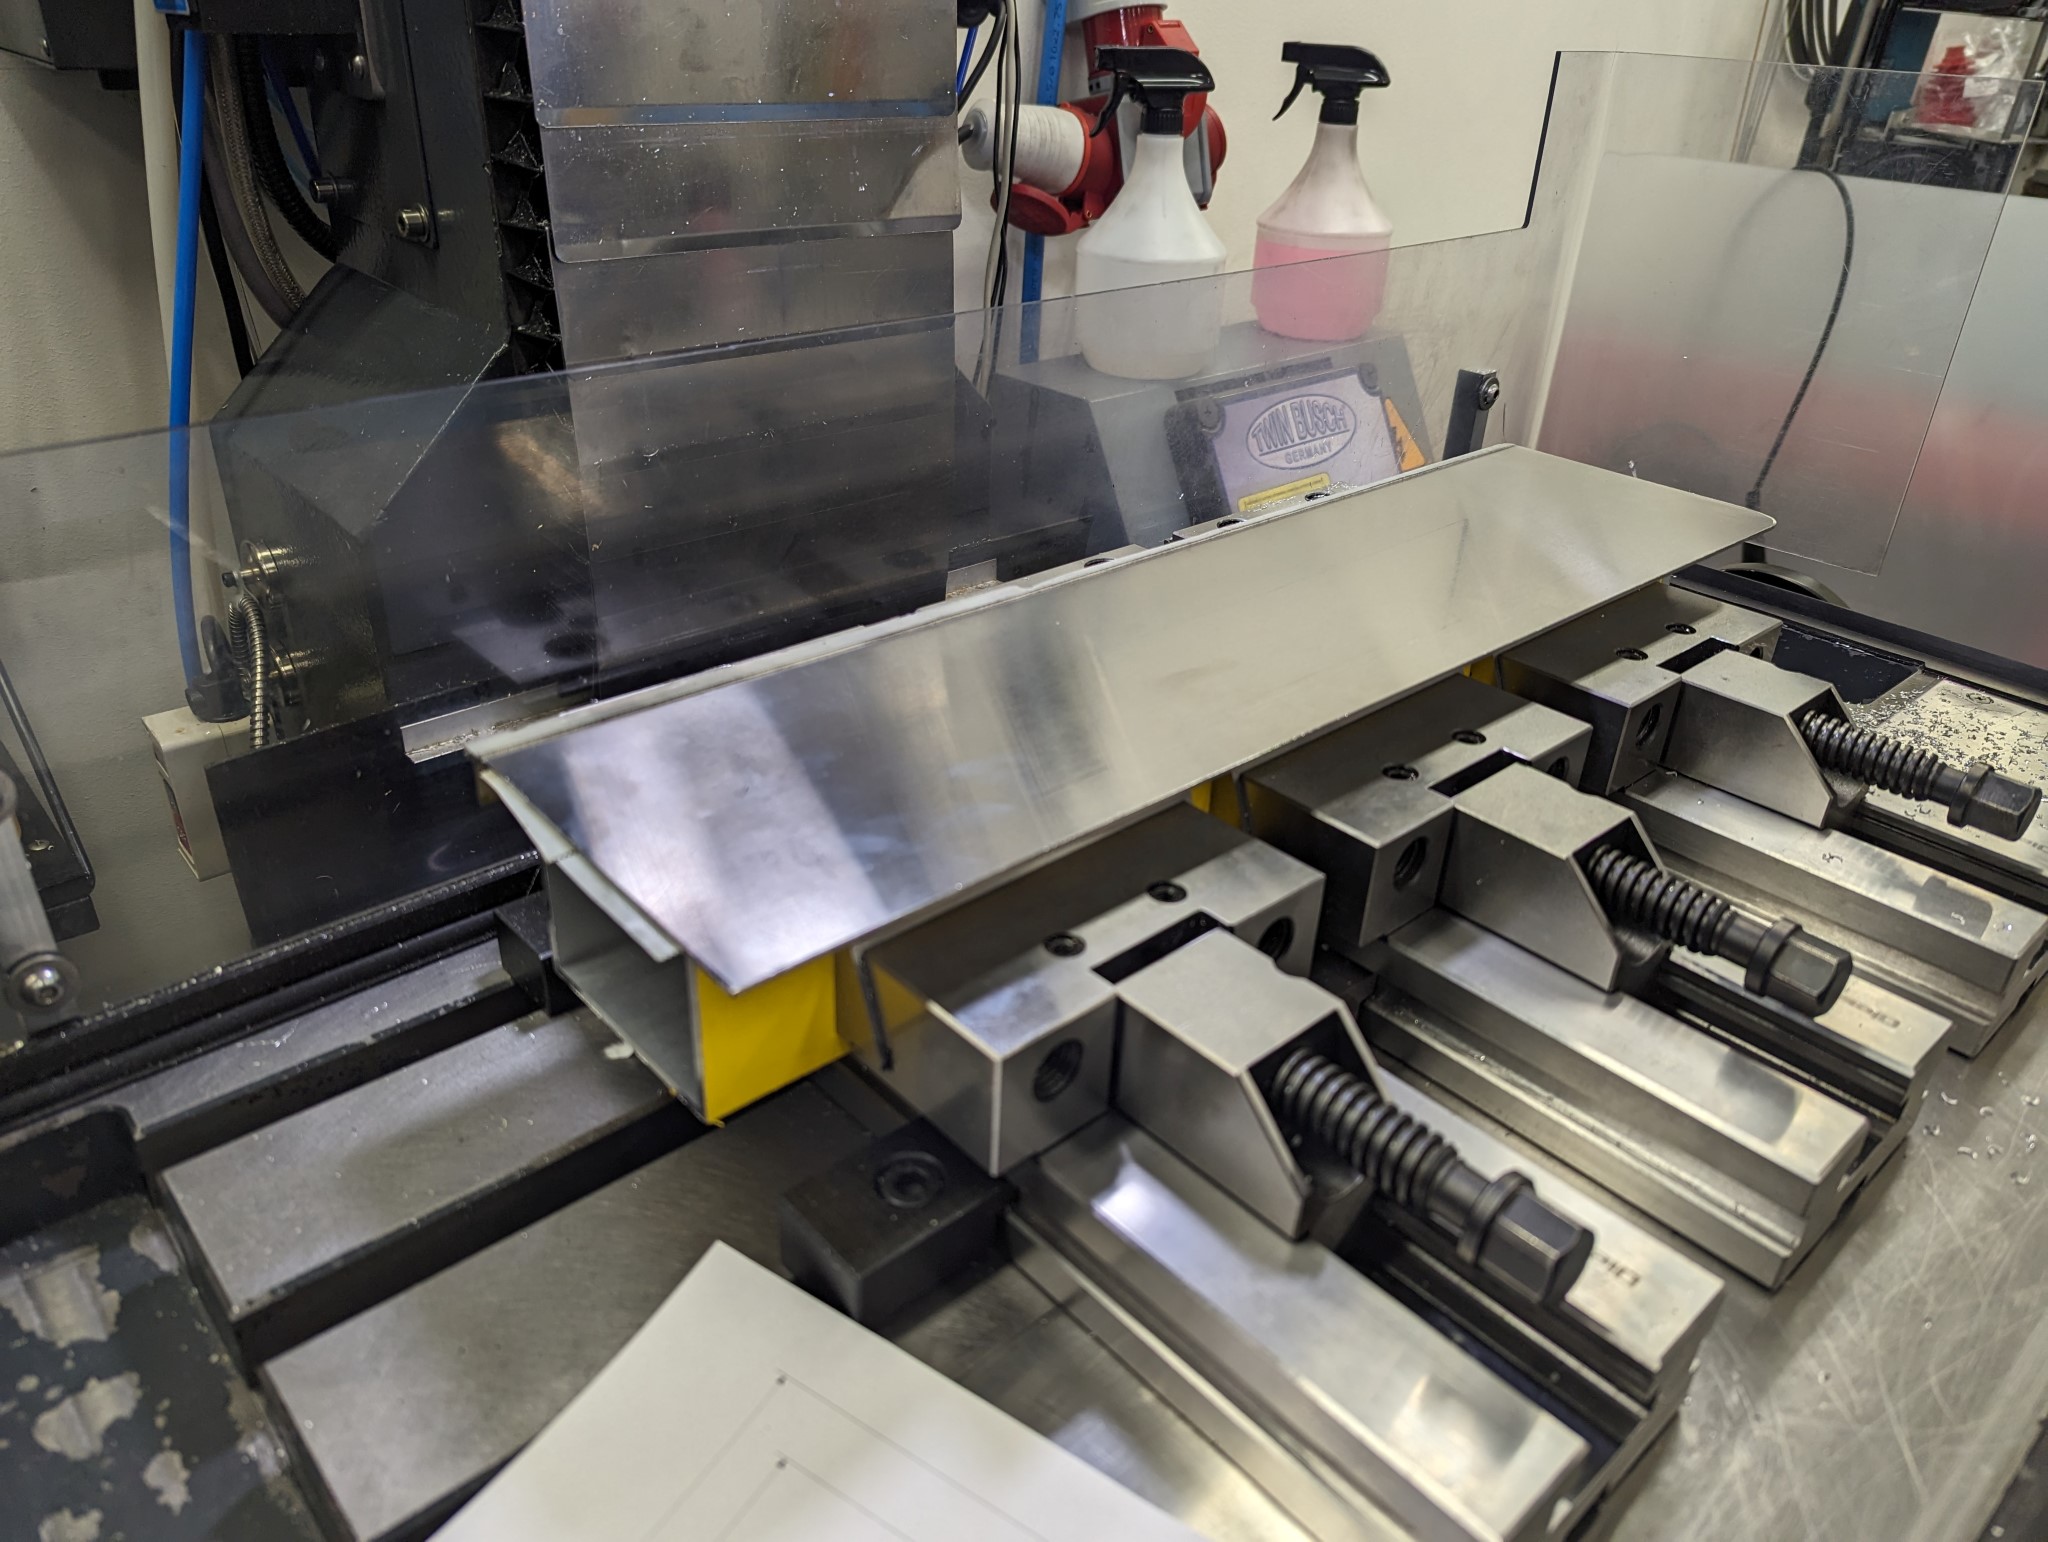
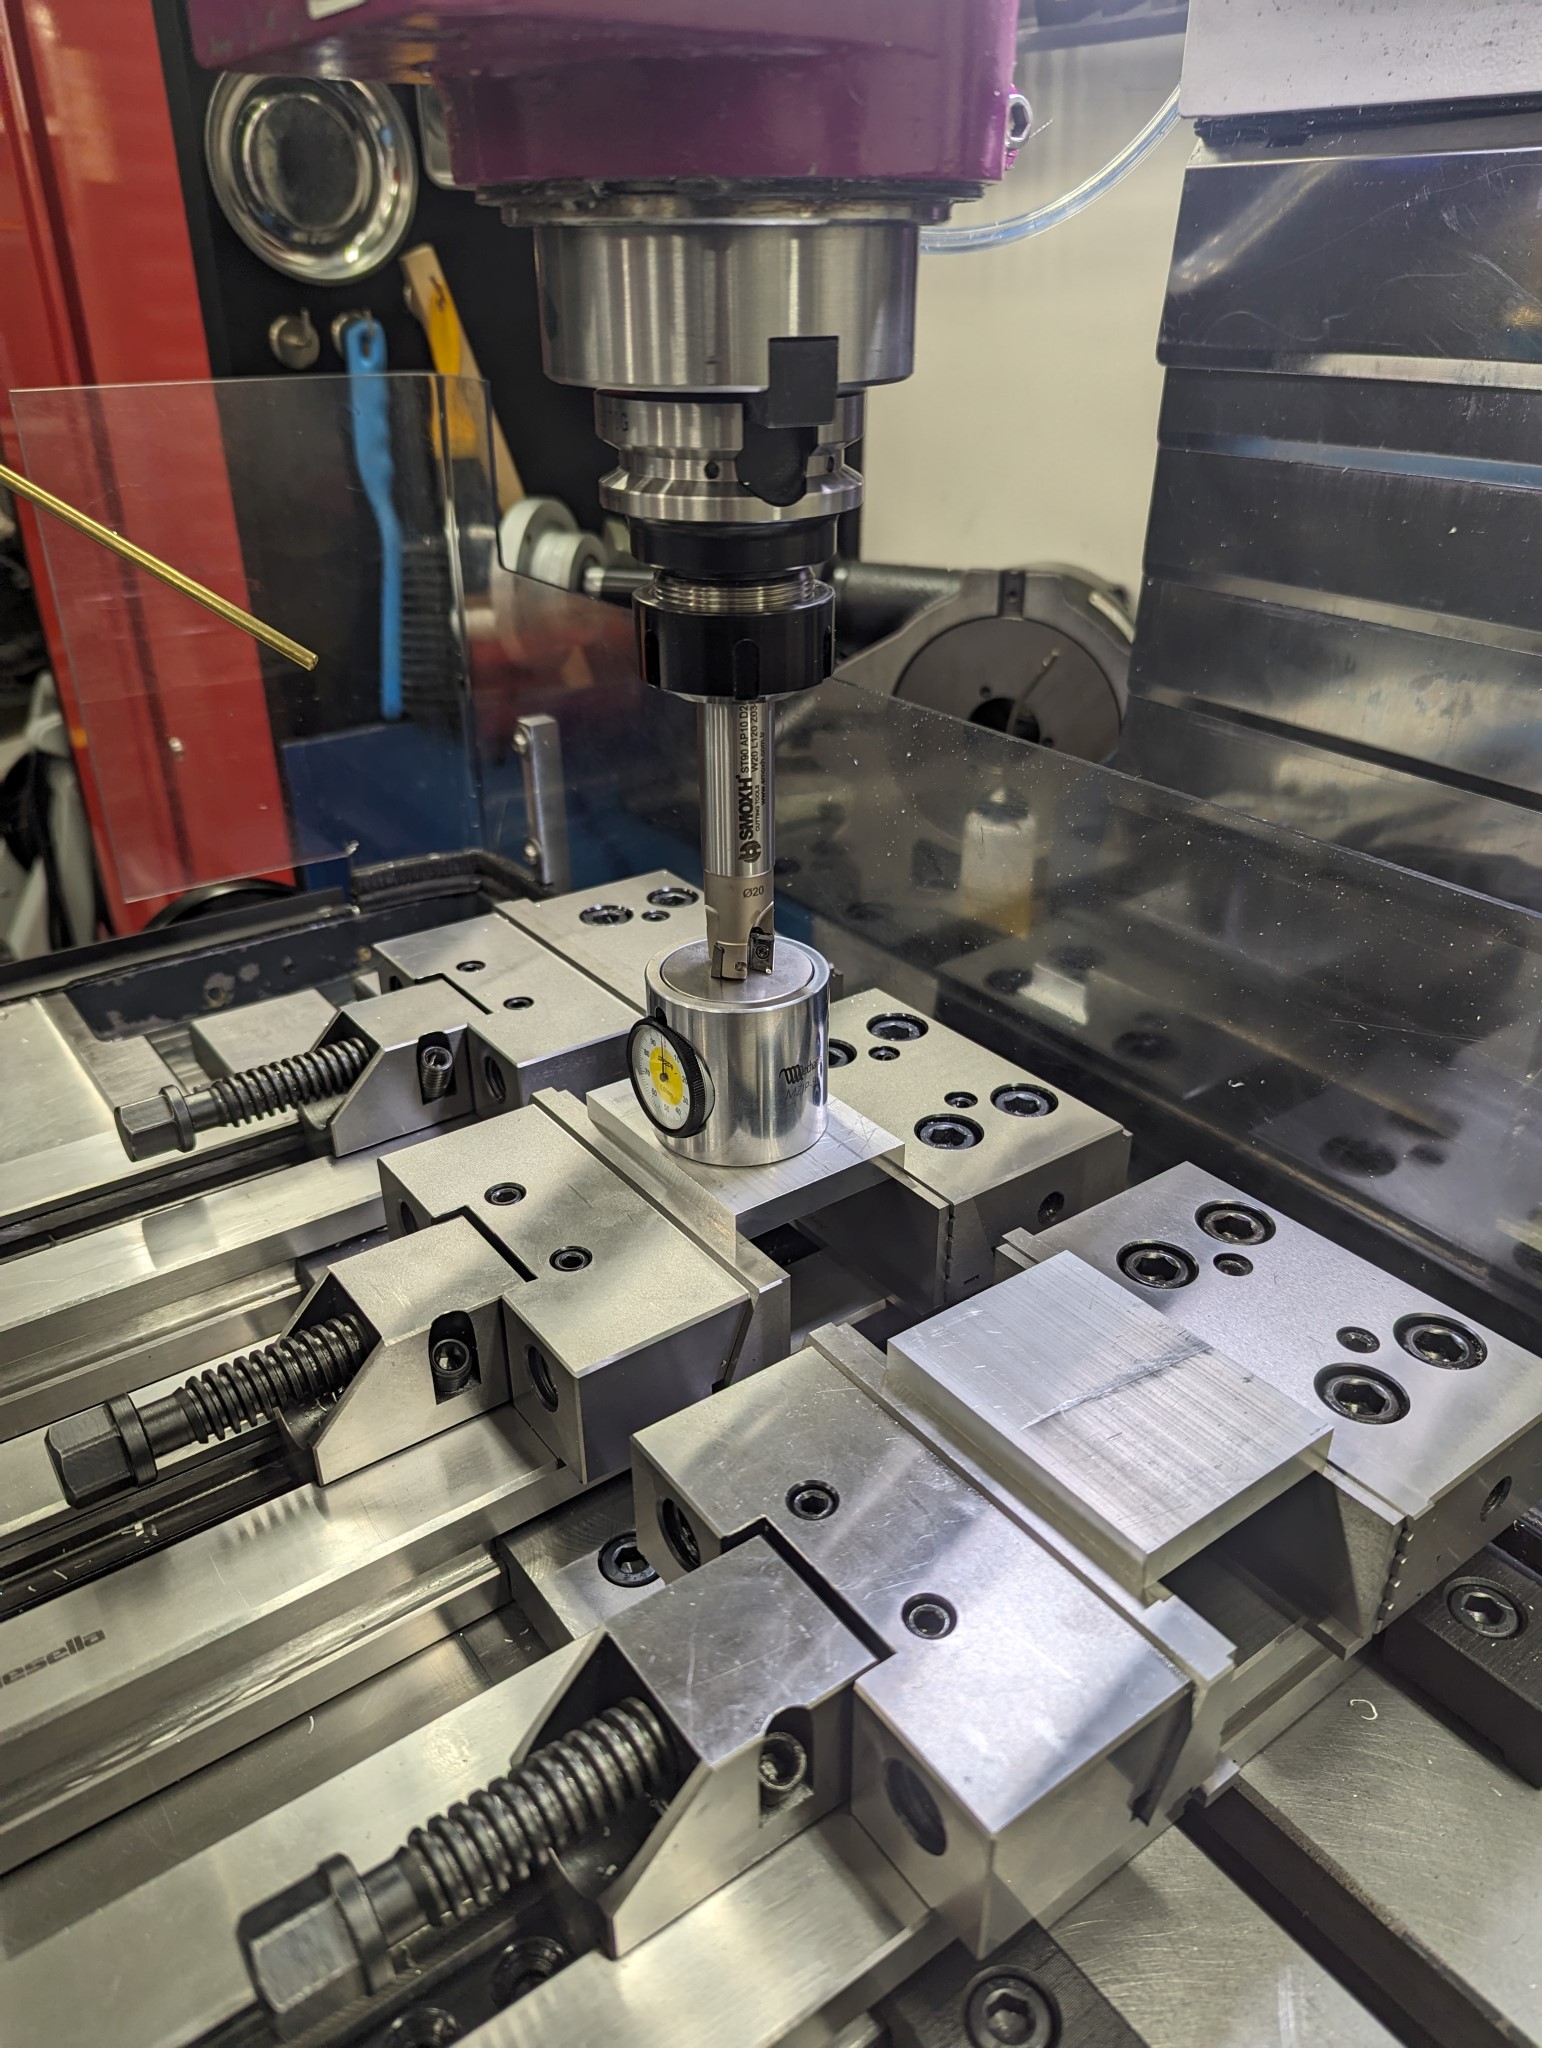
With the stainless faceplate temporarily fixed in place I drilled out the mounting holes and all other important features.
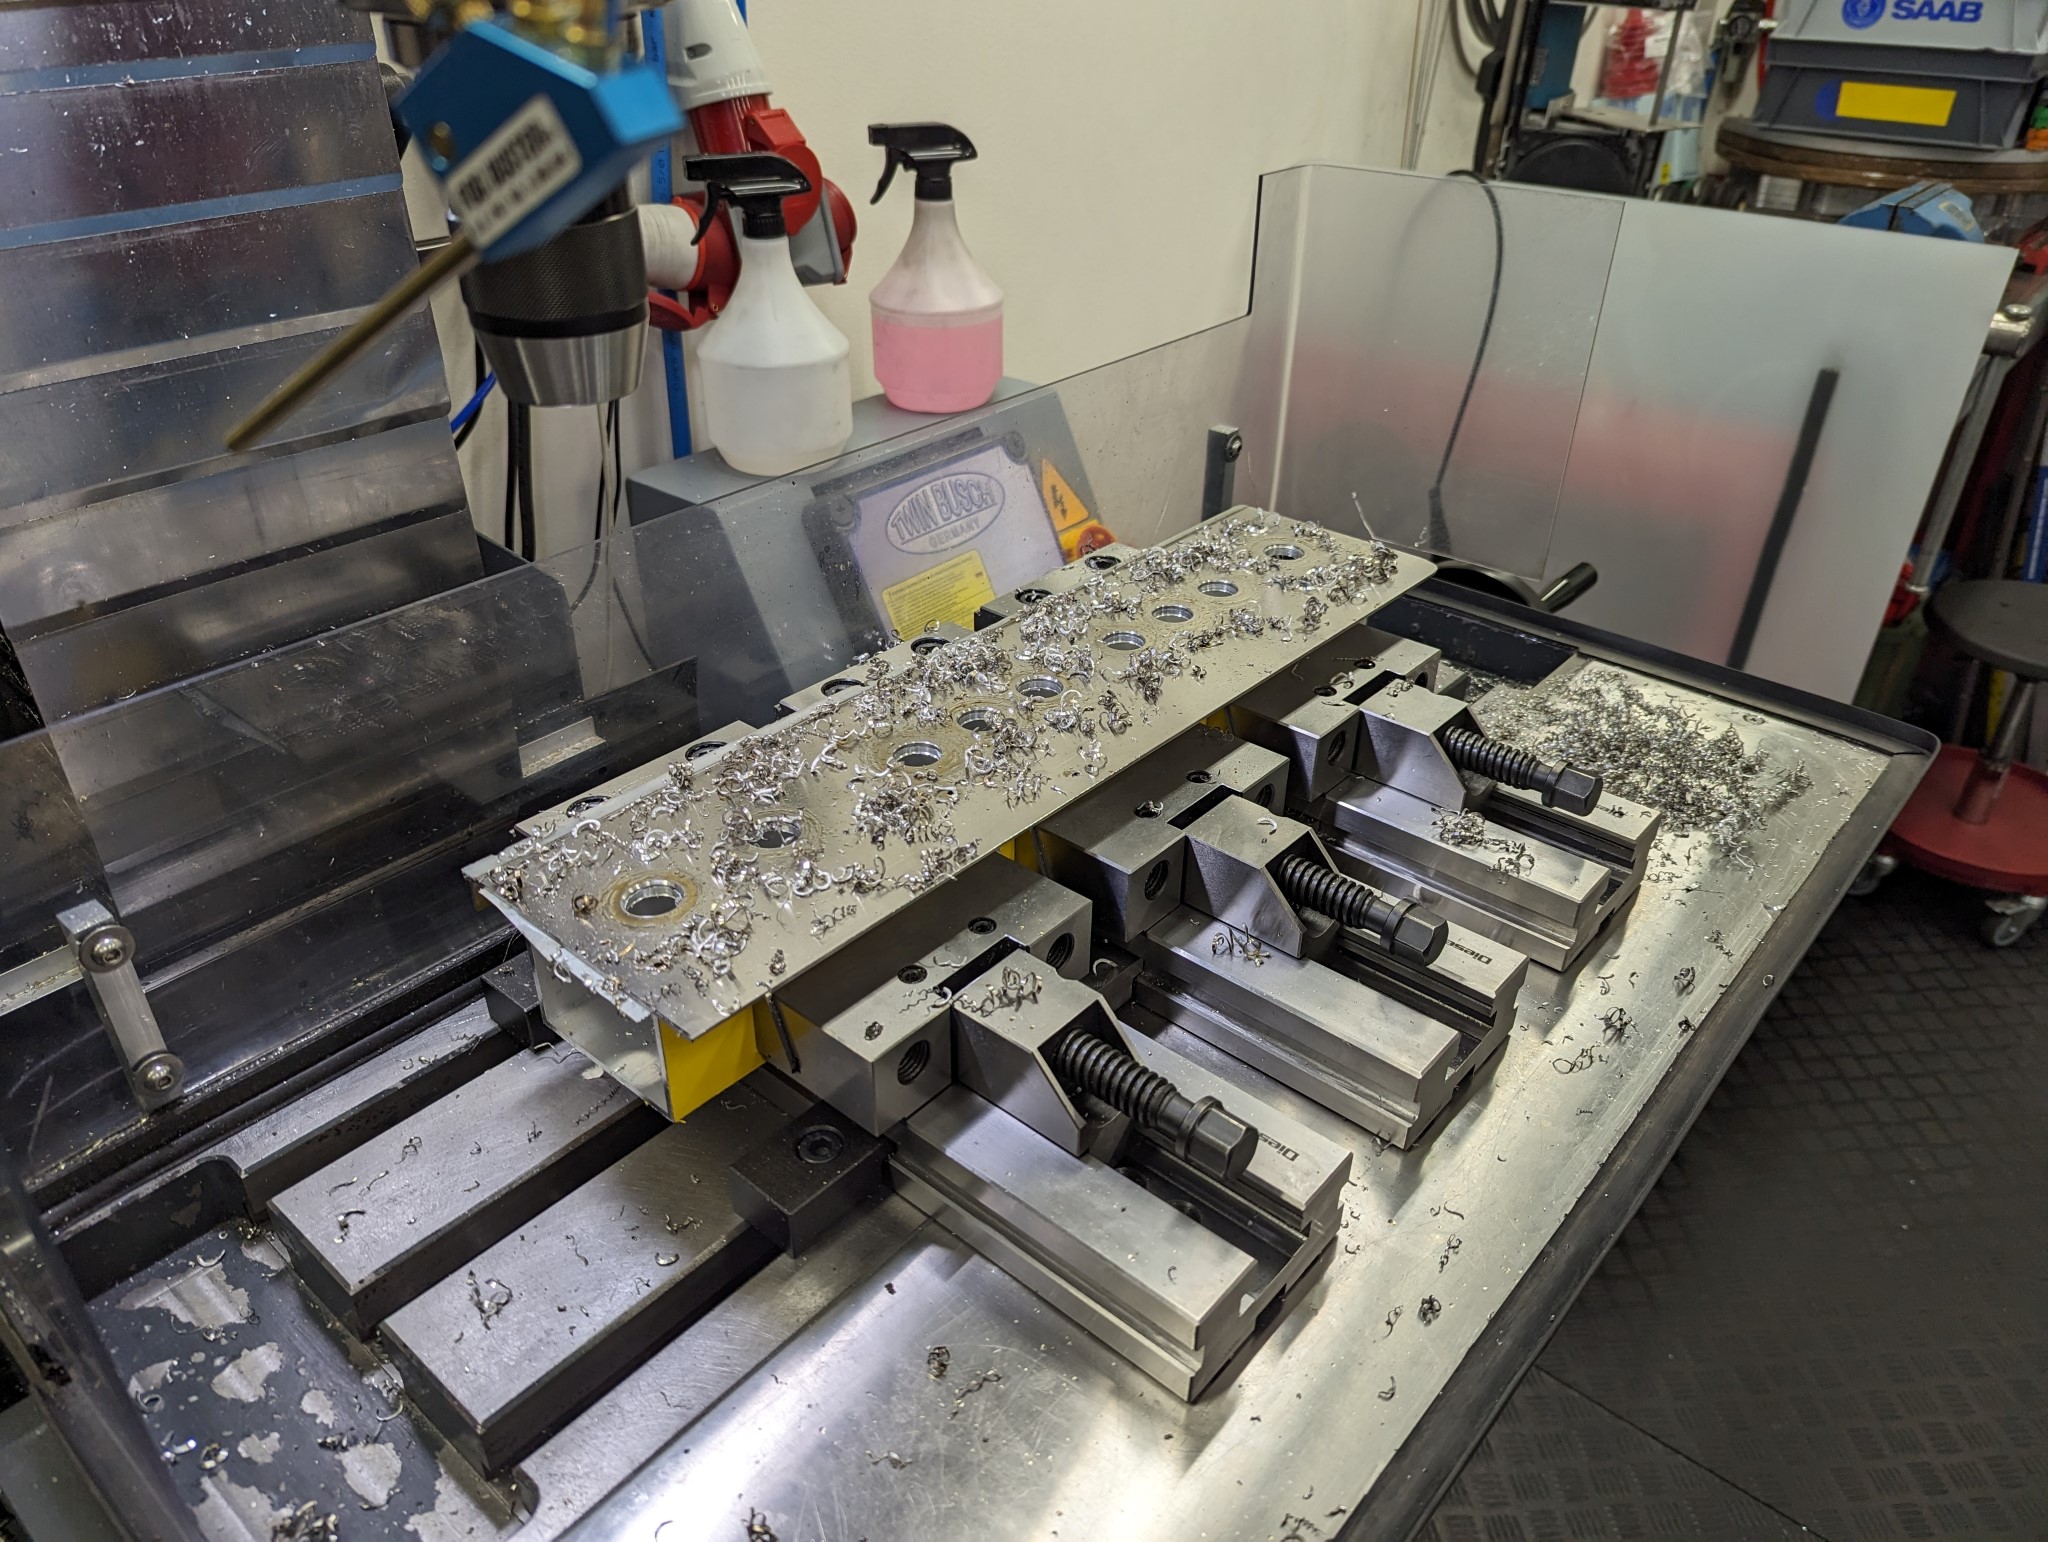
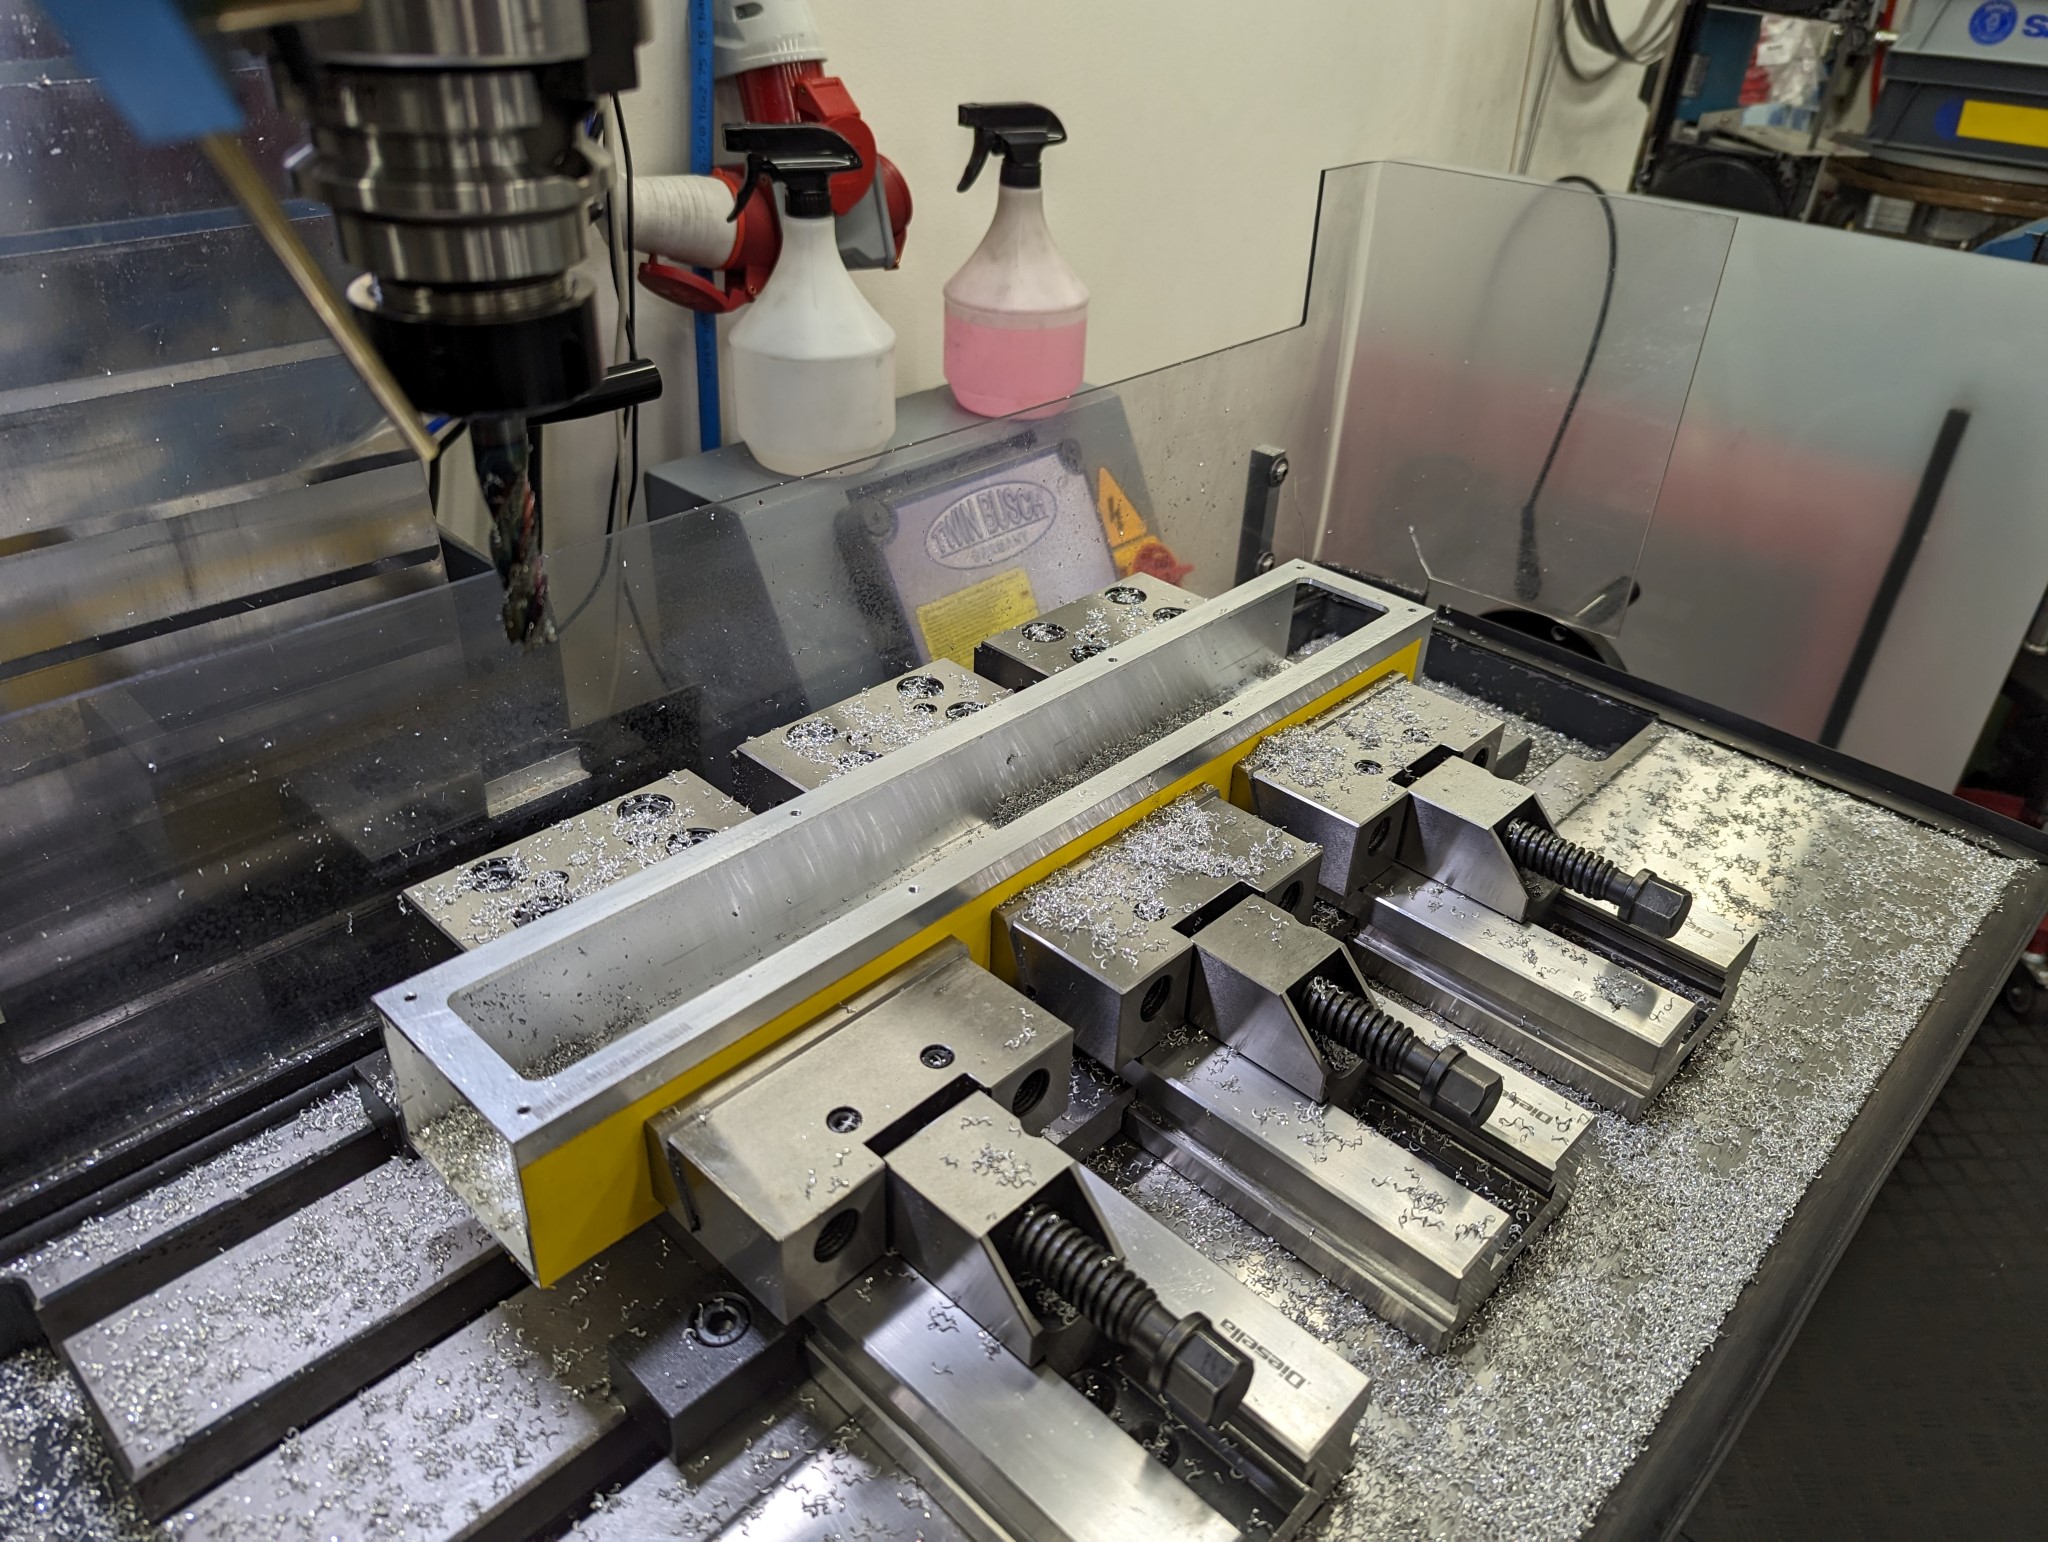
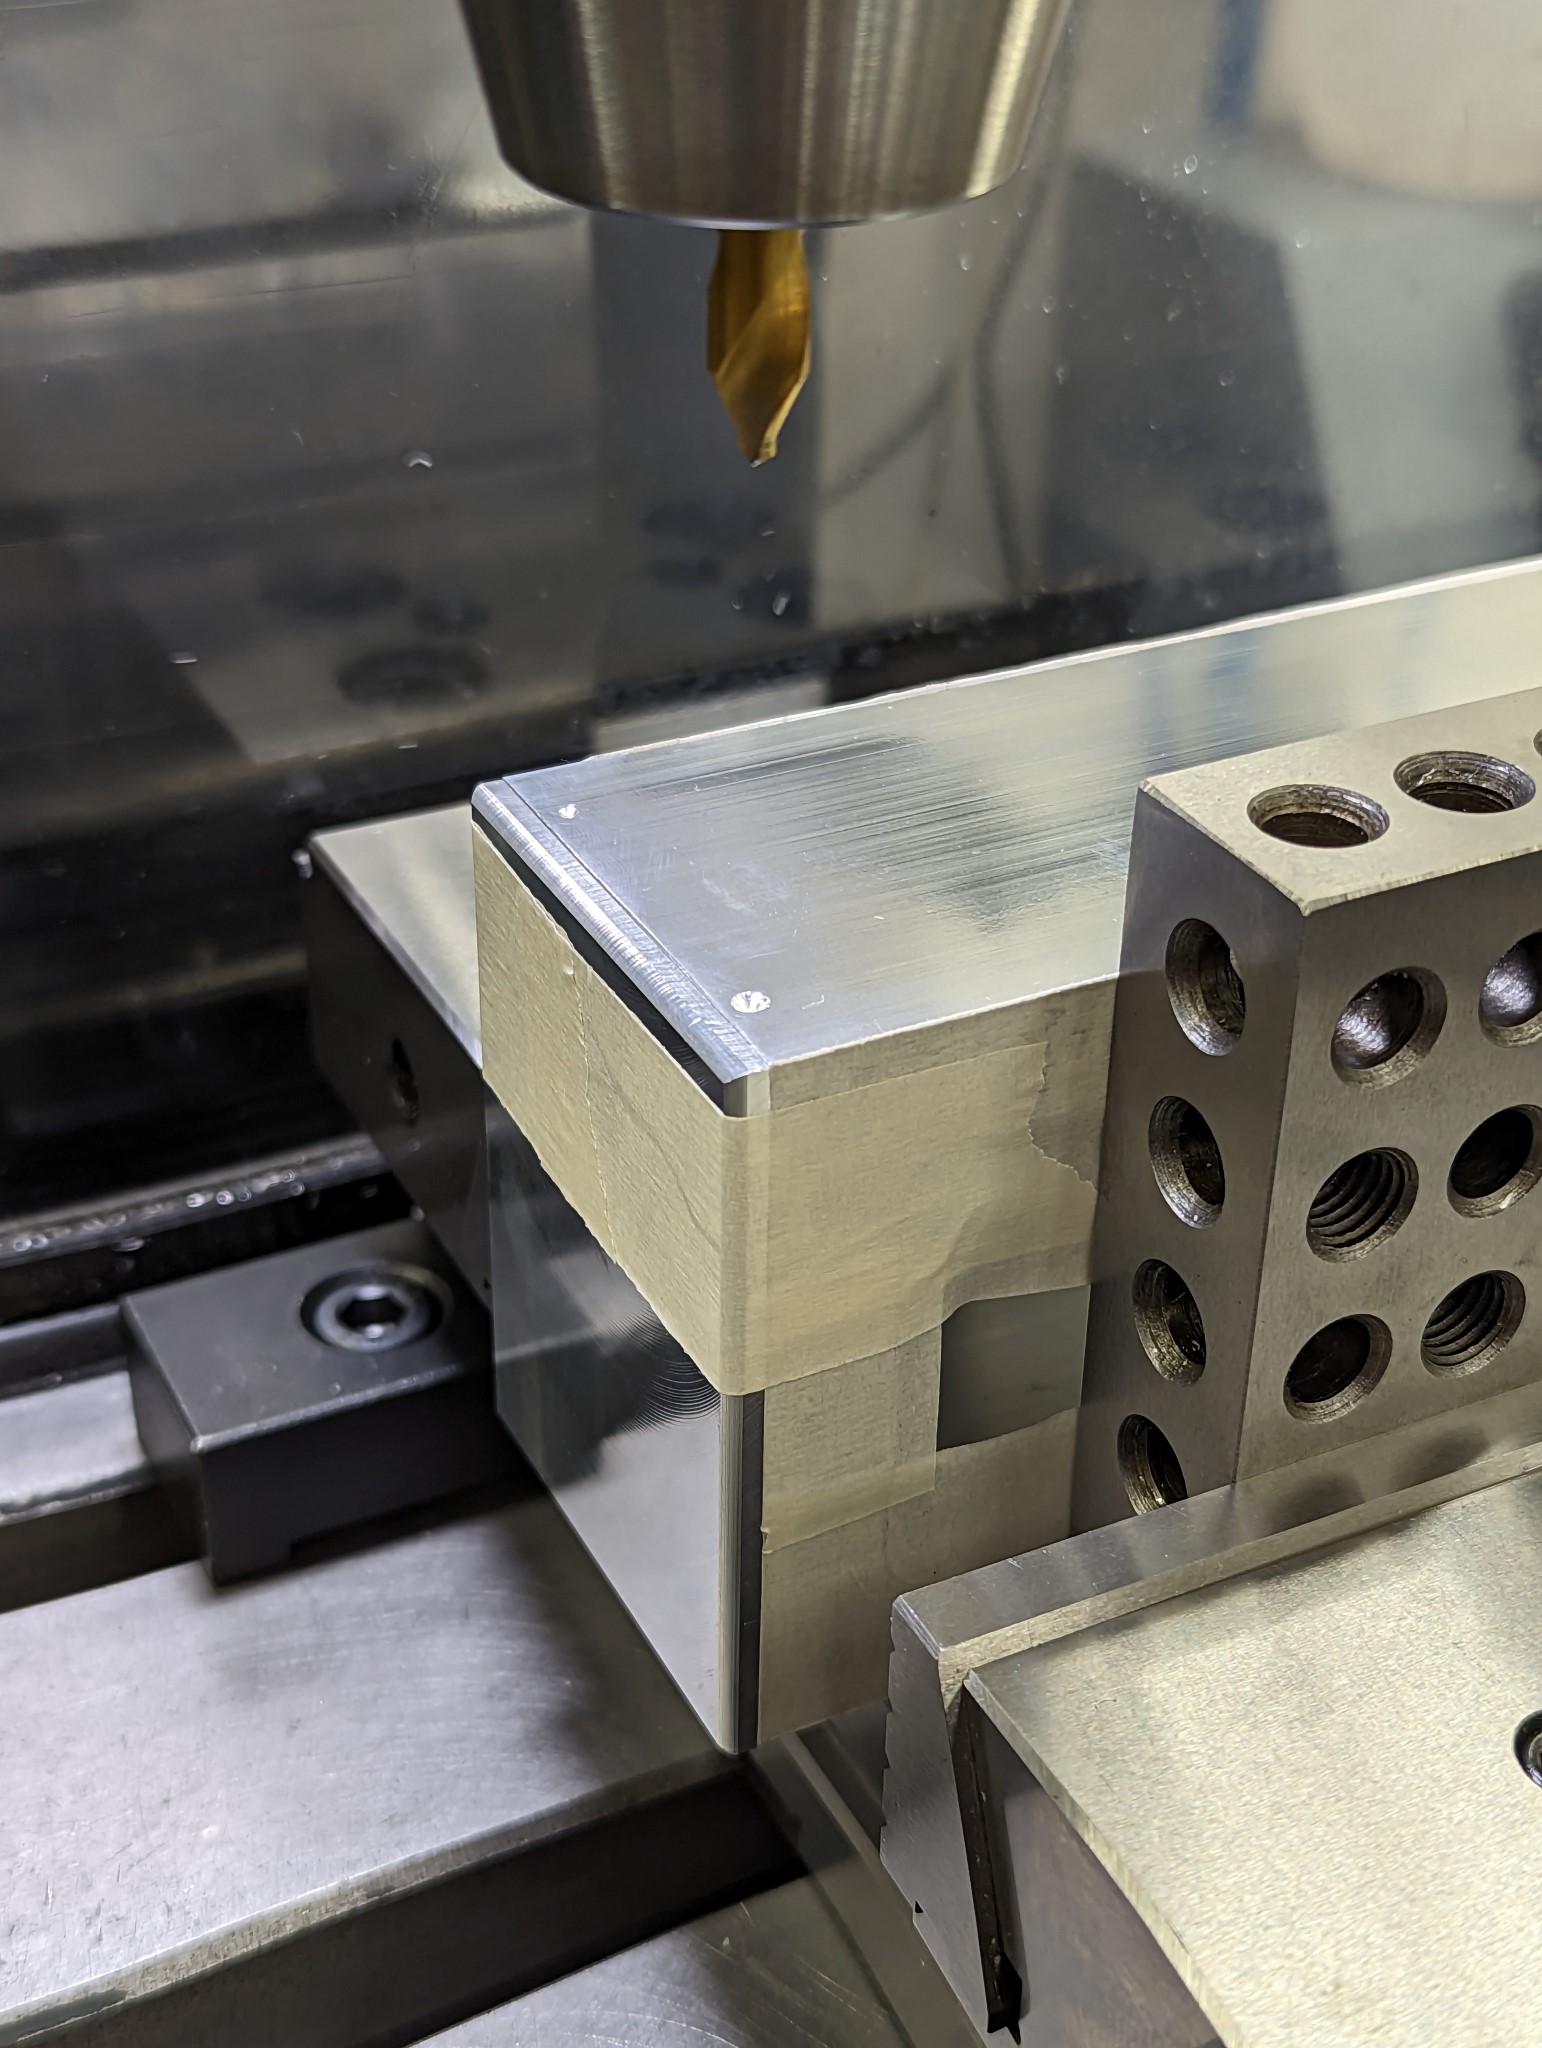
I then pried of the stainless faceplate and milled out a pocket in the aluminum extrusion so that the backside of the Eaton M22 buttons would have enough clearance.
Once that was done I threaded the mounting holes in the aluminum extrusion and bolted on the faceplate so that I could mill the sides.
My plans were to use a few physical buttons for the most essential stuff like e-stop and jogging. But after using the Axis UI to get my HAL file setup and trying all the various features I realized that physical buttons which can be felt and pressed without having to look at them is going to add a lot of value on a machine like mine which still has a quill and probably well be used in semi manual mode at least to some degree.
So I scaled up my plans for physical buttons and decided to make a sturdy panel to be mounted underneath the monitor and which can be safely operated with dirty gloves without causing any issues.
I did a rough sketch in Visio as I haven't had time to fully master FreeCAD yet.
Next I purchased an 60x80 mm aluminum extrusion with 3 mm thick walls and milled it to length
I then used double sided floor tape to glue a leftover piece of 2 mm stainless I had laying around from my previous milling machine table extension.
With the stainless faceplate temporarily fixed in place I drilled out the mounting holes and all other important features.
I then pried of the stainless faceplate and milled out a pocket in the aluminum extrusion so that the backside of the Eaton M22 buttons would have enough clearance.
Once that was done I threaded the mounting holes in the aluminum extrusion and bolted on the faceplate so that I could mill the sides.
Attachments:
Please Log in or Create an account to join the conversation.
18 Nov 2023 10:27 #285812
by Unlogic
Replied by Unlogic on topic Optimum Optimill MH50V CNC conversion
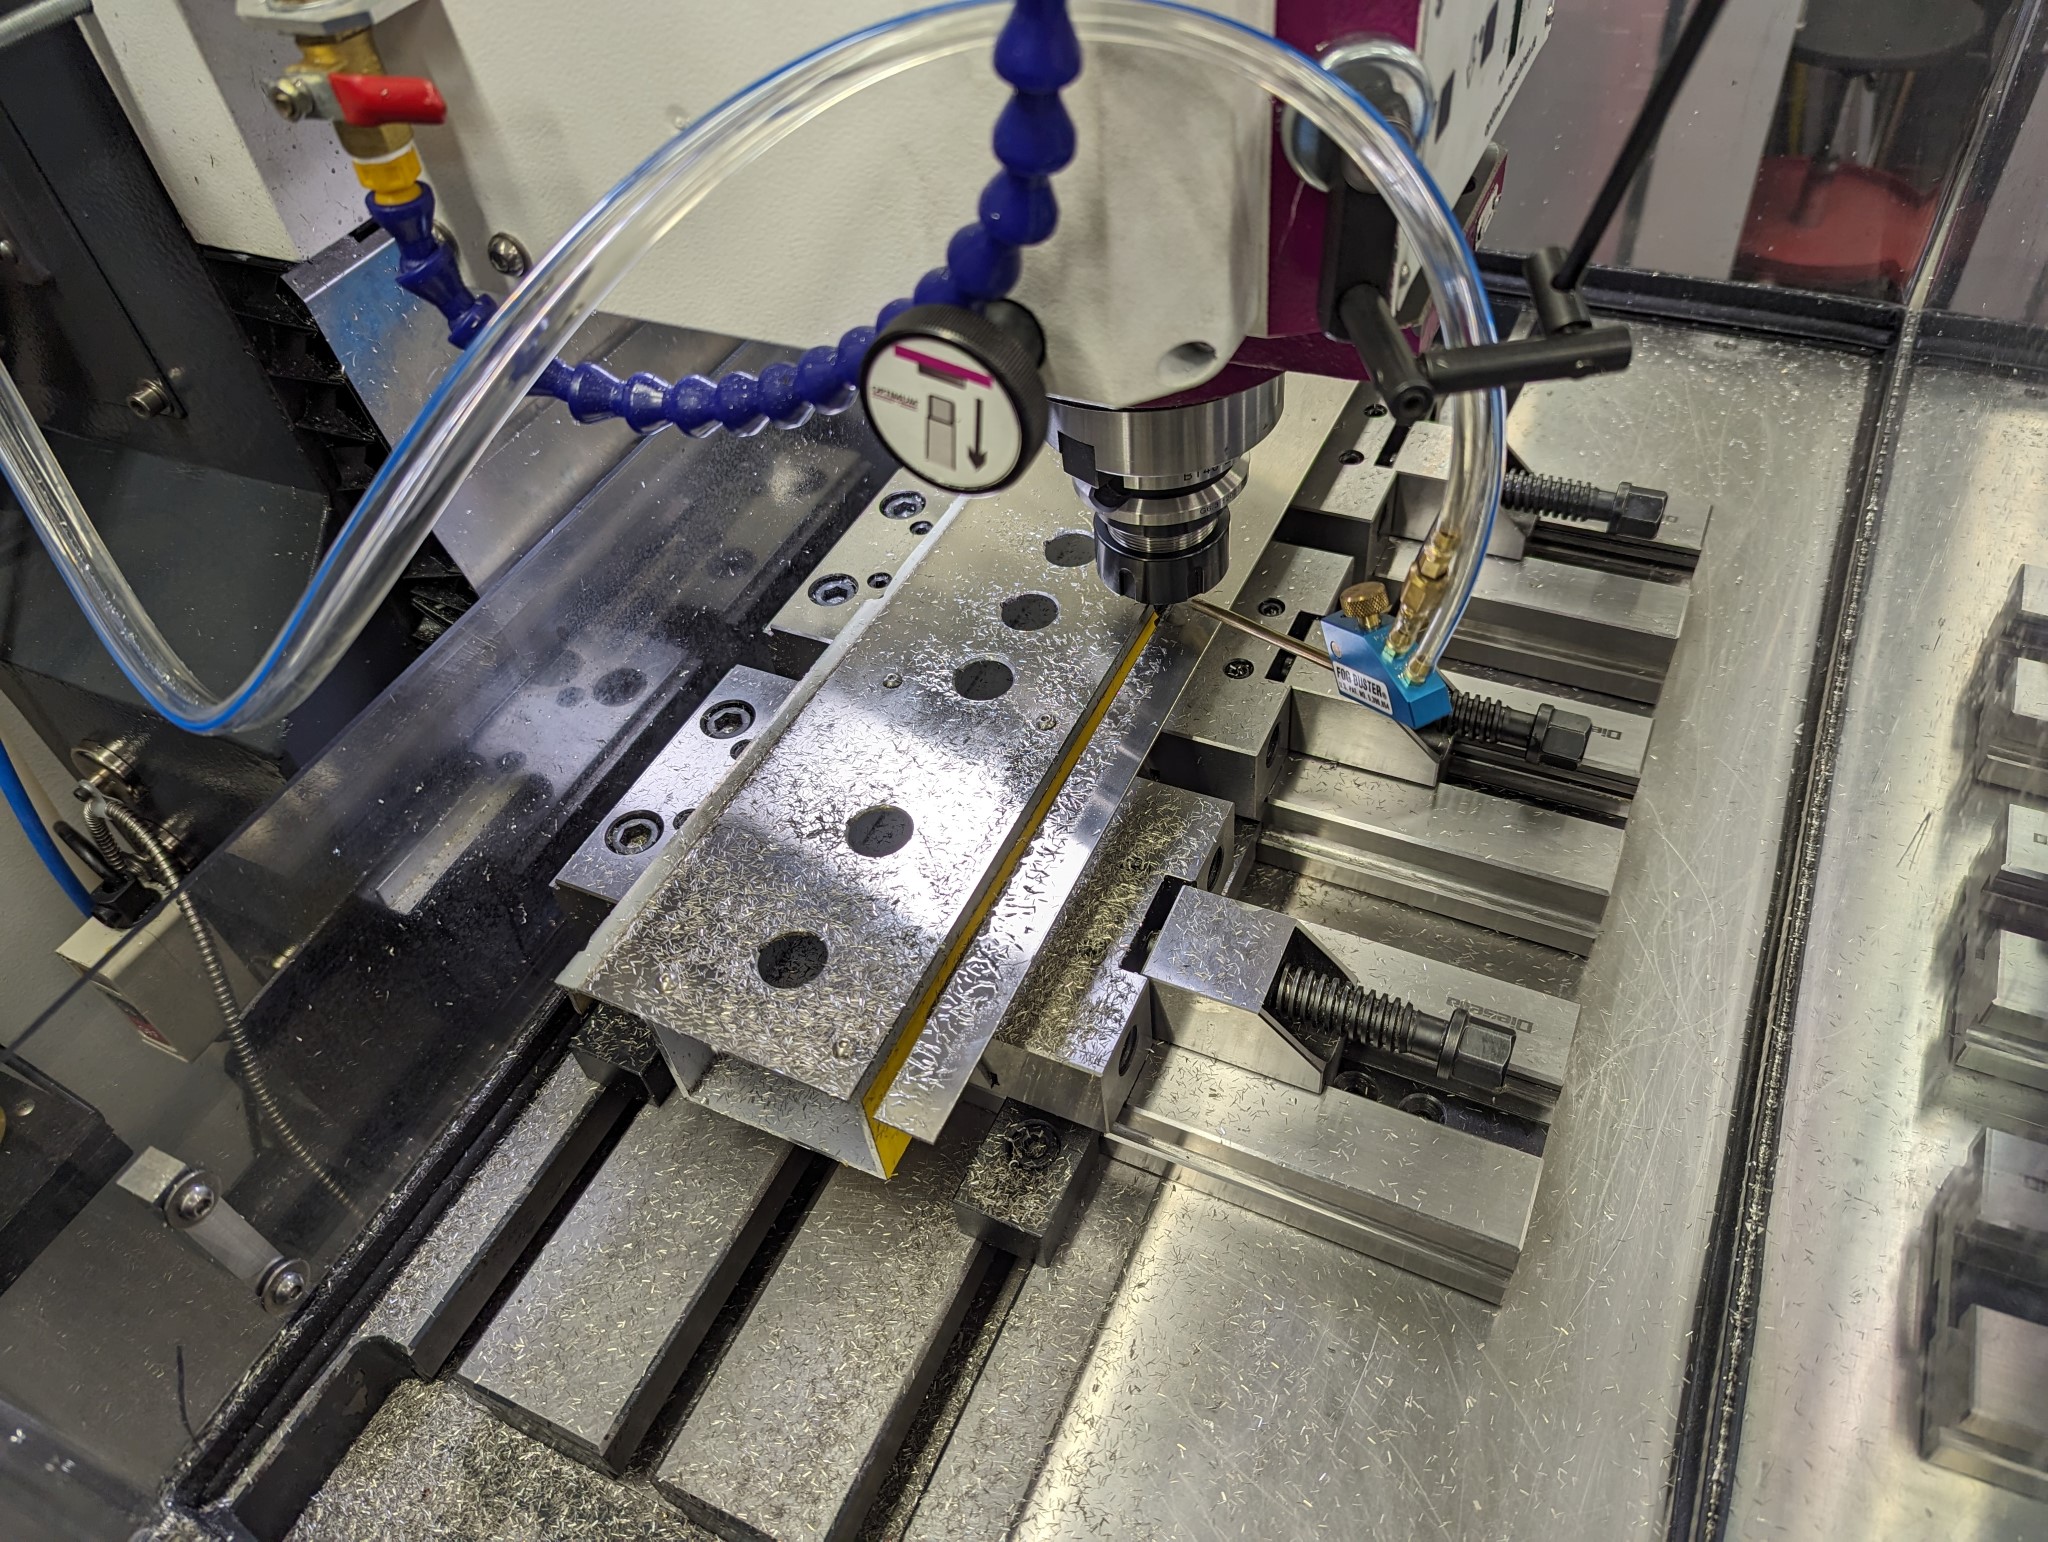
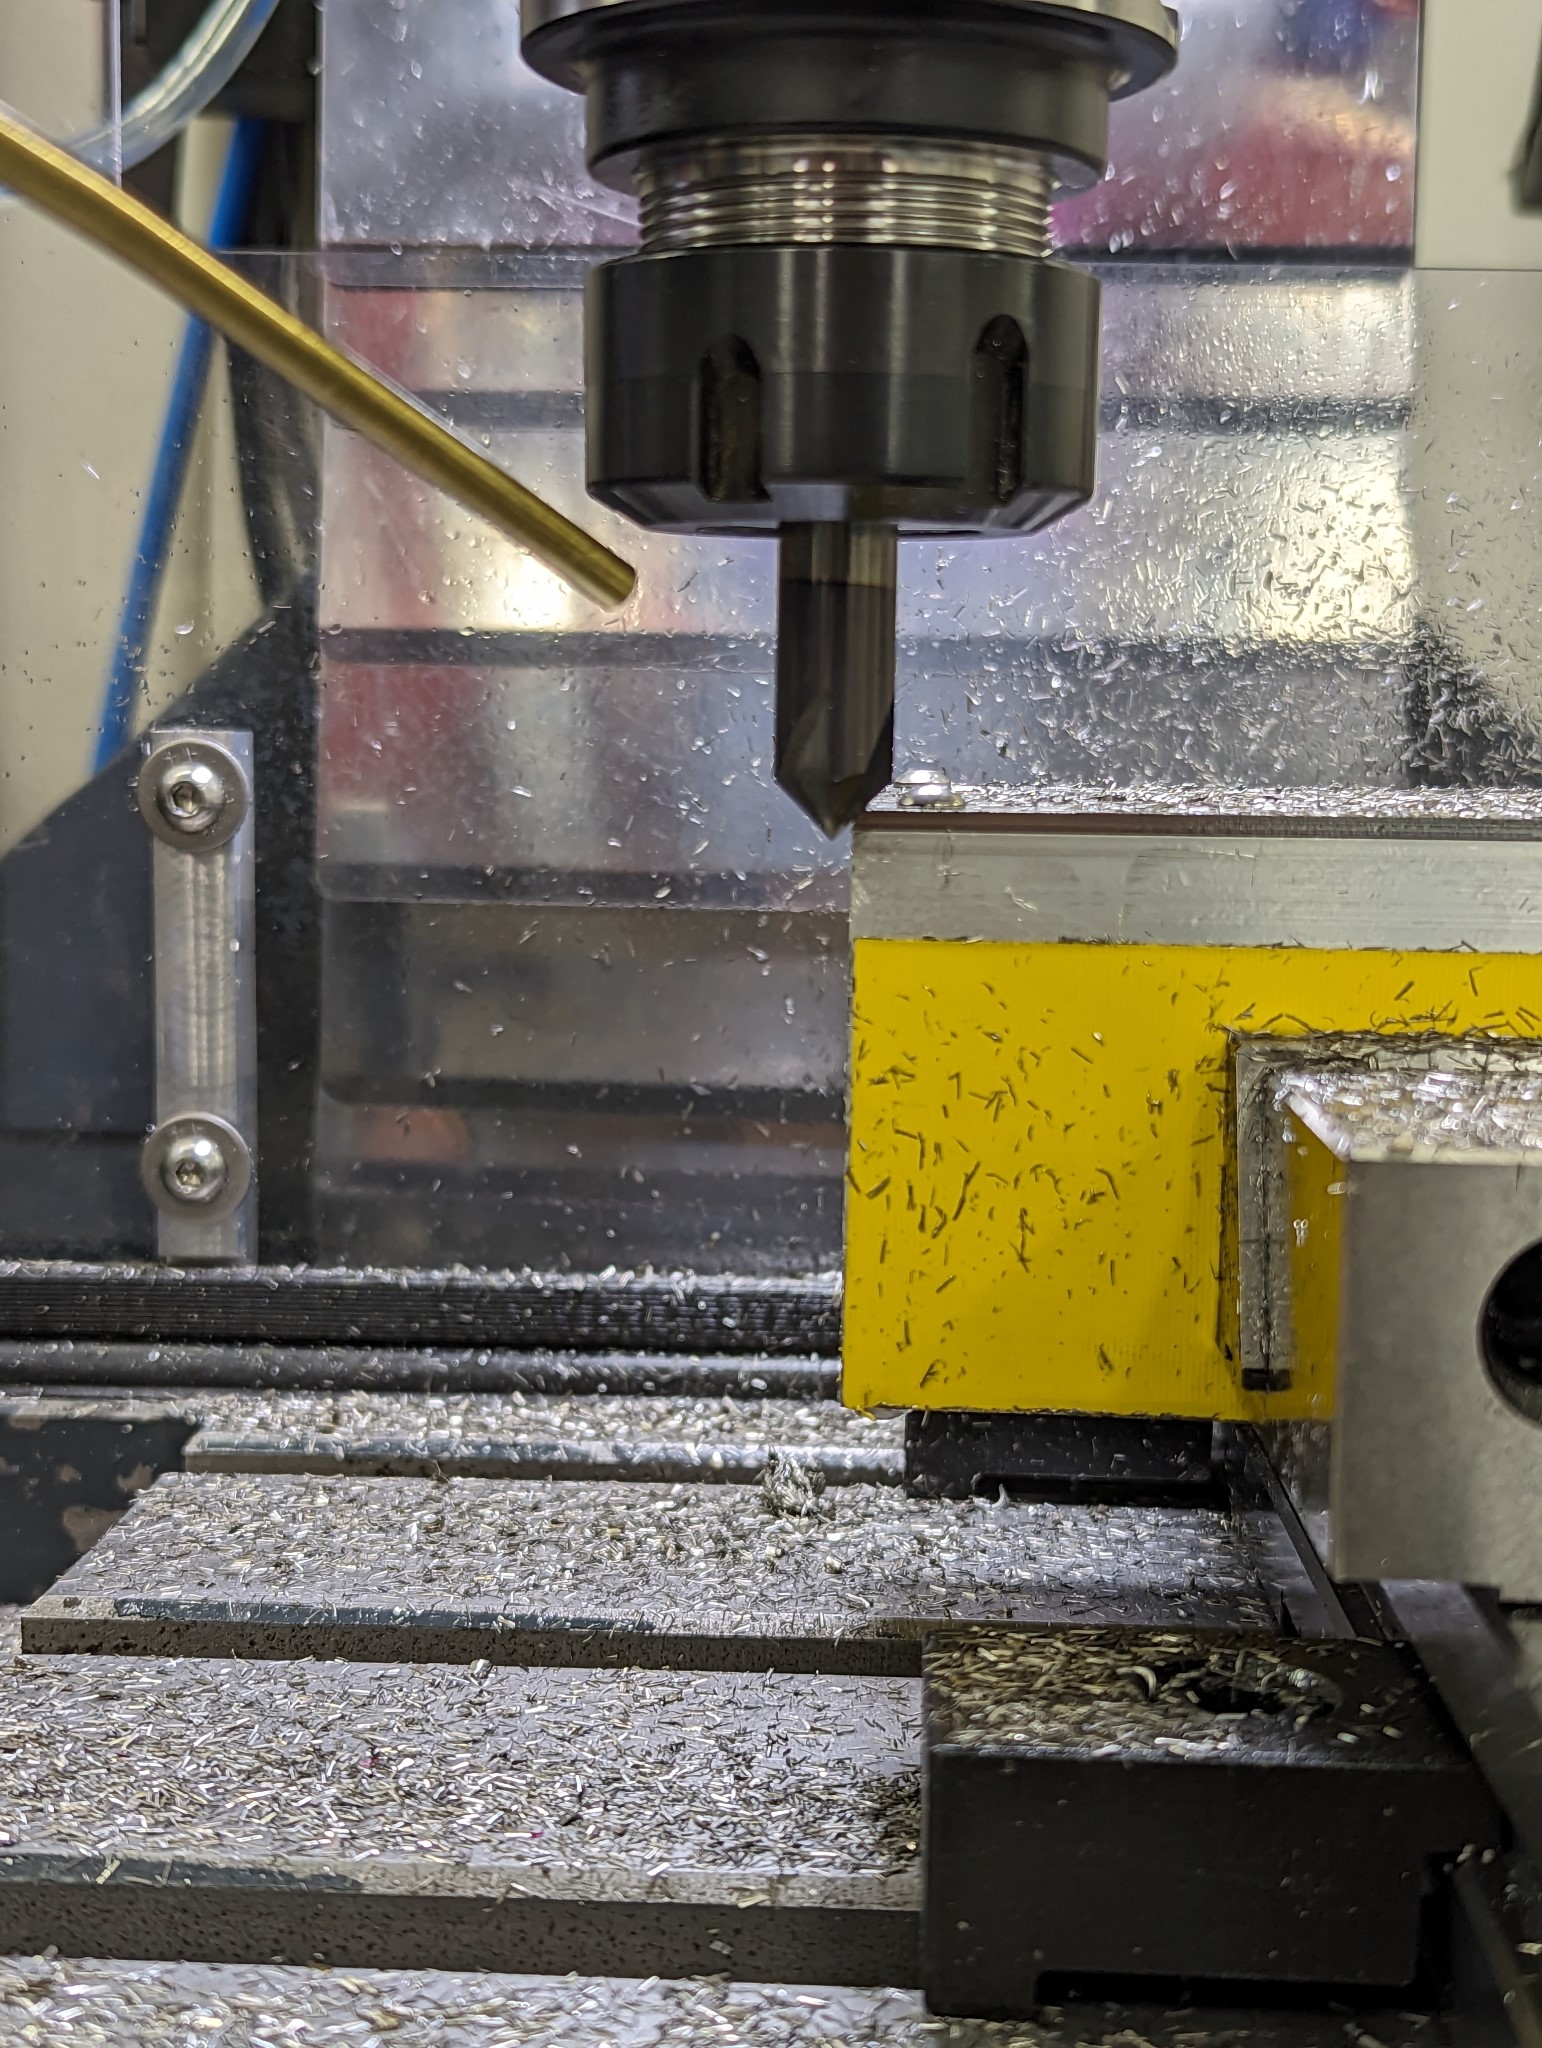
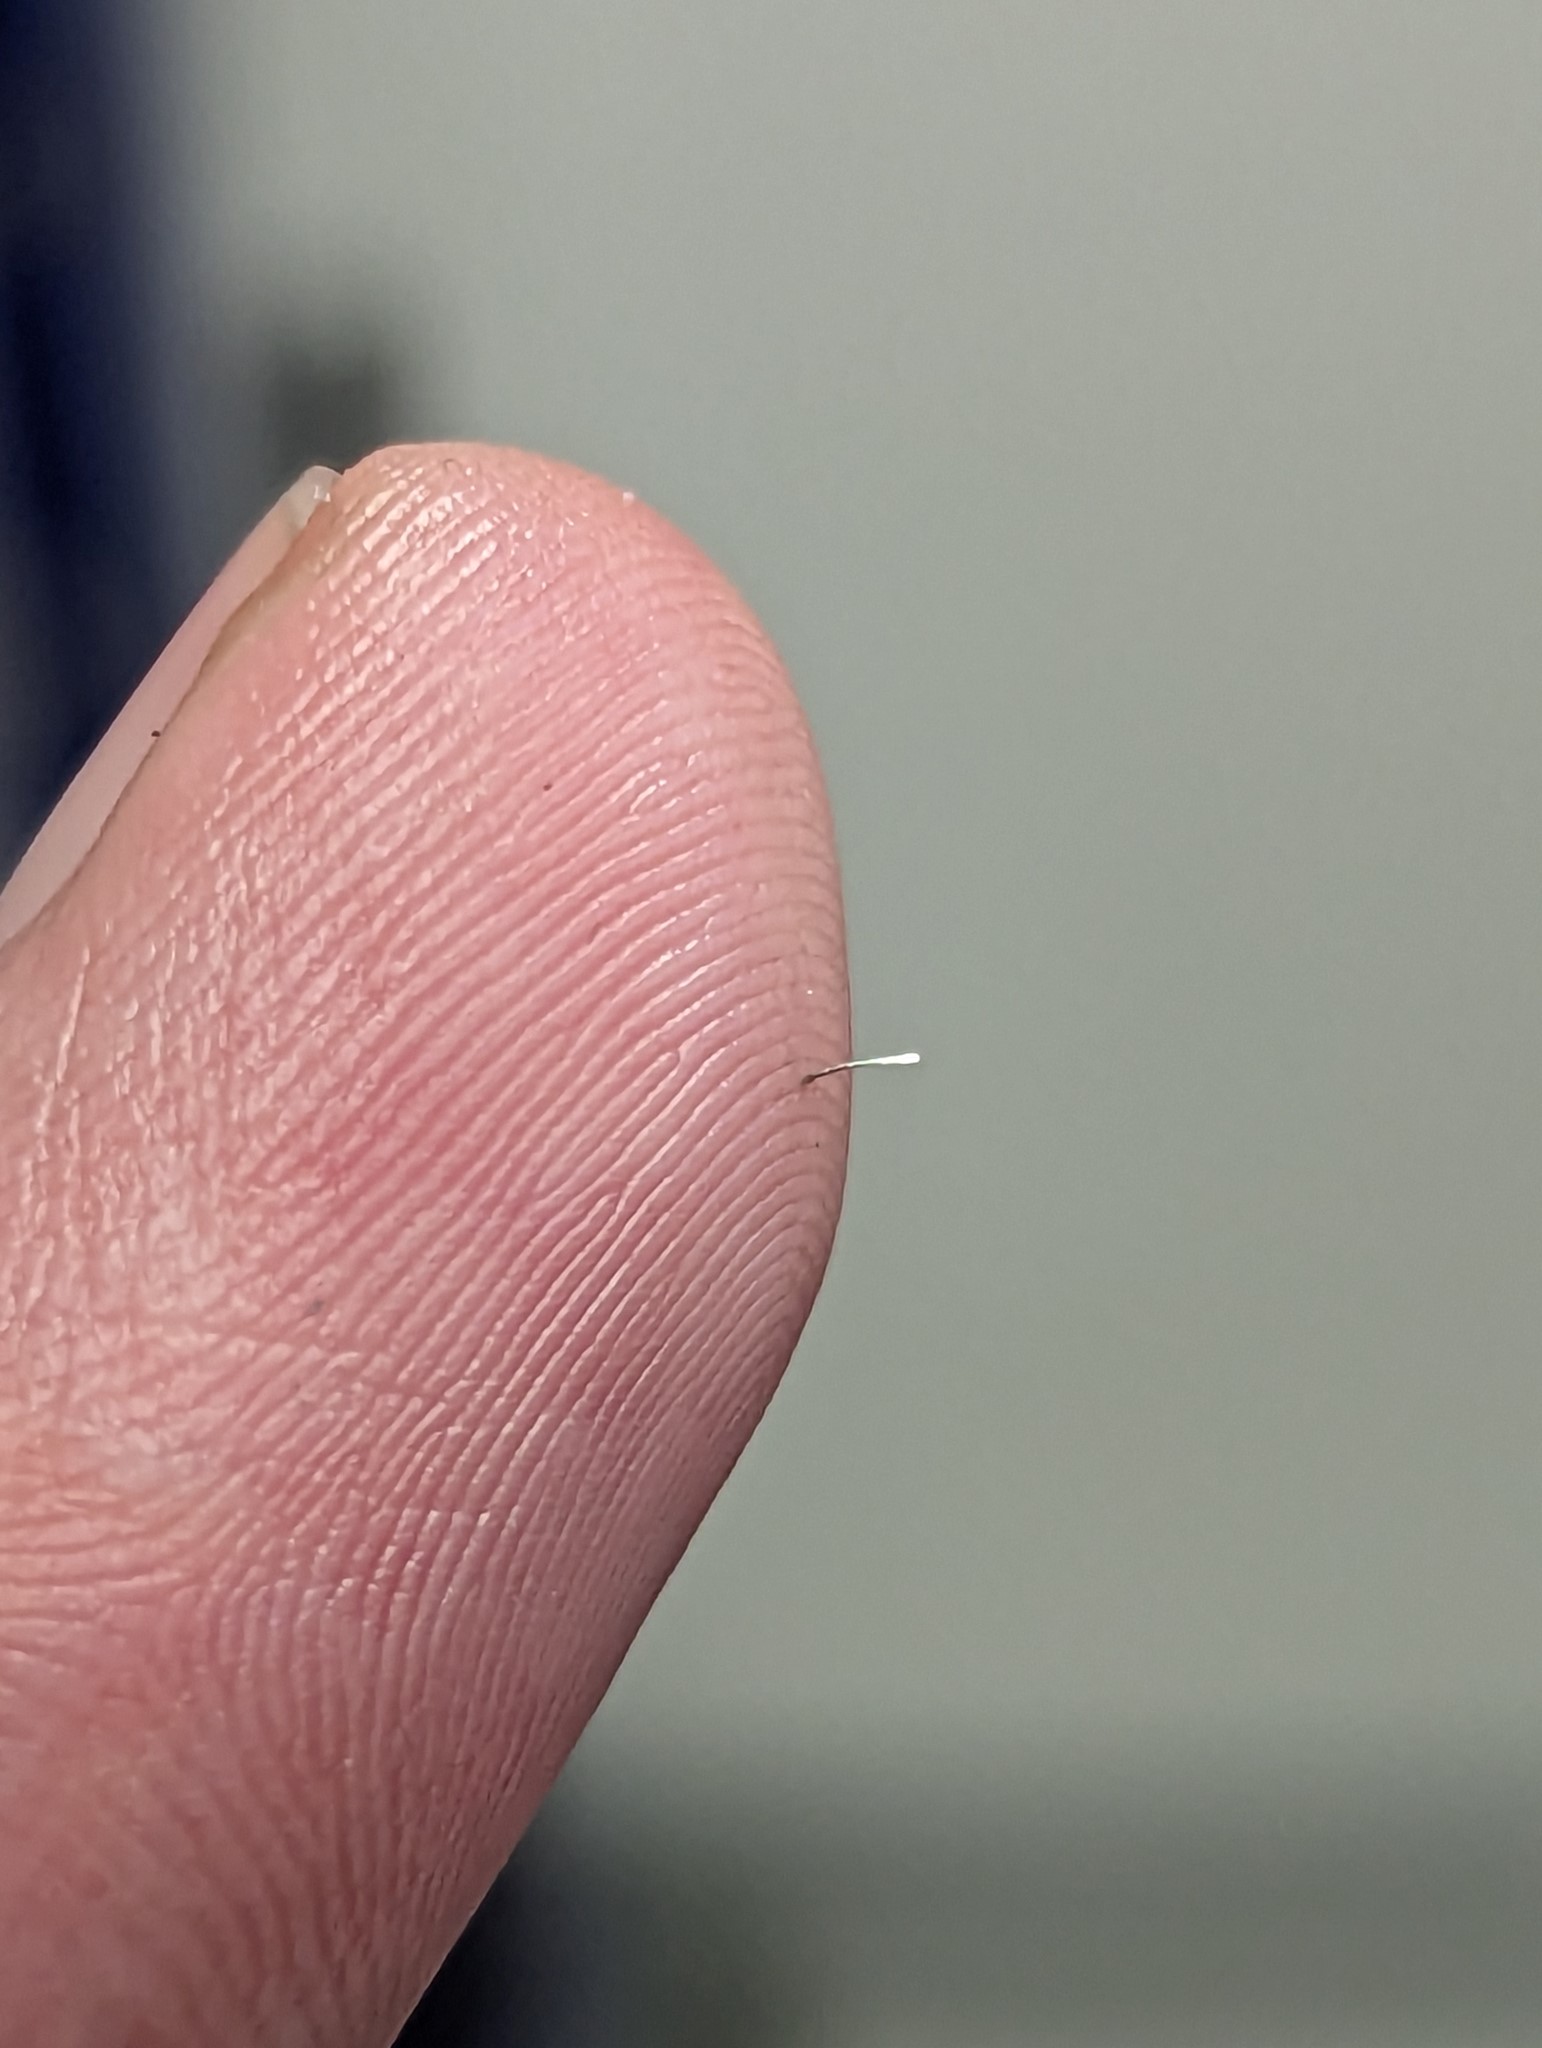
Slot milling stainless like I did here with a slow 3000 rpm spindle requires a very slow feed rate and it produced the worst chips I've come across so far. Tiny, non magnetic, super sharp and light enough to be carried by the slightest wind when not submerged in coolant.
I took me longer to clean the mill and the tooling and than to actually mill the stainless so I've ordered a small parts cleaner now.
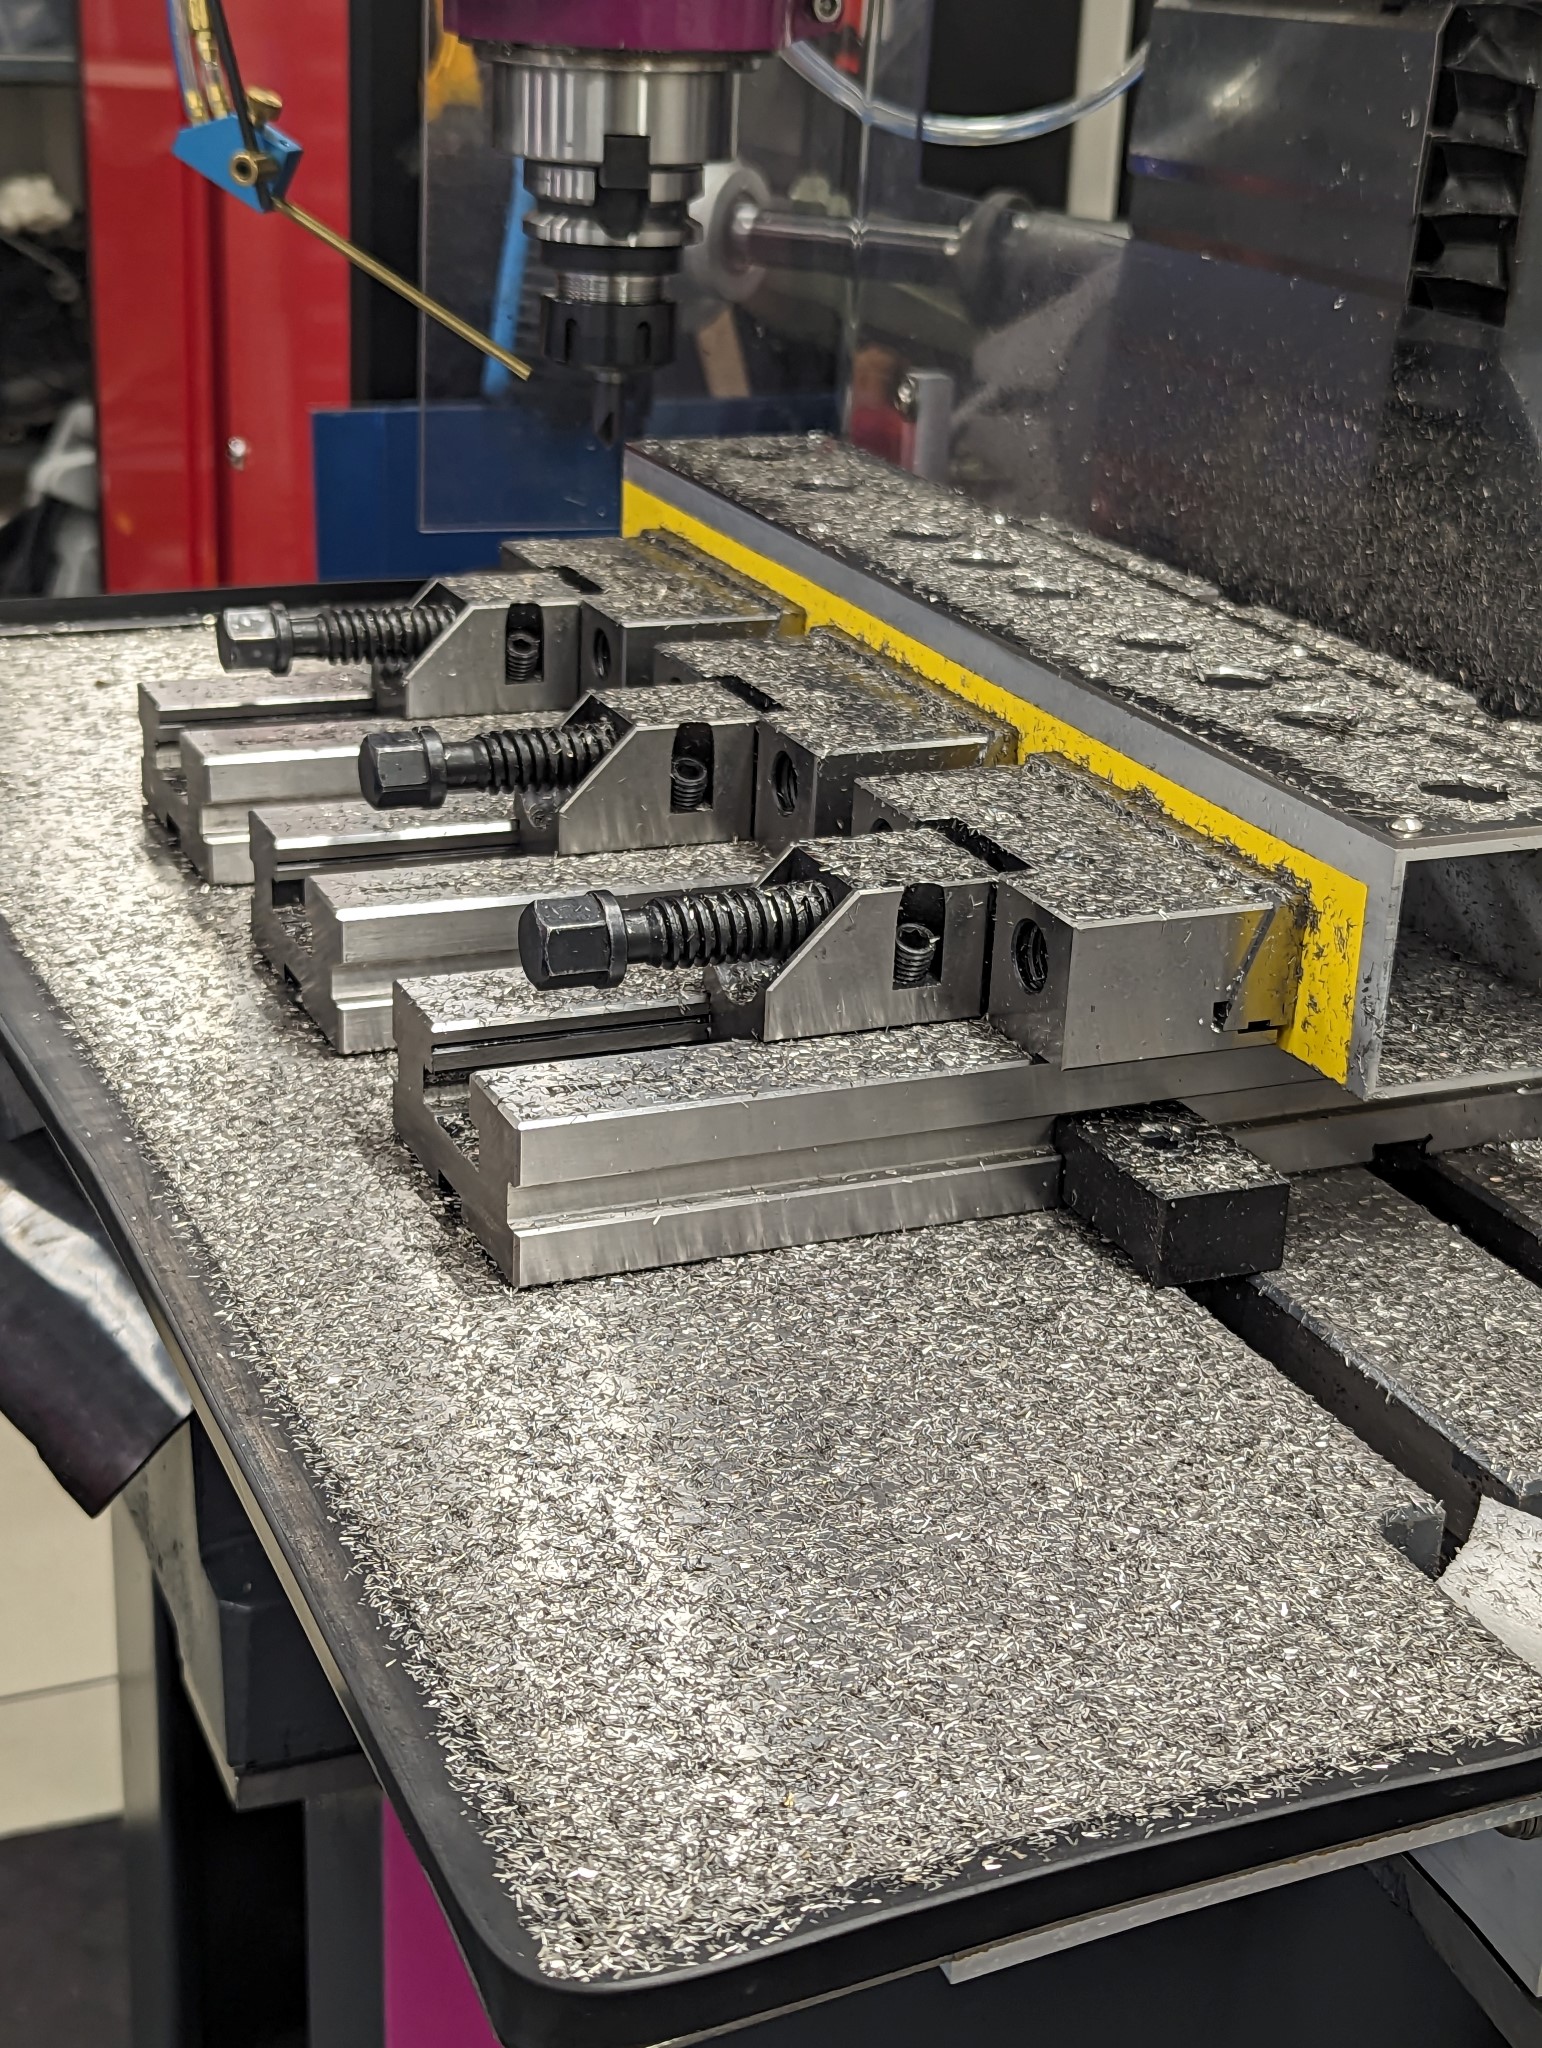
With the stainless chips out of the way I proceeded to mill aluminum end plates for the aluminum extrusion.
I took me longer to clean the mill and the tooling and than to actually mill the stainless so I've ordered a small parts cleaner now.
With the stainless chips out of the way I proceeded to mill aluminum end plates for the aluminum extrusion.
Attachments:
The following user(s) said Thank You: tommylight
Please Log in or Create an account to join the conversation.
18 Nov 2023 10:32 - 26 Nov 2023 20:12 #285813
by Unlogic
Replied by Unlogic on topic Optimum Optimill MH50V CNC conversion
This is how the control panel looks all assembled.

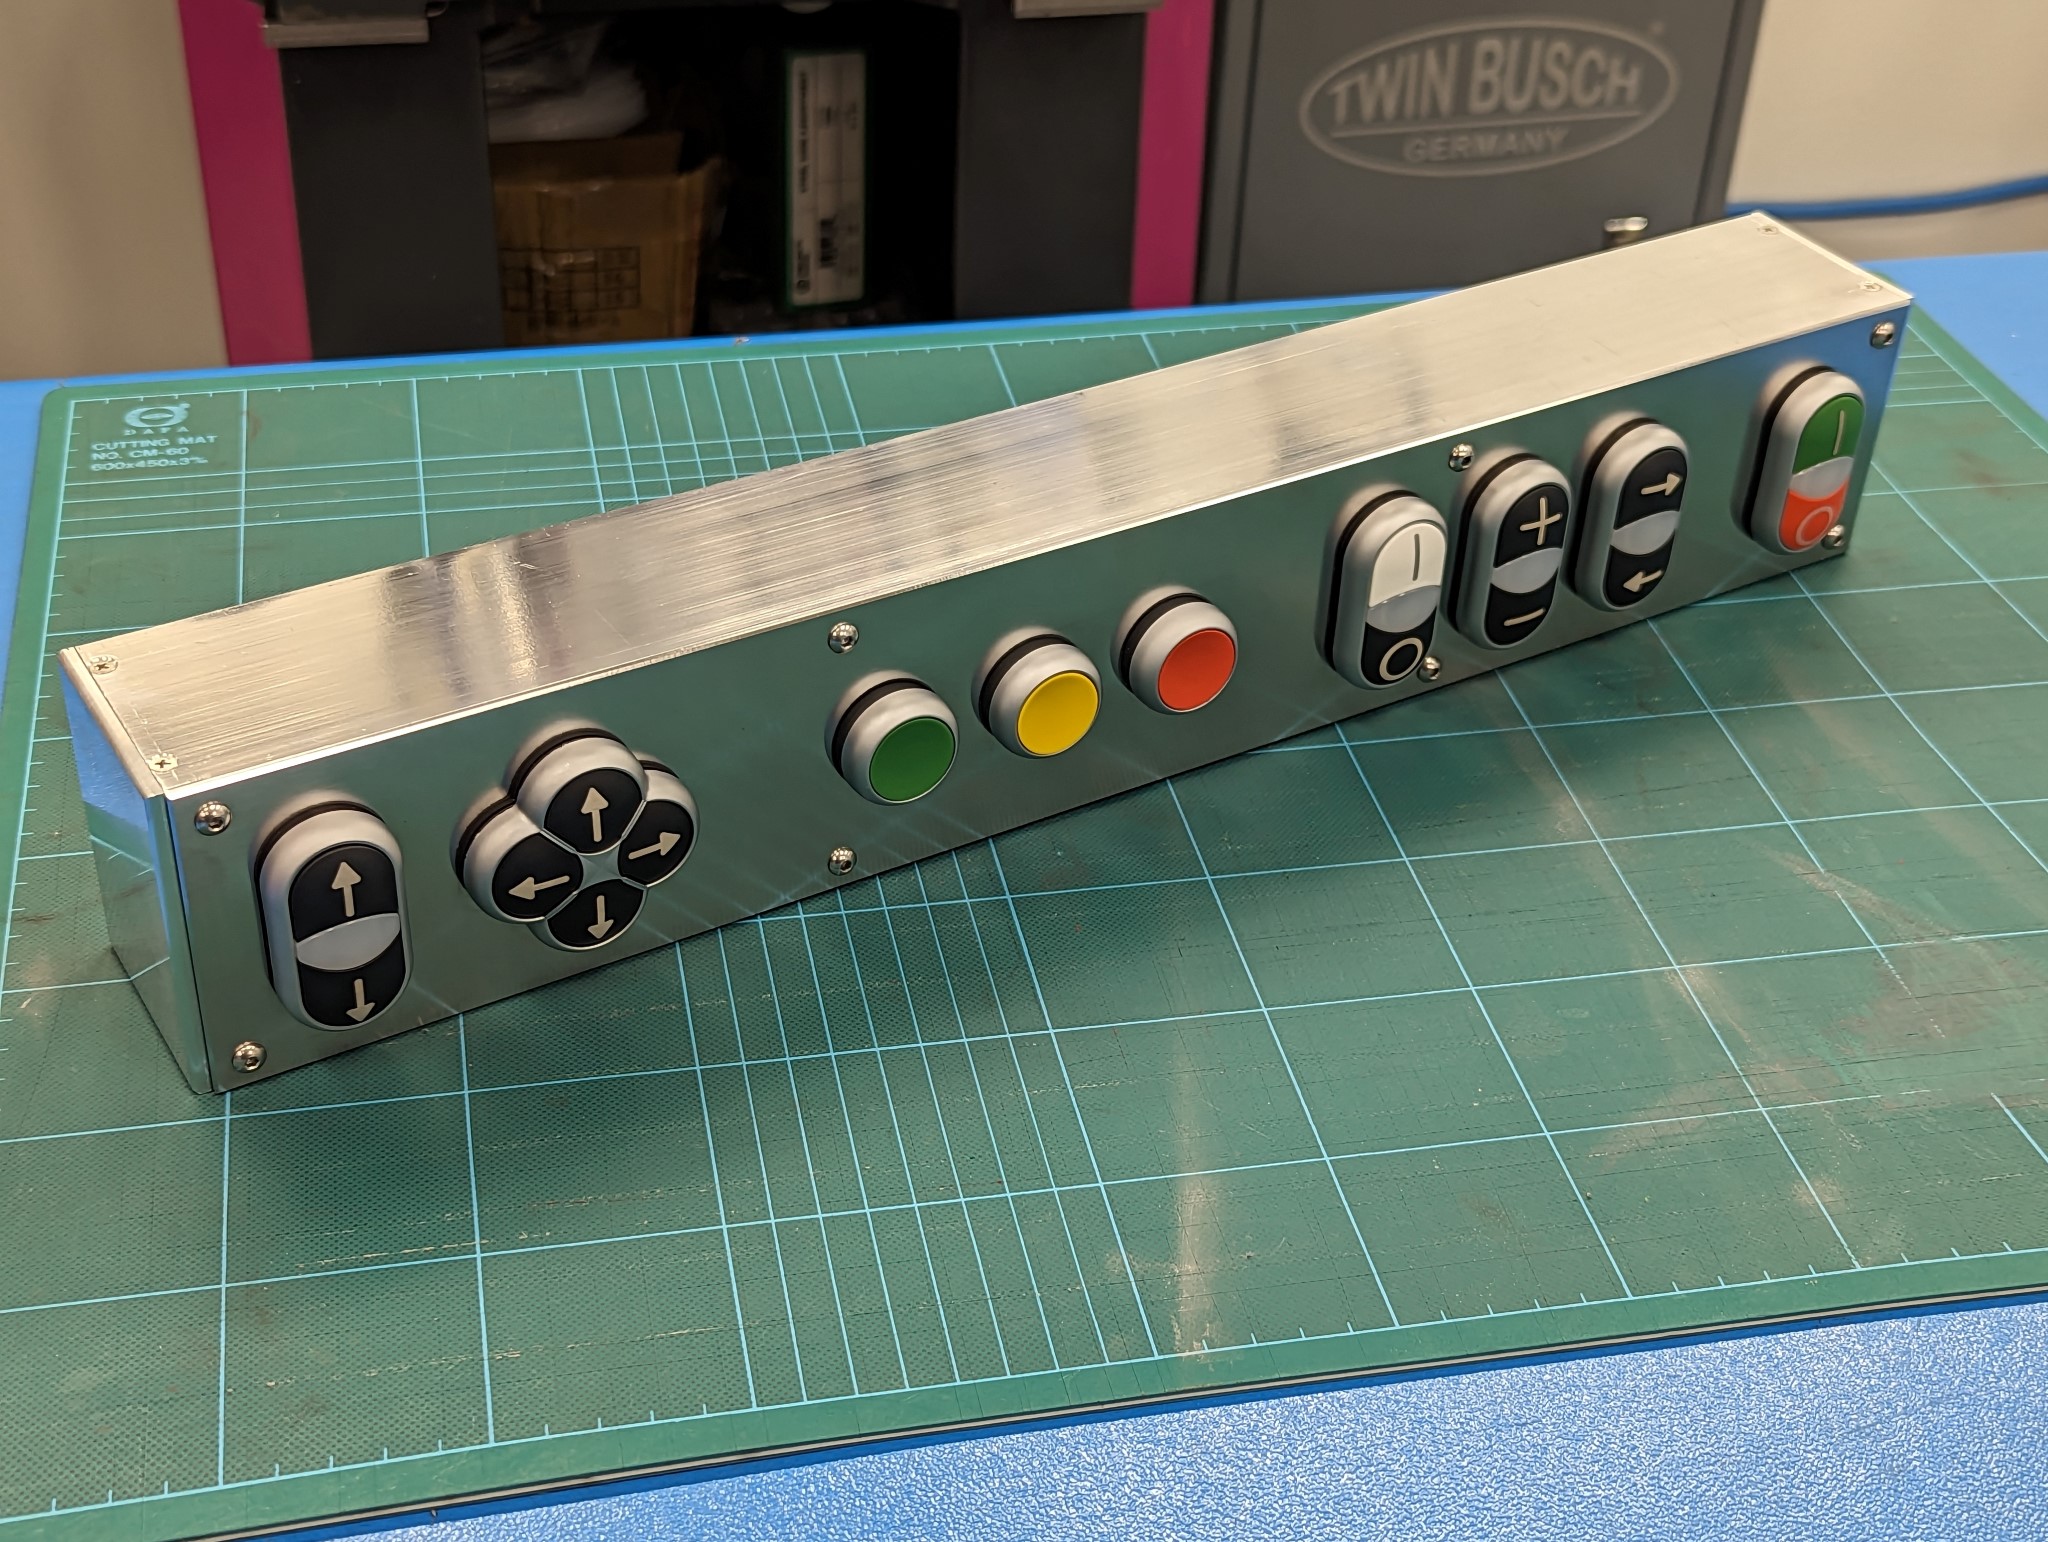
Next up is to make a proper mount so that it sits flush with front of the screen.
Next up is to make a proper mount so that it sits flush with front of the screen.
Attachments:
Last edit: 26 Nov 2023 20:12 by Unlogic.
Please Log in or Create an account to join the conversation.
26 Nov 2023 19:39 #286571
by Unlogic
Replied by Unlogic on topic Optimum Optimill MH50V CNC conversion
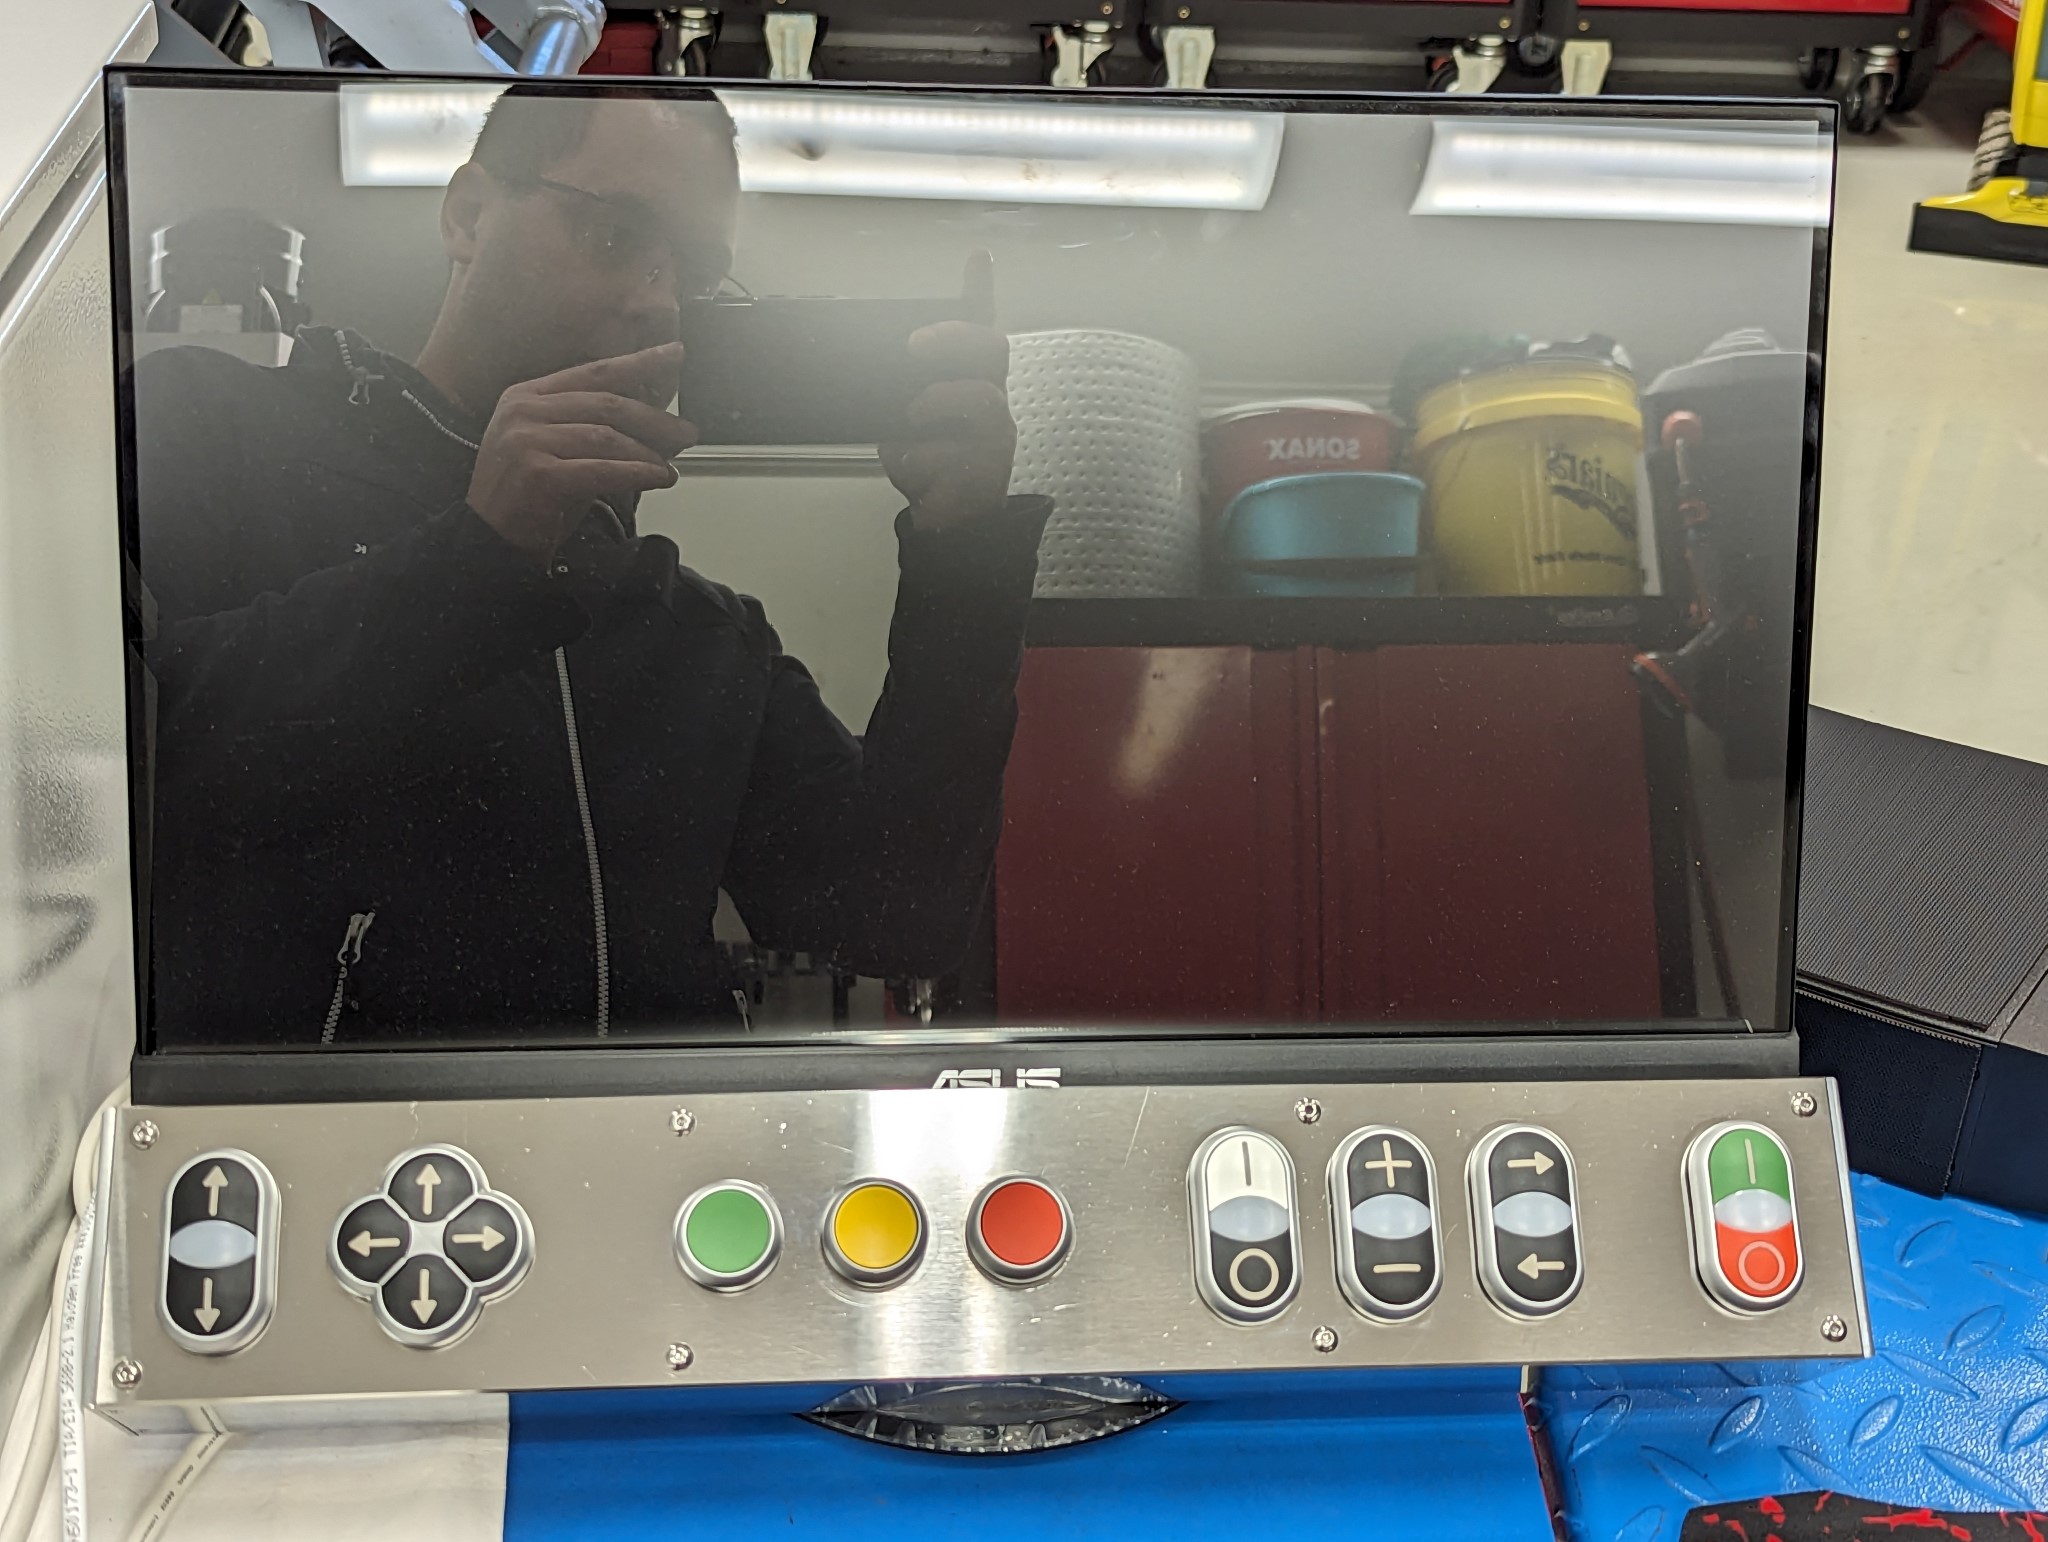
I've been working on the various parts for the control panel, the parts took some time to make but it's finally finished and fully assembled.
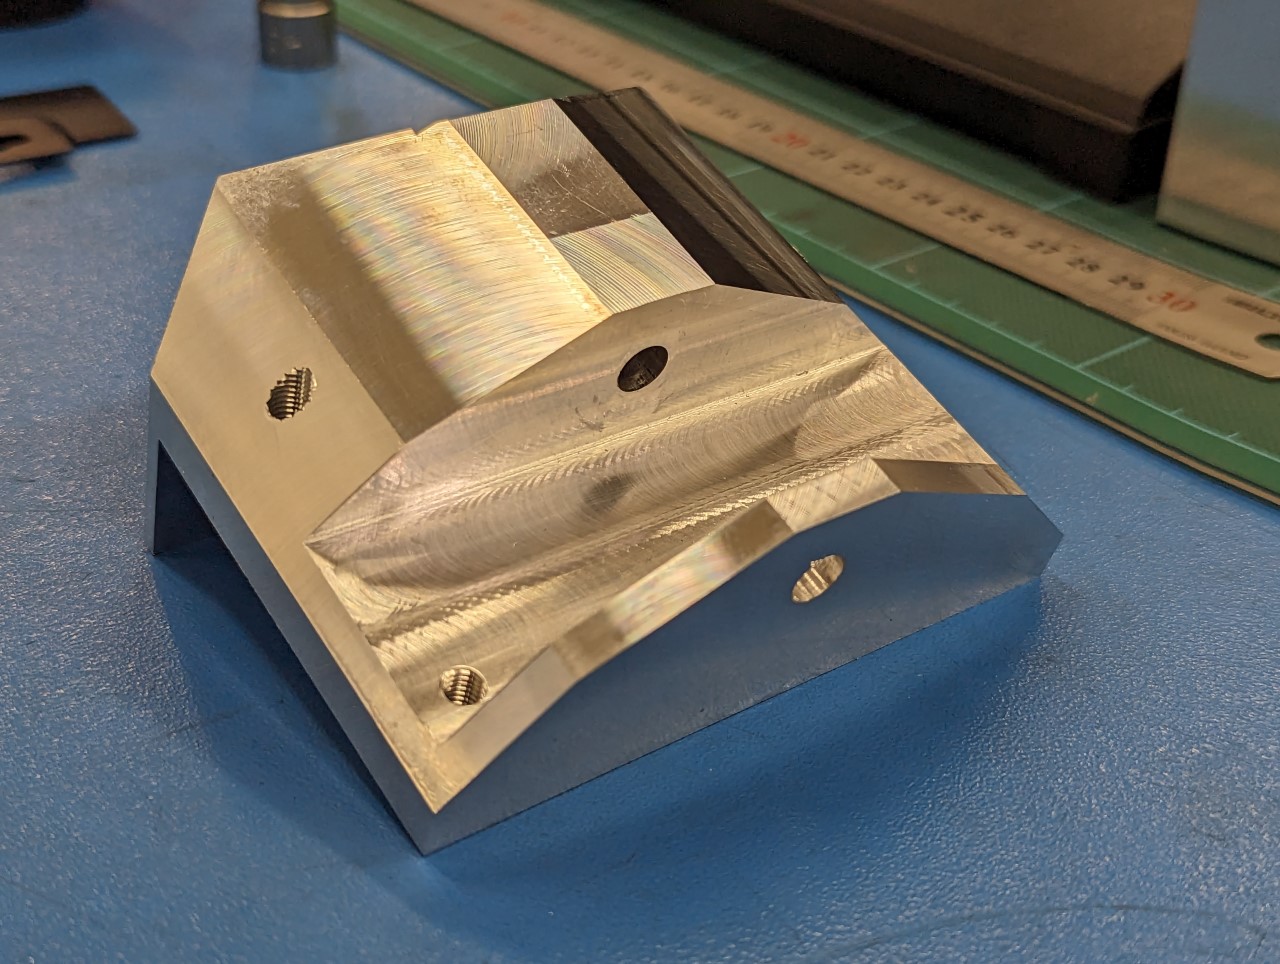
I realized that I needed a sturdy mount that could take the weight of both the box with all the buttons and the screen along with the computer. So I dug through the boxes in the garage and found a piece of aluminum that I started doing some measurement on.
In order to able to retain the tilt function of the screen (a good way to avoid glare) I opted to use the mount on the screen that's usually used for the stand instead of the vesa mount as I had initially planned. It uses three tiny M4 screws but if it works with the stock stand I figured it should work in my case too which proved correct.
So I started milling on the mount...
This is what I ended up with.
This is how it looks mounted to the arm.
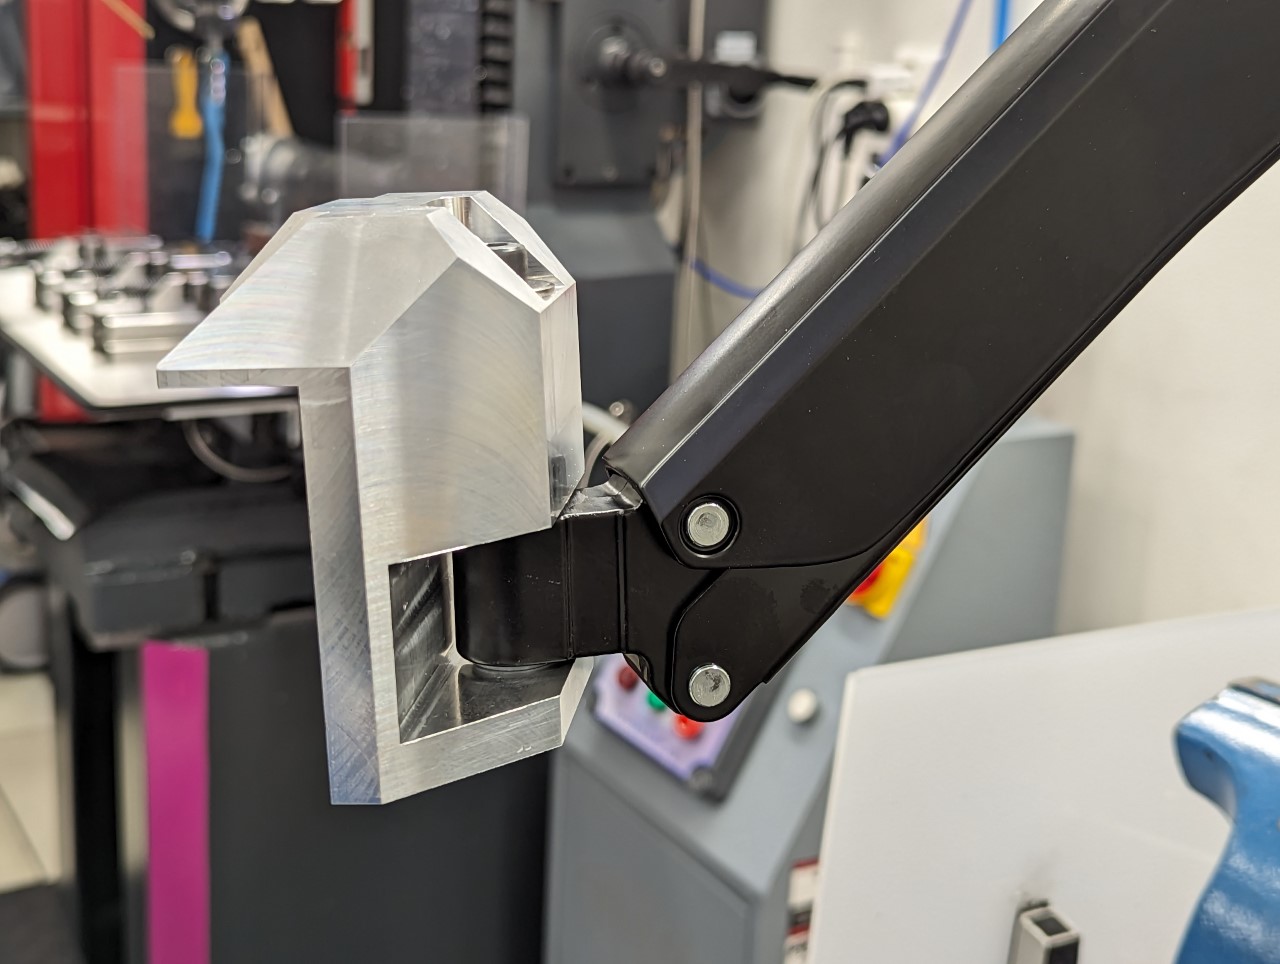
I'm using nylon washers which get compressed when I tighten the mounting bolt to control the amount of torque required to rotate the mount. That way I can assure that the mount doesn't rotate from the force required to press the buttons on the control panel.
I realized that I needed a sturdy mount that could take the weight of both the box with all the buttons and the screen along with the computer. So I dug through the boxes in the garage and found a piece of aluminum that I started doing some measurement on.
In order to able to retain the tilt function of the screen (a good way to avoid glare) I opted to use the mount on the screen that's usually used for the stand instead of the vesa mount as I had initially planned. It uses three tiny M4 screws but if it works with the stock stand I figured it should work in my case too which proved correct.
So I started milling on the mount...
This is what I ended up with.
This is how it looks mounted to the arm.
I'm using nylon washers which get compressed when I tighten the mounting bolt to control the amount of torque required to rotate the mount. That way I can assure that the mount doesn't rotate from the force required to press the buttons on the control panel.
Attachments:
Please Log in or Create an account to join the conversation.
Moderators: piasdom
Time to create page: 1.456 seconds