Optimum Optimill MH50V CNC conversion
10 Dec 2023 18:19 #287778
by Unlogic
Replied by Unlogic on topic Optimum Optimill MH50V CNC conversion
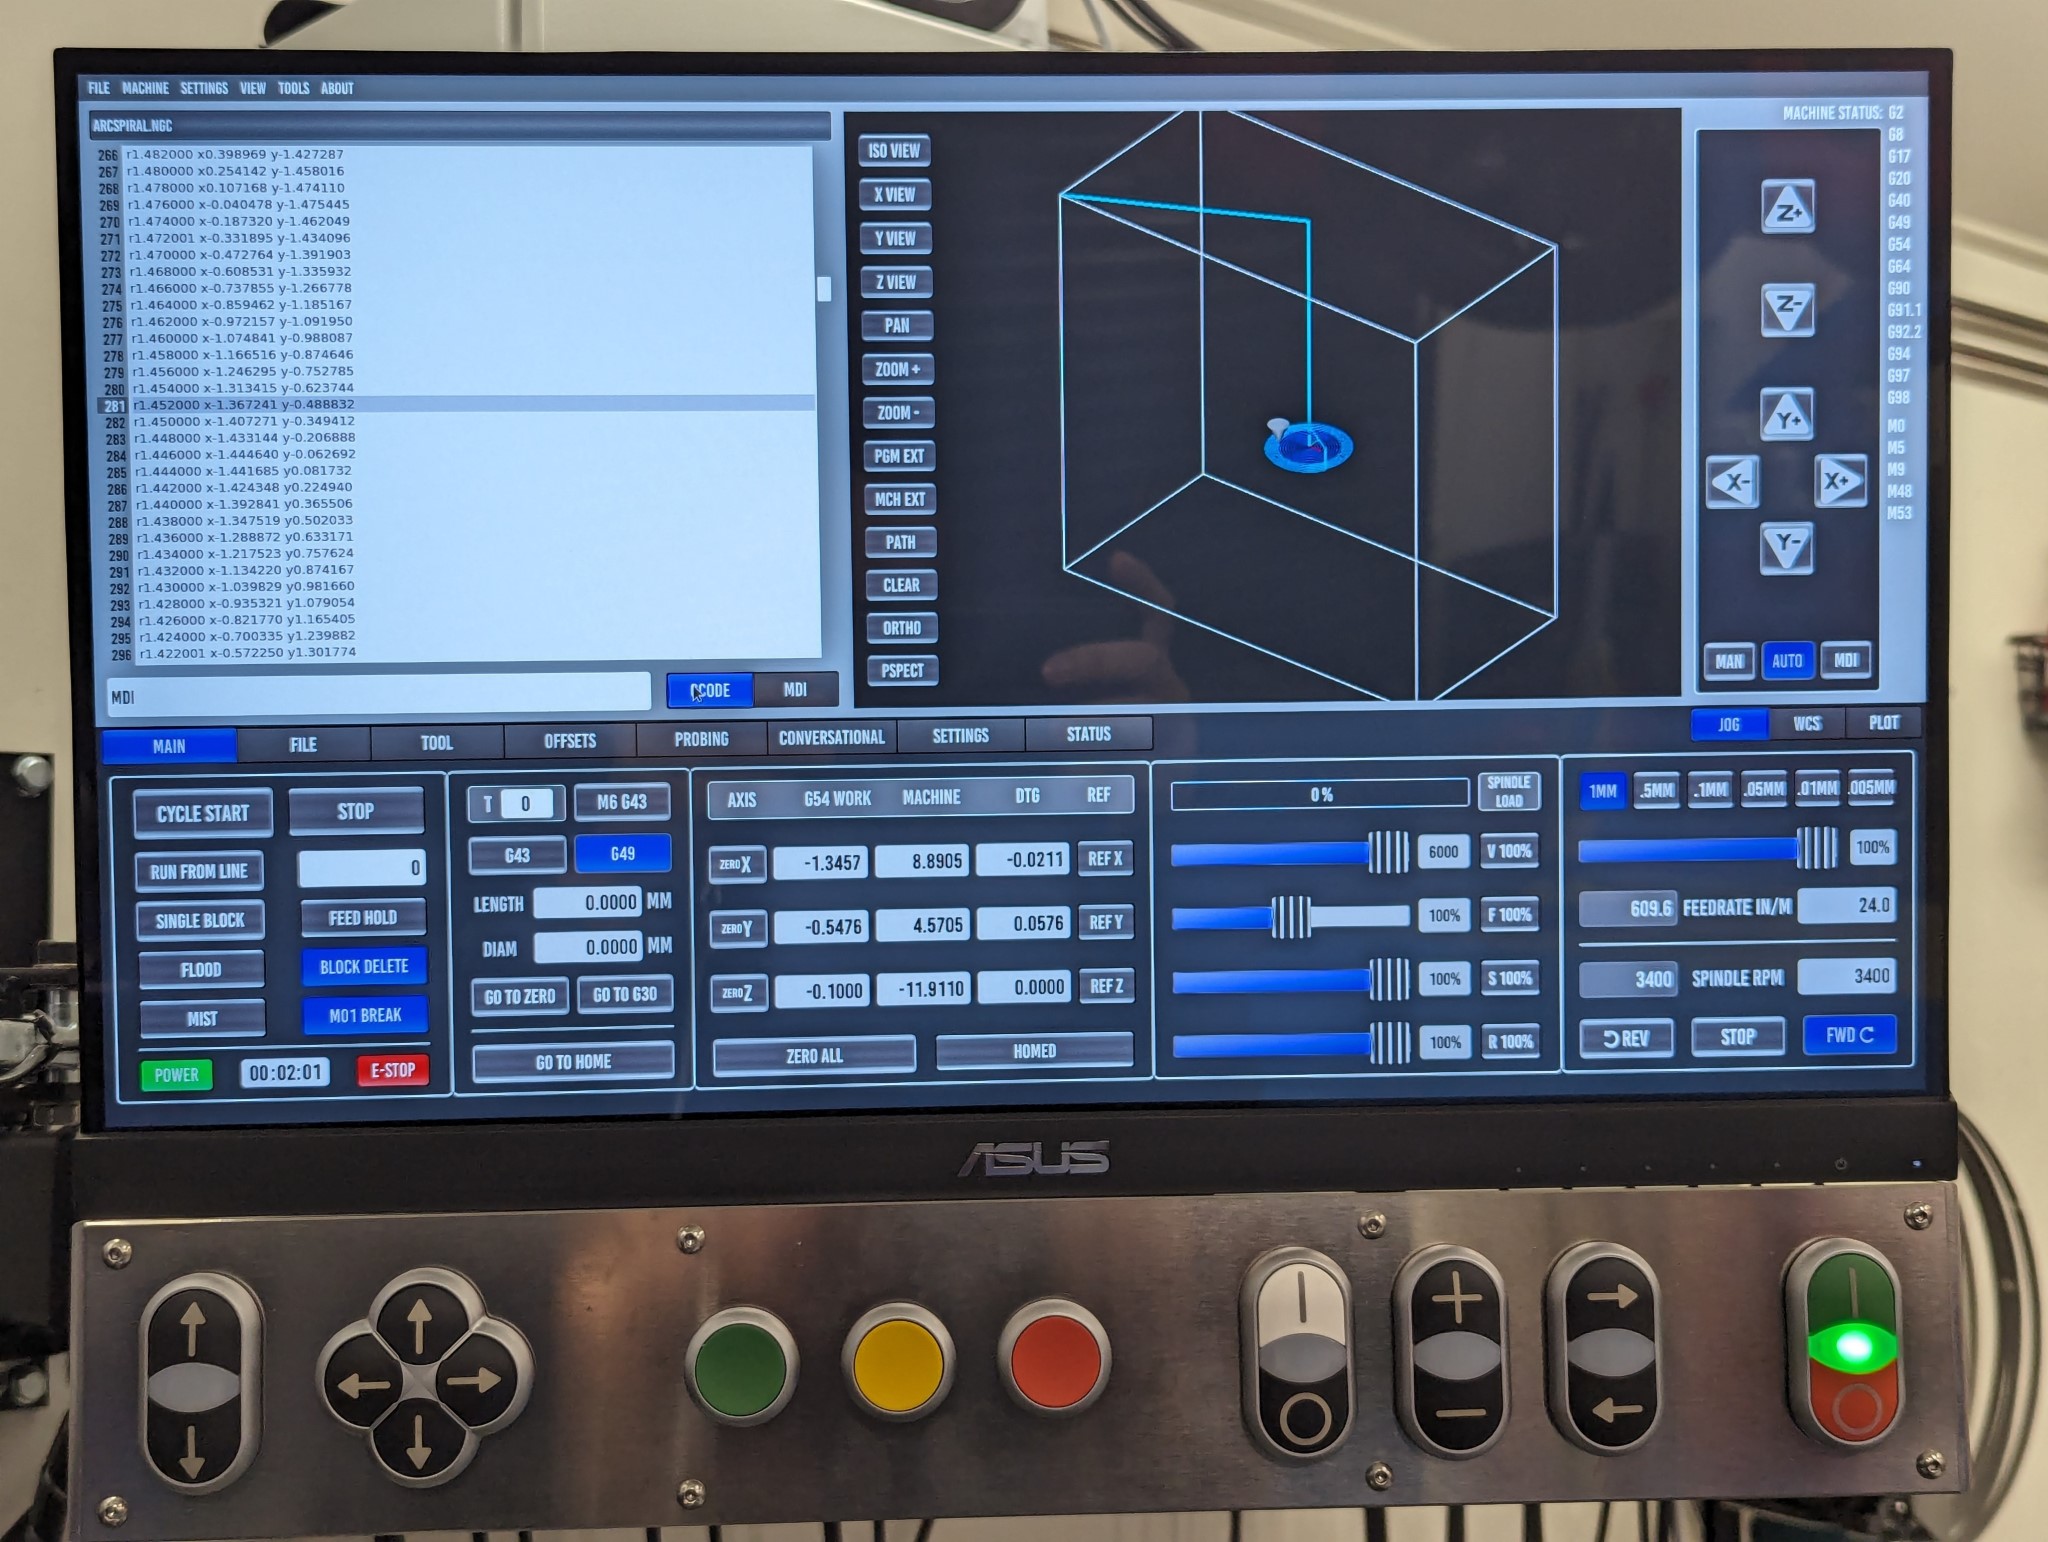
I have Probe Basic up and running now with all the HAL customizations I had previously added in my Axis configuration.
It wasn't smooth sailing however as I hit a few snags along the way which I had not foreseen in my preparations.
Those who have followed this thread know that I had initially planned to use a HP Elitedesk G2 Mini computer for this build but I abandoned it for an older Core 2 Quad setup instead as the Elitedesk had horrible delay and network problems.
I knew that Probe Basic required OpenGL 1.50 or later and the Intel specs for the Core 2 Duo motherboard (Intel DQ45EK) I was using as specified the following in the manual for the motherboard.

But in fact Probe Basic doesn't need OpenGL 1.5 it actually needs OpenGL Shading Language (GLSL) which is something different. Now days the OpenGL shader version number always matches the OpenGL version number but this wasn't always the case as OpenGL 3.2 and below used a separate version number for the shader for some reason...
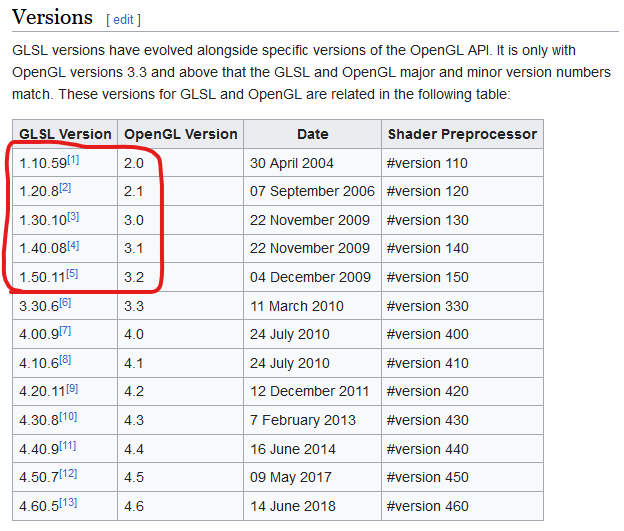
This meant that the 3D preview window in Probe Basic wouldn't work on the Core 2 Quad based computer work even though it worked fine in Axis...

At the same time as this played out I realized thanks to Rodw's post in the thread linked below that there are actually multiple versions of the HP Elitedesk G2 Mini computer.
forum.linuxcnc.org/27-driver-boards/4691...ead?start=300#287022
That explains why my experience installing Debian in legacy mode on that computer differed so much from what RotarySMP described in his thread linked below:
forum.linuxcnc.org/26-turning/41498-scha...fit?start=260#227063
The Elitedesk G2 Mini version I have seems to use a laptop CPU that explains why legacy mode was so broken. Laptops haven't focused on legacy mode for a long time since Windows requires secure boot, TPM etc these days.
Based on this information and together with the need for newer pixel shader version support I decided to give the Elitedesk another try but this time in UEFI mode. The computer fought me every step of the way in legacy mode as I've described previously but in UEFI mode it was the opposite and everything installed without a hitch and it booted just fine from the NVMe drive.
It would also launch Probe Basic just fine as it support a much higher OpenGL and OpenGL Shading Language version. The latency in UEFI mode is 2-3 times that of the Core 2 Duo at around 35000-45000 but still usable with the Mesa cards. But most importantly the wired network now worked properly which surprised me as it was pretty much unusable in legacy mode.
This meant I had to revise my recently built control panel slightly. As I had built a rail based mounting system on the back of the monitor I had to build two new rails for the Elitedesk.


Once Probe Basic was up and running I came across some very strange work offset coordinate errors that I couldn't find anything about online.
Turned out that my e-stop related HAL changes somehow interfered with the initialization of the current offset in Probe Basic.
I didn't fully manage to find the root cause of this but I was able to find a workaround by changing the initialization as described in this thread:
forum.linuxcnc.org/qtpyvcp/50922-configu...ied-properly?start=0
The only thing I have left software wise for now is to modify Probe Basic in some way so that I can control the jog speed of my physical buttons but I'll tackle that a bit later.
The next step is to modify the mill so that I can add central lubrication and ball screws for X and Y. I'll start with the central lubrication as I'm currently waiting for HTD 5M pulleys and polyamide belts from Norelem for the ball screws.
It wasn't smooth sailing however as I hit a few snags along the way which I had not foreseen in my preparations.
Those who have followed this thread know that I had initially planned to use a HP Elitedesk G2 Mini computer for this build but I abandoned it for an older Core 2 Quad setup instead as the Elitedesk had horrible delay and network problems.
I knew that Probe Basic required OpenGL 1.50 or later and the Intel specs for the Core 2 Duo motherboard (Intel DQ45EK) I was using as specified the following in the manual for the motherboard.
But in fact Probe Basic doesn't need OpenGL 1.5 it actually needs OpenGL Shading Language (GLSL) which is something different. Now days the OpenGL shader version number always matches the OpenGL version number but this wasn't always the case as OpenGL 3.2 and below used a separate version number for the shader for some reason...
This meant that the 3D preview window in Probe Basic wouldn't work on the Core 2 Quad based computer work even though it worked fine in Axis...
At the same time as this played out I realized thanks to Rodw's post in the thread linked below that there are actually multiple versions of the HP Elitedesk G2 Mini computer.
forum.linuxcnc.org/27-driver-boards/4691...ead?start=300#287022
That explains why my experience installing Debian in legacy mode on that computer differed so much from what RotarySMP described in his thread linked below:
forum.linuxcnc.org/26-turning/41498-scha...fit?start=260#227063
The Elitedesk G2 Mini version I have seems to use a laptop CPU that explains why legacy mode was so broken. Laptops haven't focused on legacy mode for a long time since Windows requires secure boot, TPM etc these days.
Based on this information and together with the need for newer pixel shader version support I decided to give the Elitedesk another try but this time in UEFI mode. The computer fought me every step of the way in legacy mode as I've described previously but in UEFI mode it was the opposite and everything installed without a hitch and it booted just fine from the NVMe drive.
It would also launch Probe Basic just fine as it support a much higher OpenGL and OpenGL Shading Language version. The latency in UEFI mode is 2-3 times that of the Core 2 Duo at around 35000-45000 but still usable with the Mesa cards. But most importantly the wired network now worked properly which surprised me as it was pretty much unusable in legacy mode.
This meant I had to revise my recently built control panel slightly. As I had built a rail based mounting system on the back of the monitor I had to build two new rails for the Elitedesk.
Once Probe Basic was up and running I came across some very strange work offset coordinate errors that I couldn't find anything about online.
Turned out that my e-stop related HAL changes somehow interfered with the initialization of the current offset in Probe Basic.
I didn't fully manage to find the root cause of this but I was able to find a workaround by changing the initialization as described in this thread:
forum.linuxcnc.org/qtpyvcp/50922-configu...ied-properly?start=0
The only thing I have left software wise for now is to modify Probe Basic in some way so that I can control the jog speed of my physical buttons but I'll tackle that a bit later.
The next step is to modify the mill so that I can add central lubrication and ball screws for X and Y. I'll start with the central lubrication as I'm currently waiting for HTD 5M pulleys and polyamide belts from Norelem for the ball screws.
Attachments:
The following user(s) said Thank You: besriworld
Please Log in or Create an account to join the conversation.

10 Dec 2023 19:58 #287787
by PCW
Replied by PCW on topic Optimum Optimill MH50V CNC conversion
That's interesting about the 800 G2, If you have good long term network
performance on the 35W model (in UEFI mode) I should change my post about
that model.
performance on the 35W model (in UEFI mode) I should change my post about
that model.
Please Log in or Create an account to join the conversation.
10 Dec 2023 20:12 #287789
by Unlogic
Replied by Unlogic on topic Optimum Optimill MH50V CNC conversion
I spent the better part of today restarting things as I was trouble shooting my Probe Basic setup so it wasn't a proper stress test.
But I intend to leave the computer and cabinet running for a day or two while I work on the more mechanical stuff in order to see how it works before we can call this a success.
In legacy mode the network card would always stop working within one day if I left the computer on.
But I intend to leave the computer and cabinet running for a day or two while I work on the more mechanical stuff in order to see how it works before we can call this a success.
In legacy mode the network card would always stop working within one day if I left the computer on.
The following user(s) said Thank You: tommylight
Please Log in or Create an account to join the conversation.
10 Feb 2024 21:19 #293039
by Unlogic
Replied by Unlogic on topic Optimum Optimill MH50V CNC conversion
A quick update to just say that I have not disappeared

I'm working on the mechanical parts of the CNC conversion with bearing block mounts, ball screw mounts, central lubrication etc. I've posted most of that content in my thread over at Hobby Machinist ( link ) as it's not really LinuxCNC related.
But here are a few photos of what I've been working on.
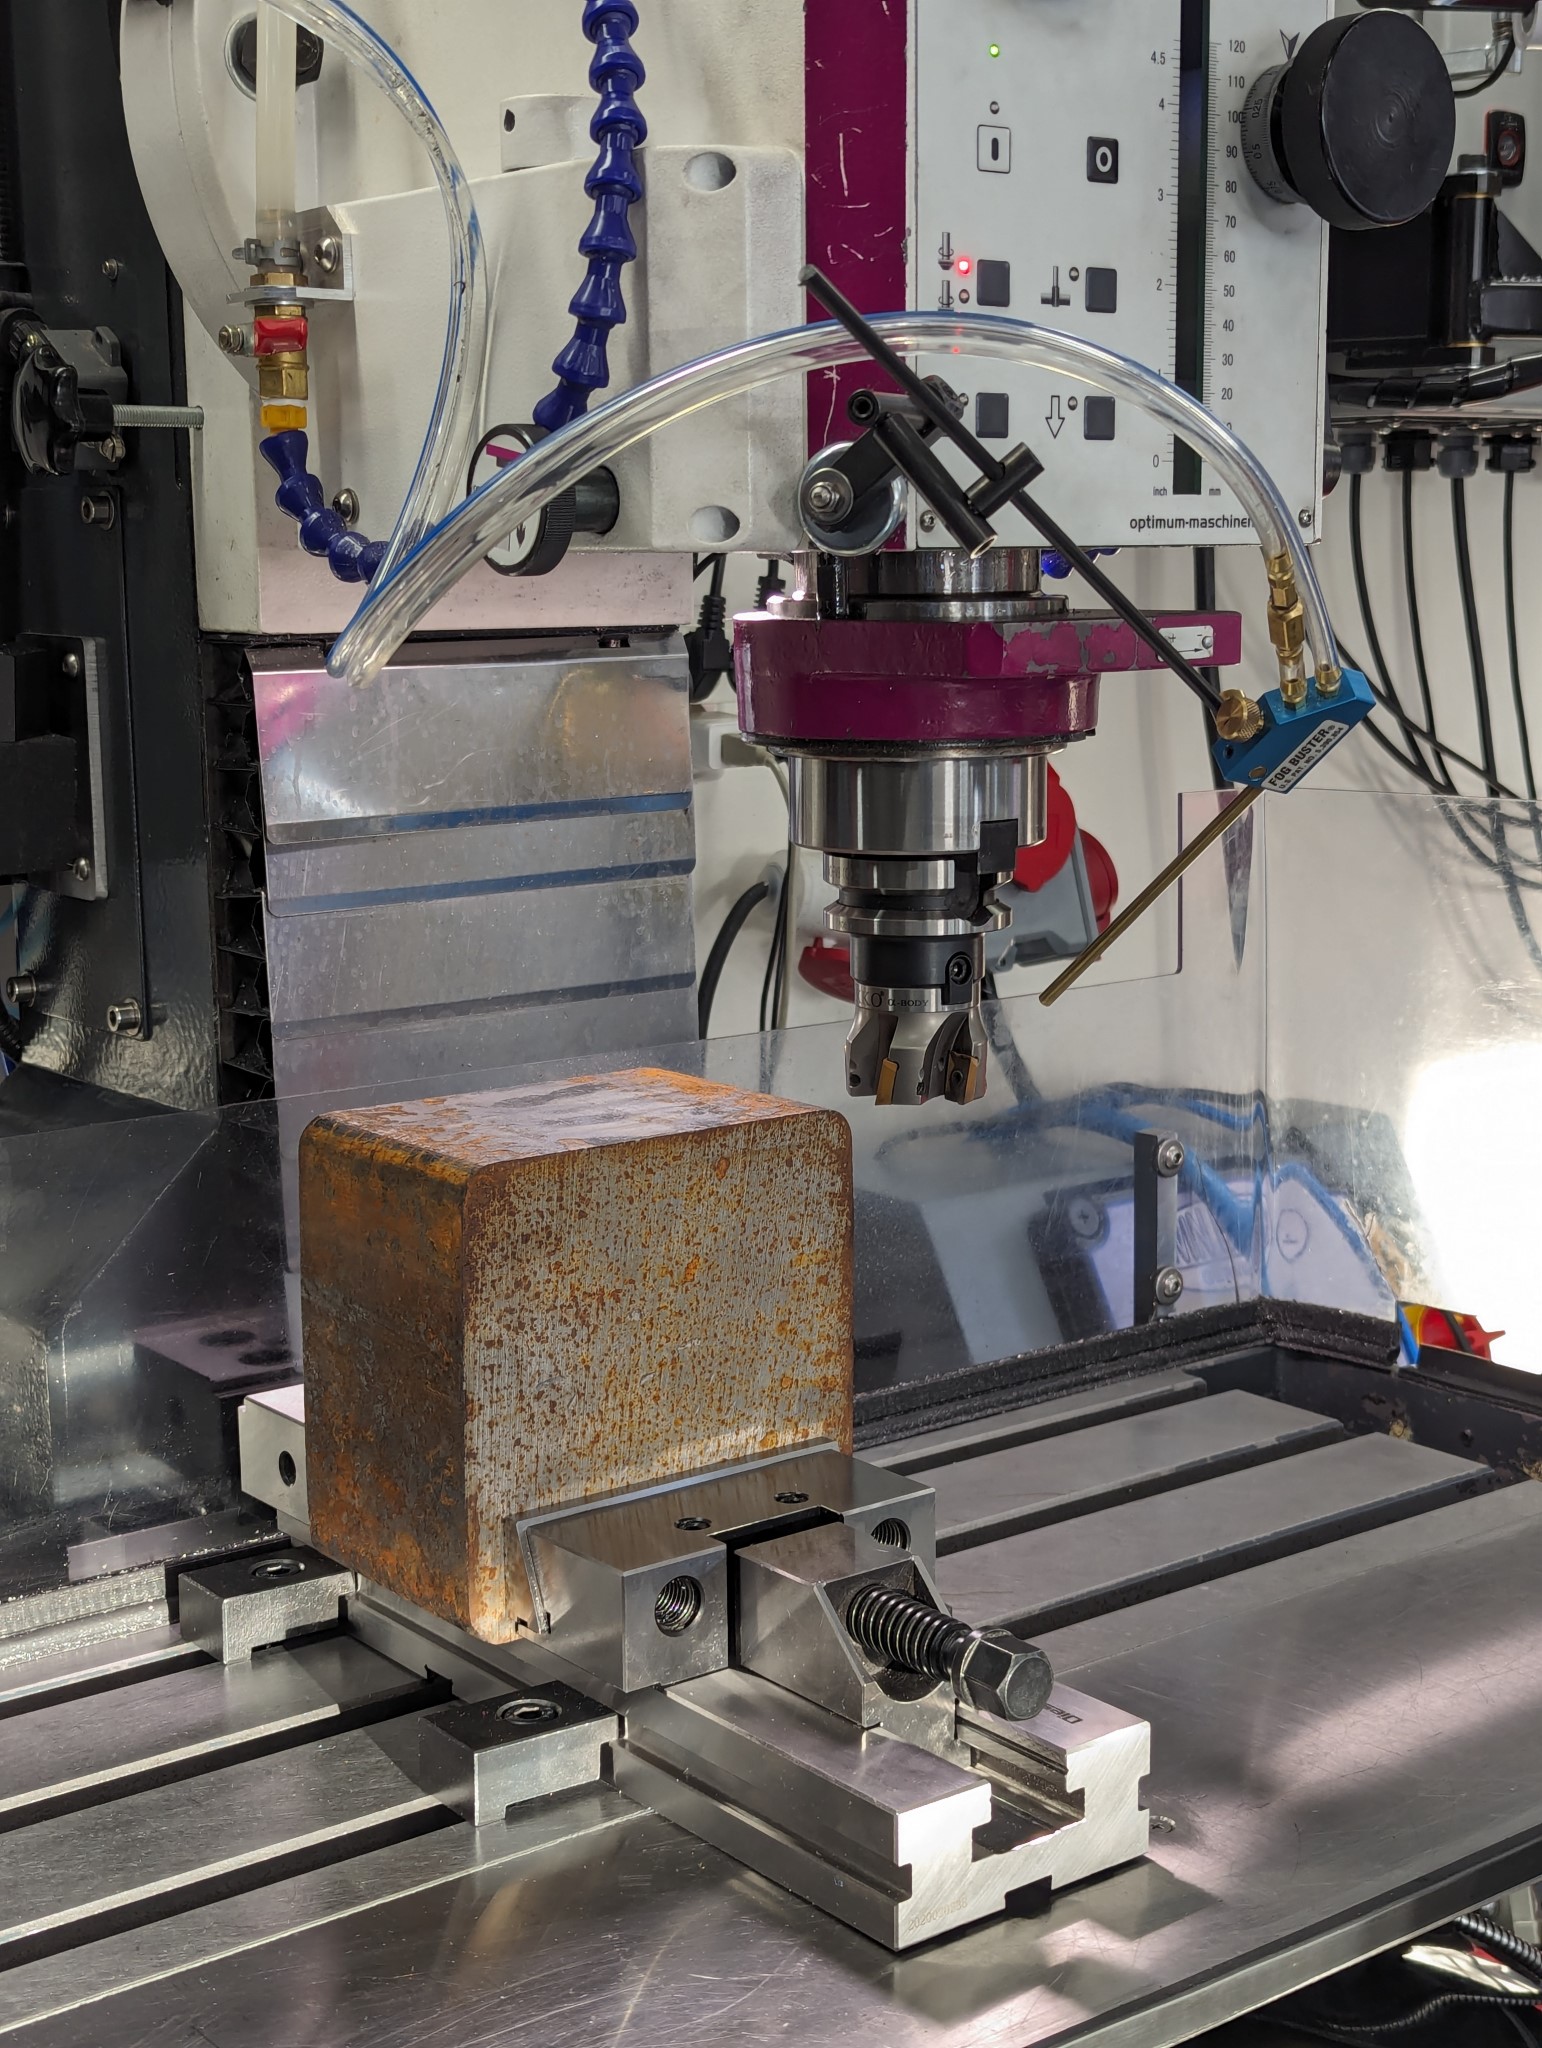
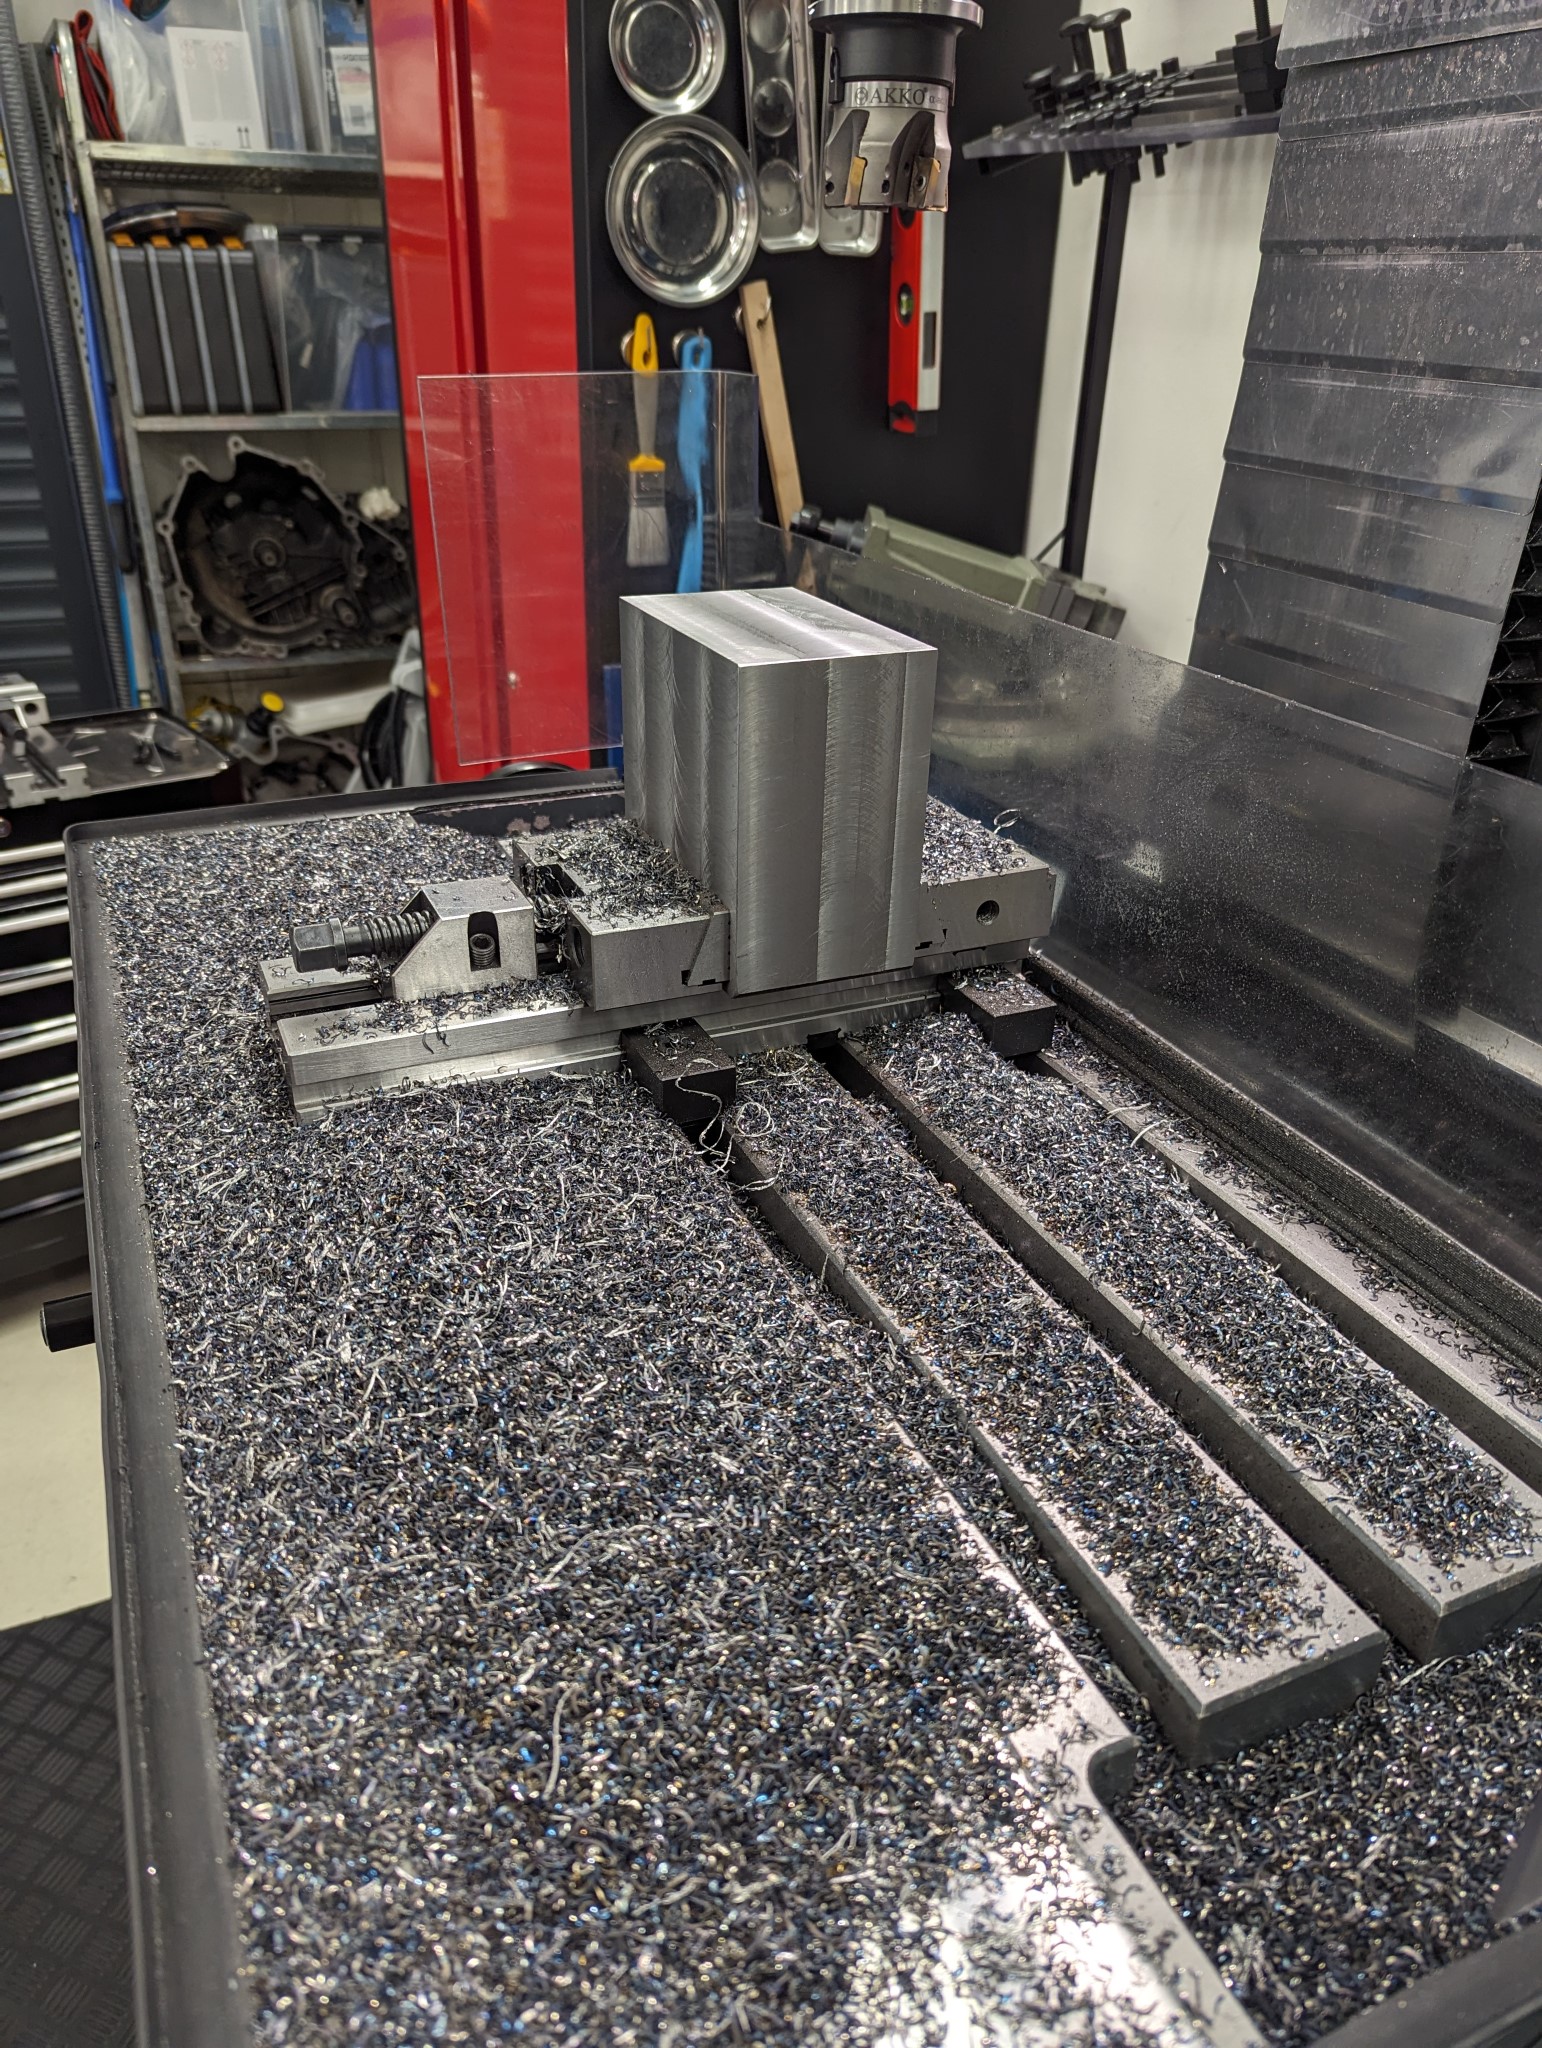
Most parts are done now, just the bearing block and ball nut mount for the Y-axis left. As I'm doing them in steel it takes a while to manually mill them.
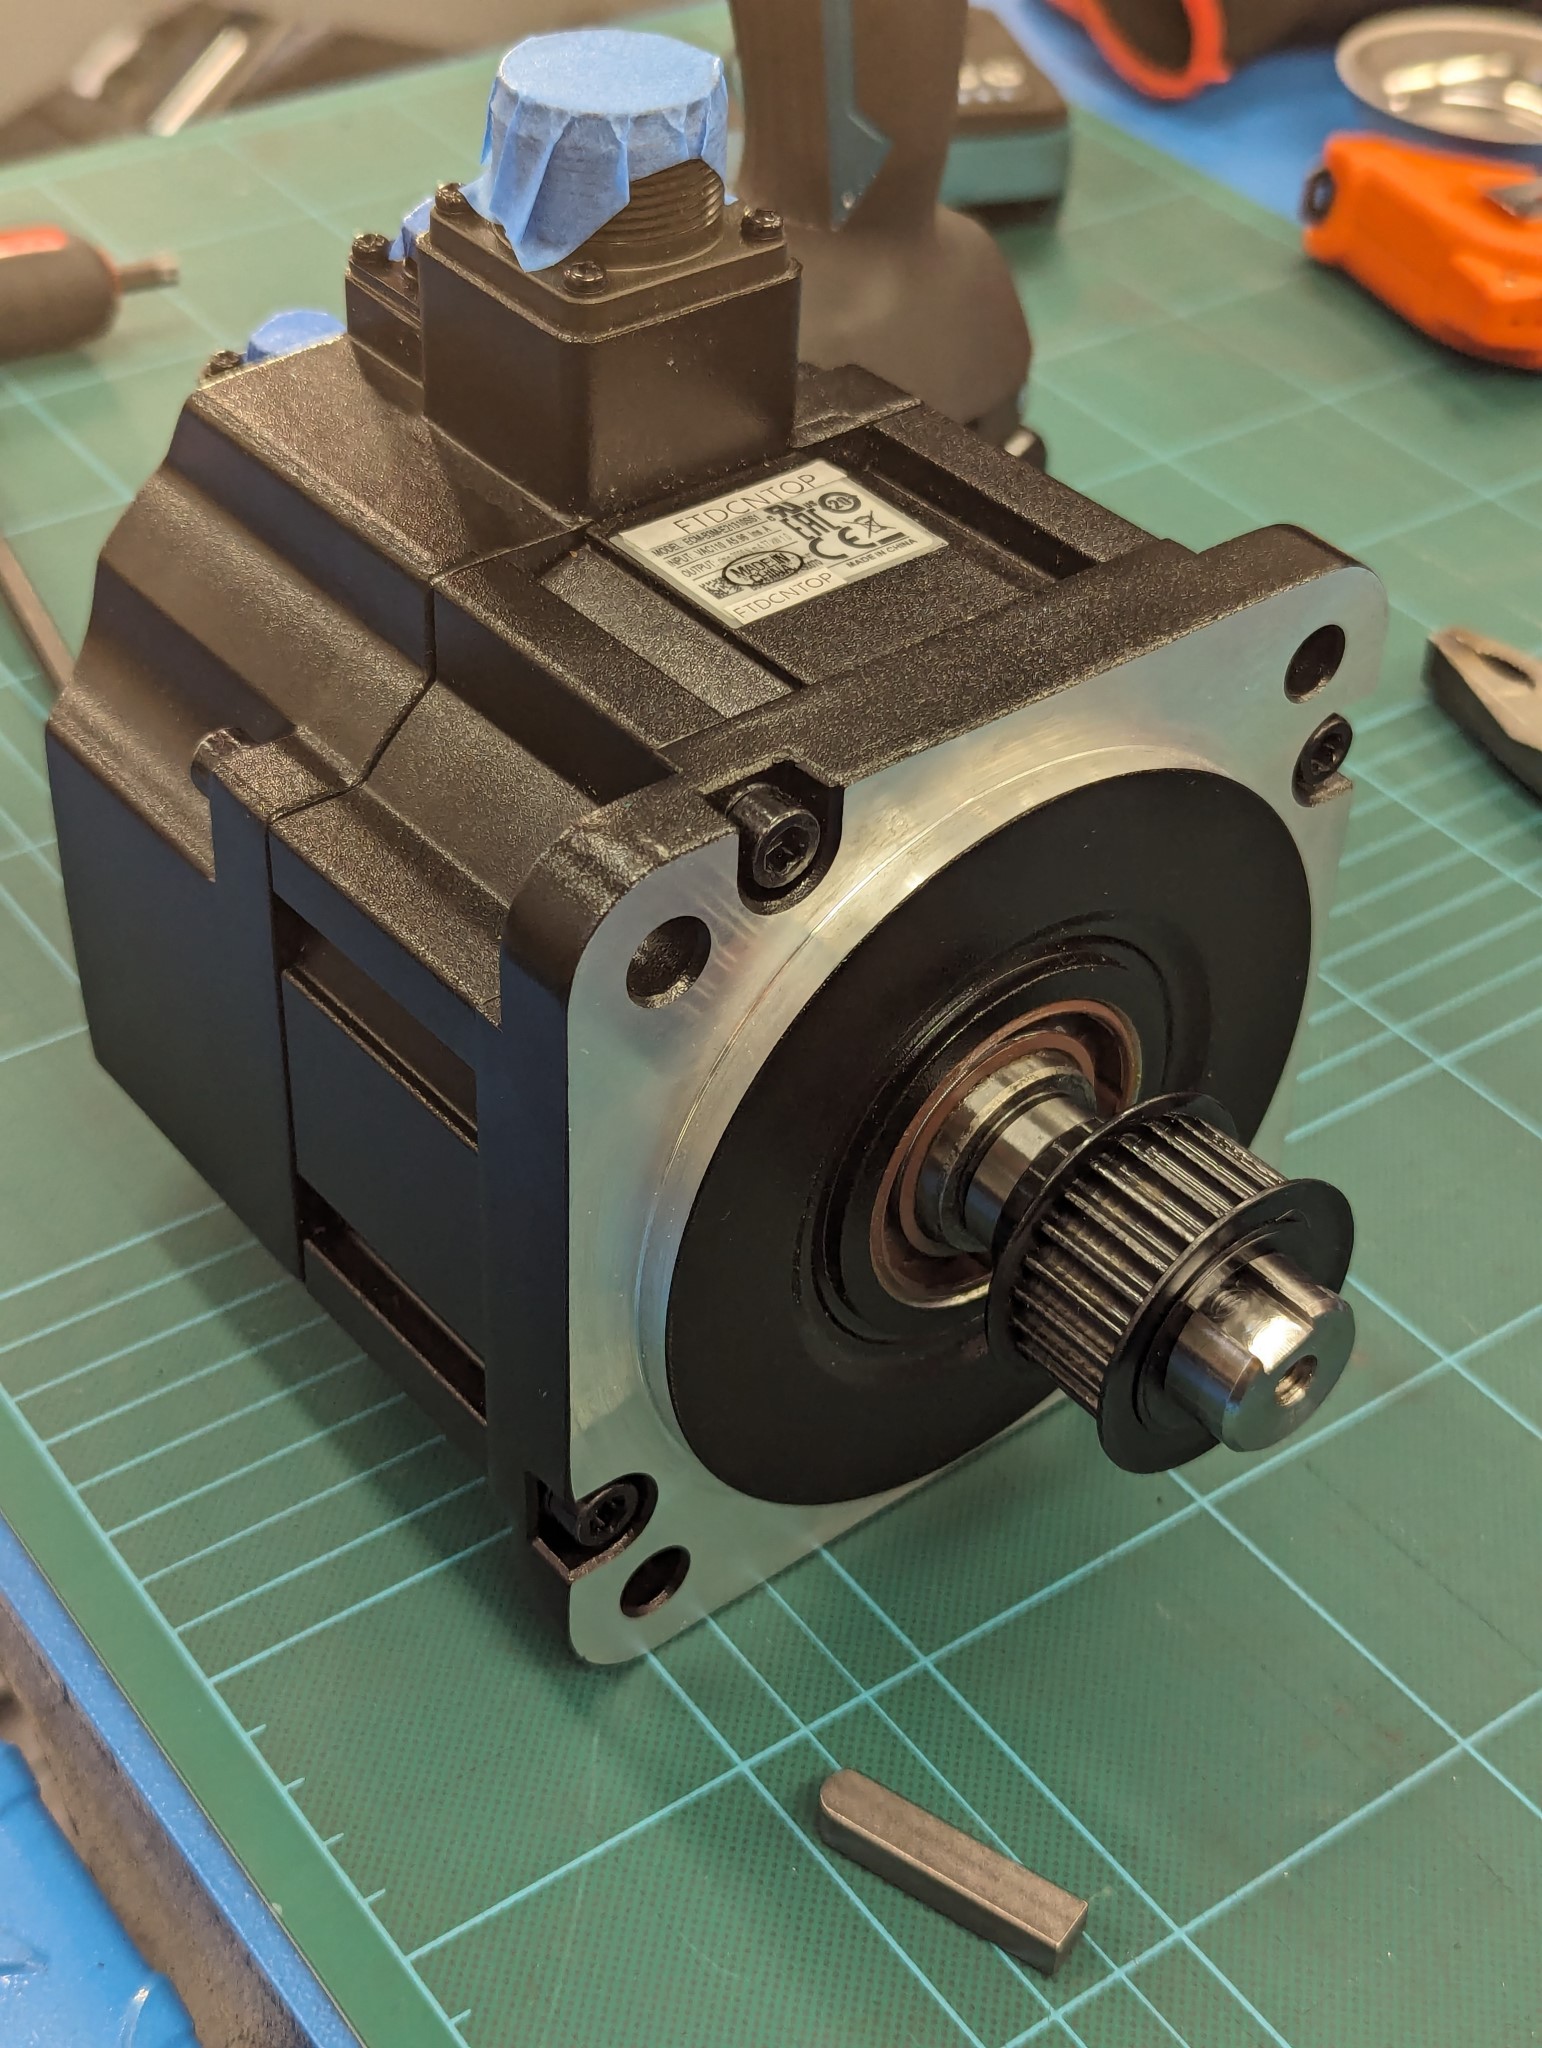
It should also be mentioned that the Elitedesk G2 Mini has been working fine without any errors after I switched over to UEFI mode. I've had the servos connected to the control cabinet running some of the LinuxCNC g-code samples over and over as a stress test.
I'm working on the mechanical parts of the CNC conversion with bearing block mounts, ball screw mounts, central lubrication etc. I've posted most of that content in my thread over at Hobby Machinist ( link ) as it's not really LinuxCNC related.
But here are a few photos of what I've been working on.
Most parts are done now, just the bearing block and ball nut mount for the Y-axis left. As I'm doing them in steel it takes a while to manually mill them.
It should also be mentioned that the Elitedesk G2 Mini has been working fine without any errors after I switched over to UEFI mode. I've had the servos connected to the control cabinet running some of the LinuxCNC g-code samples over and over as a stress test.
Attachments:
The following user(s) said Thank You: tommylight
Please Log in or Create an account to join the conversation.
- tommylight
-

- Away
- Moderator
-

Less
More
- Posts: 17938
- Thank you received: 5957
10 Feb 2024 22:07 #293040
by tommylight
It is controlled (or gona be) by LinuxCNC, so we would like pictures.
I uploaded pictures and videos of an ordnance disposal tank i retrofitted (well, i did 2) and got over 600 views here
forum.linuxcnc.org/show-your-stuff/50574-retrofitting-a-tank
Replied by tommylight on topic Optimum Optimill MH50V CNC conversion
And jealousy sets in ...I've posted most of that content in my thread over at Hobby Machinist as it's not really LinuxCNC related.
It is controlled (or gona be) by LinuxCNC, so we would like pictures.
I uploaded pictures and videos of an ordnance disposal tank i retrofitted (well, i did 2) and got over 600 views here
forum.linuxcnc.org/show-your-stuff/50574-retrofitting-a-tank
Please Log in or Create an account to join the conversation.
18 Feb 2024 18:00 #293692
by Unlogic
Replied by Unlogic on topic Optimum Optimill MH50V CNC conversion
Okay here is a more detailed post of the progress I've made since finishing the electronics cabinet.
I intentionally did the mechanical stuff last as I knew it would force me to tear down the mill a few times in order to get measurements and test the new parts which in turn would prevent me from milling other stuff.
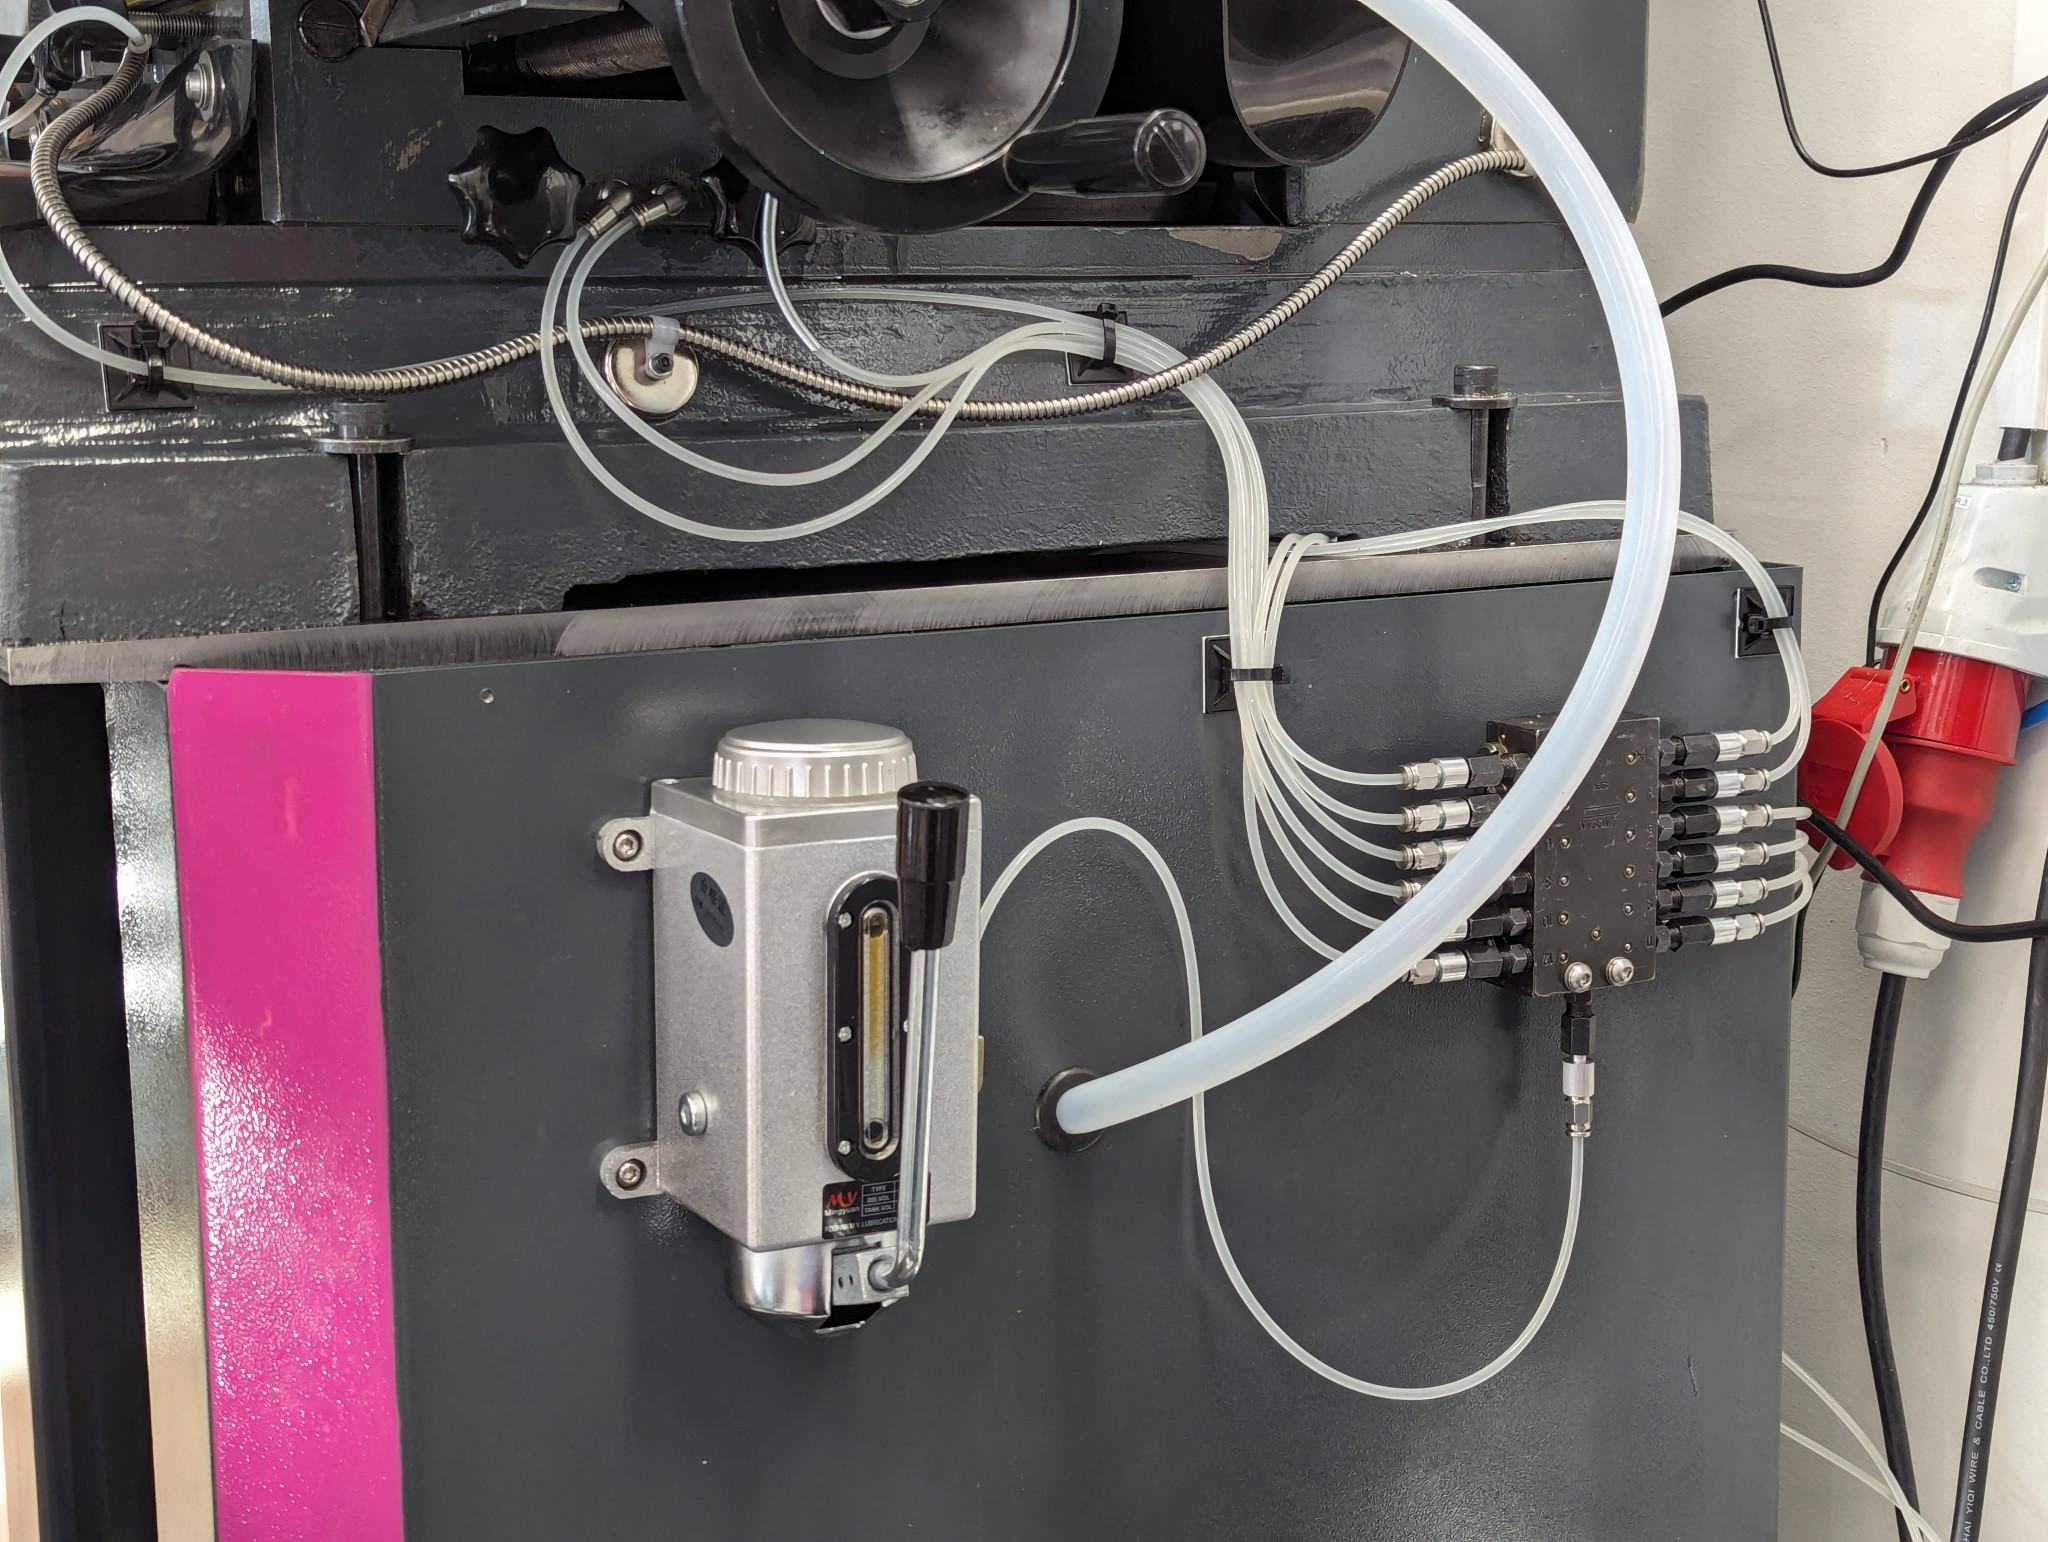
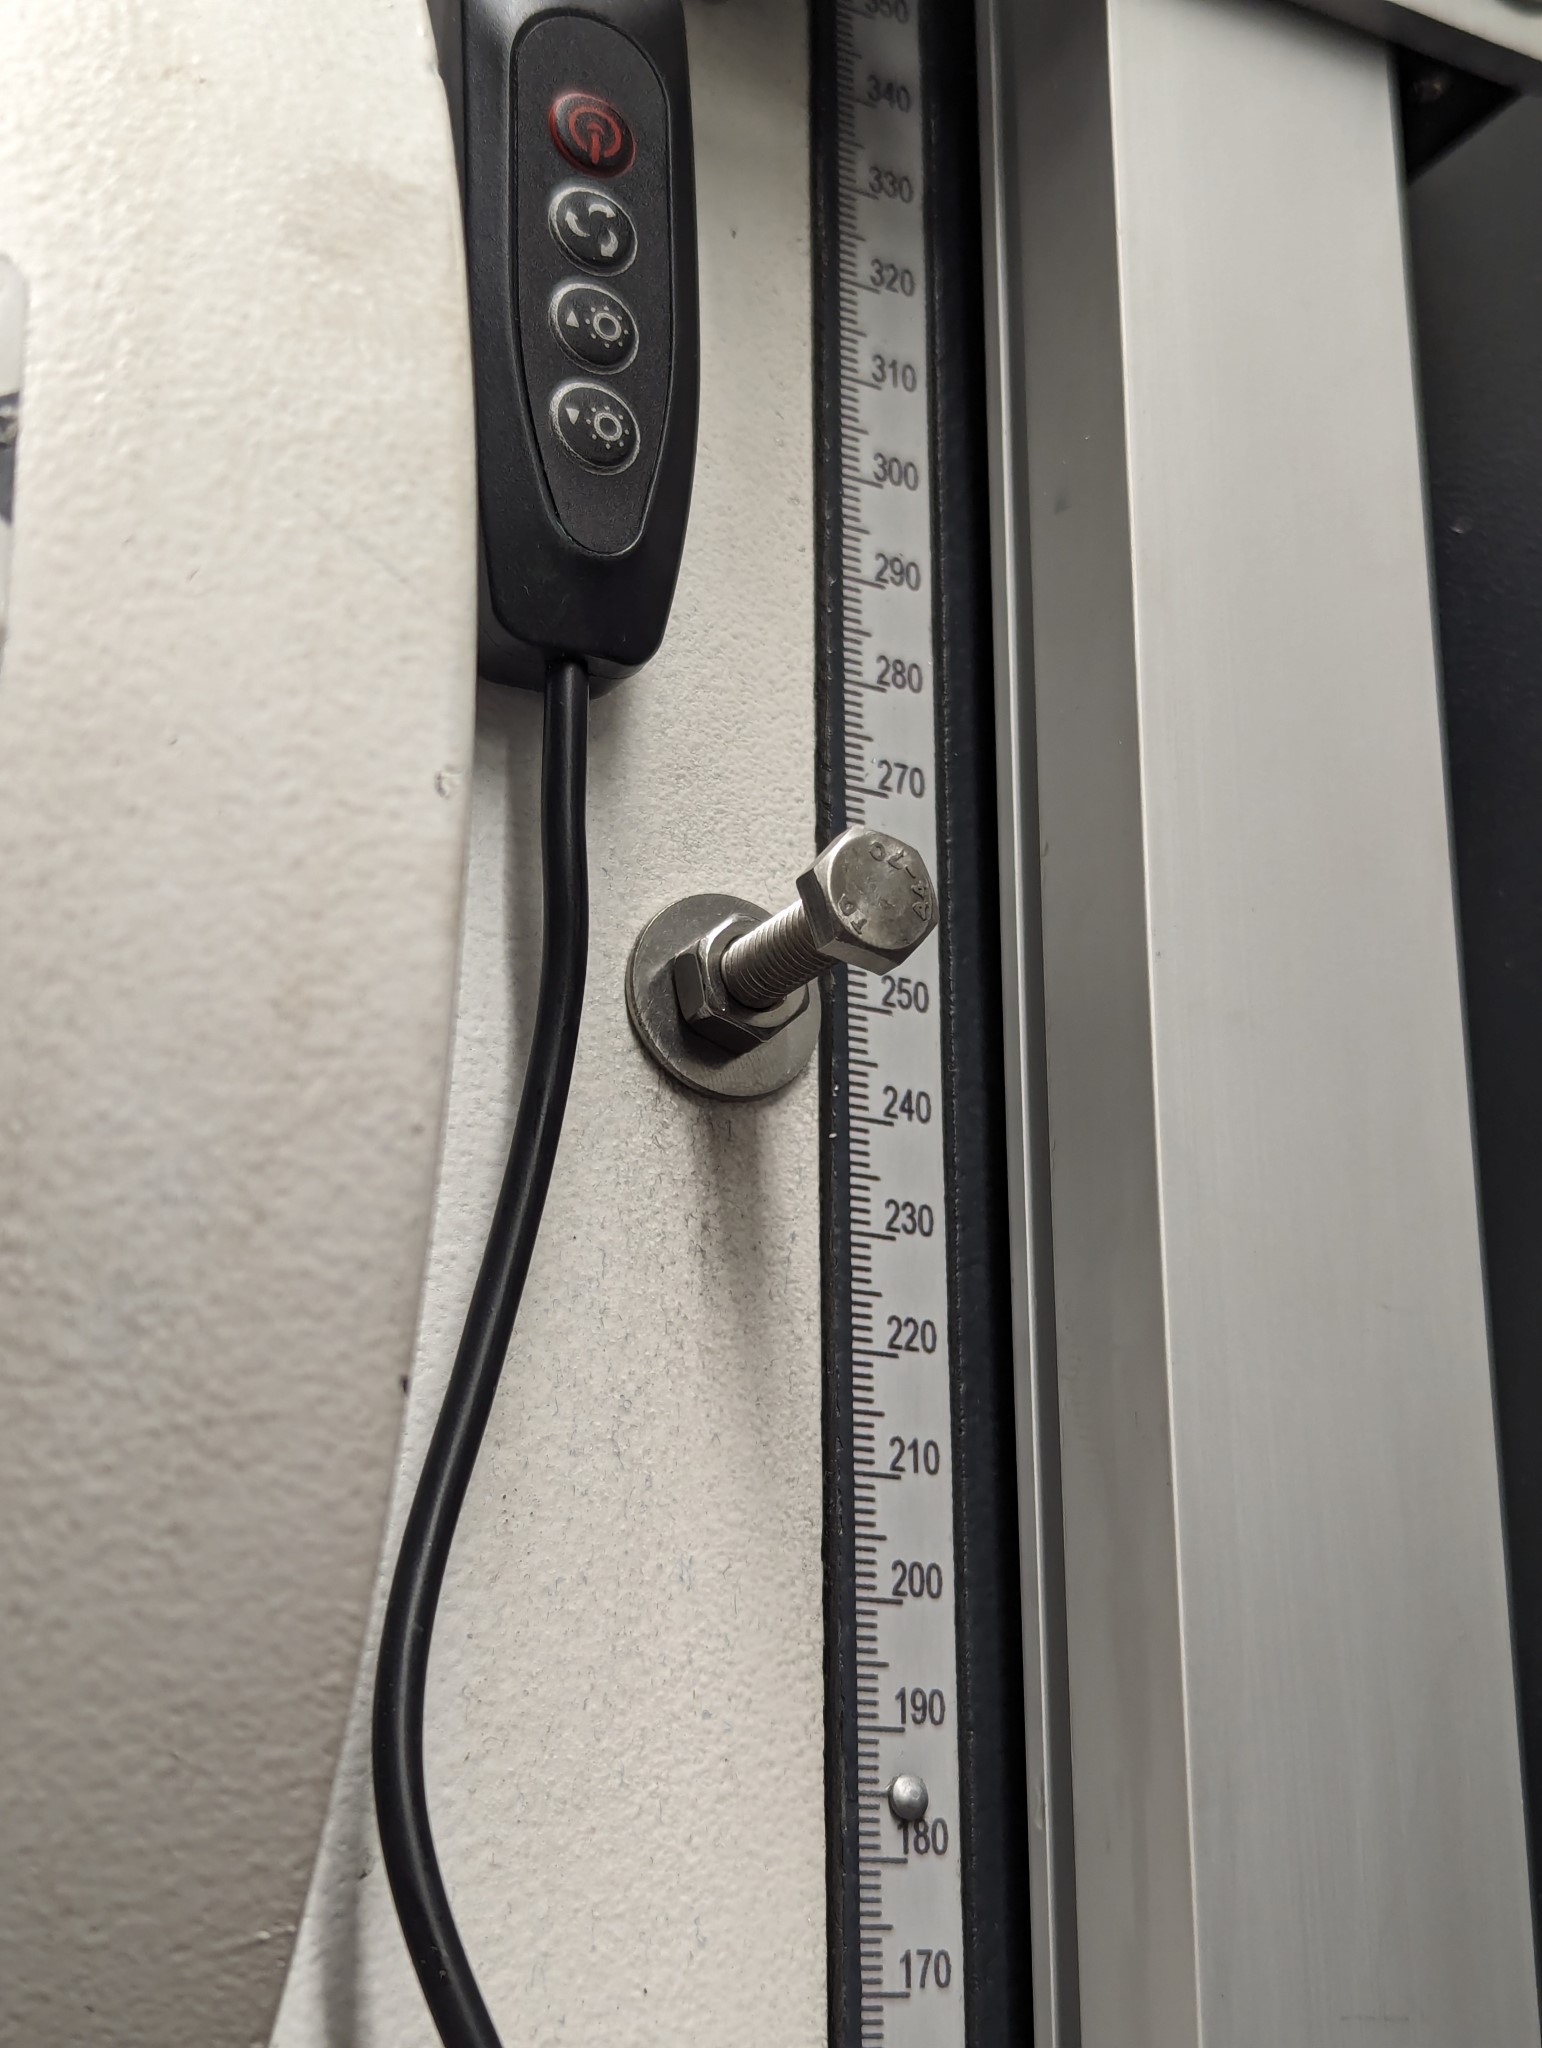
Two years ago I started collecting parts for a central lubrication system and the parts had been sitting in a box for almost two years. But now that I was about to pull the machine apart I figured it was time to install it.
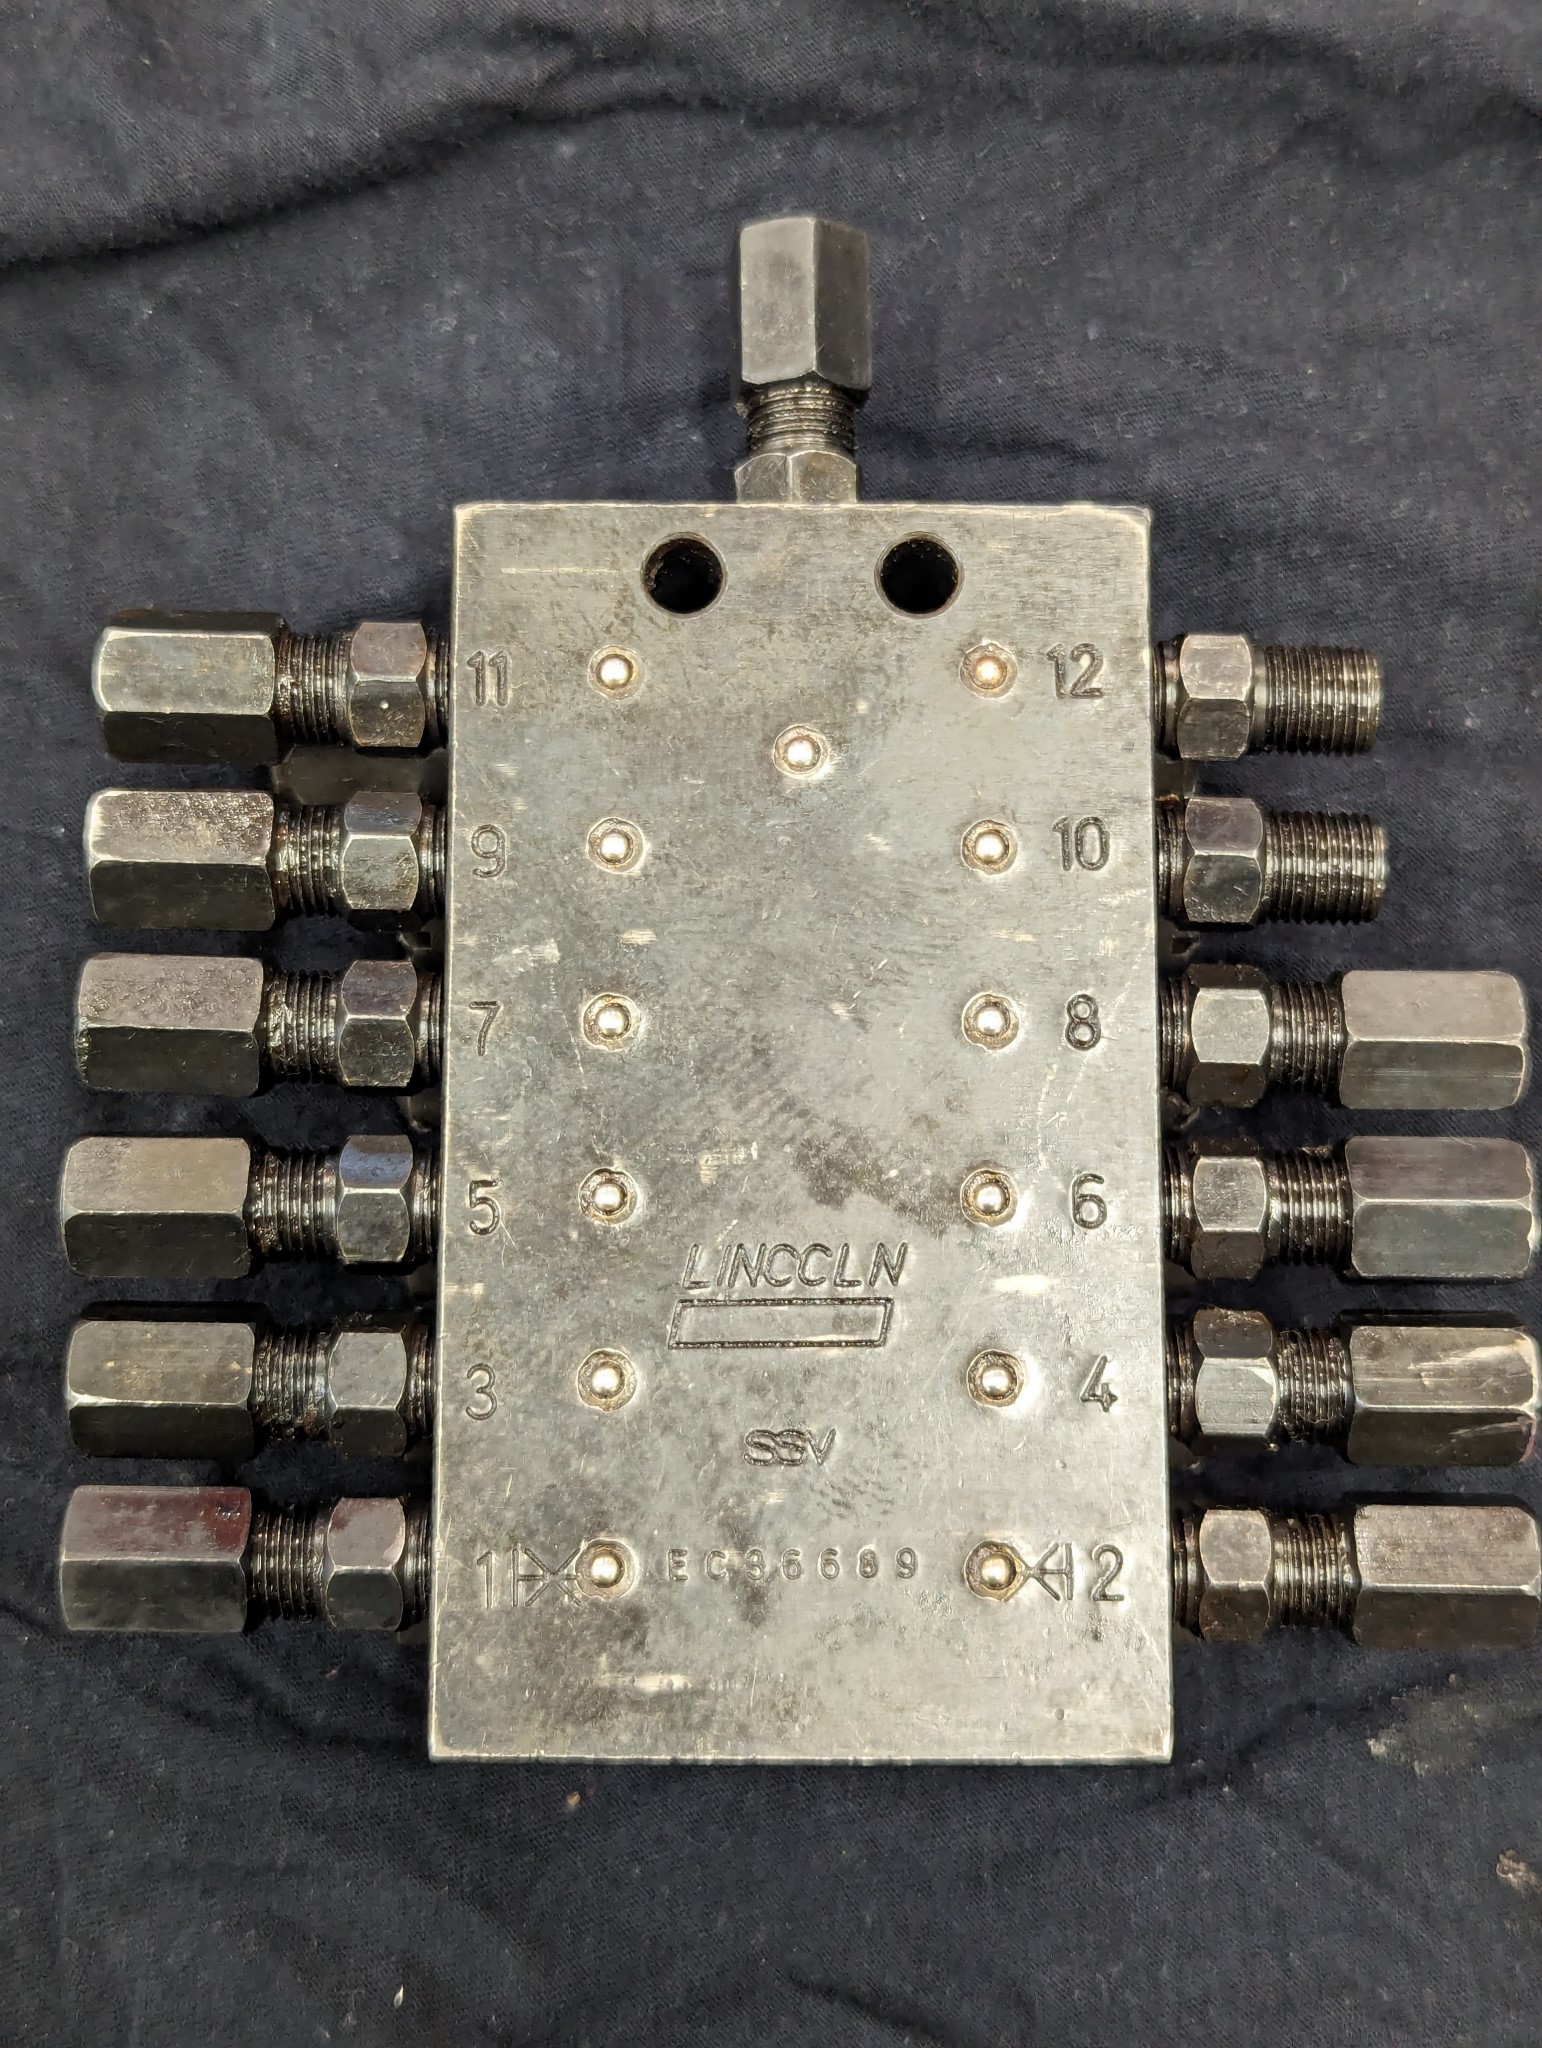
I purchased a clone of SKF Lincoln metering device from Aliexpress and specified that I wanted 6 mm fittings.
I thought that meant M6 threads but instead the block arrived with 6mm crimp fittings using some type of ferrules I knew I'd never be able to find locally.
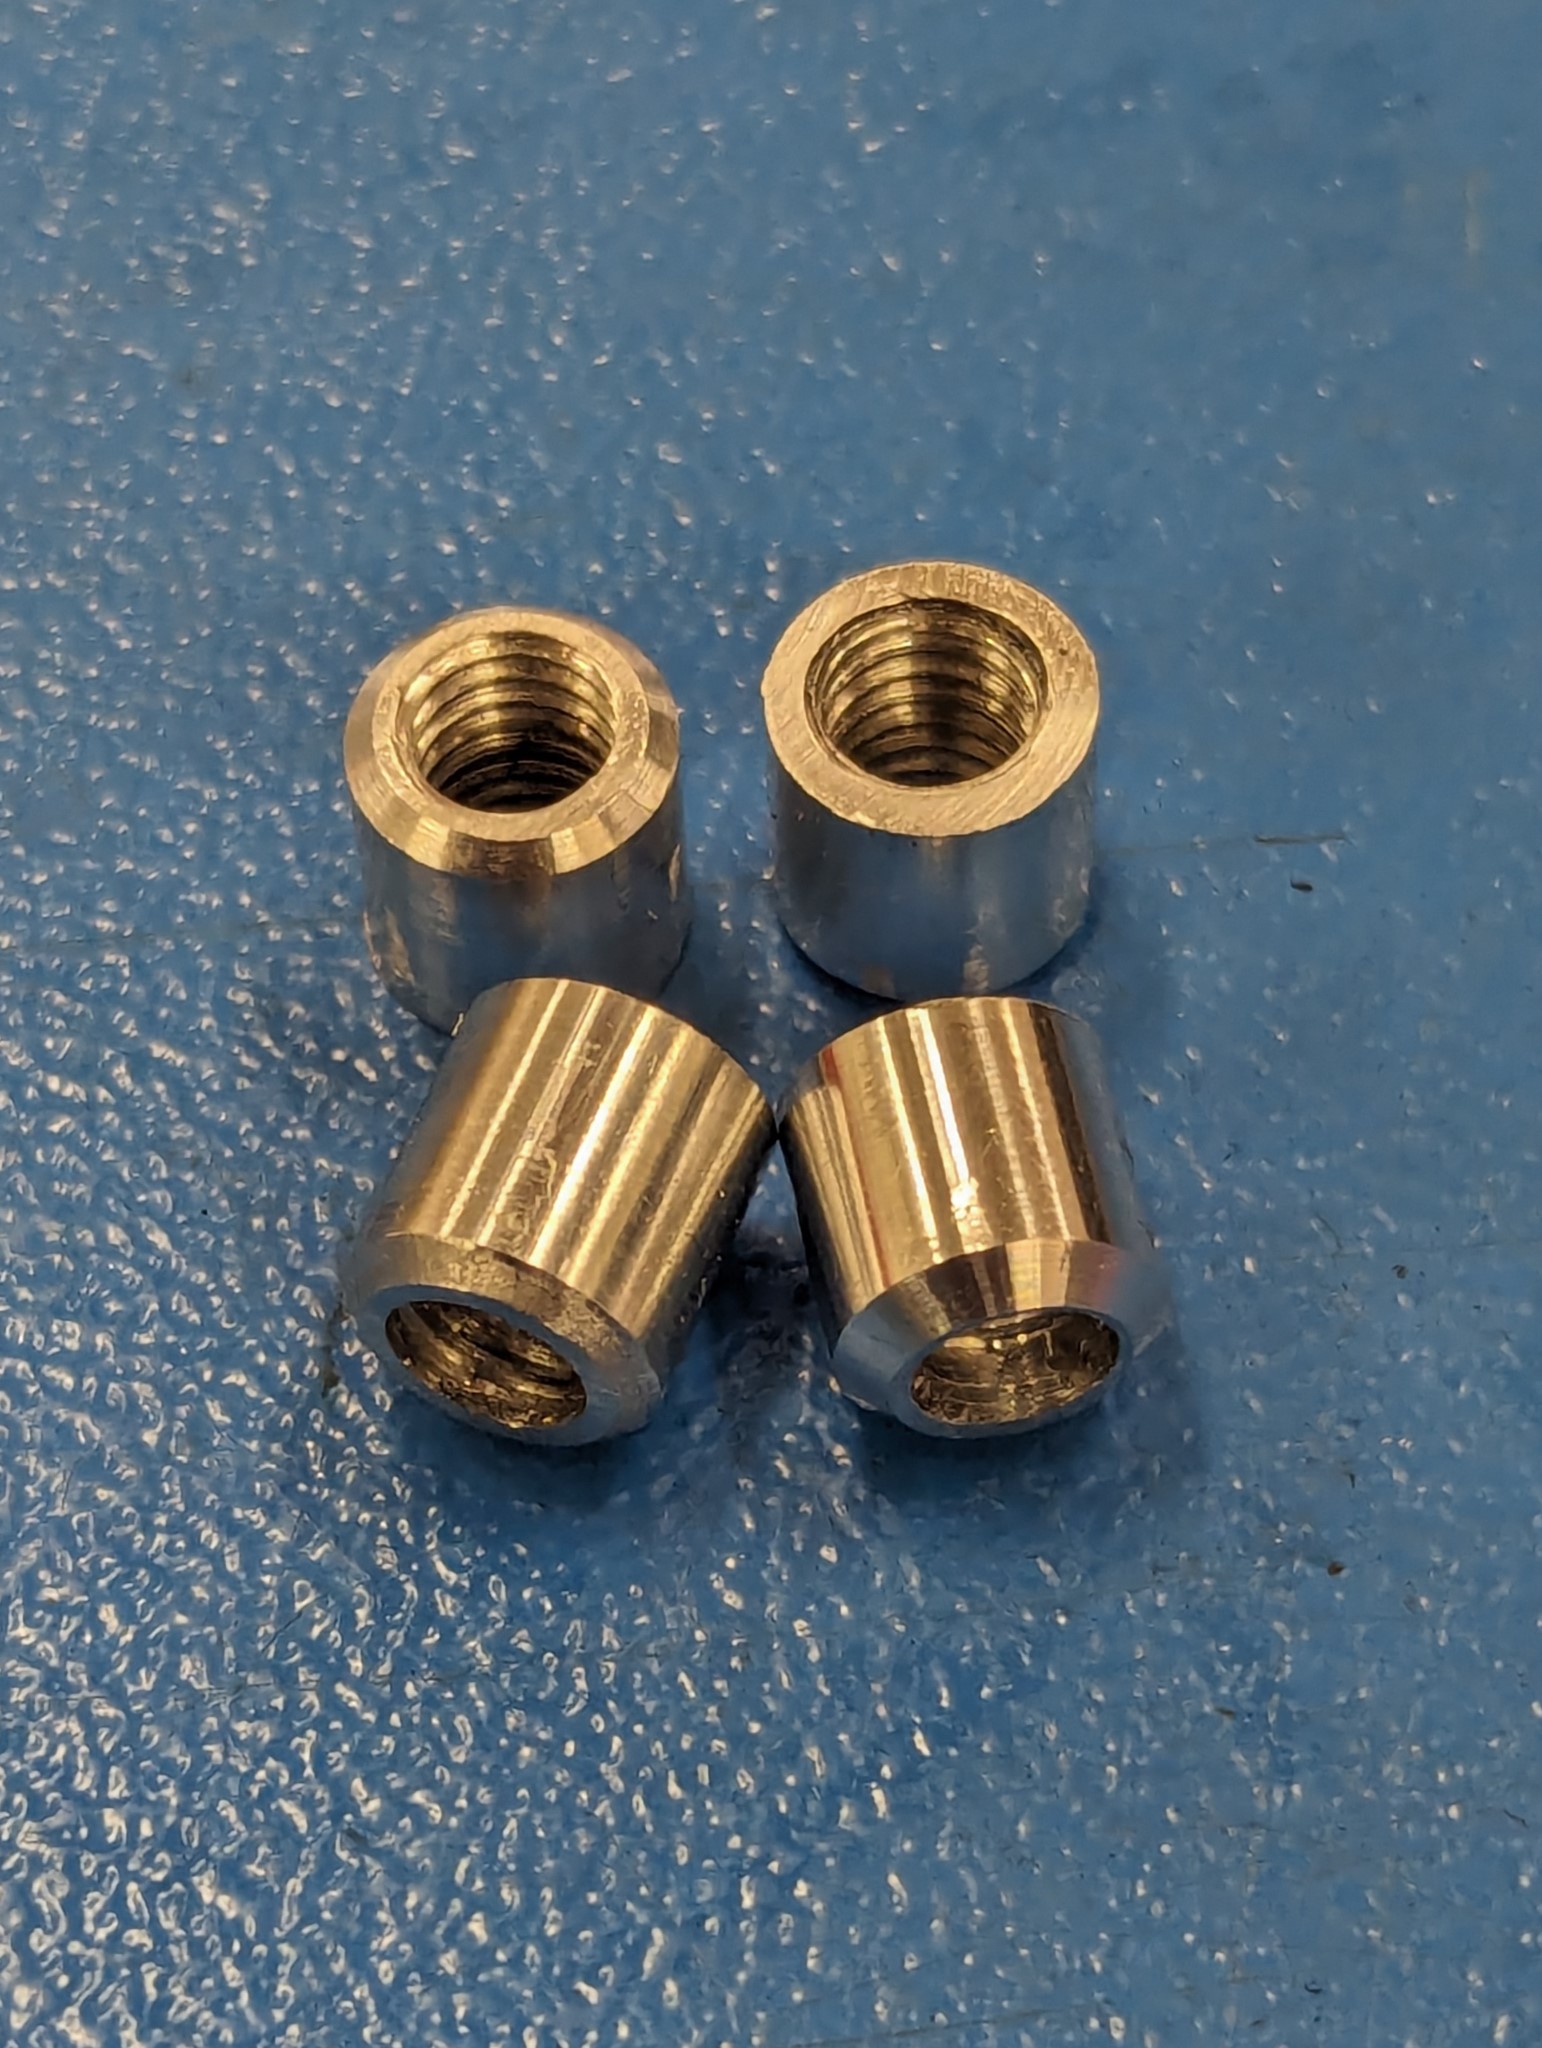
This meant I had one chance to tighten the connections before the ferrules would be wasted. I also needed to adapt the connections so I that could use the push in fittings for 4mm hose with M6 thread that I had already purchased.
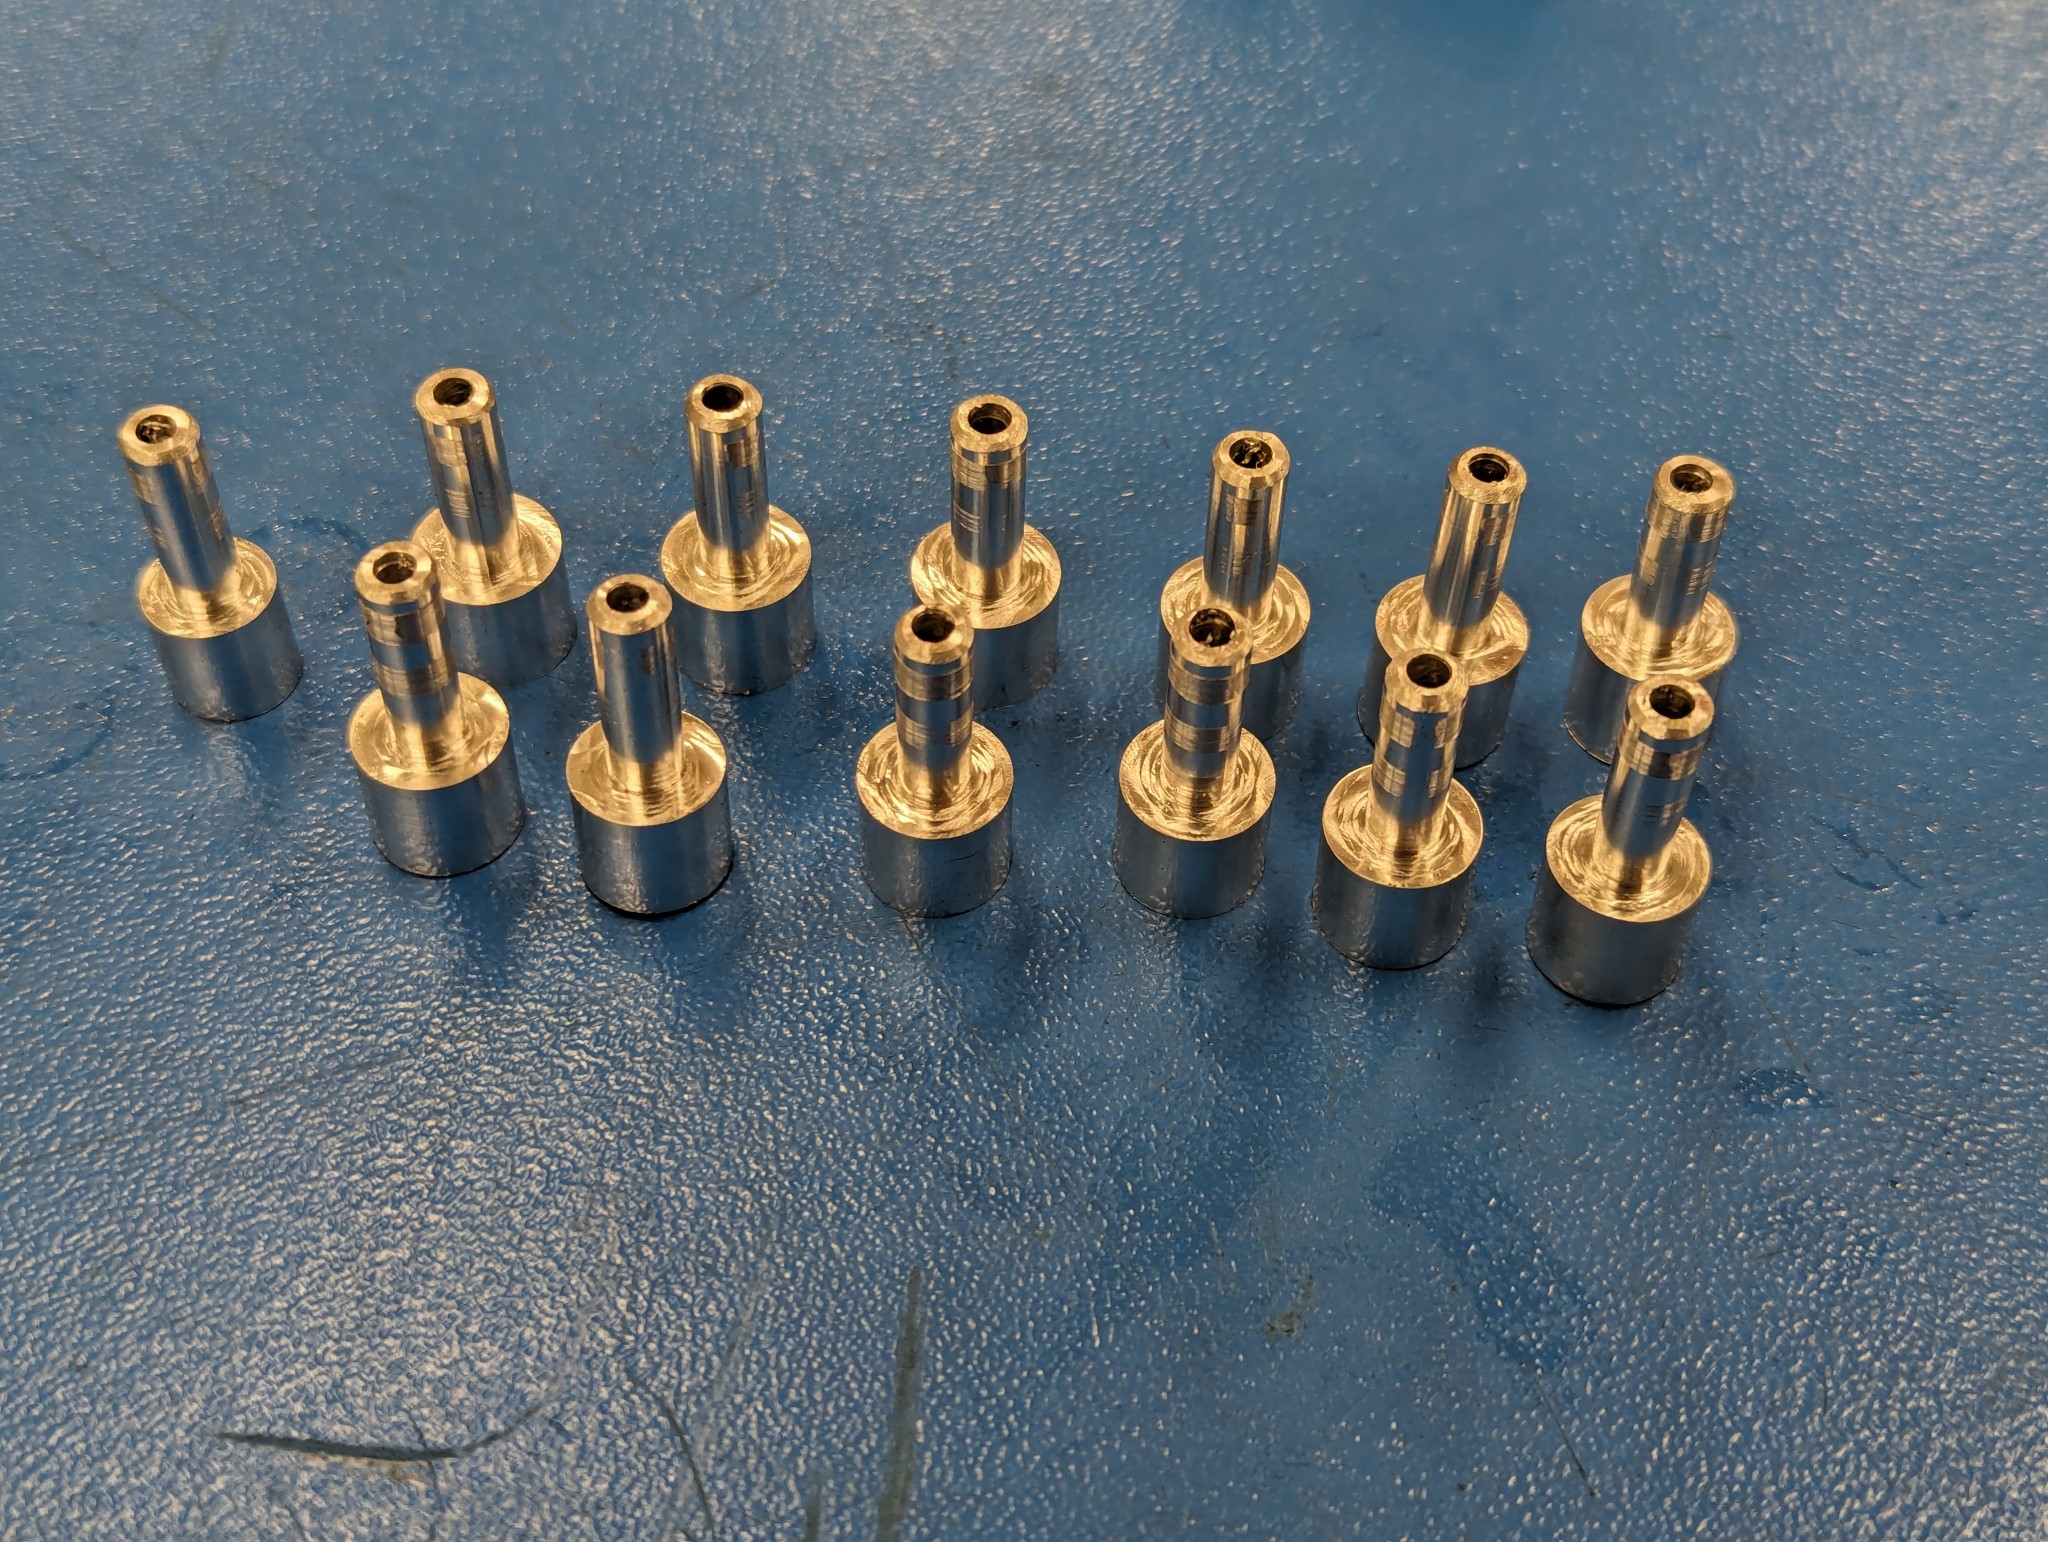
As I have no lathe this meant lots of cranking on the rotary table but in the end I had 13 adapters made so that I could install the fittings and test the metering block.
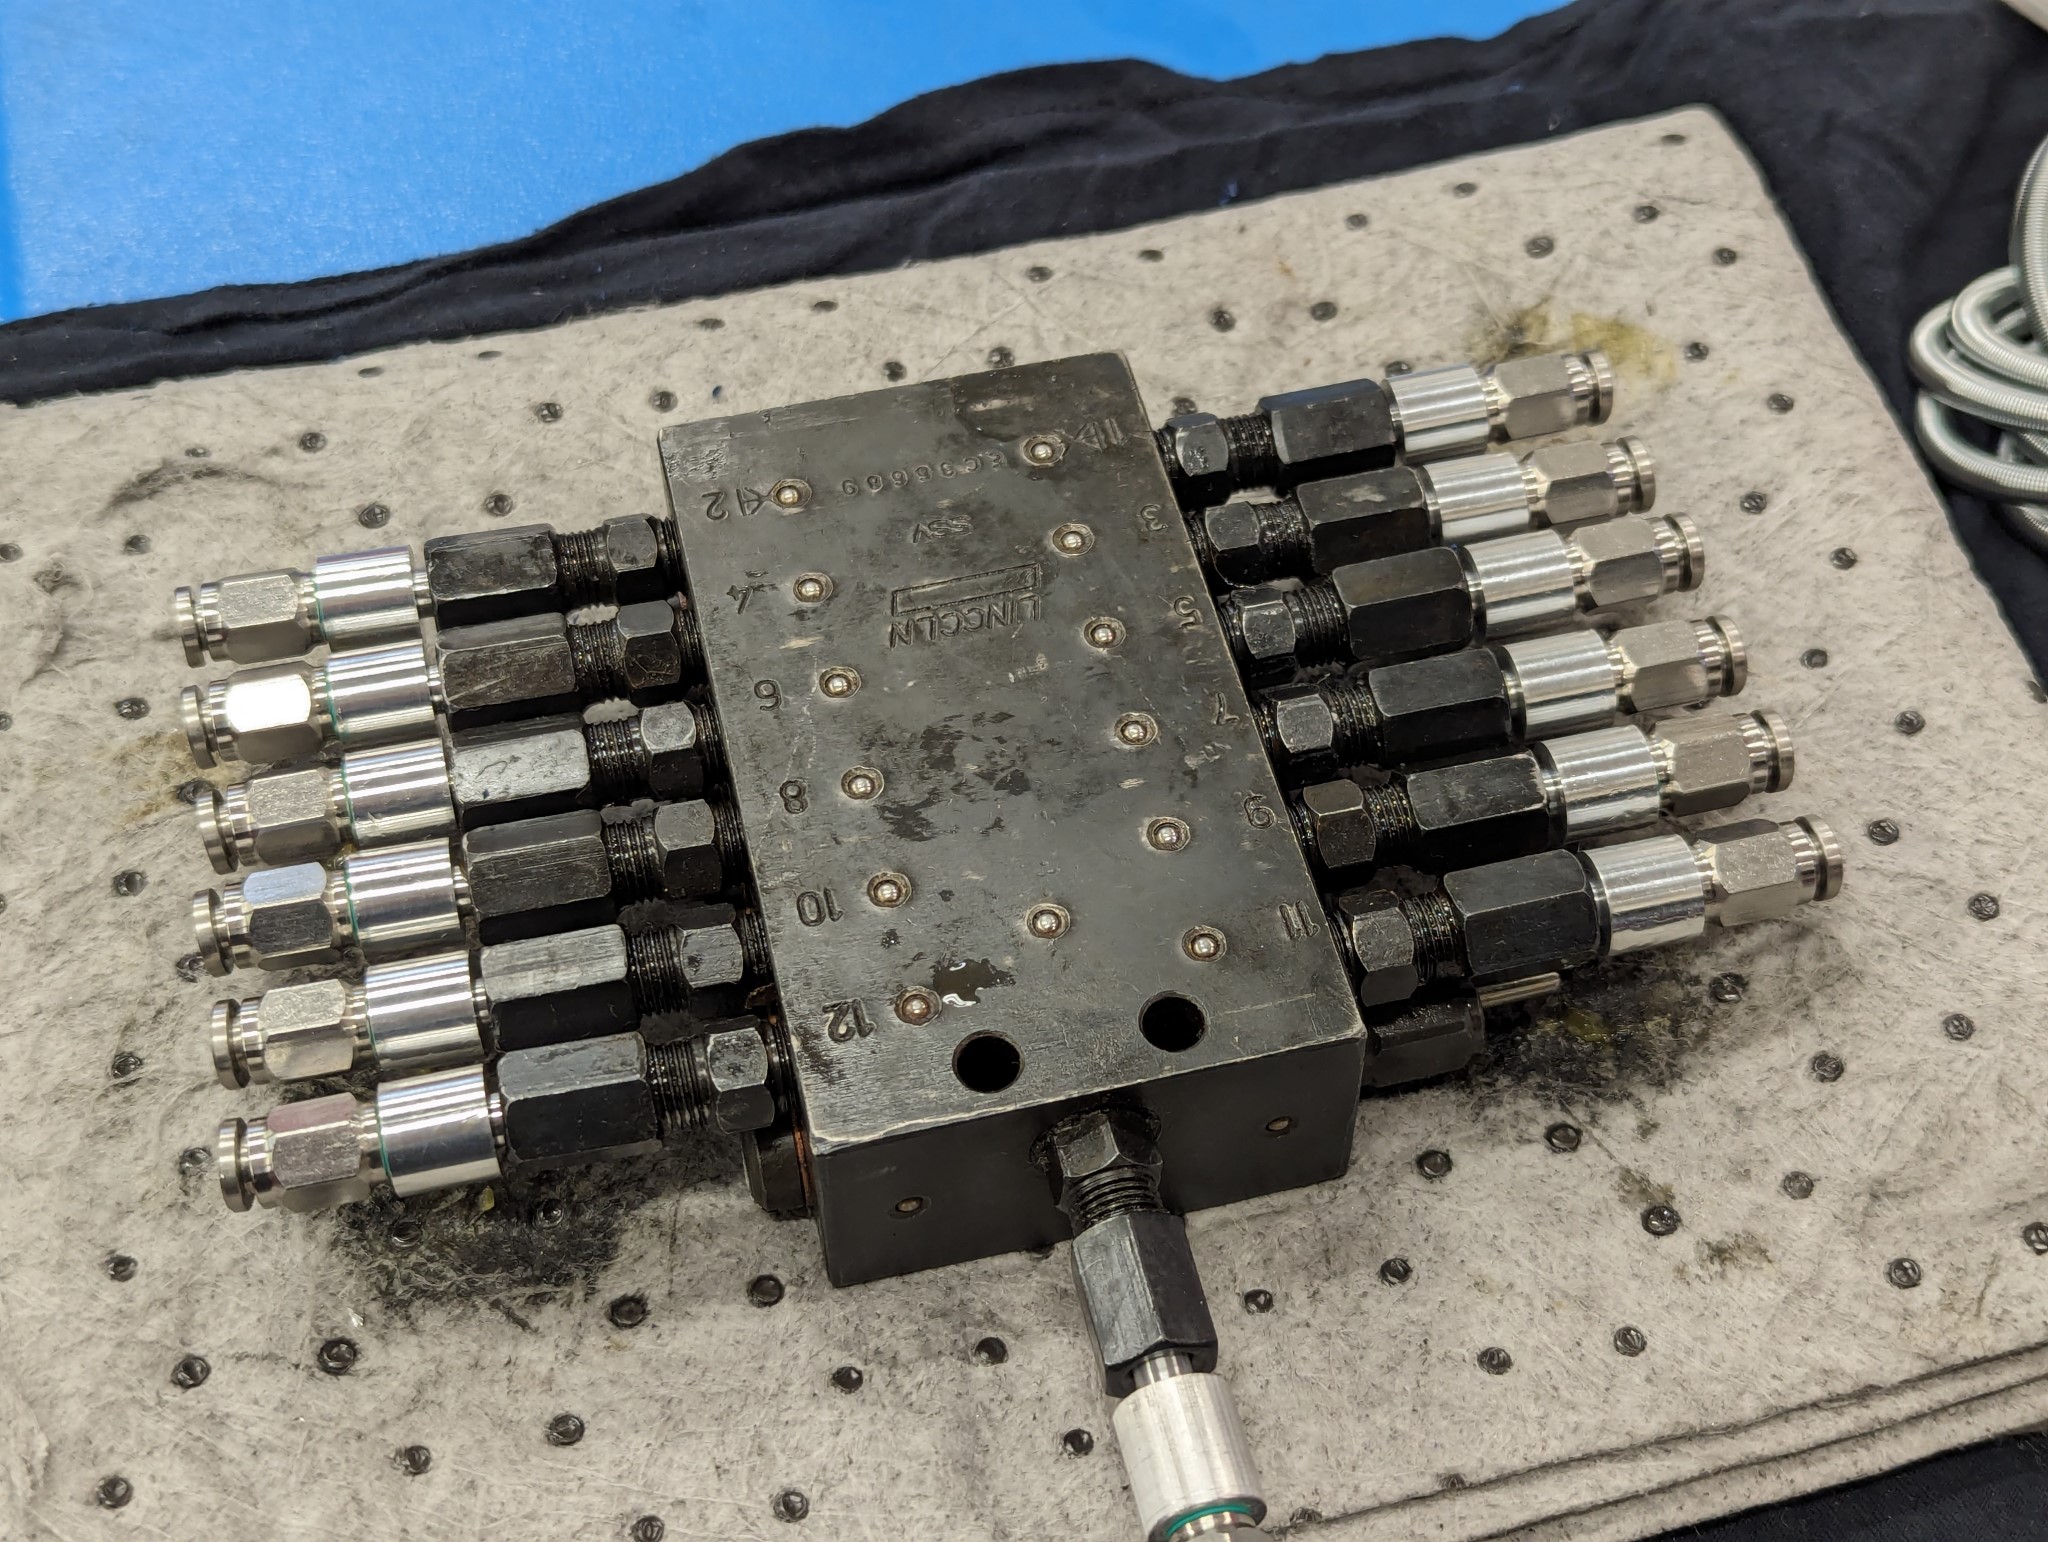
First I thought the block was faulty as it seemed to be completely blocked but it turned out to just be full of partially dried grease which took a while to flush out with the way oil I'm using.
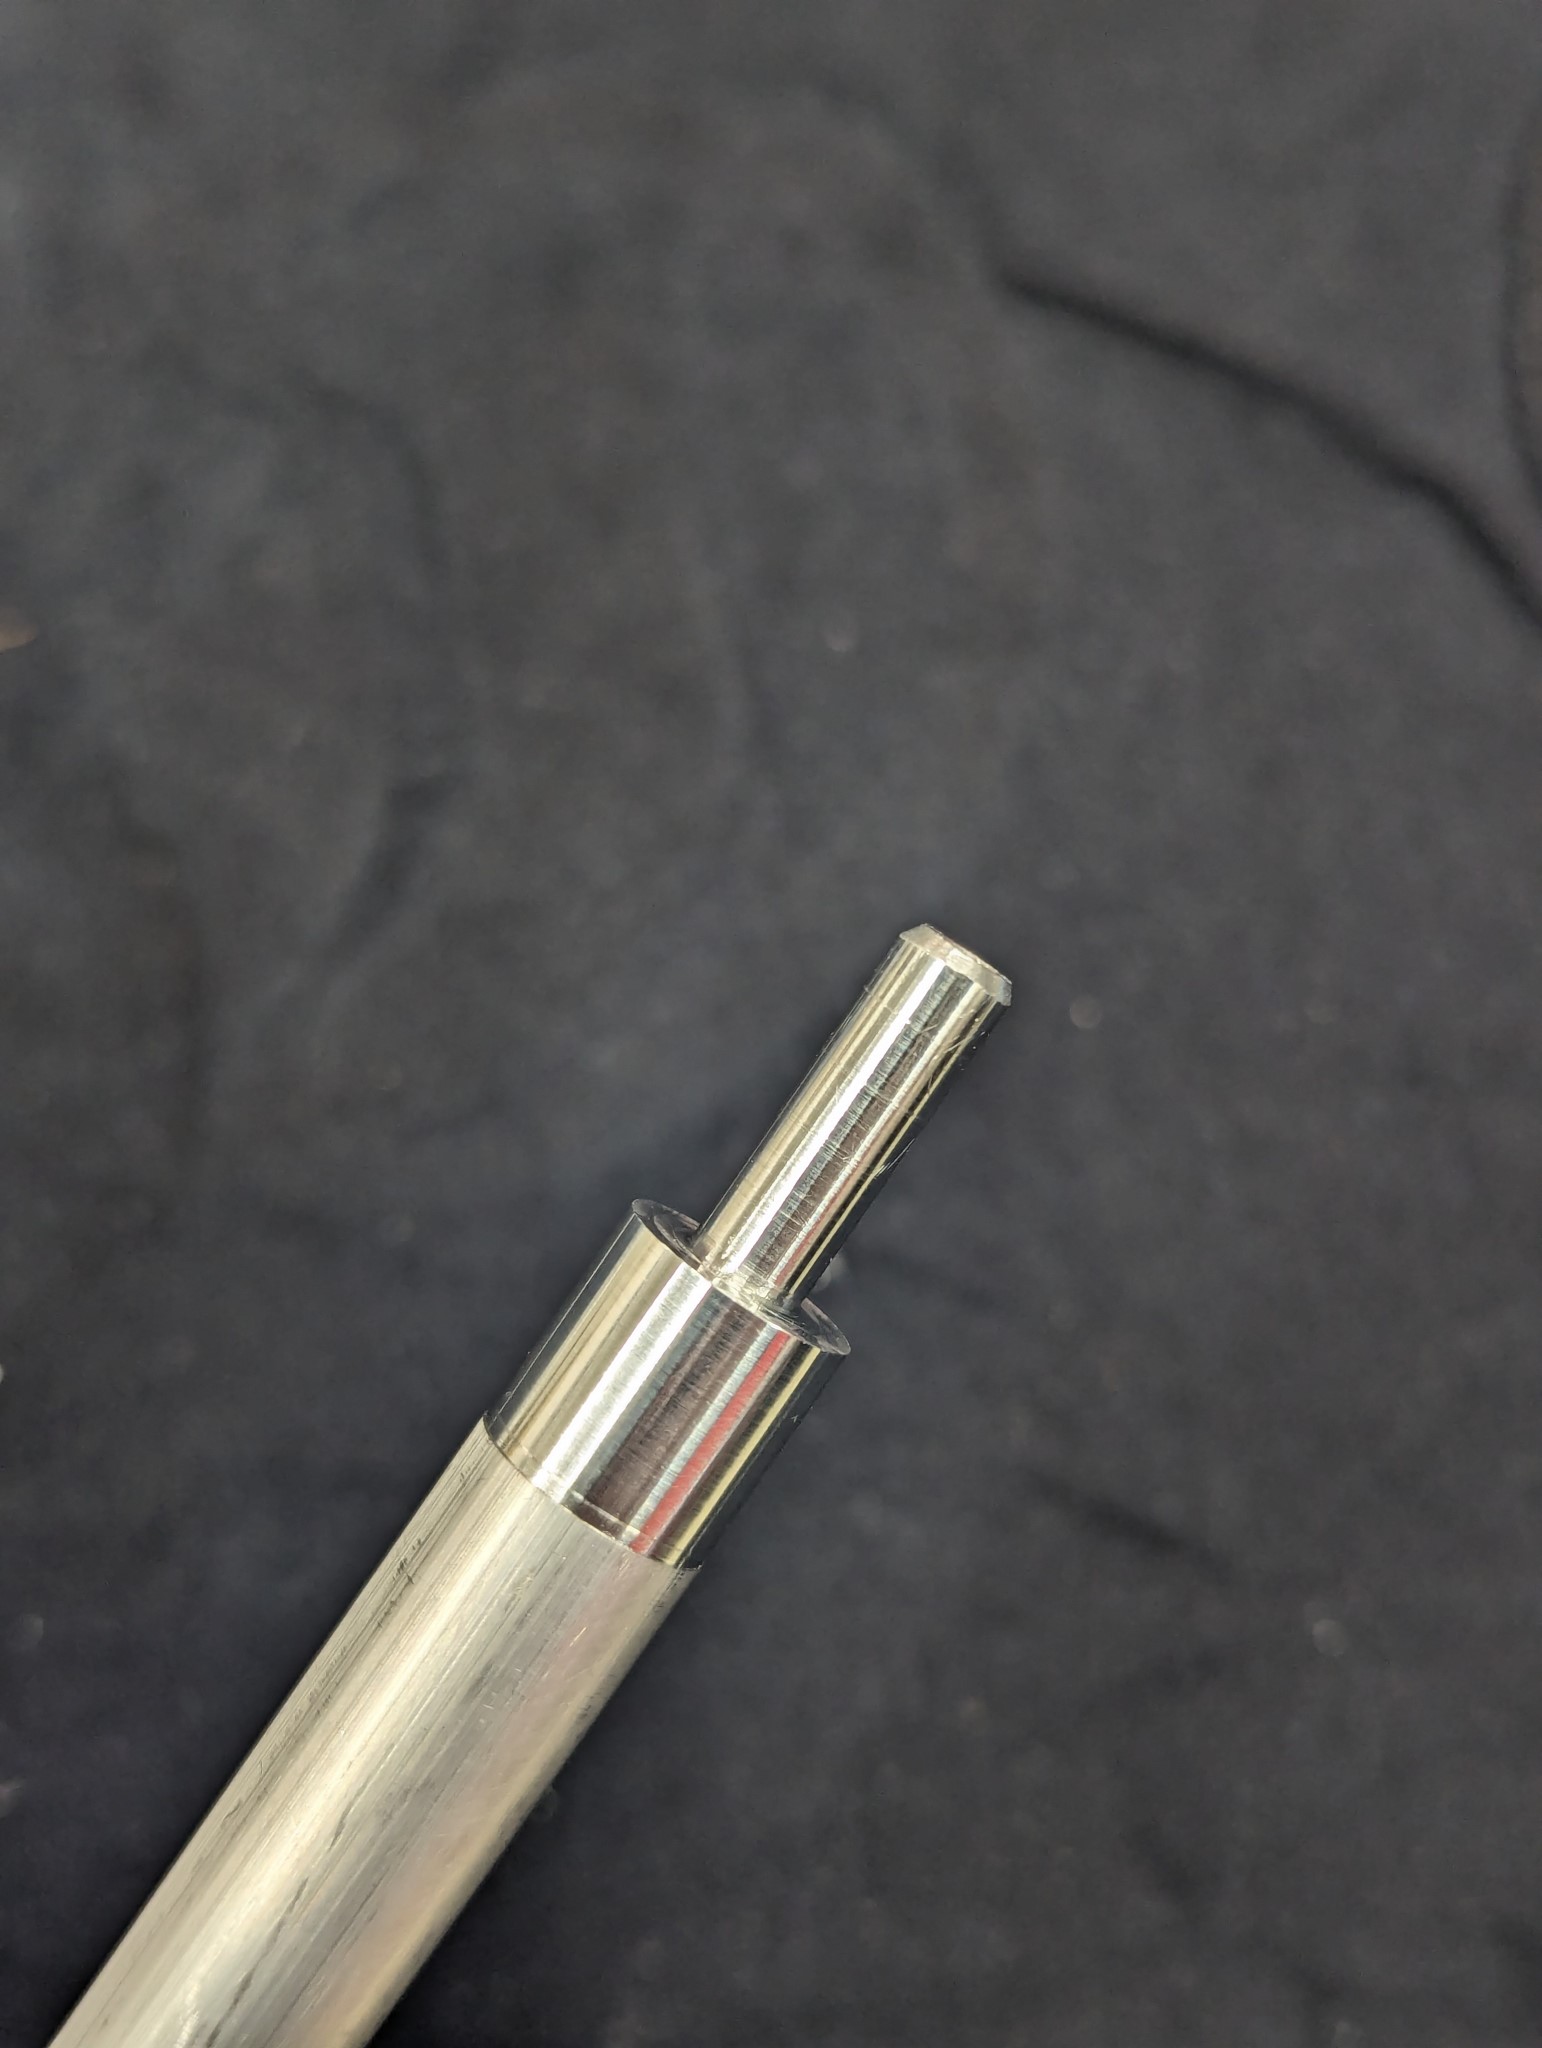
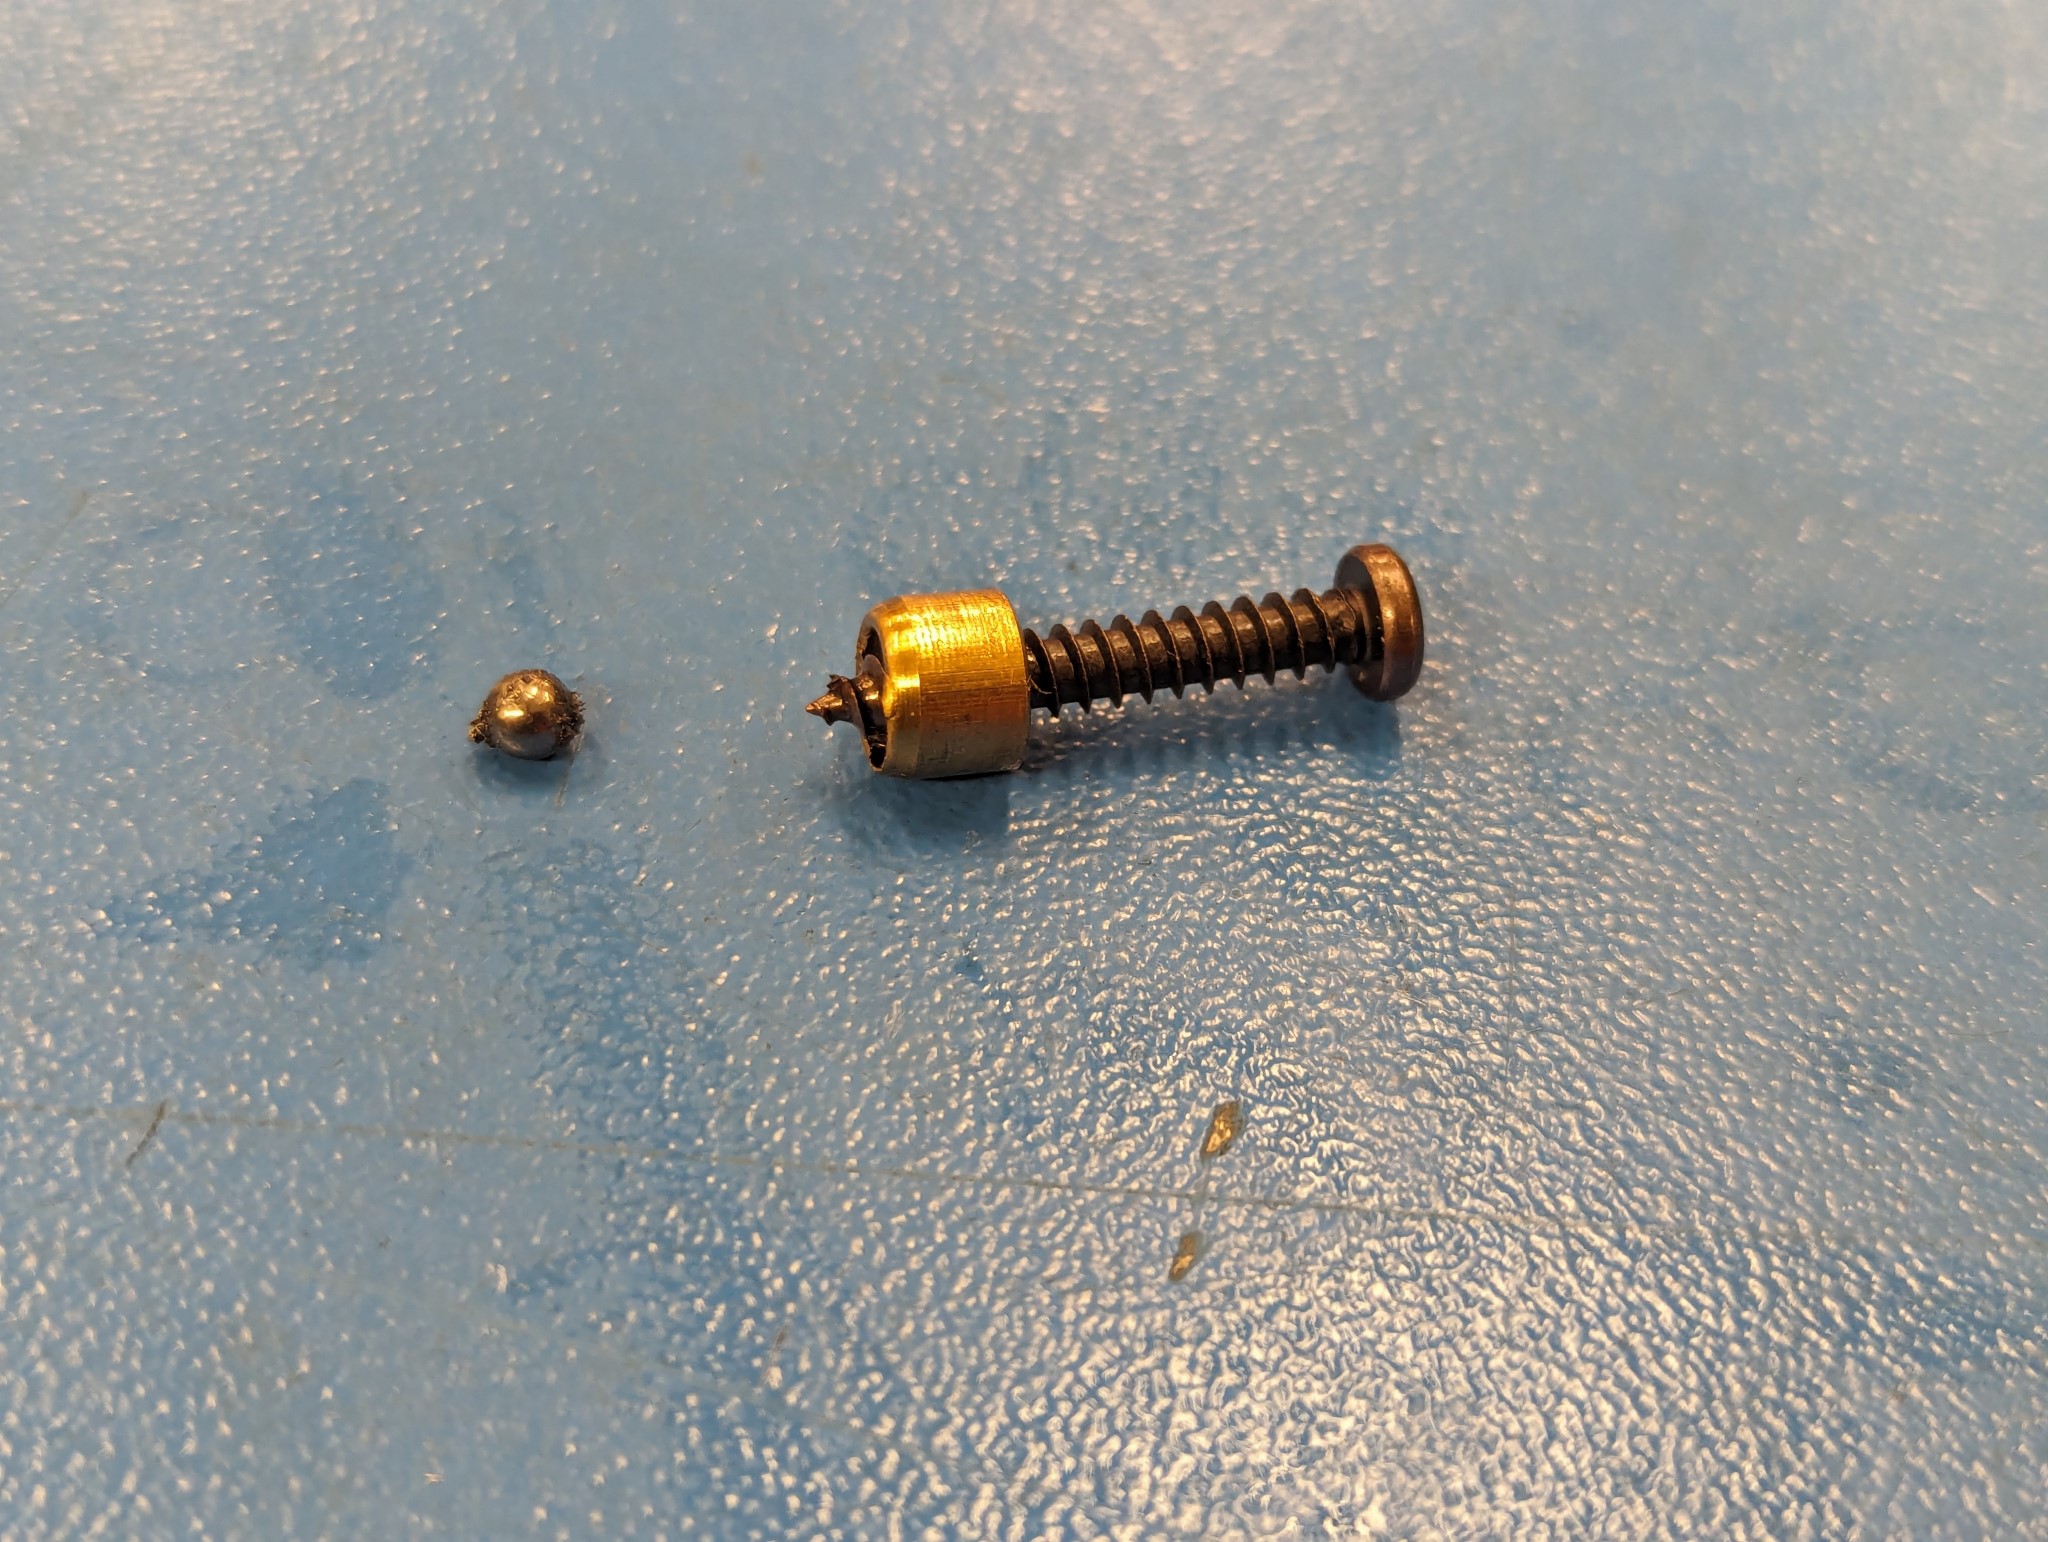
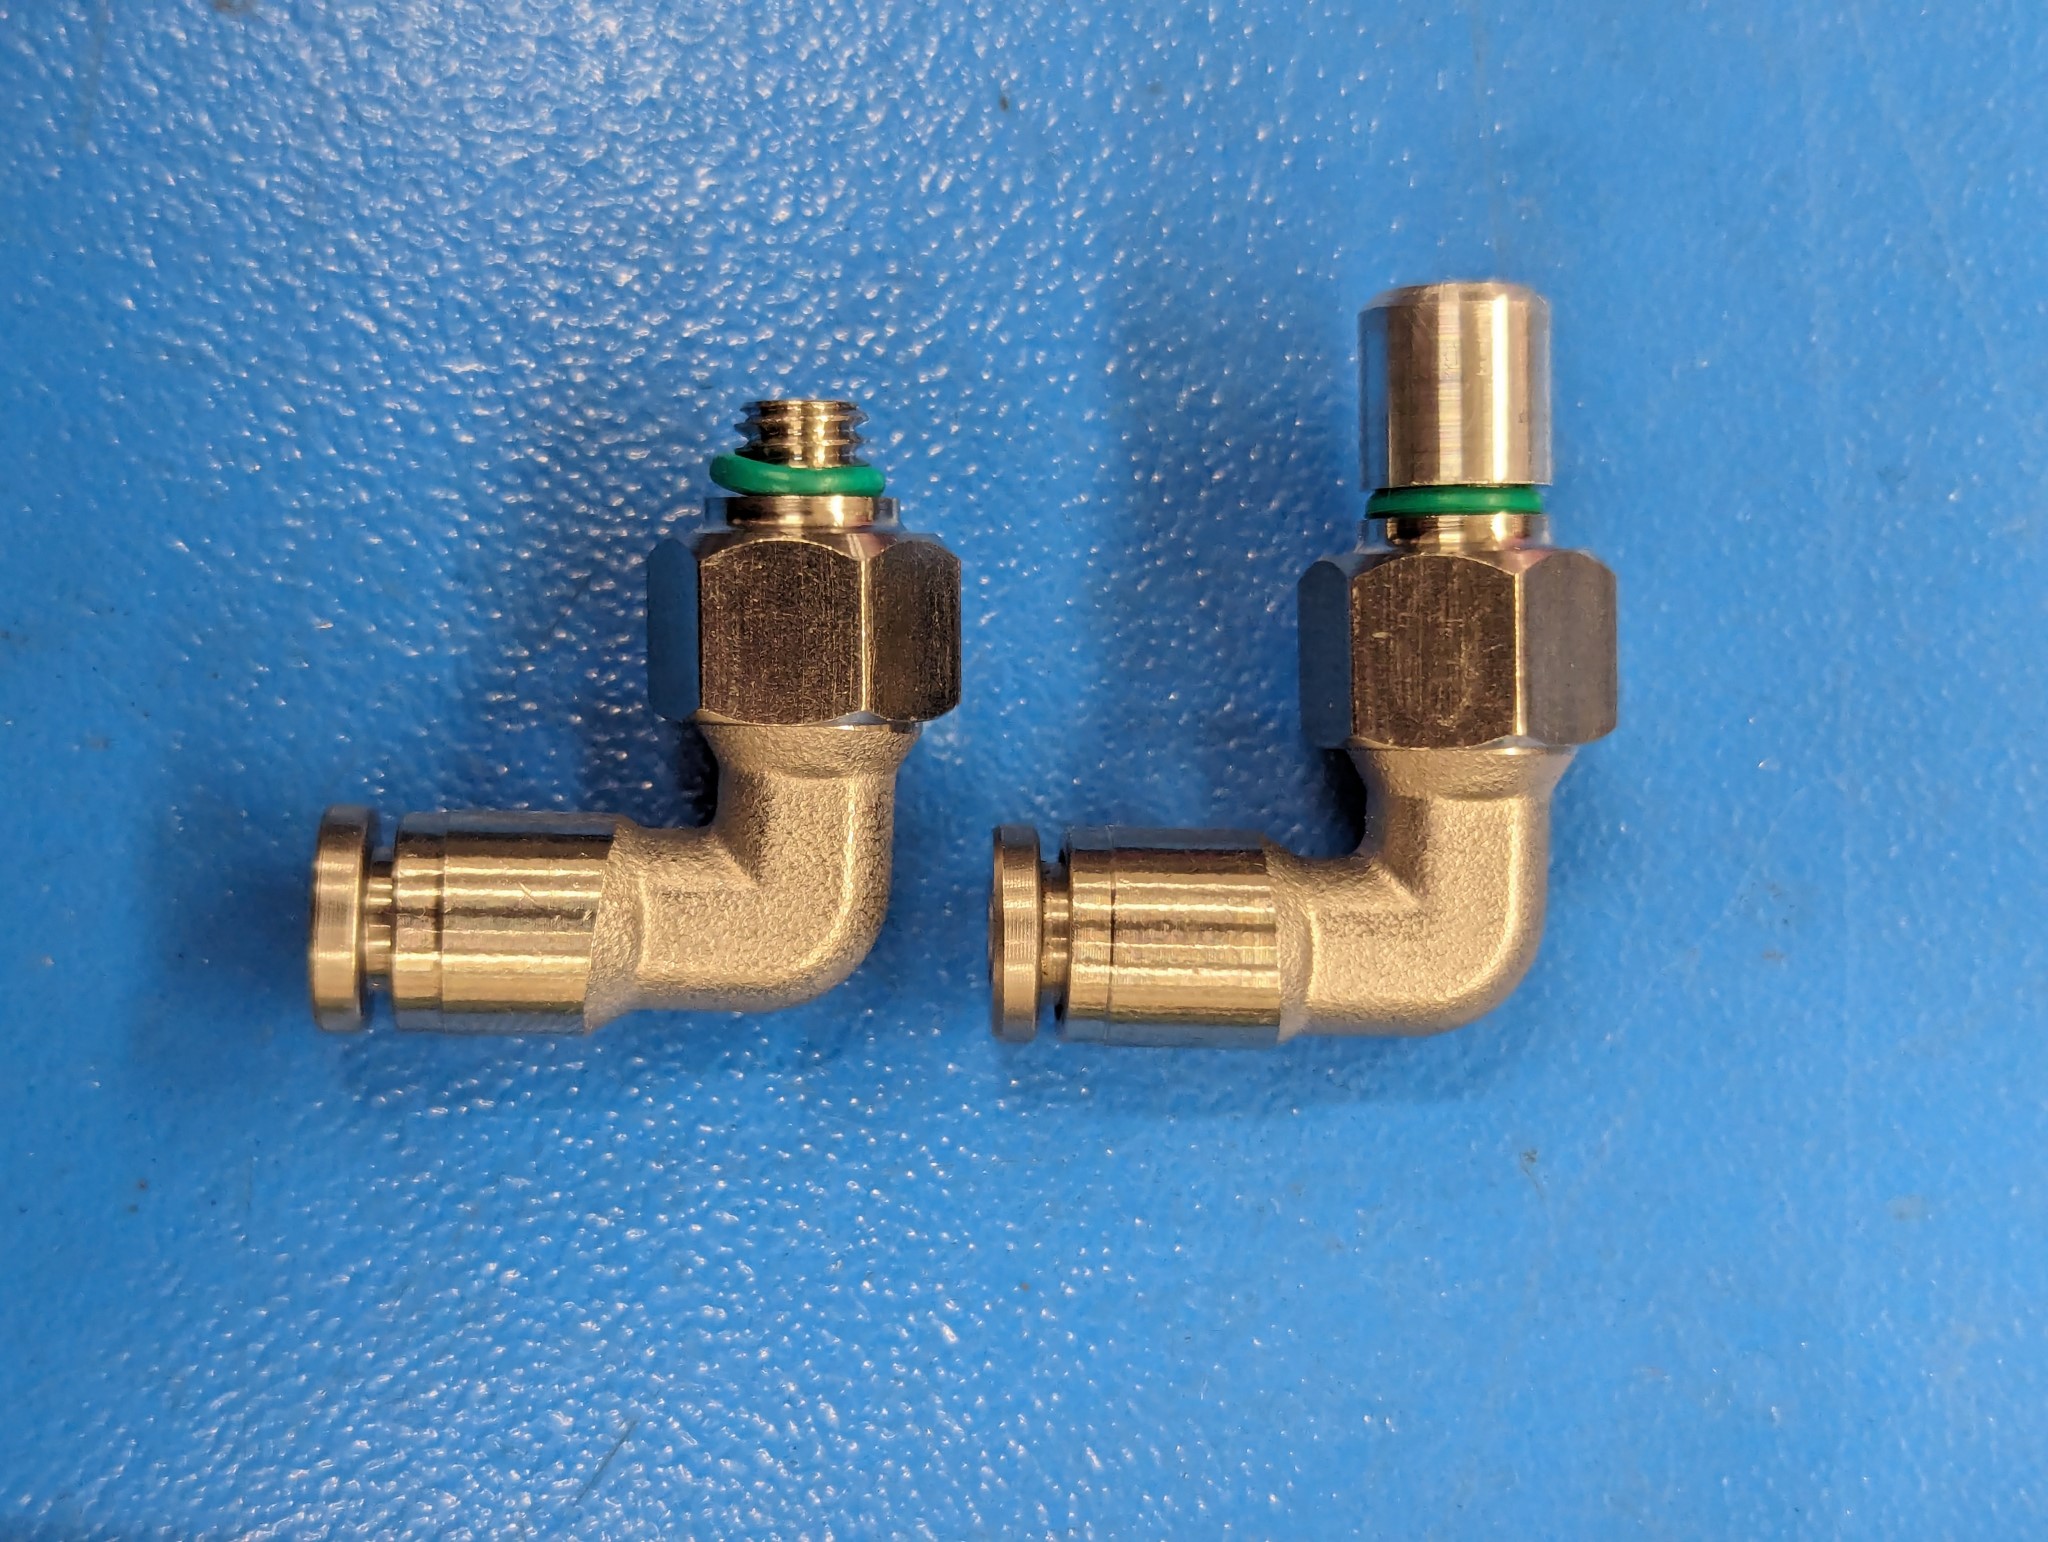
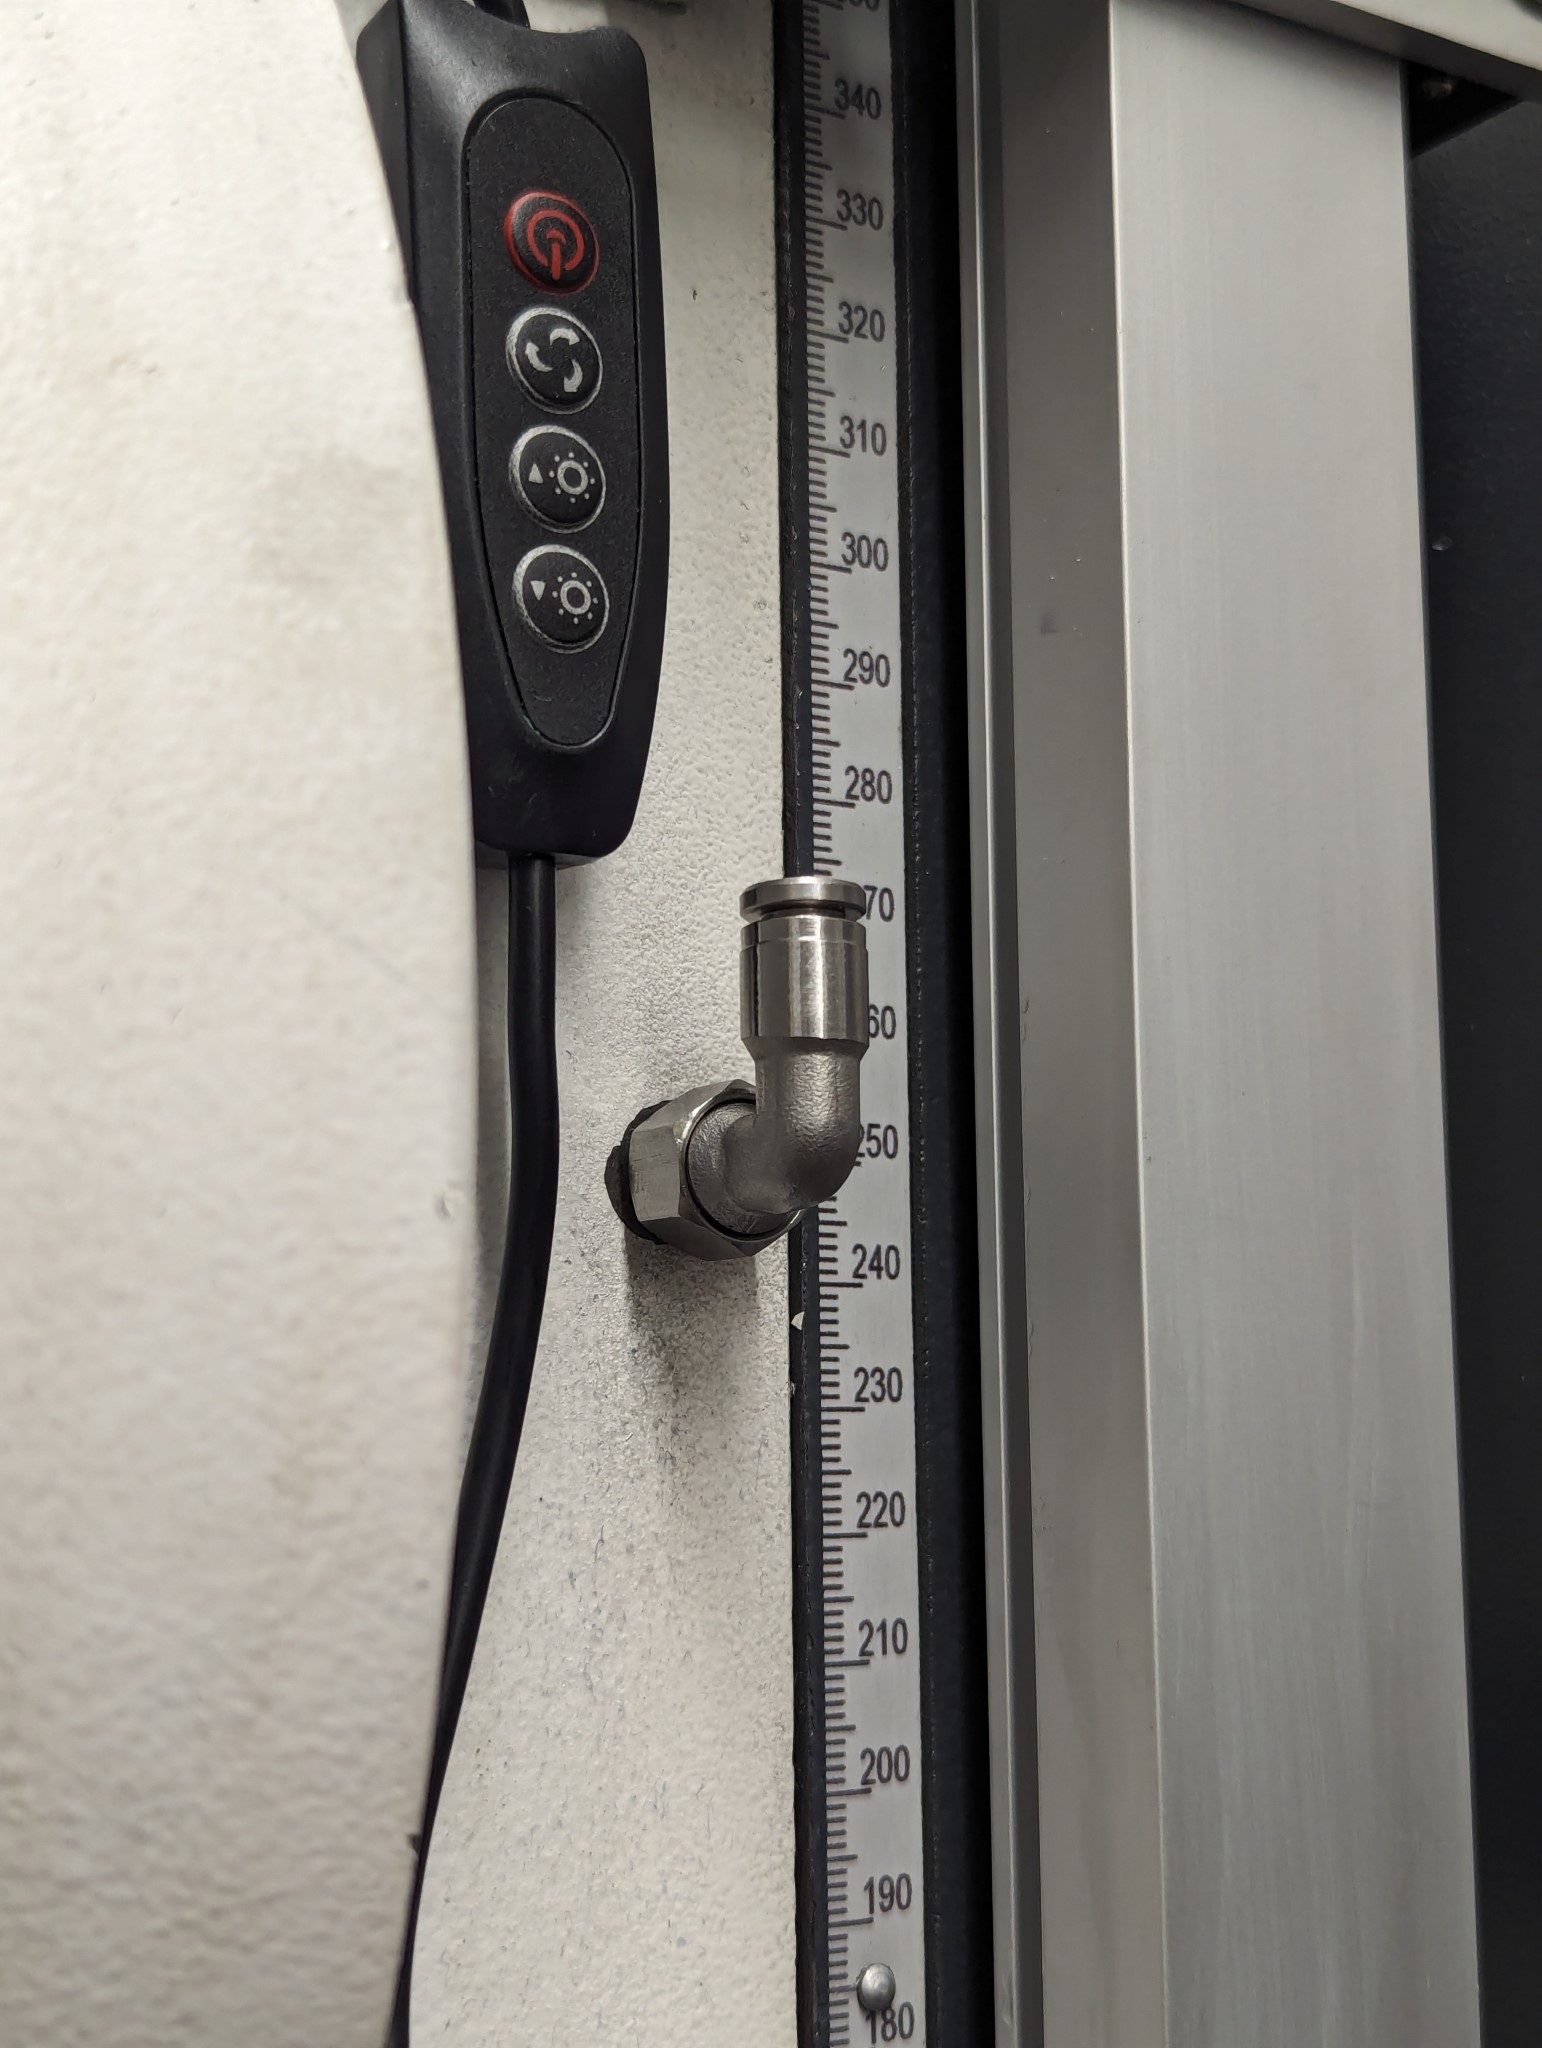
Next up I removed the few ball oilers that came with my machine using a small screw (the machine only had 4 of them for all axis combined).
I then made adapters that I could push into the holes where the ball oilers had been converting them to a M6 thread.
I intentionally did the mechanical stuff last as I knew it would force me to tear down the mill a few times in order to get measurements and test the new parts which in turn would prevent me from milling other stuff.
Two years ago I started collecting parts for a central lubrication system and the parts had been sitting in a box for almost two years. But now that I was about to pull the machine apart I figured it was time to install it.
I purchased a clone of SKF Lincoln metering device from Aliexpress and specified that I wanted 6 mm fittings.
I thought that meant M6 threads but instead the block arrived with 6mm crimp fittings using some type of ferrules I knew I'd never be able to find locally.
This meant I had one chance to tighten the connections before the ferrules would be wasted. I also needed to adapt the connections so I that could use the push in fittings for 4mm hose with M6 thread that I had already purchased.
As I have no lathe this meant lots of cranking on the rotary table but in the end I had 13 adapters made so that I could install the fittings and test the metering block.
First I thought the block was faulty as it seemed to be completely blocked but it turned out to just be full of partially dried grease which took a while to flush out with the way oil I'm using.
Next up I removed the few ball oilers that came with my machine using a small screw (the machine only had 4 of them for all axis combined).
I then made adapters that I could push into the holes where the ball oilers had been converting them to a M6 thread.
Attachments:
Please Log in or Create an account to join the conversation.
18 Feb 2024 18:05 #293693
by Unlogic
Replied by Unlogic on topic Optimum Optimill MH50V CNC conversion
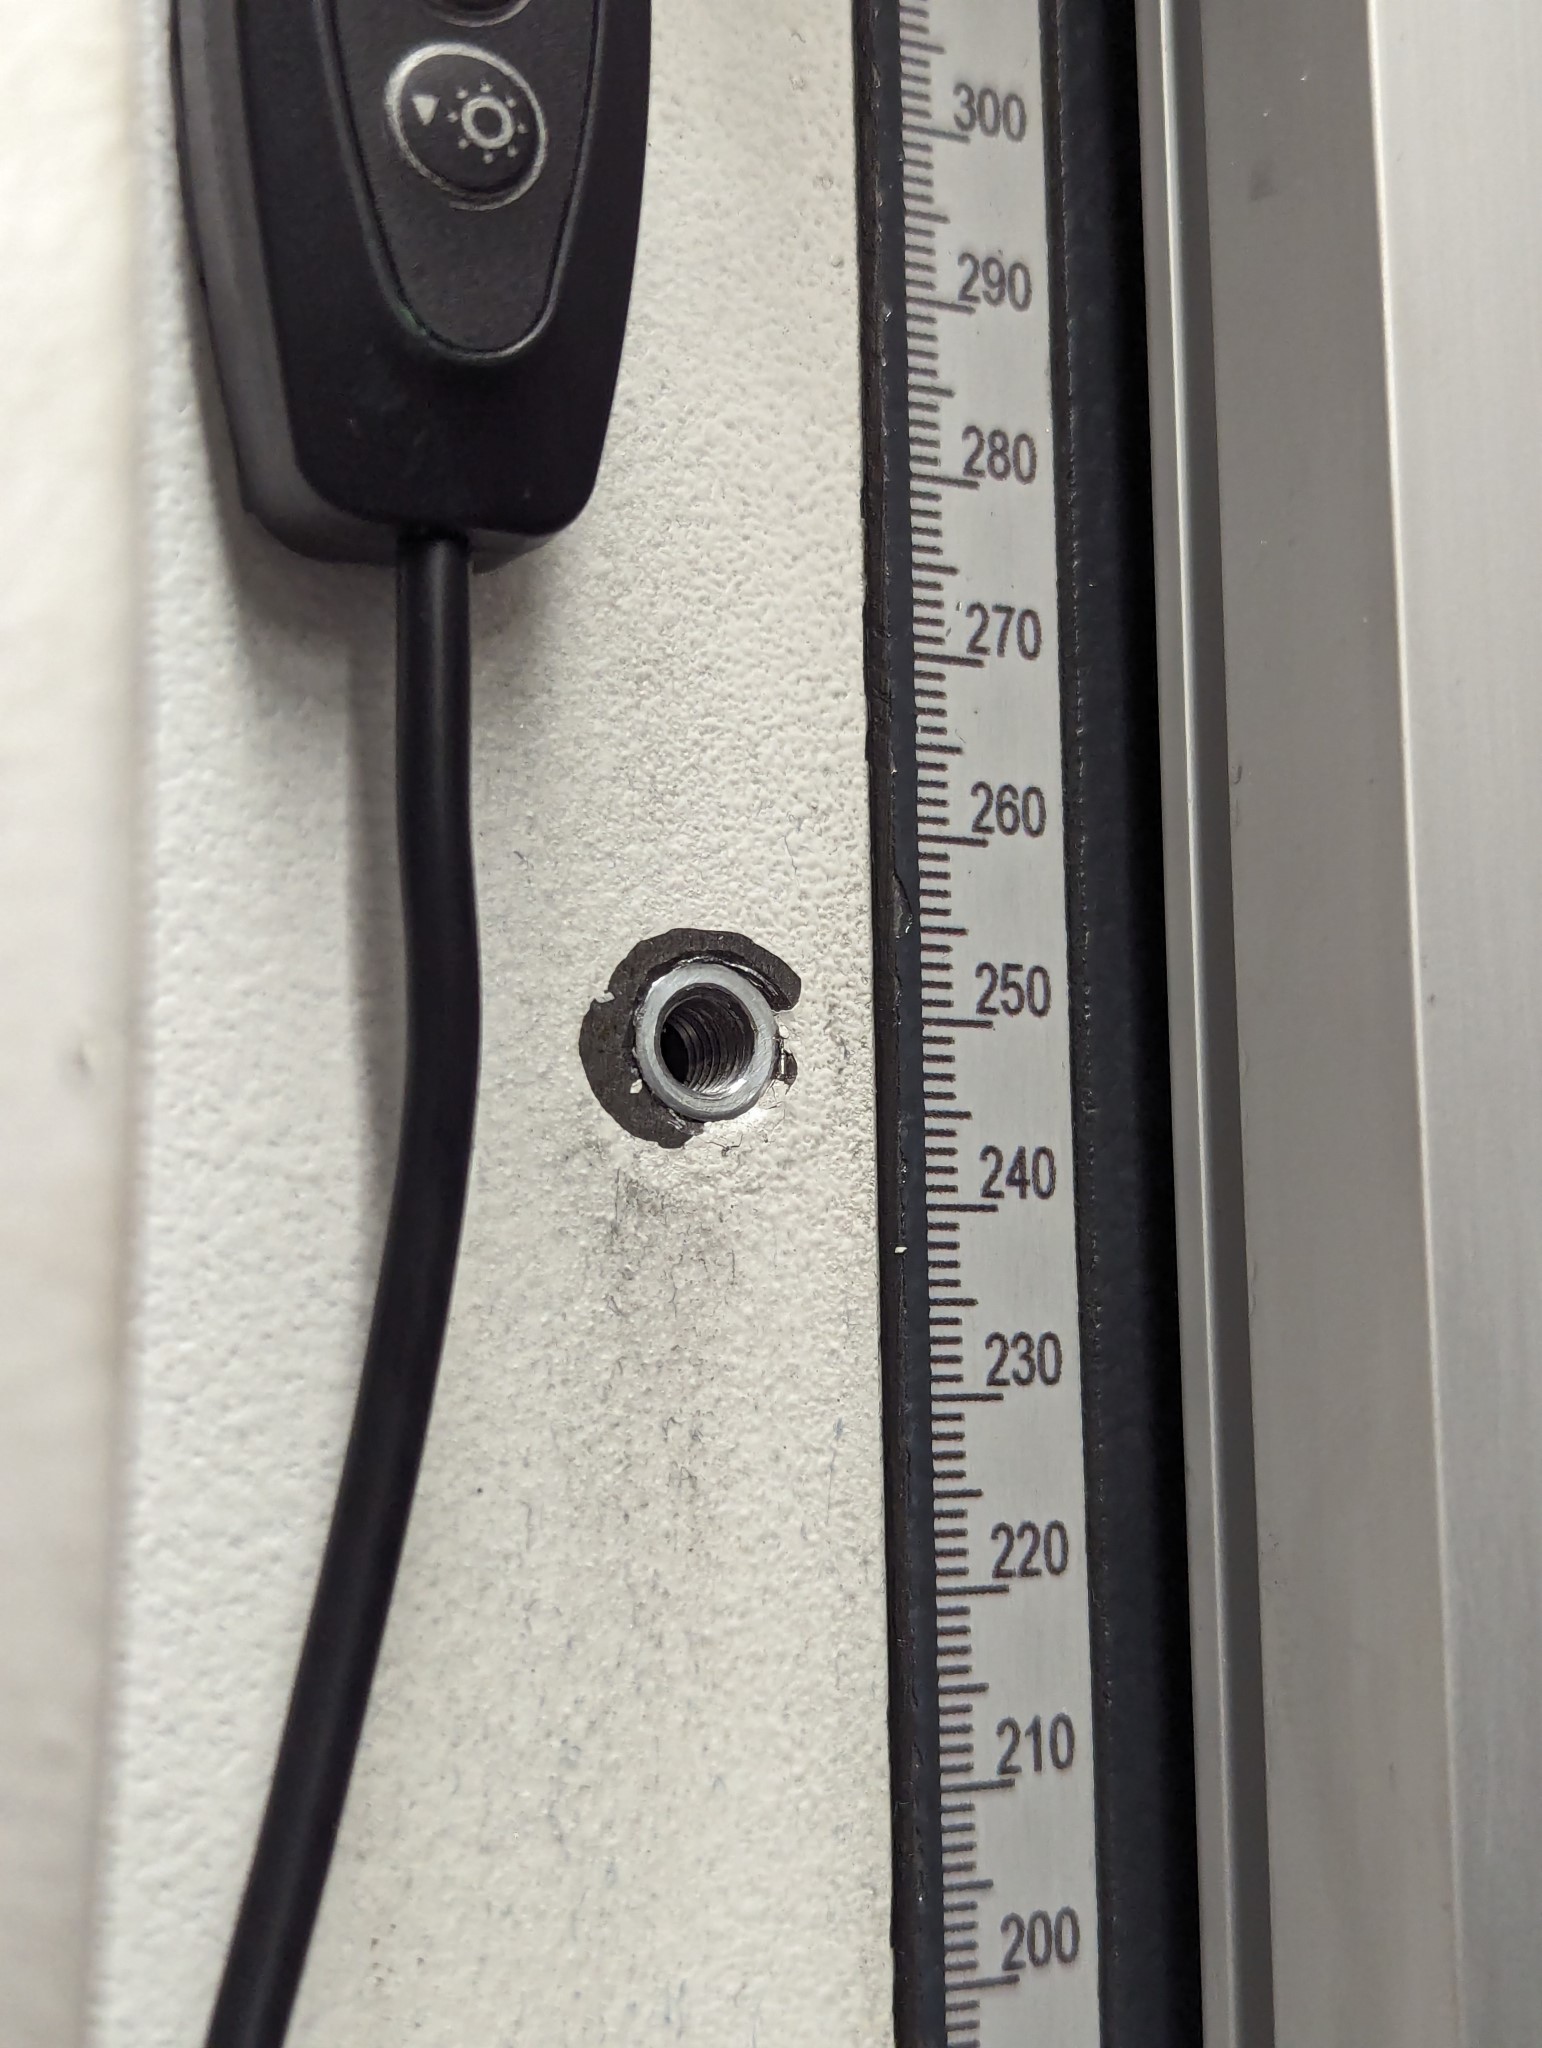
A continuation of the previous post.
Attachments:
Please Log in or Create an account to join the conversation.
18 Feb 2024 18:21 #293694
by Unlogic
Replied by Unlogic on topic Optimum Optimill MH50V CNC conversion
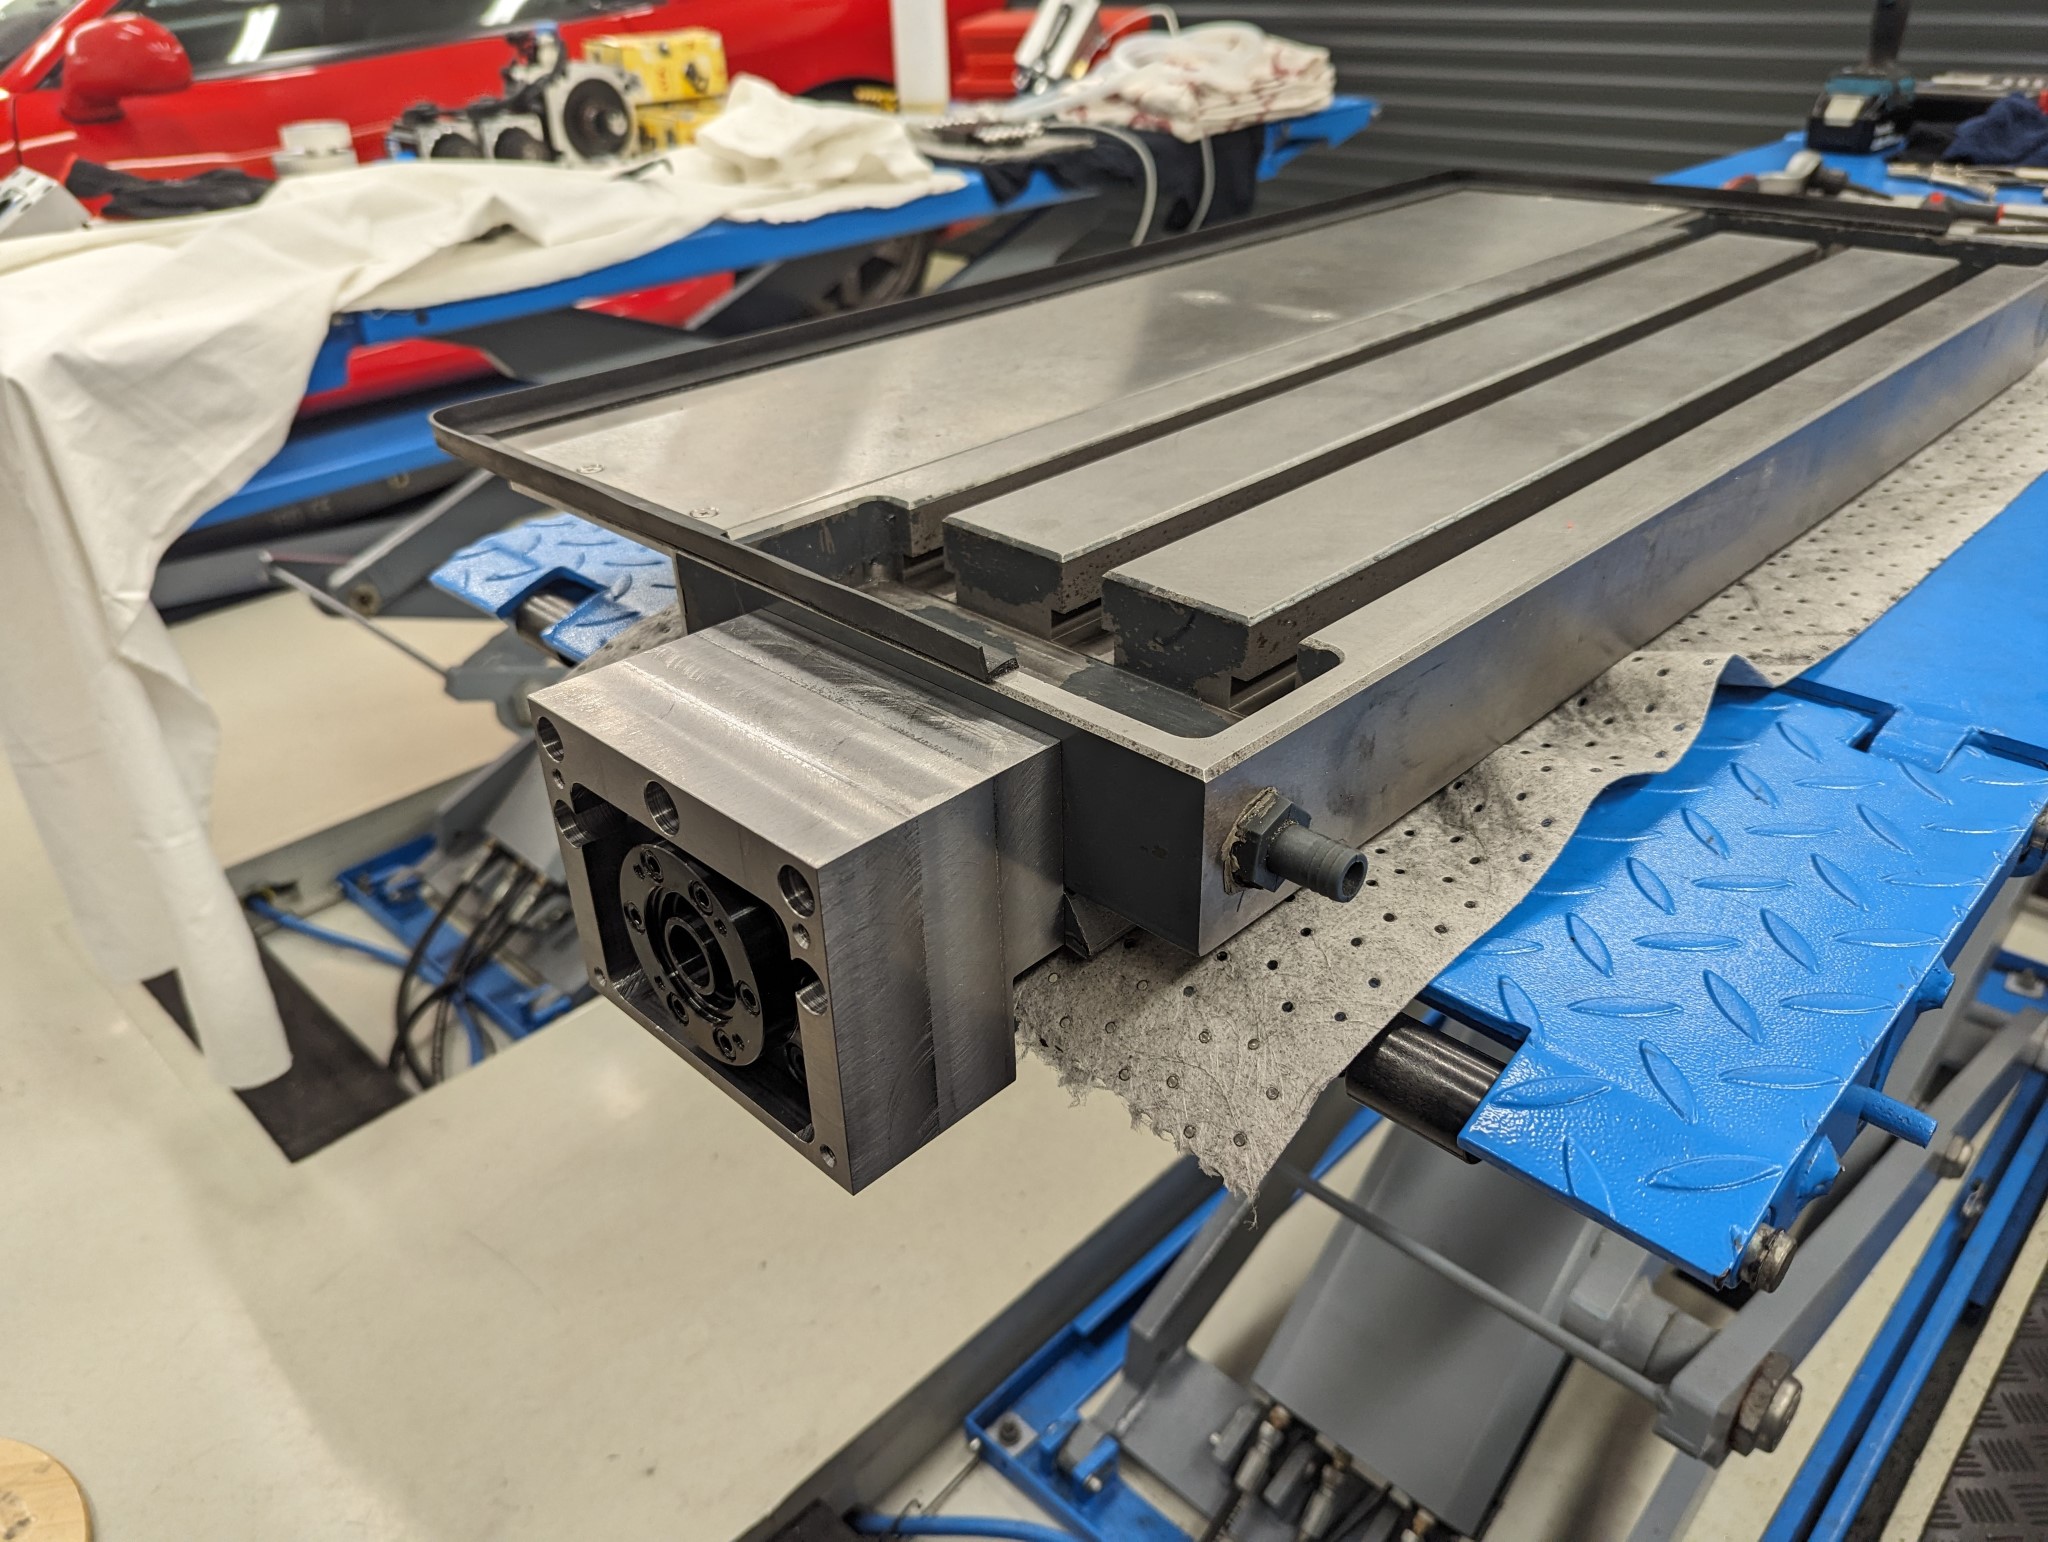
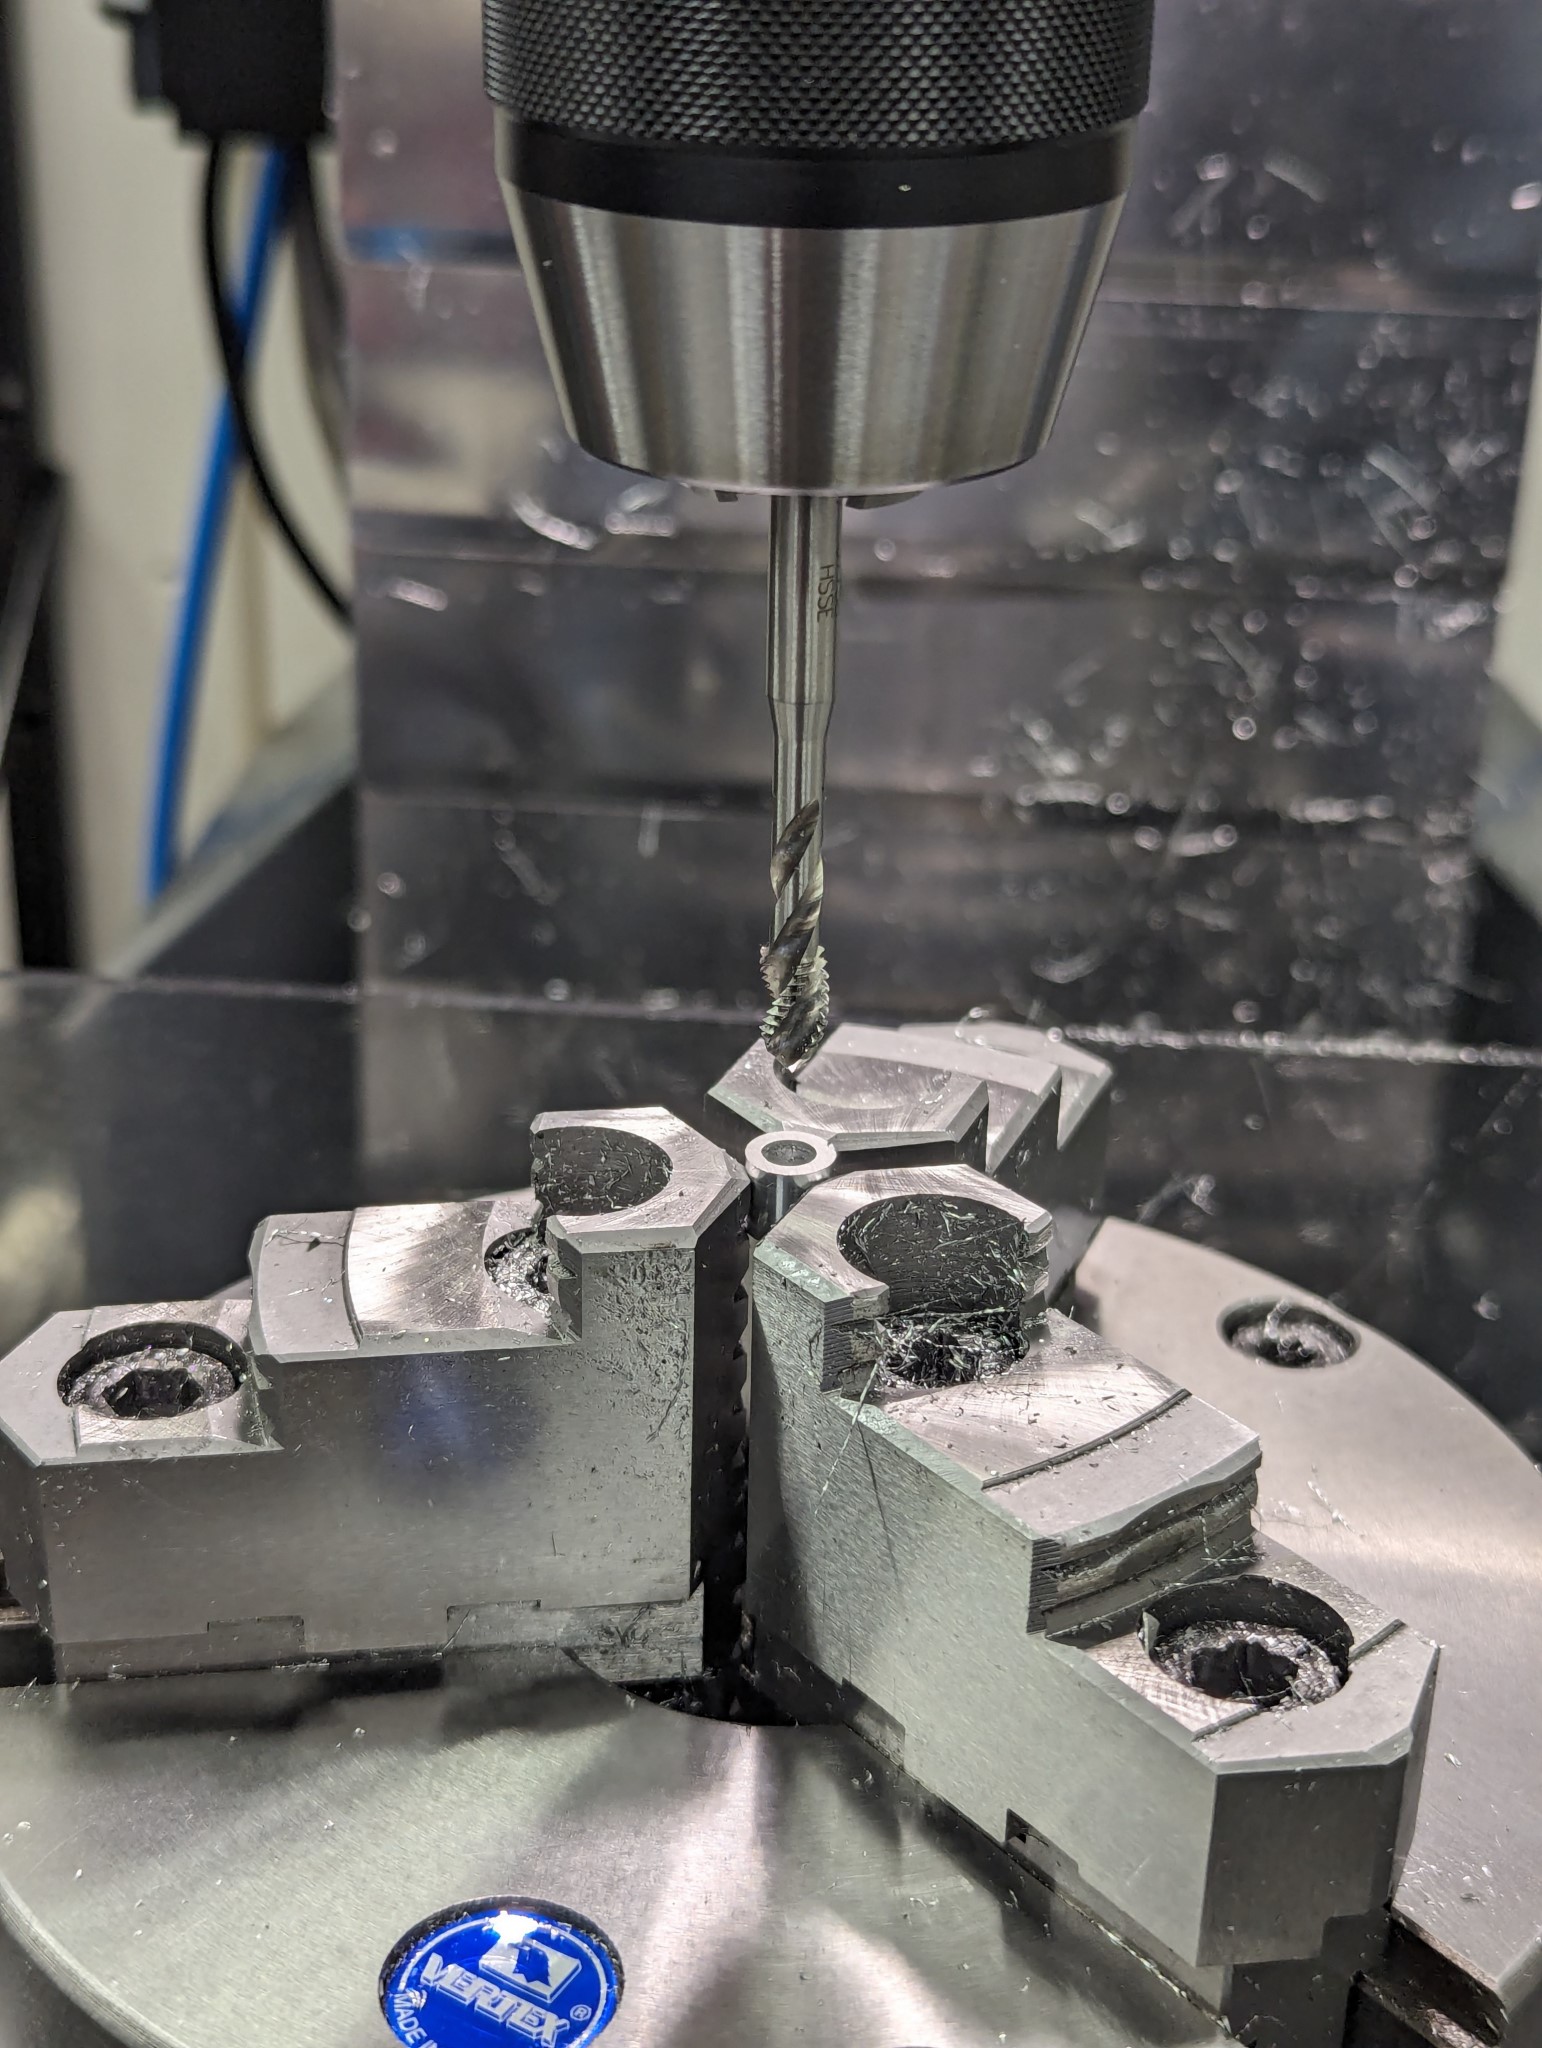
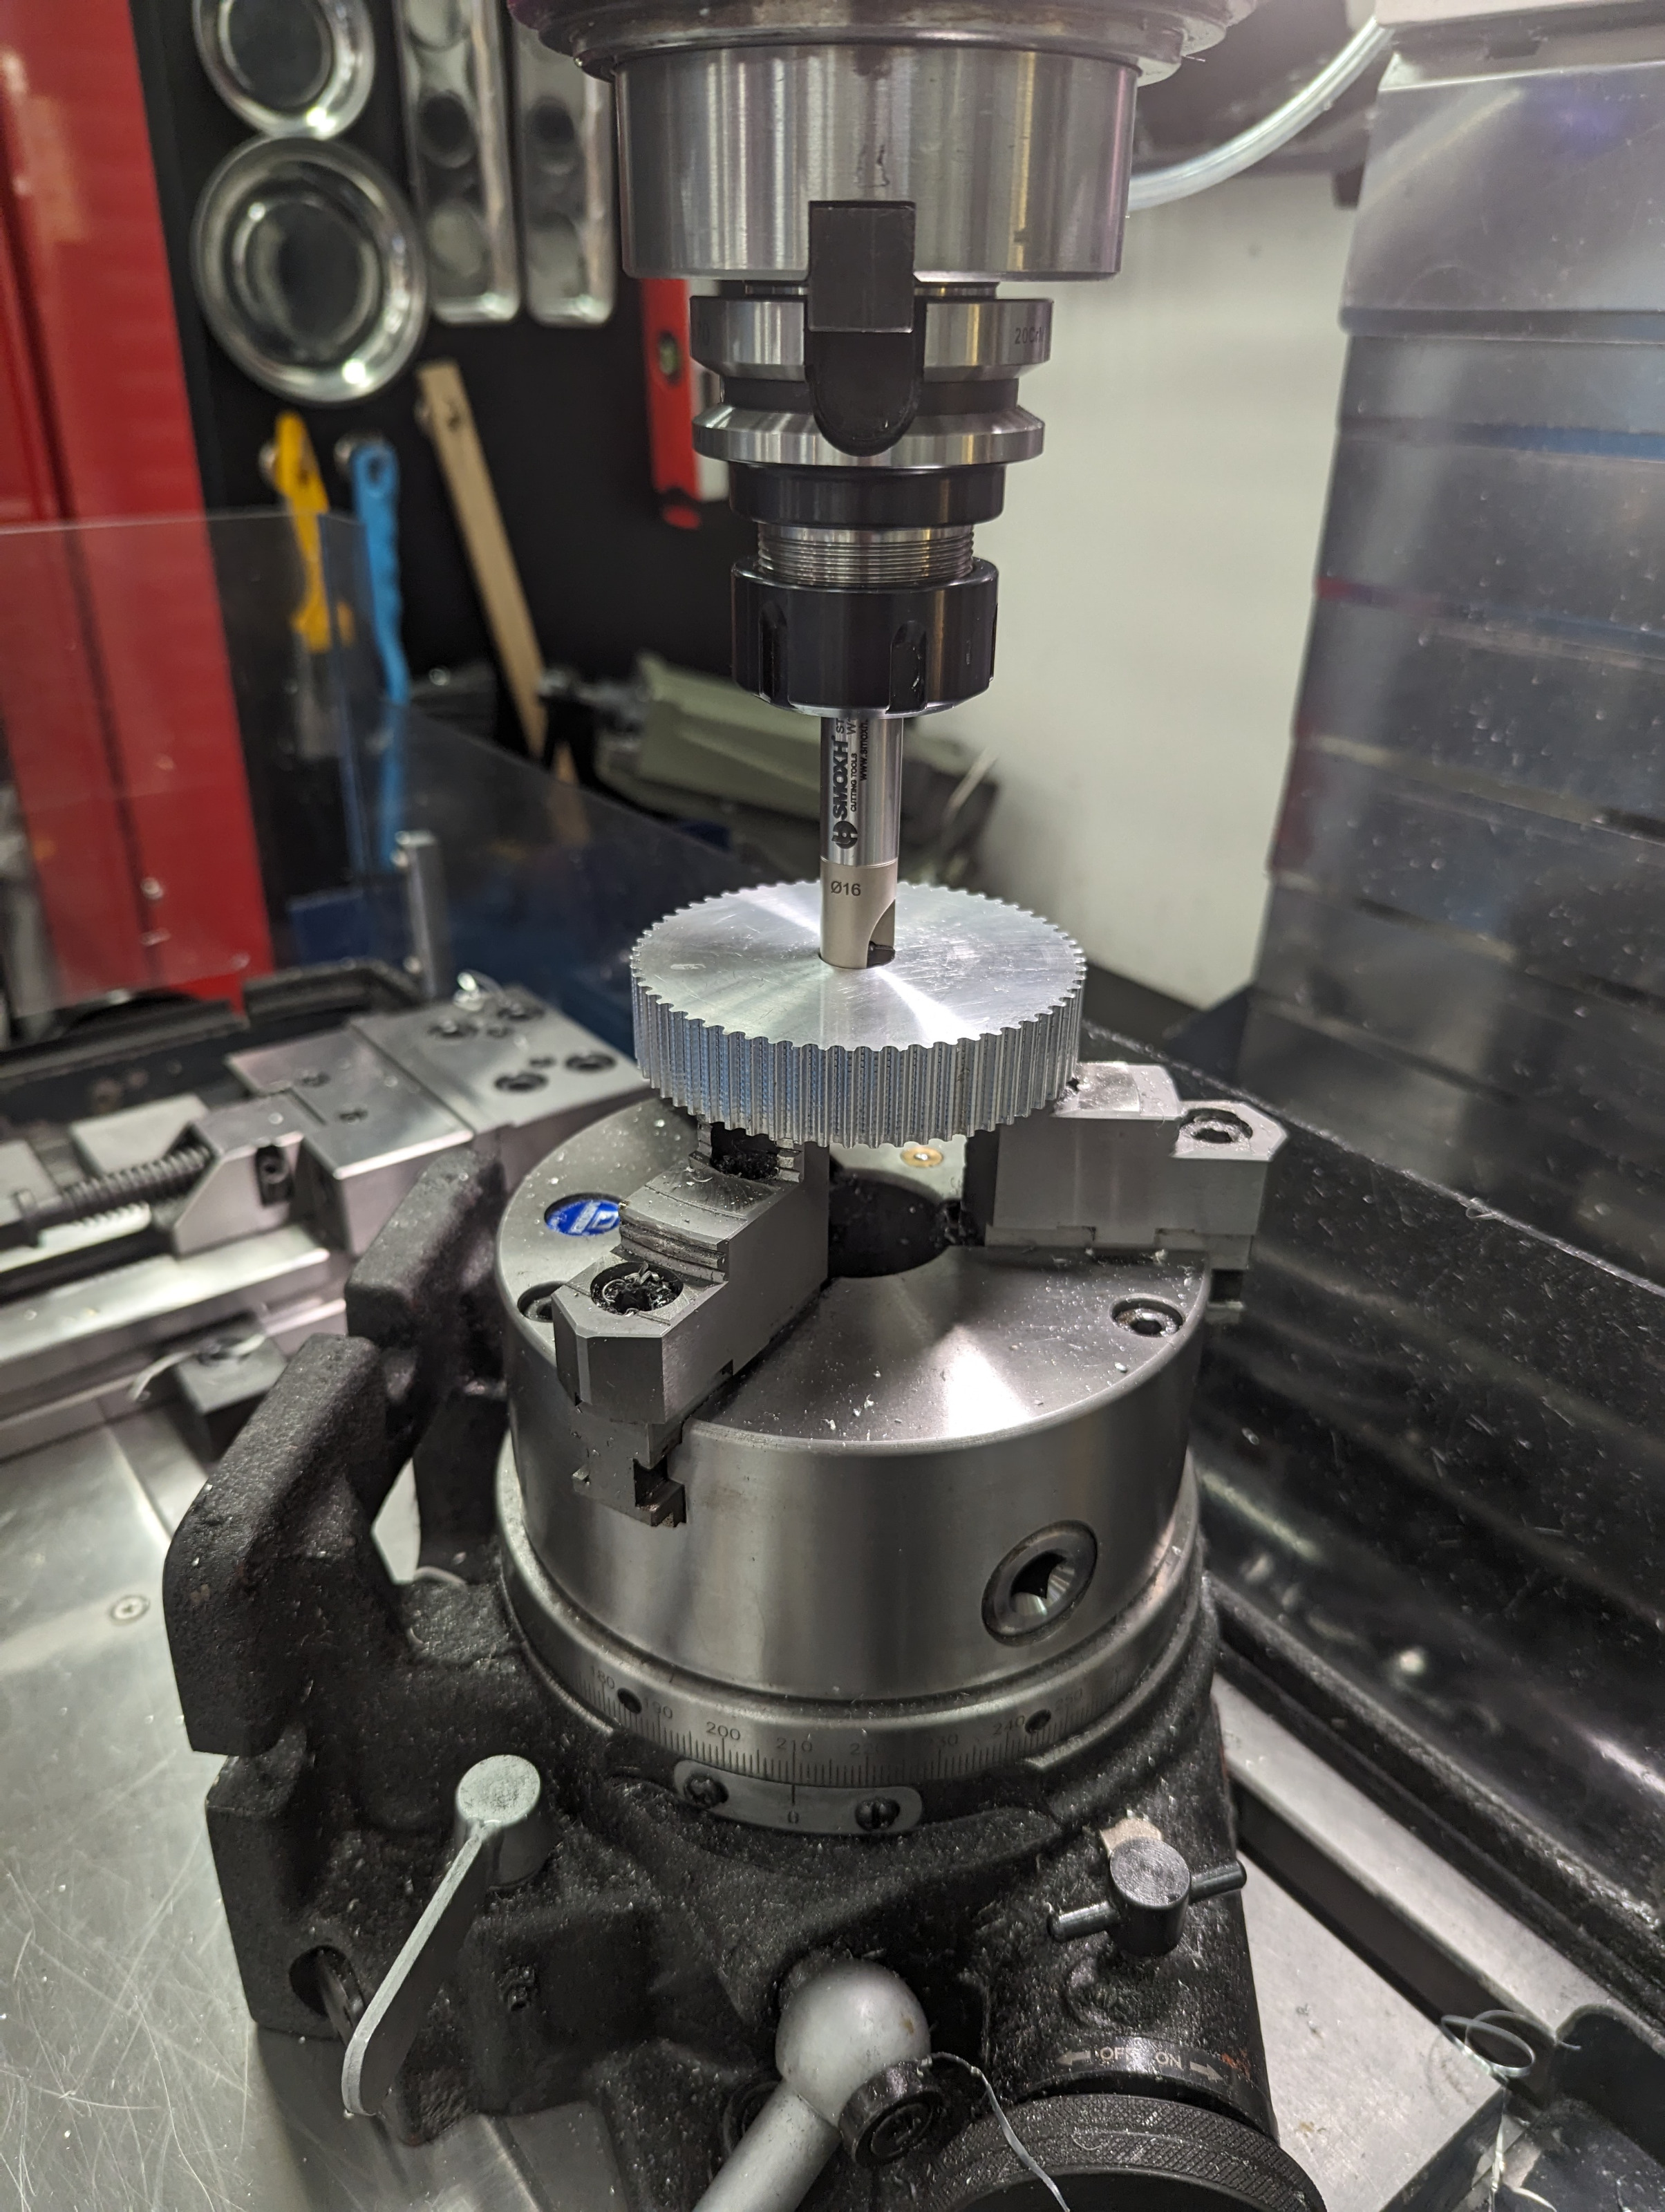
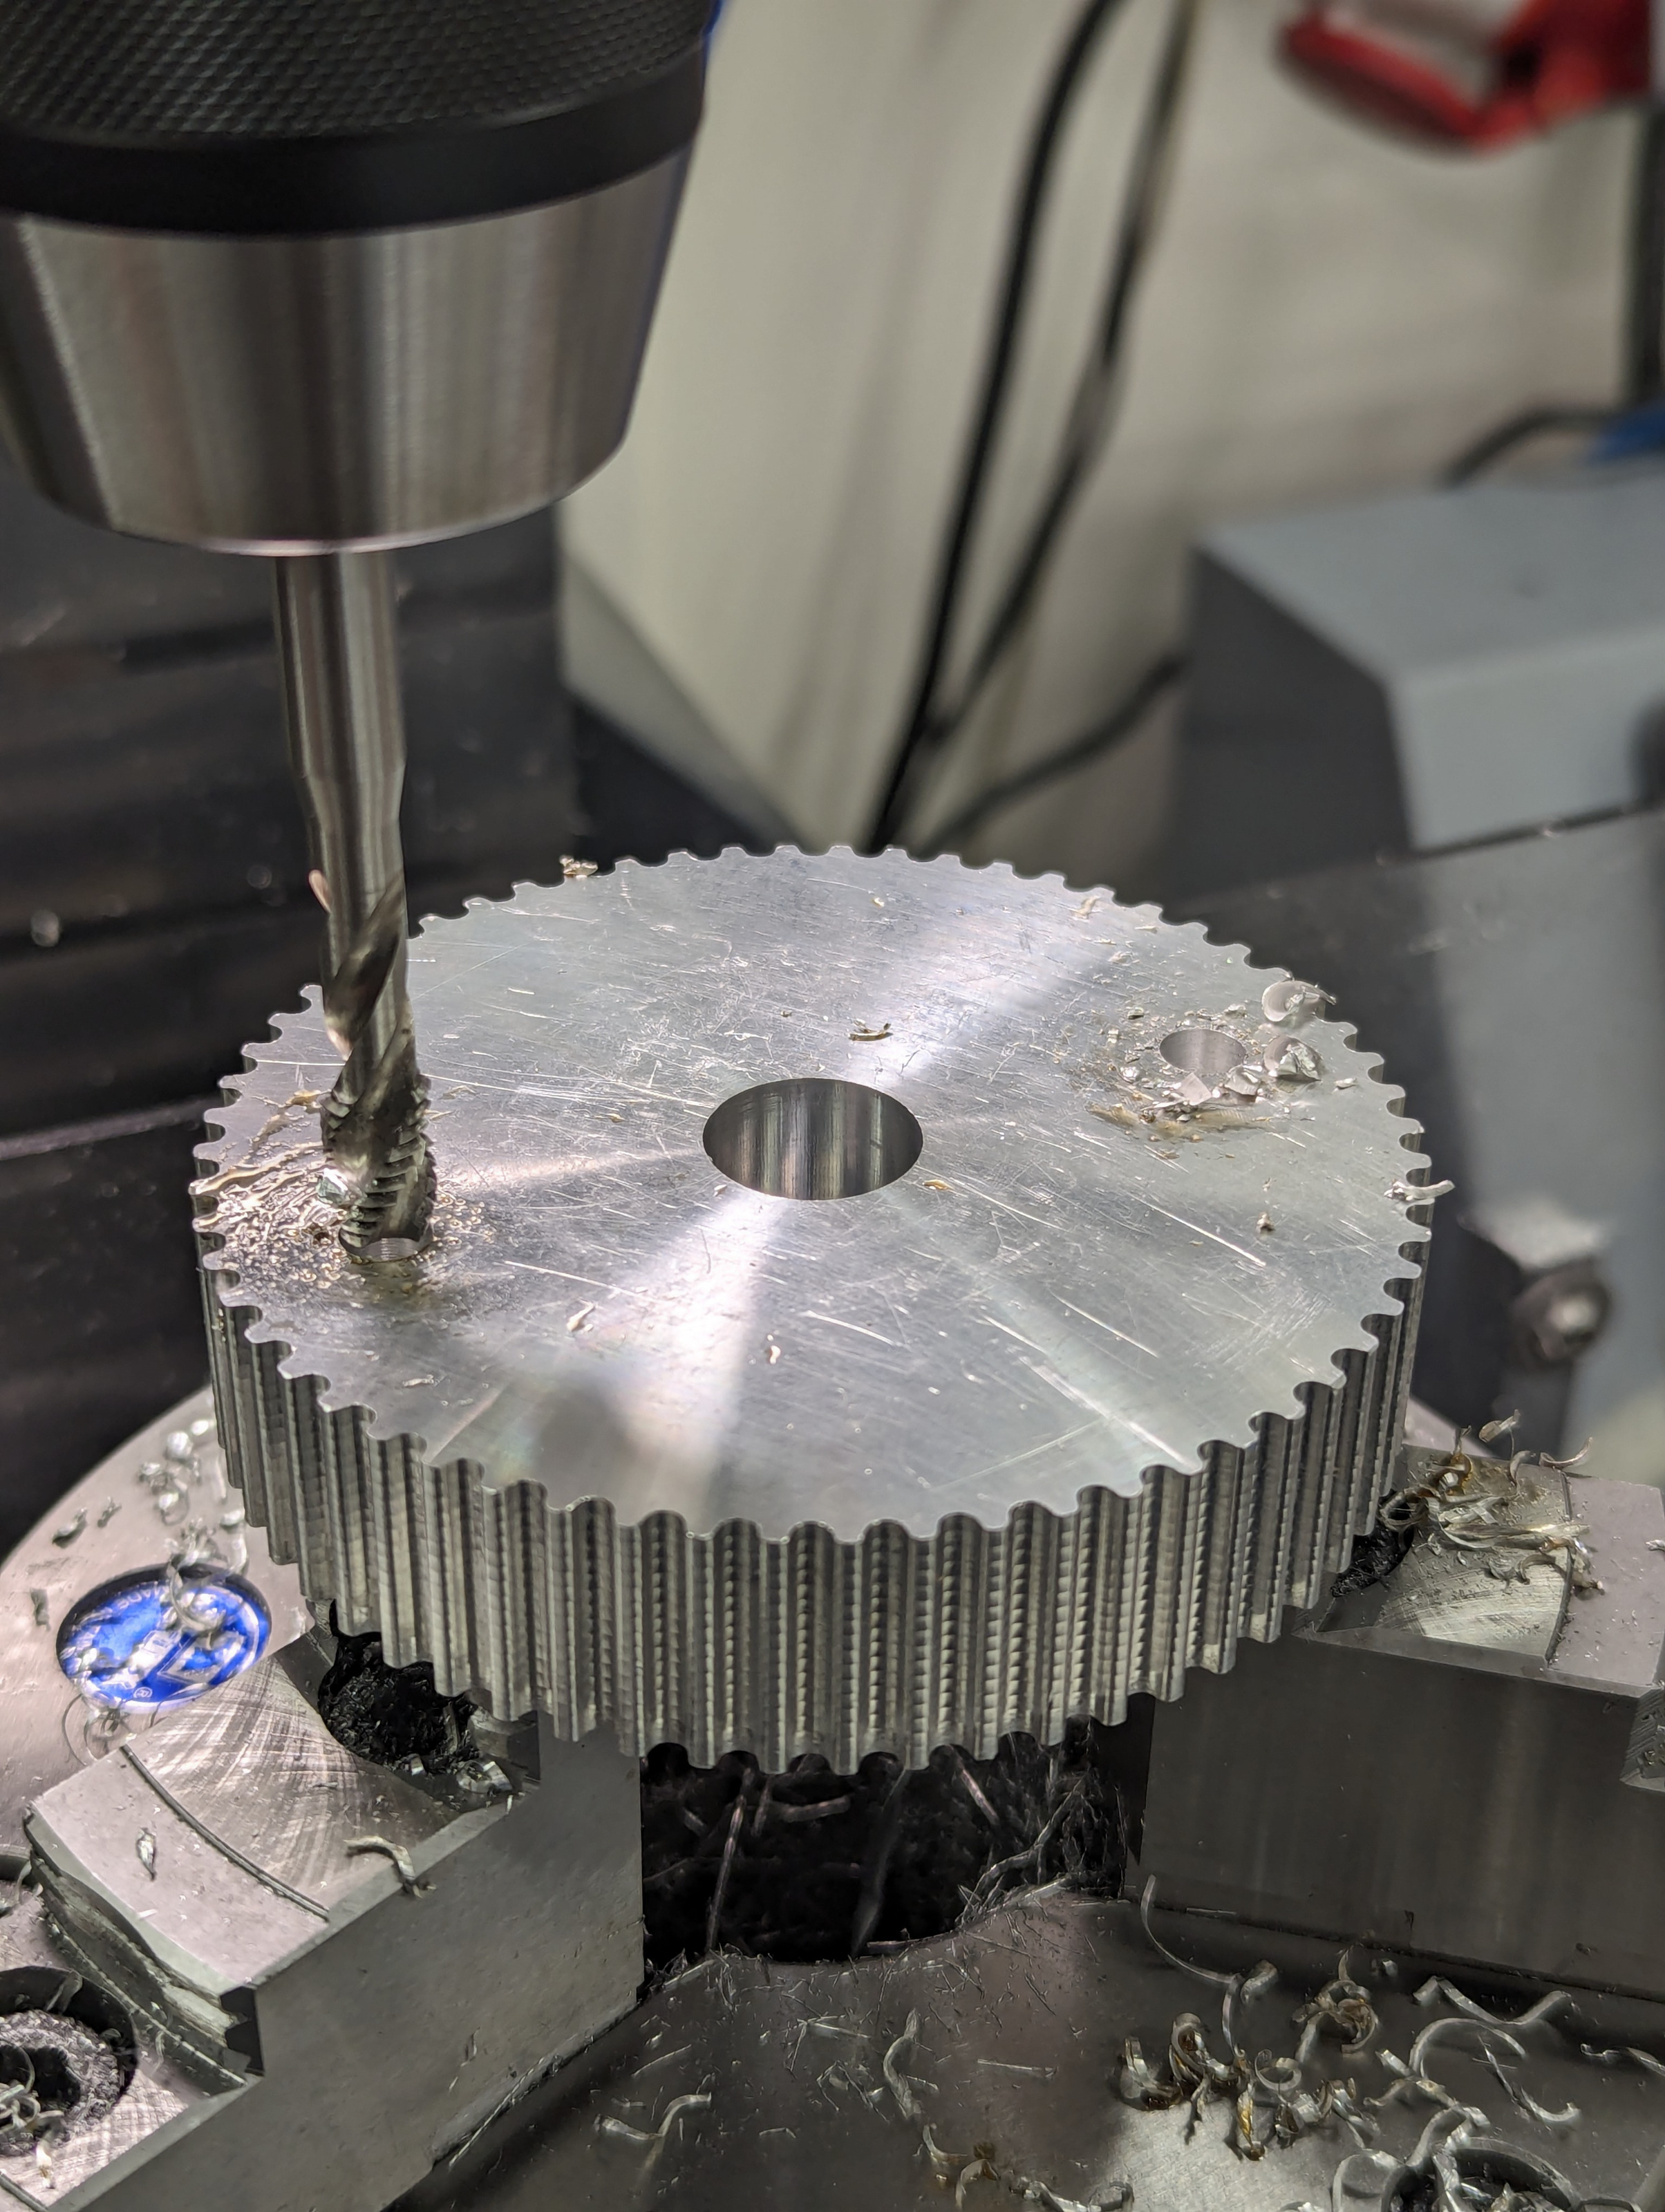
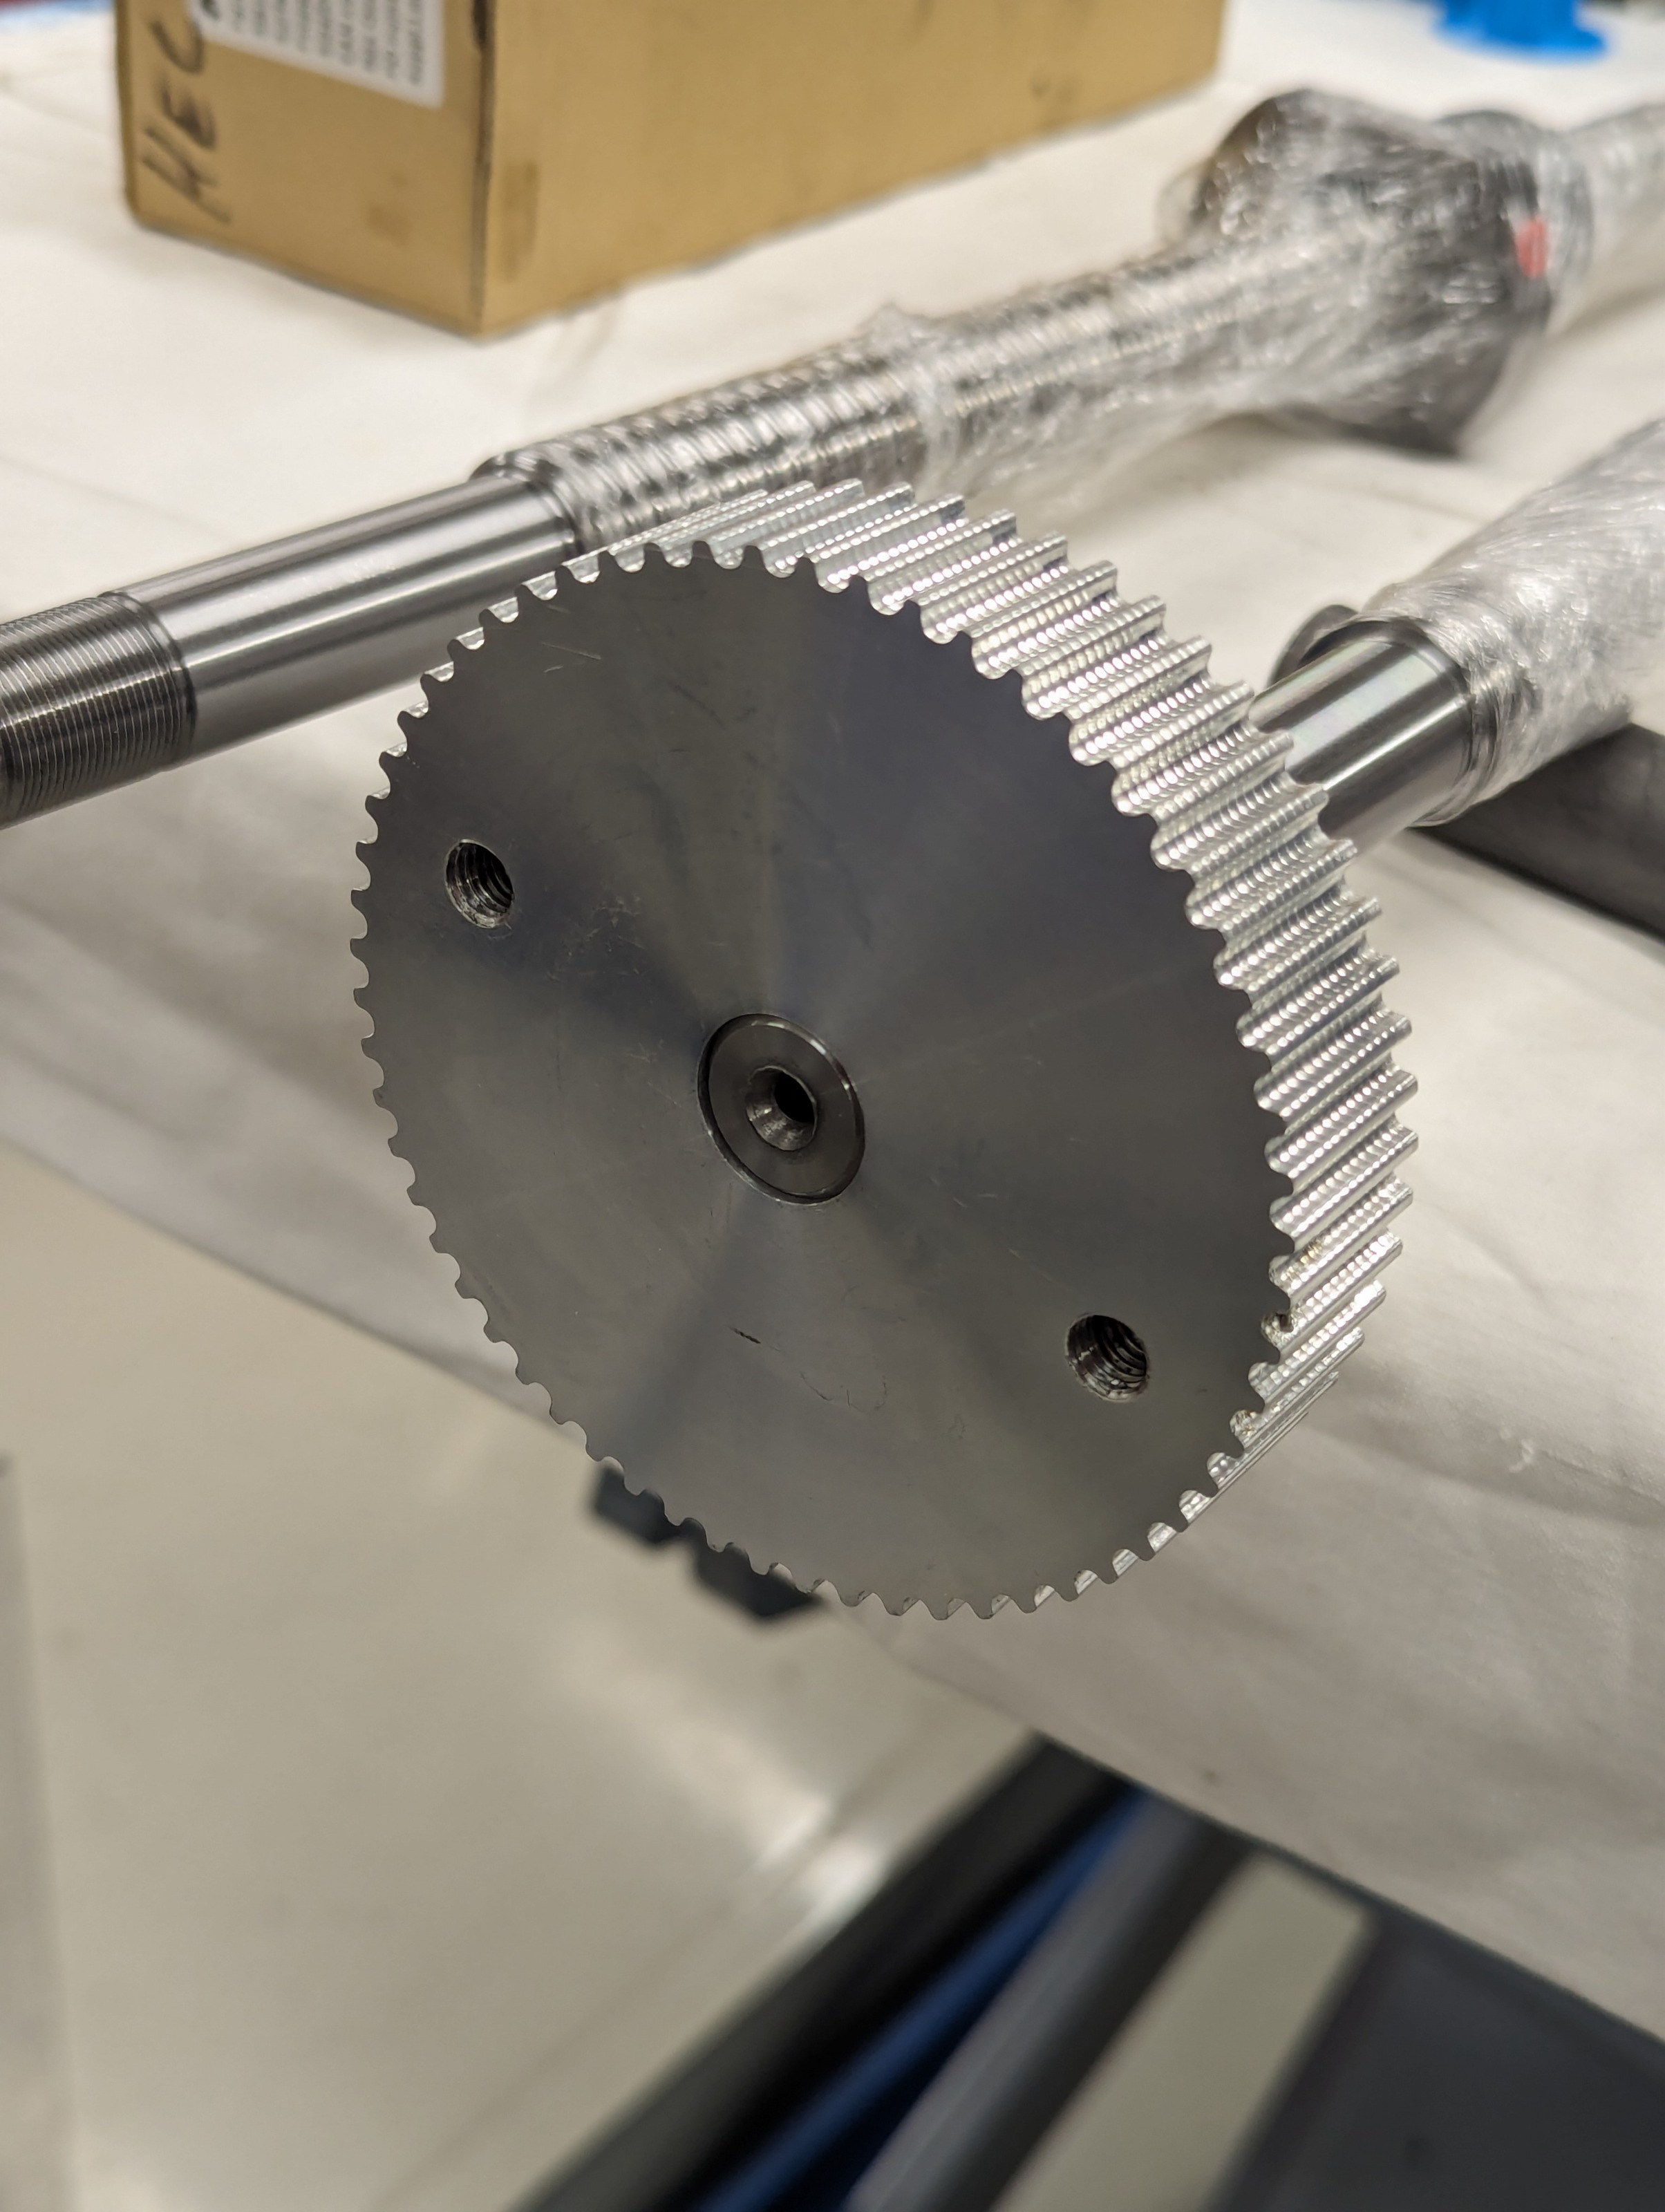
With the central lubrication stuff prepared I decided to turn my attention to pulleys and belts.
I knew that I would need a reduction an all axes and I knew that there was different type of belts and pulleys to choose from. However this turned out to be a much deeper wormhole than I had anticipated with all kinds of new "cool and superior" type of belts and pulleys listed here and there but with very varying availability. In the end I settled for something that I knew was gonna be around for the foreseeable future, high grade HTD 5M pulleys and polyamide belts from Norelem in Germany.
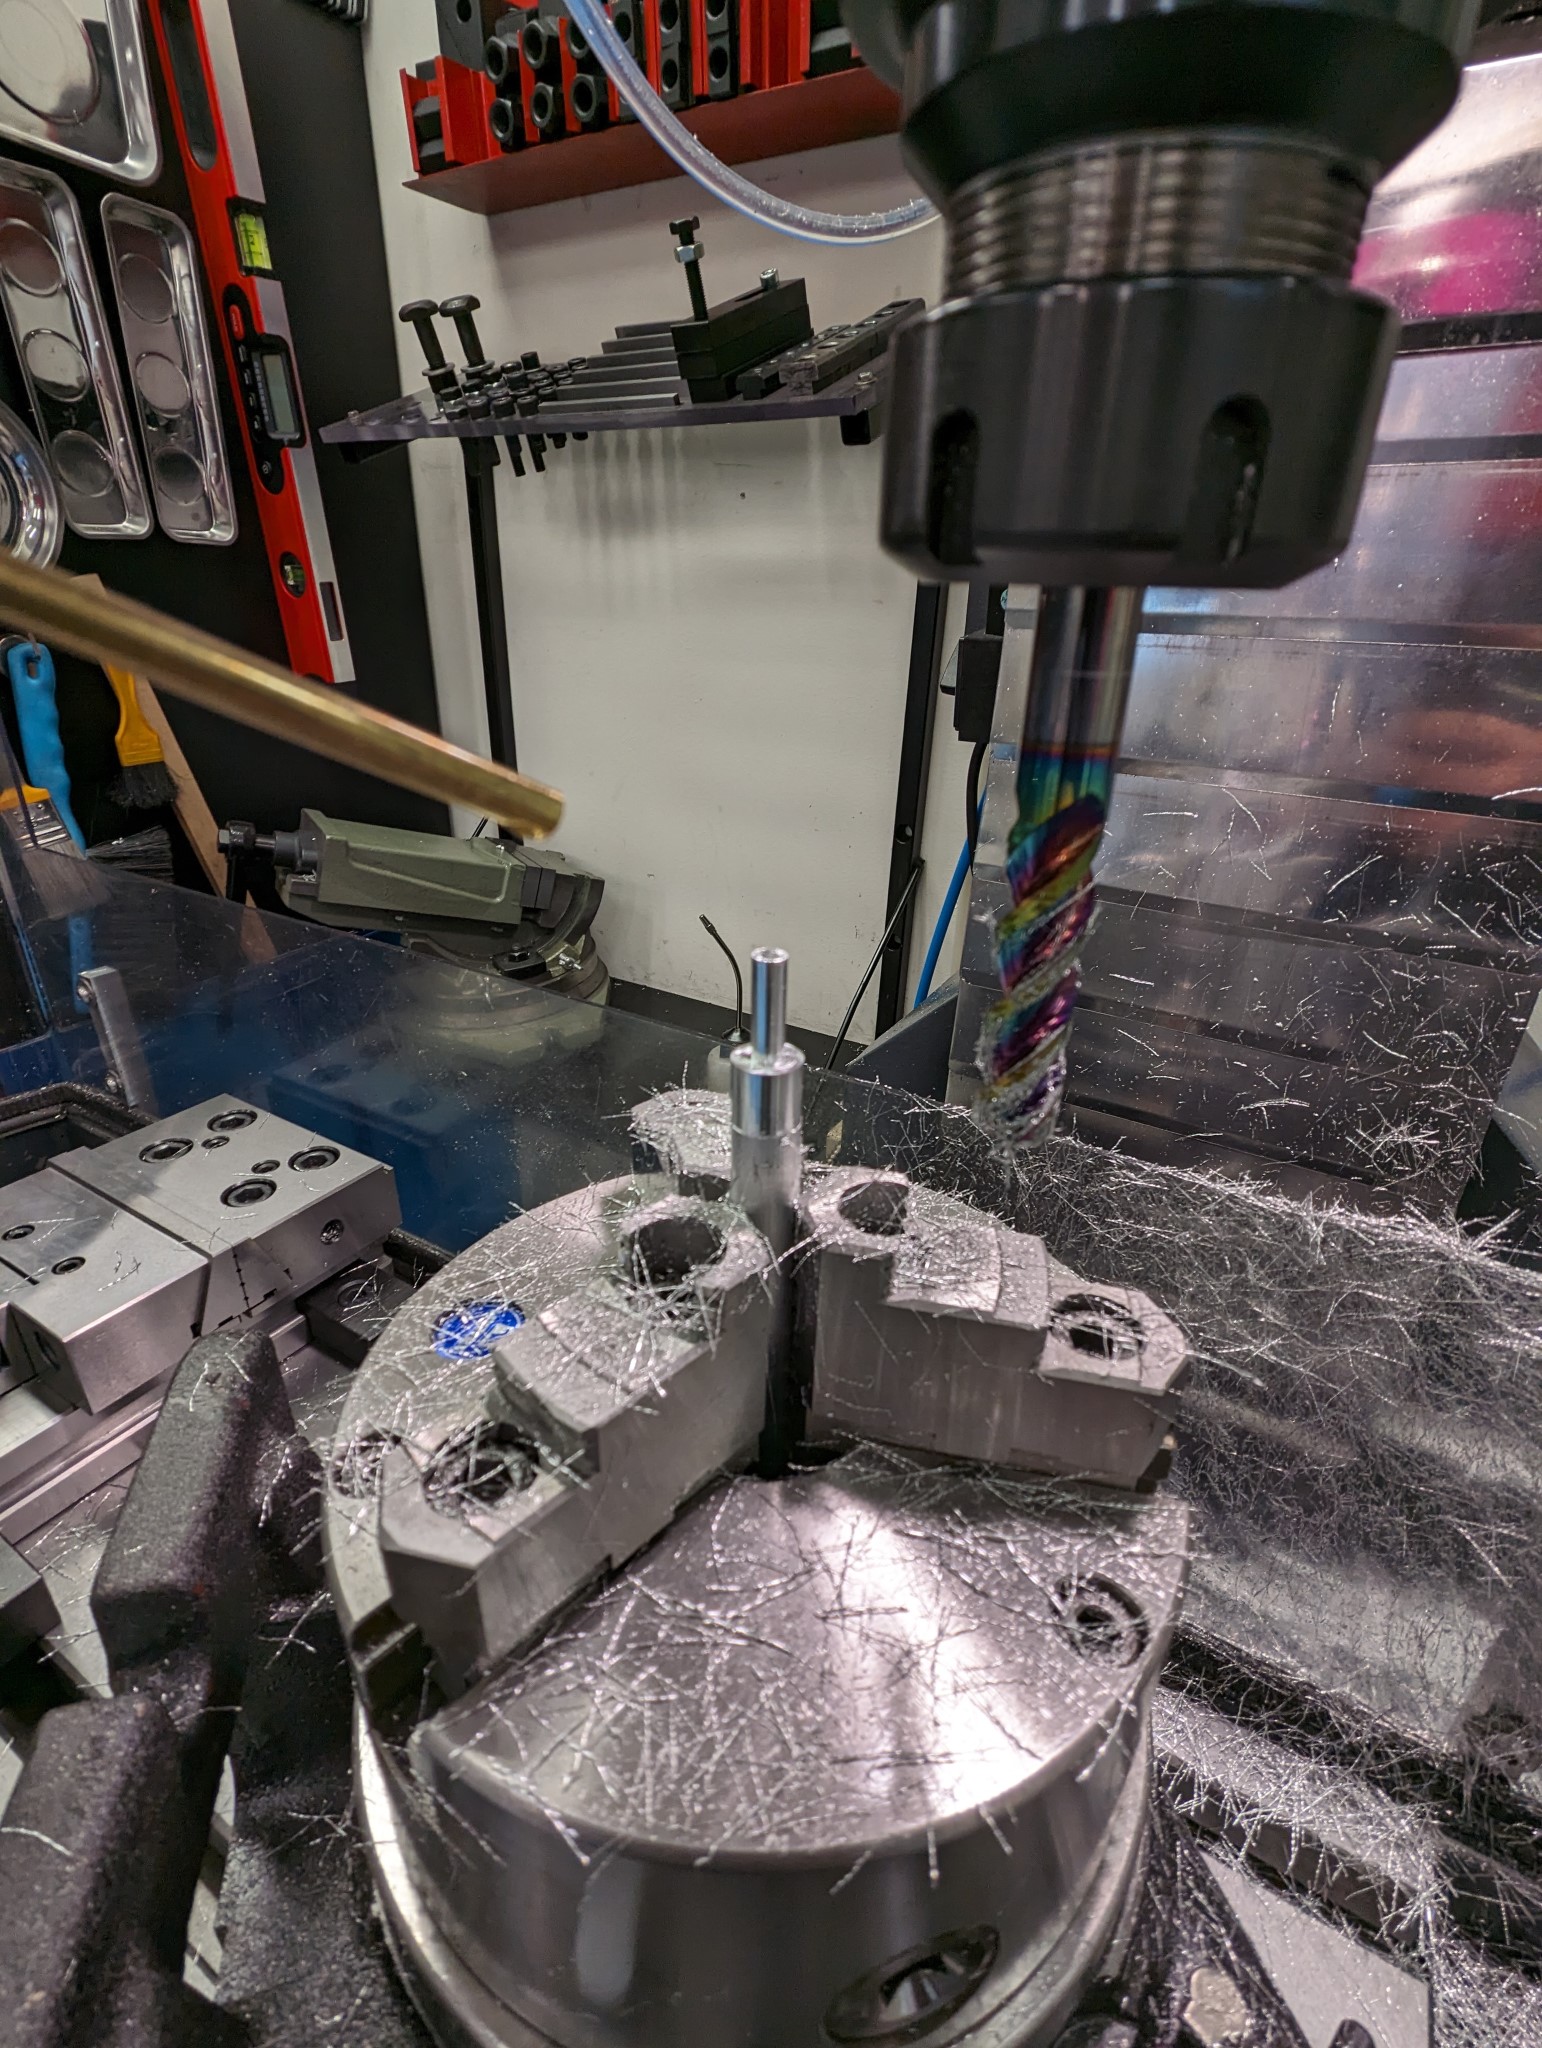
And as I still don't have a lathe I had to bring out the rotary table again in order to make the precise center holes in the pulleys matching the ball screws and servos. This took a while especially in the smaller steel pulleys where I had to be very careful to avoid too much mill deflection.
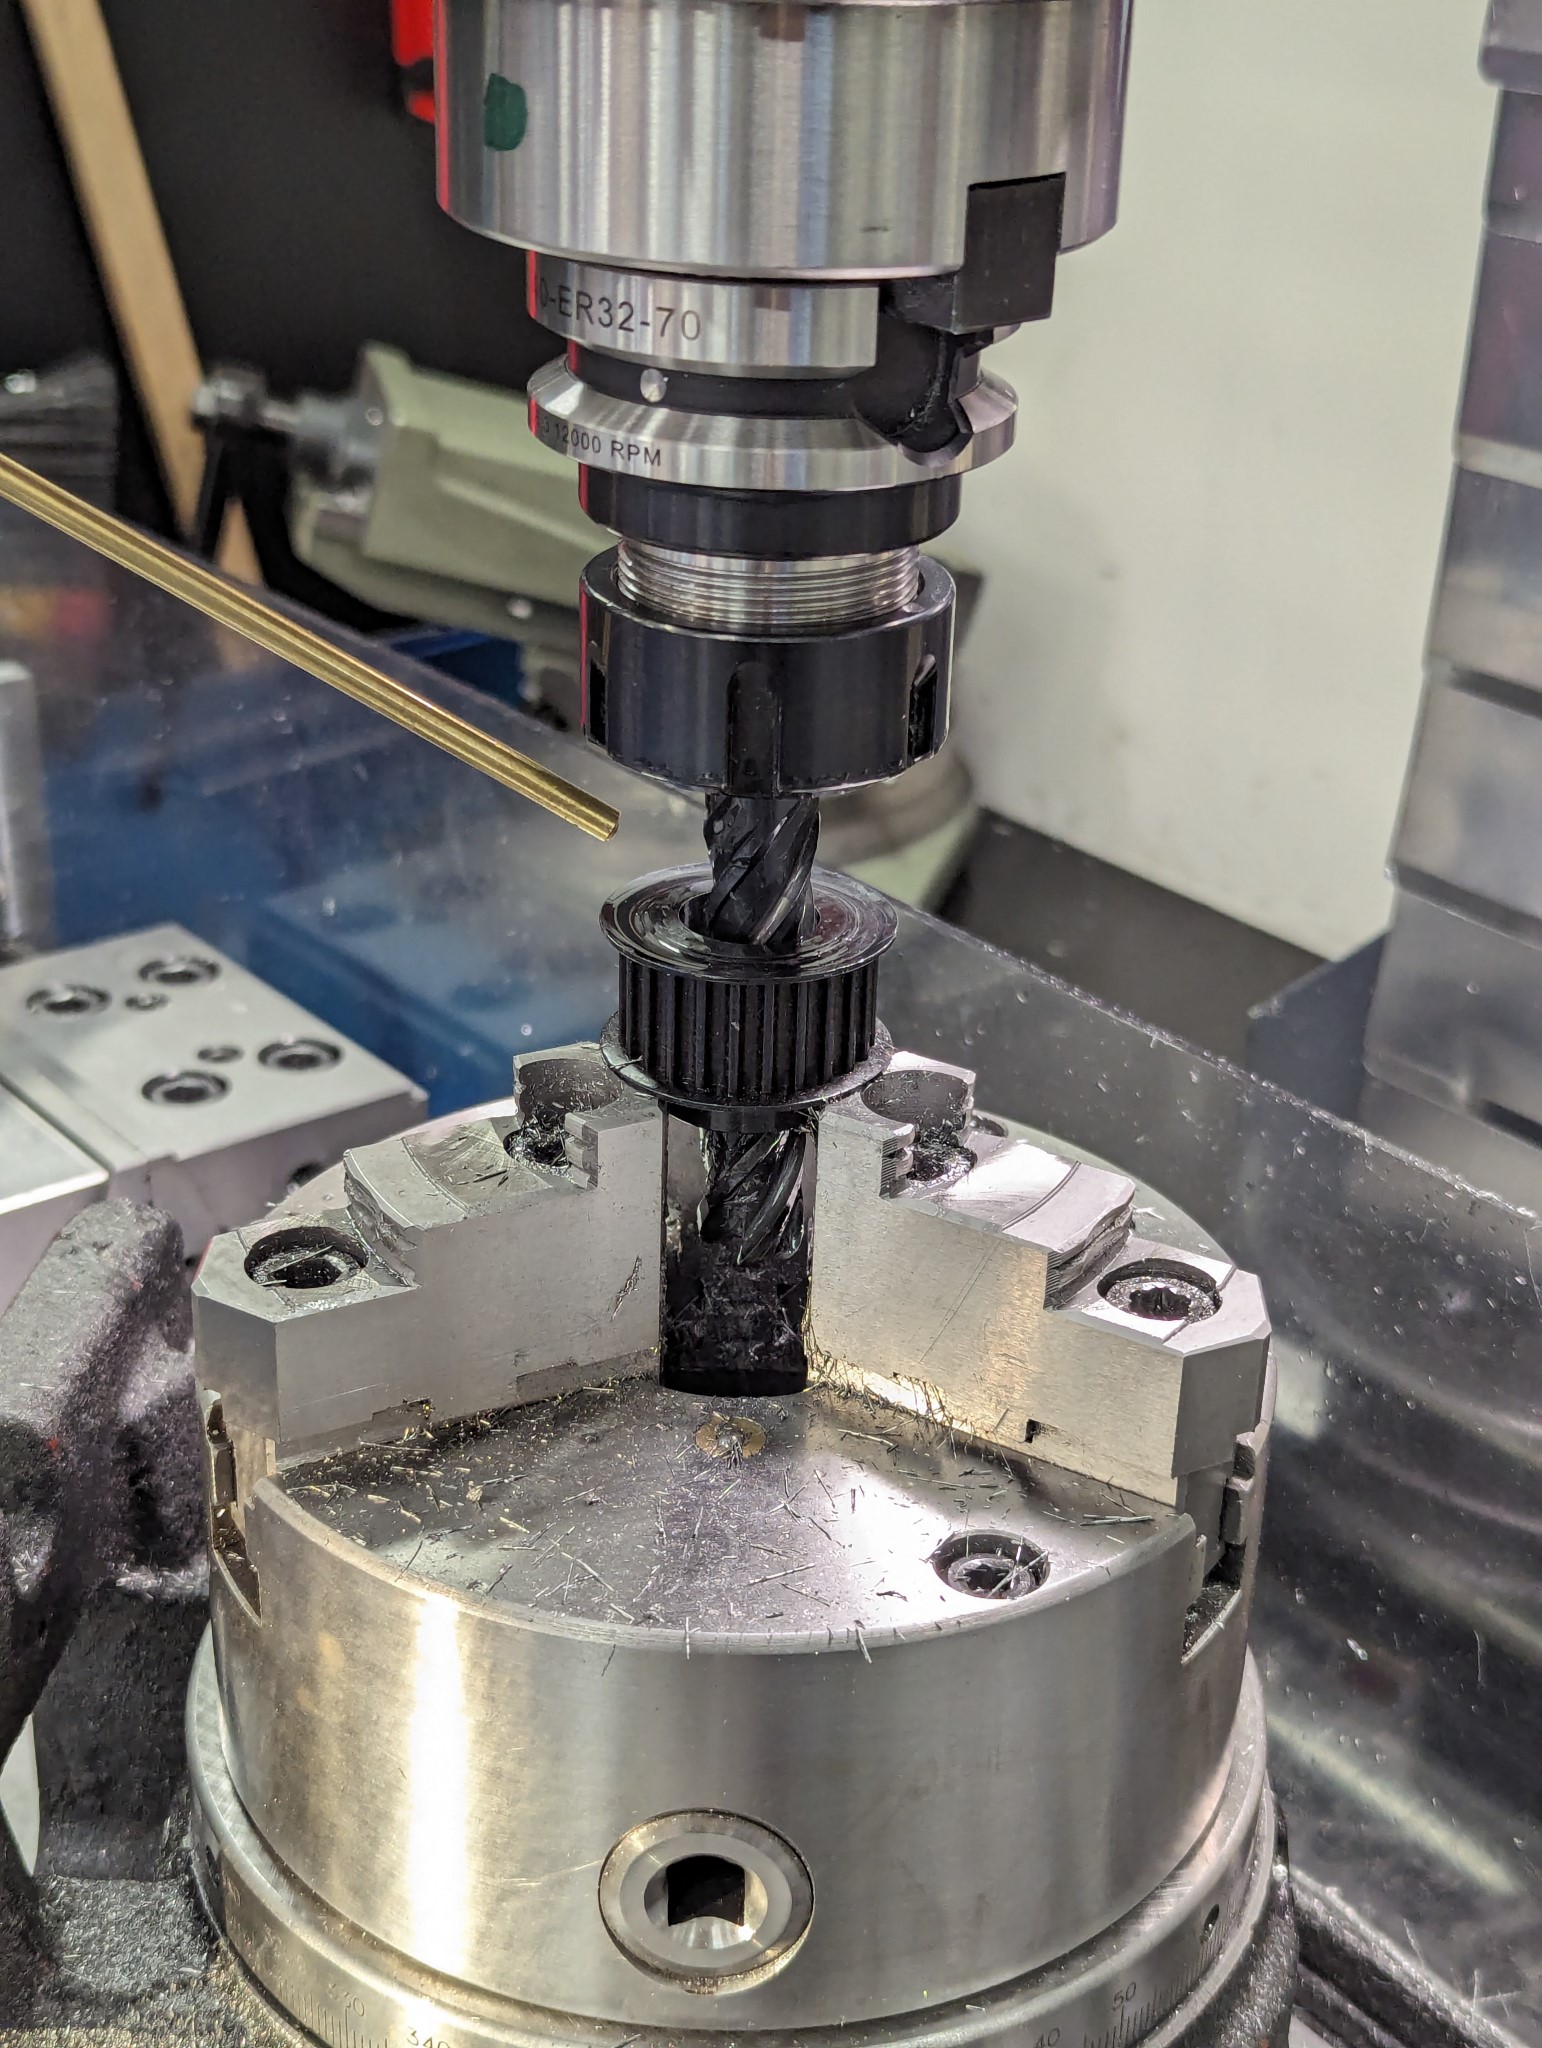
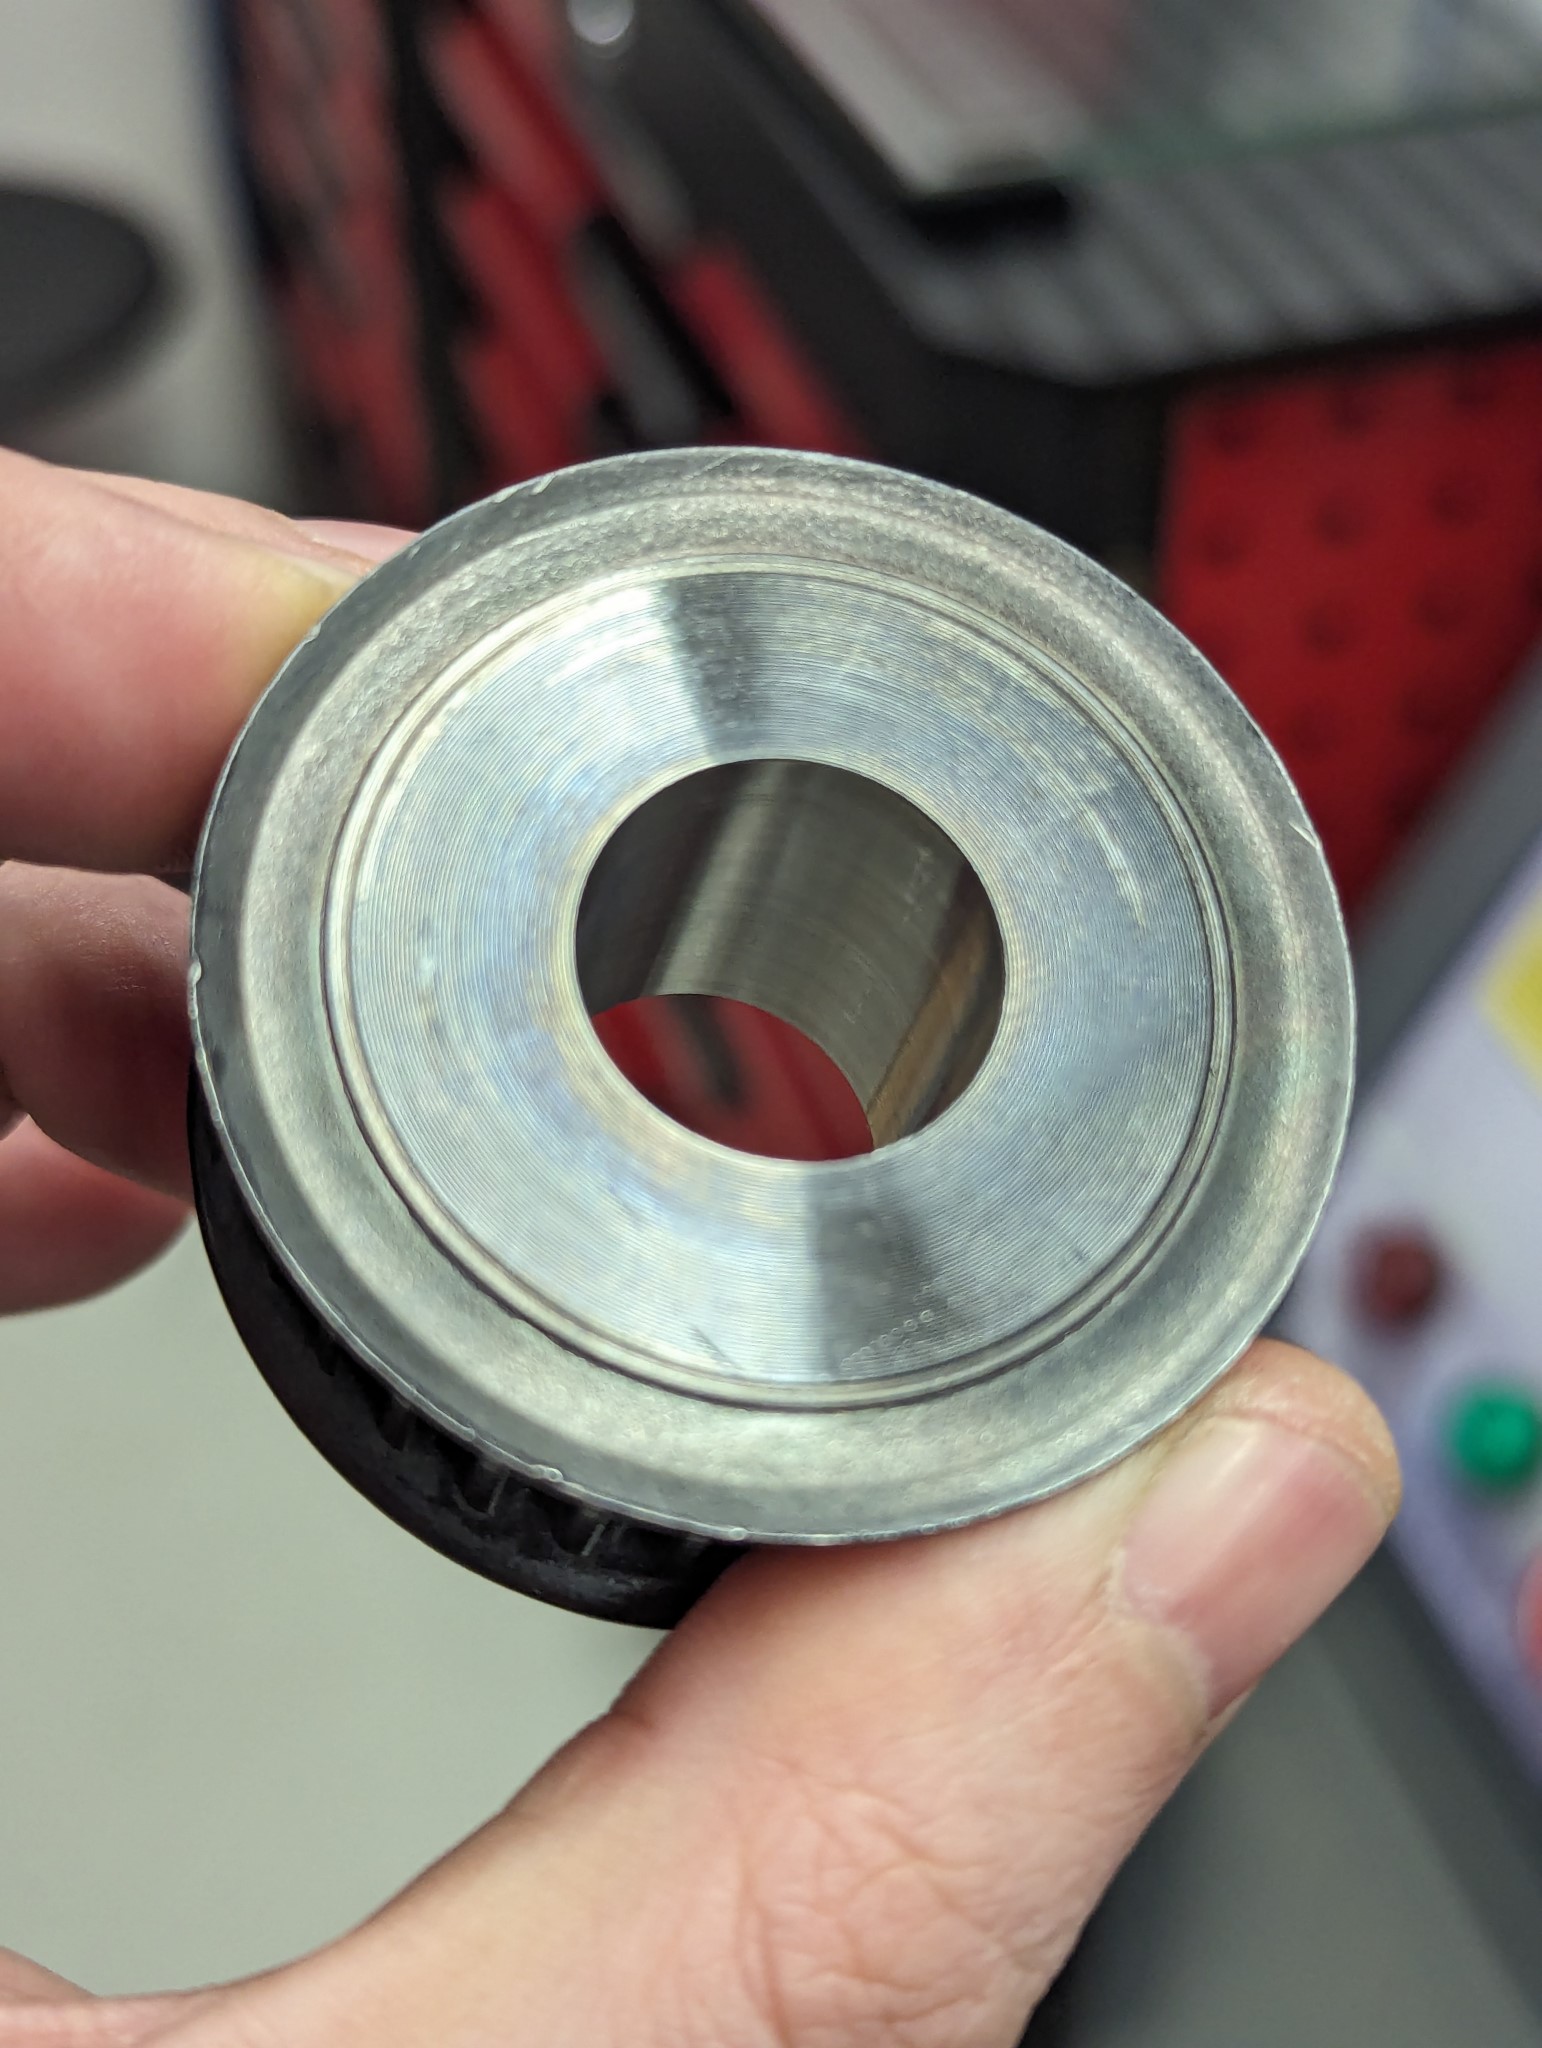
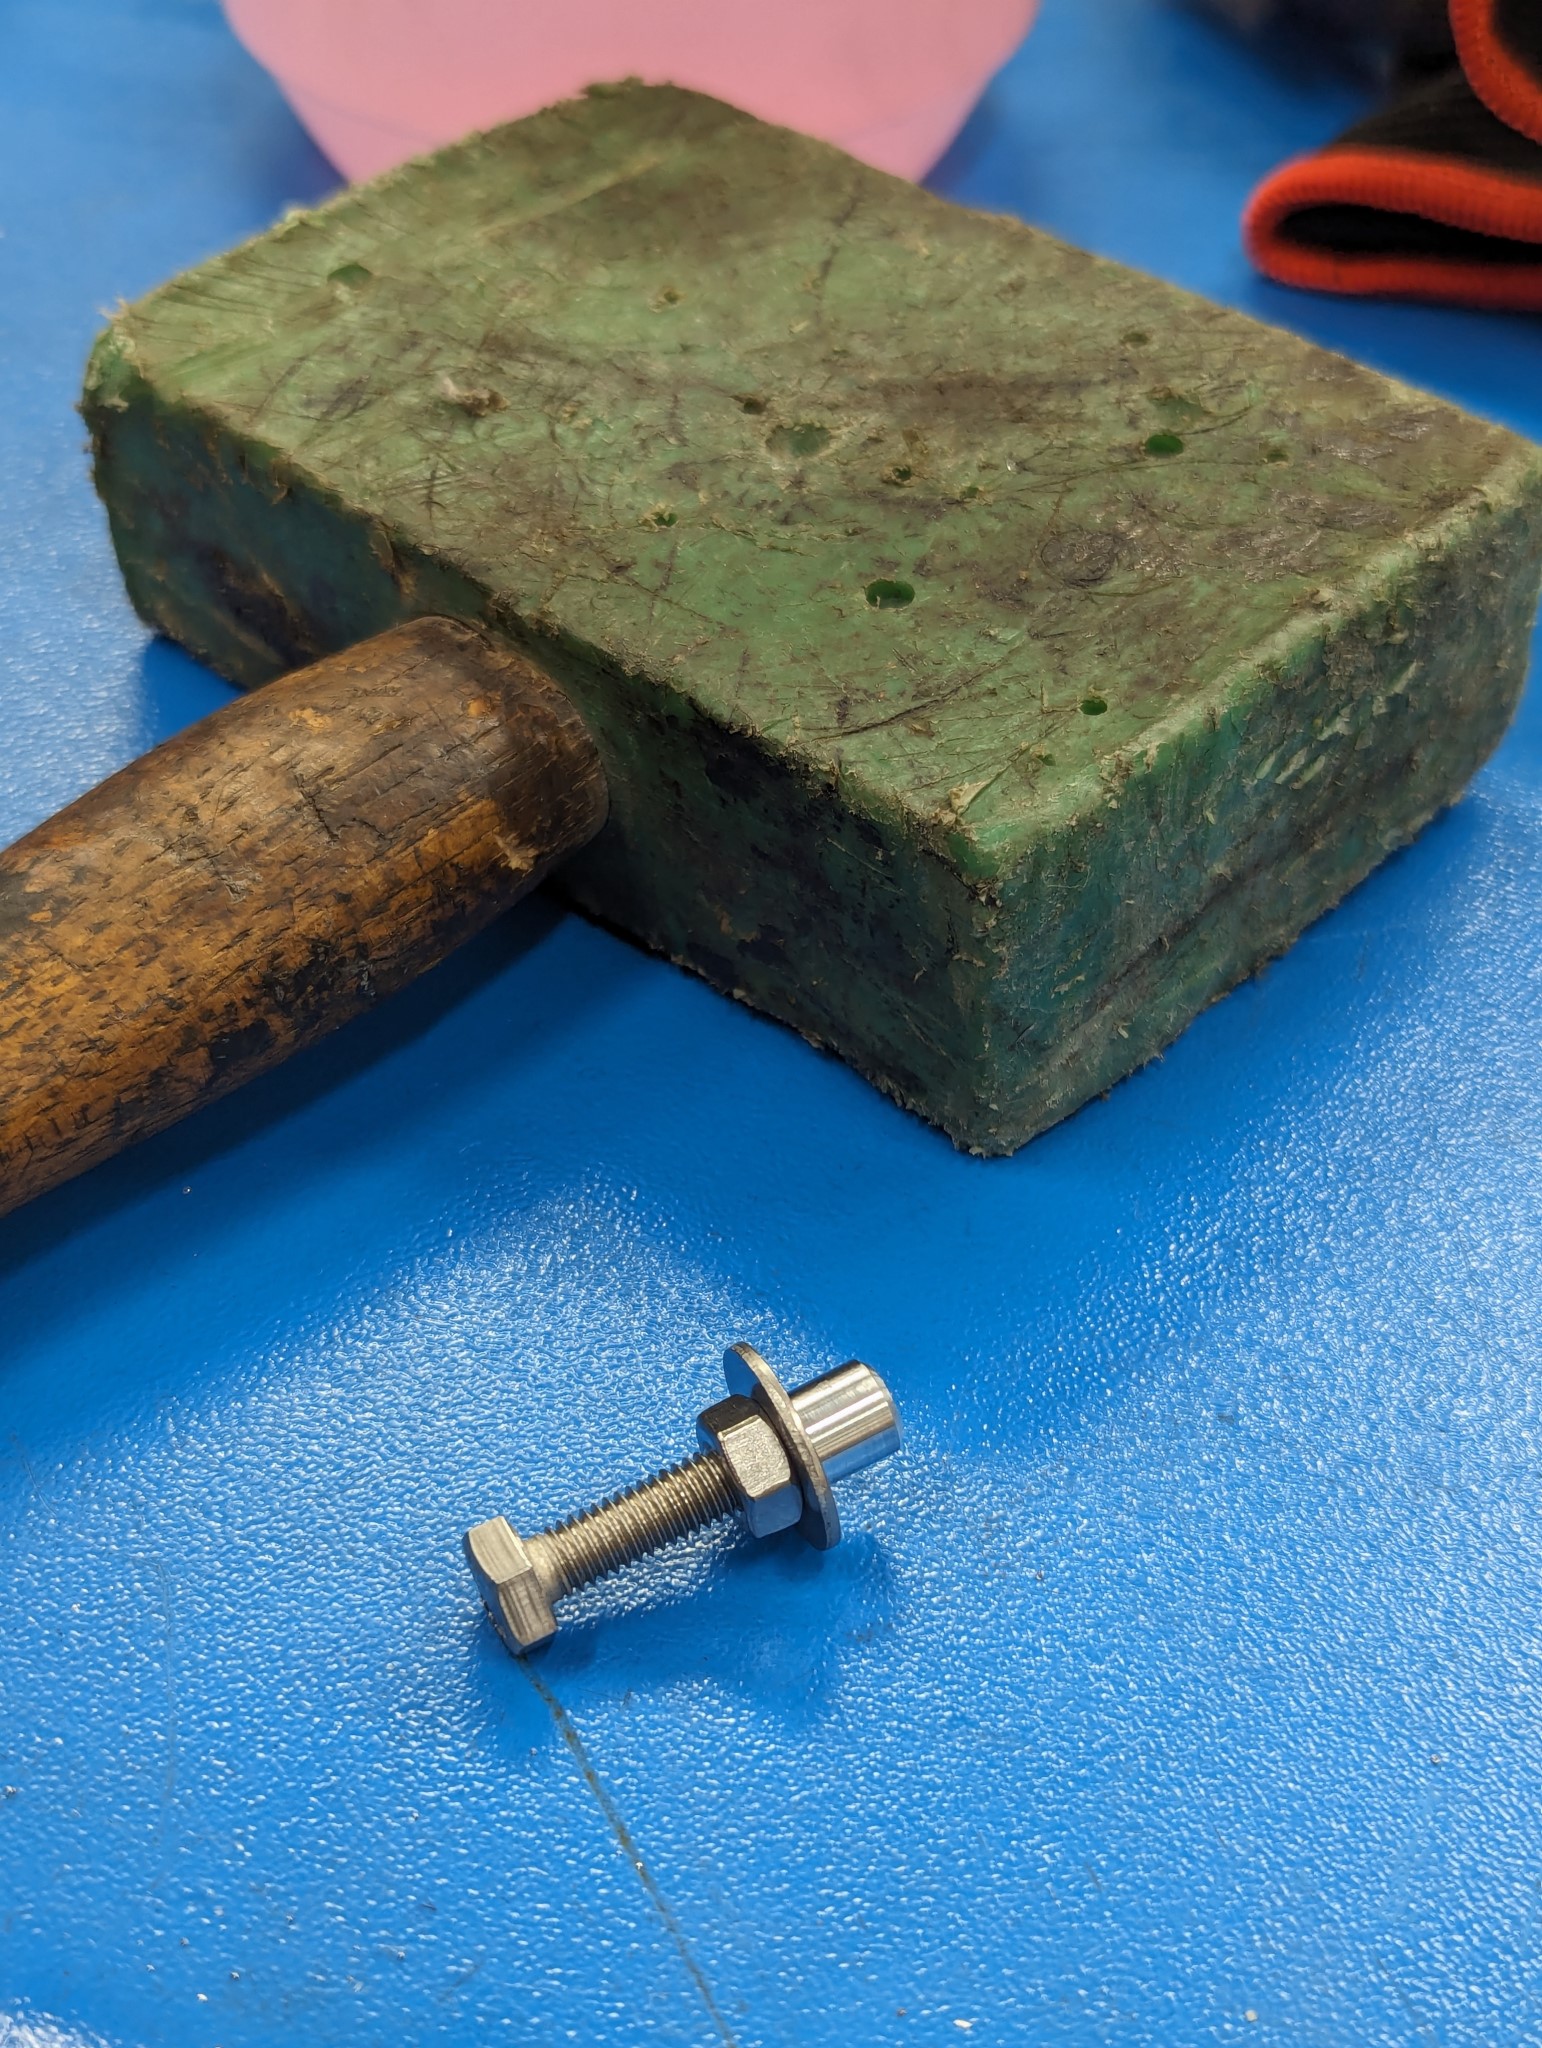
On the larger aluminum pulleys I added two threaded M8 holes in order to simplify the attachment of a puller in case I need to remove them from the ball screws.
I knew that I would need a reduction an all axes and I knew that there was different type of belts and pulleys to choose from. However this turned out to be a much deeper wormhole than I had anticipated with all kinds of new "cool and superior" type of belts and pulleys listed here and there but with very varying availability. In the end I settled for something that I knew was gonna be around for the foreseeable future, high grade HTD 5M pulleys and polyamide belts from Norelem in Germany.
And as I still don't have a lathe I had to bring out the rotary table again in order to make the precise center holes in the pulleys matching the ball screws and servos. This took a while especially in the smaller steel pulleys where I had to be very careful to avoid too much mill deflection.
On the larger aluminum pulleys I added two threaded M8 holes in order to simplify the attachment of a puller in case I need to remove them from the ball screws.
Attachments:
The following user(s) said Thank You: tommylight
Please Log in or Create an account to join the conversation.
18 Feb 2024 18:37 #293696
by Unlogic
Replied by Unlogic on topic Optimum Optimill MH50V CNC conversion
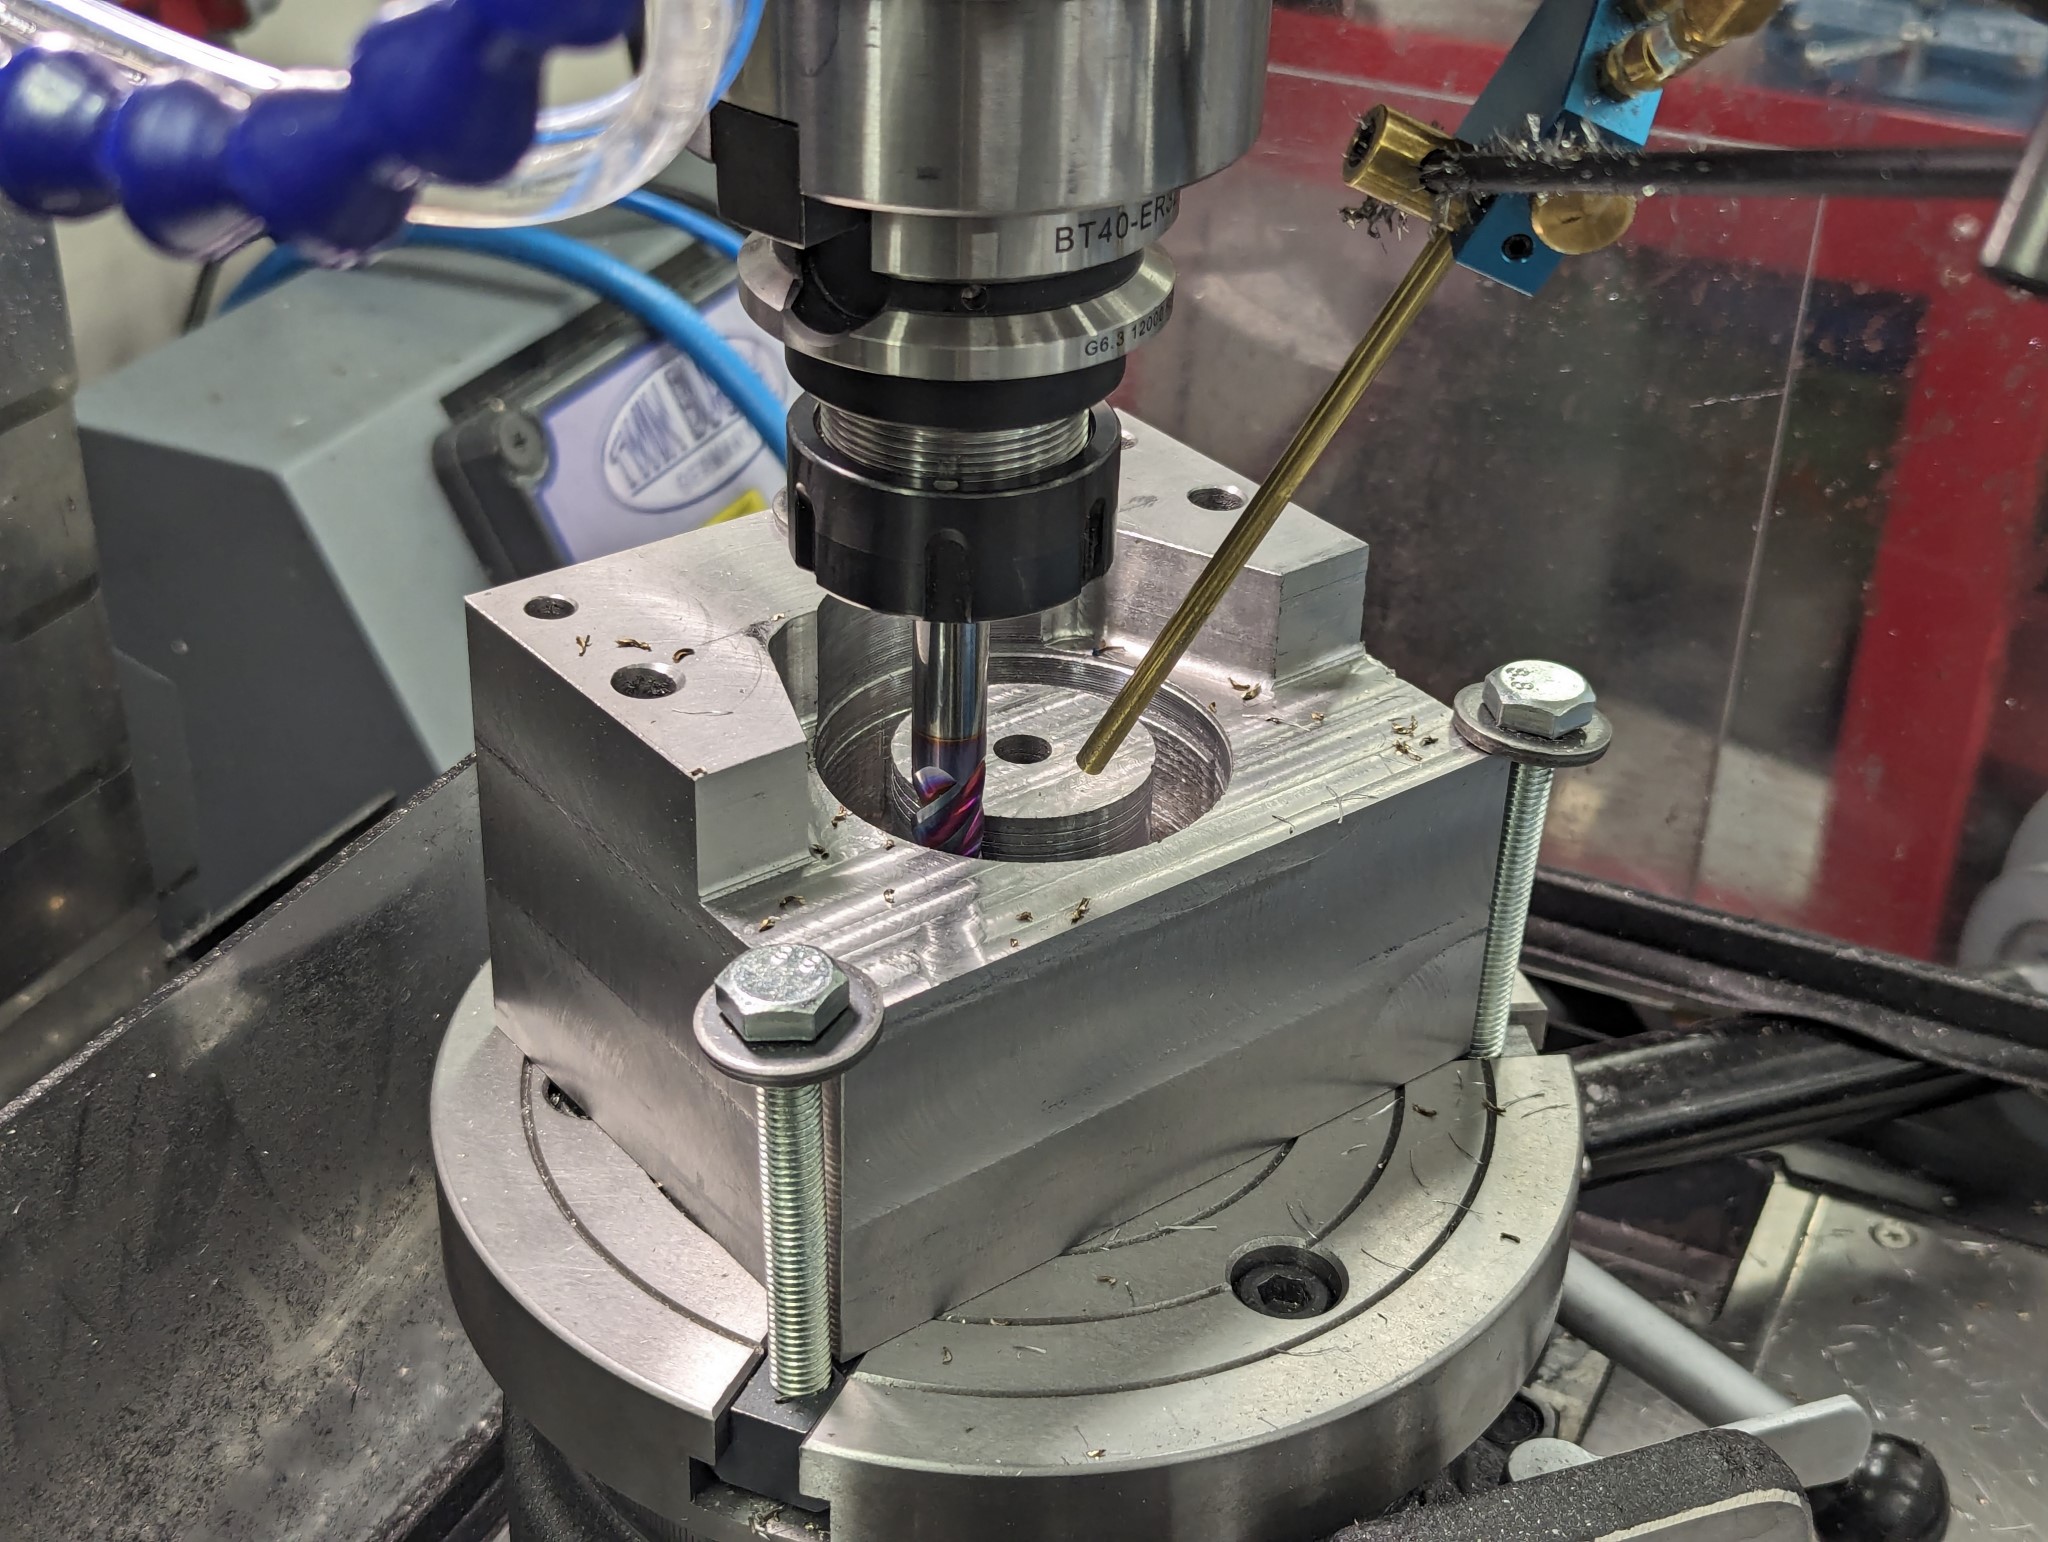
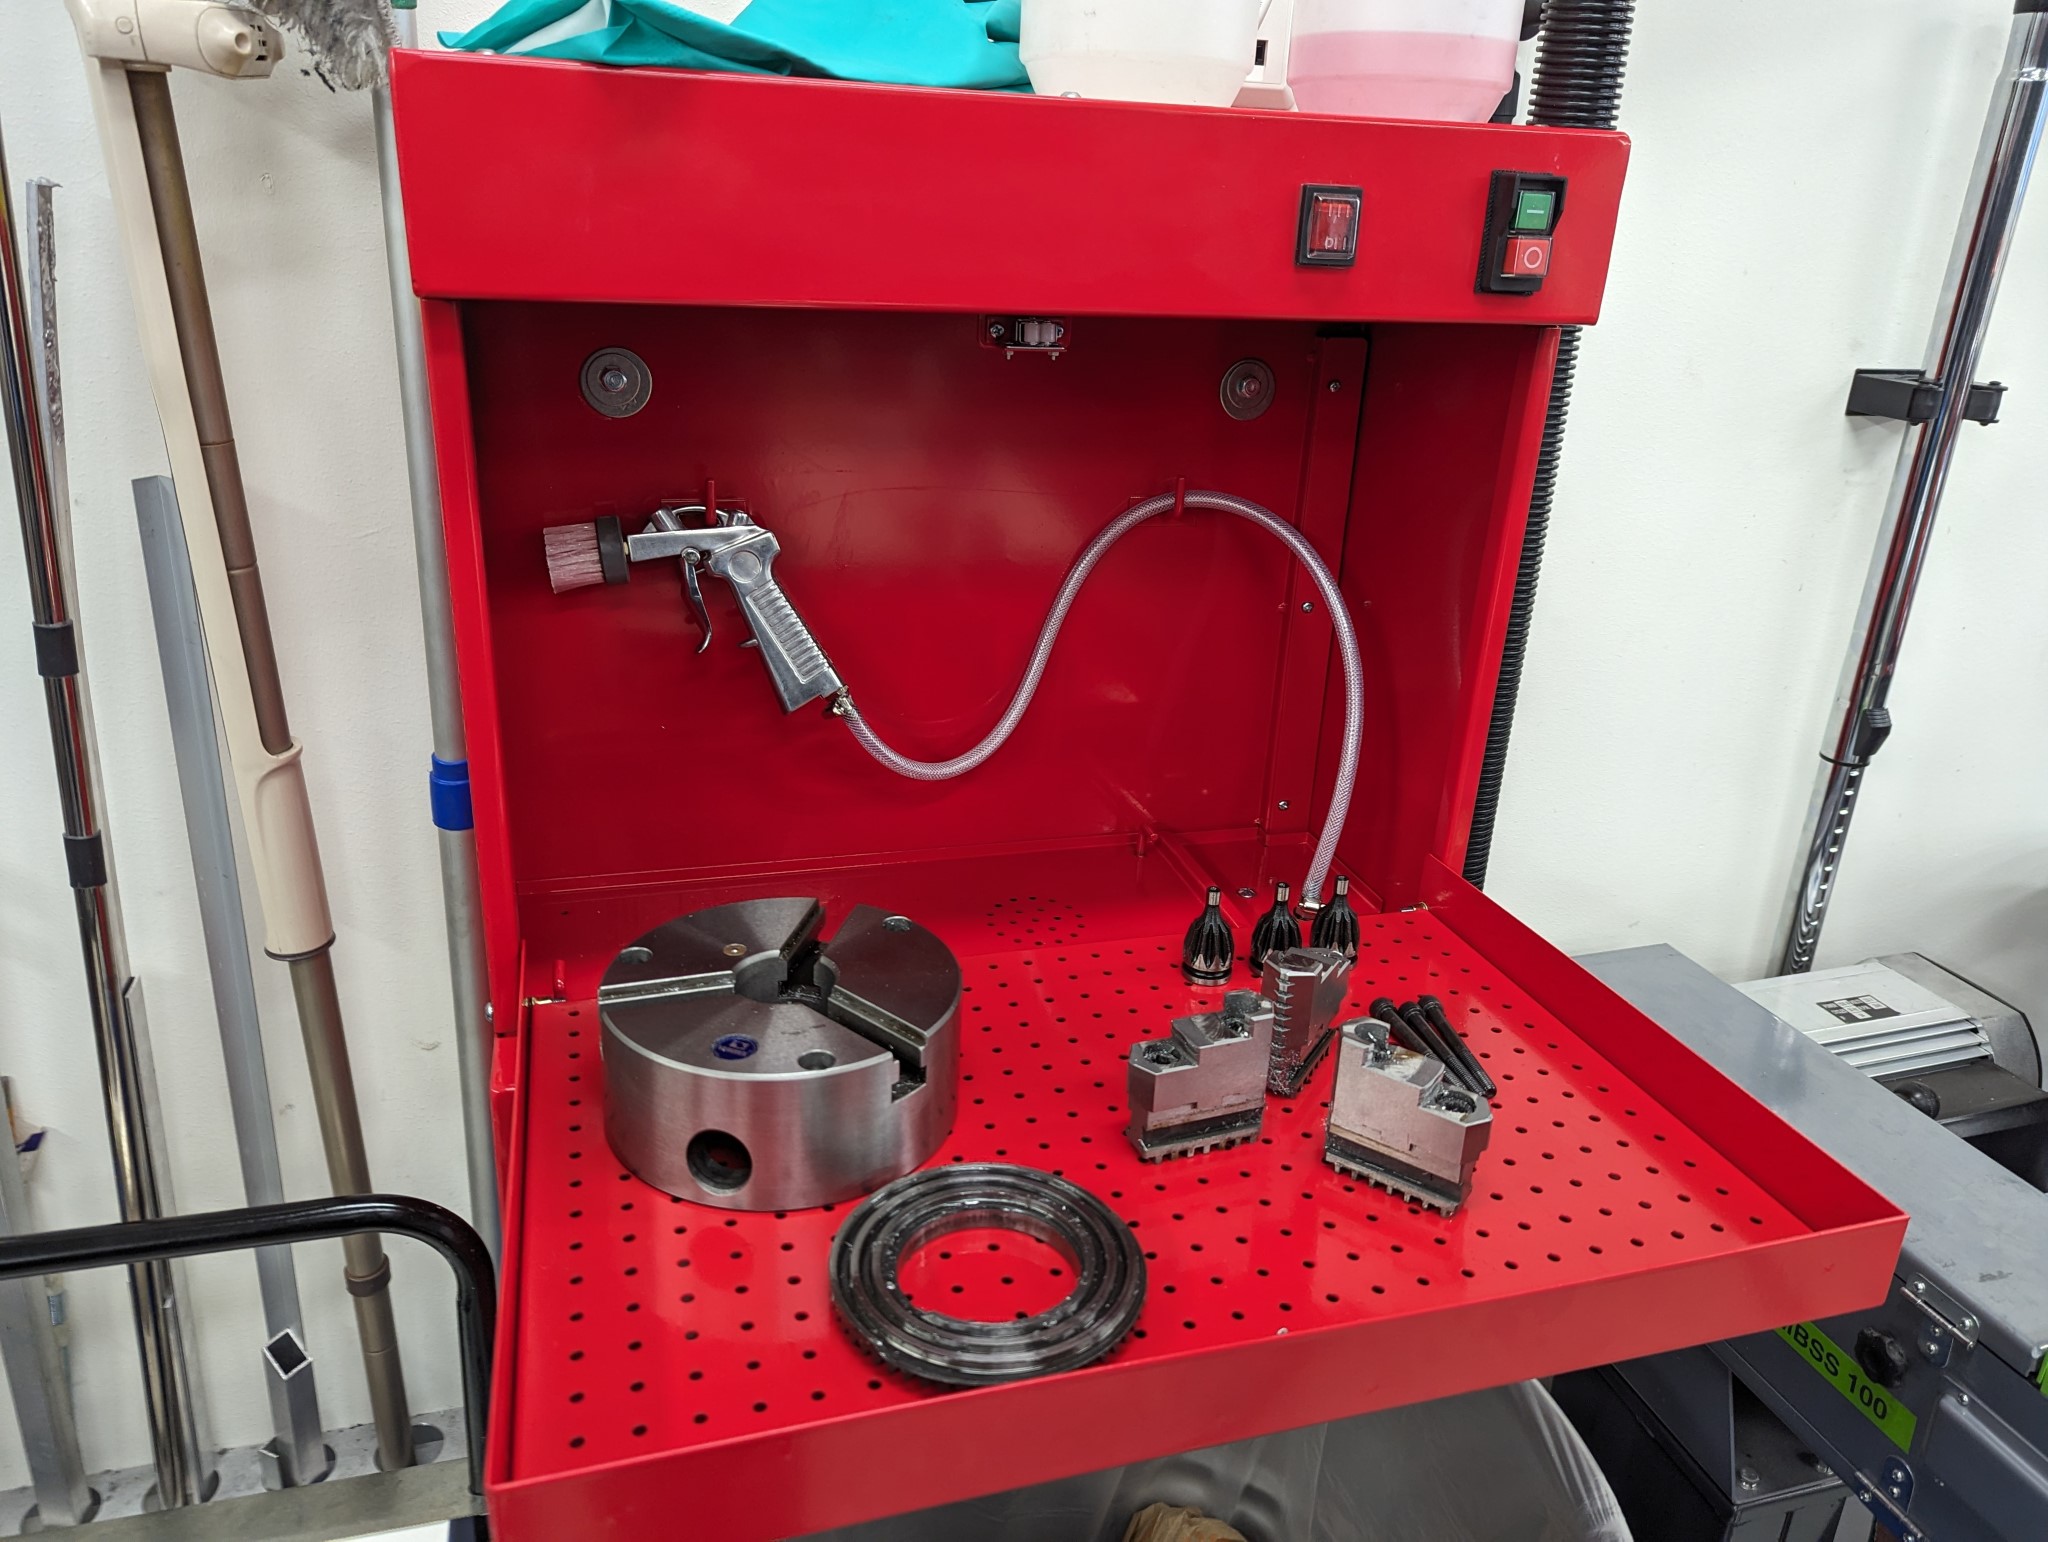
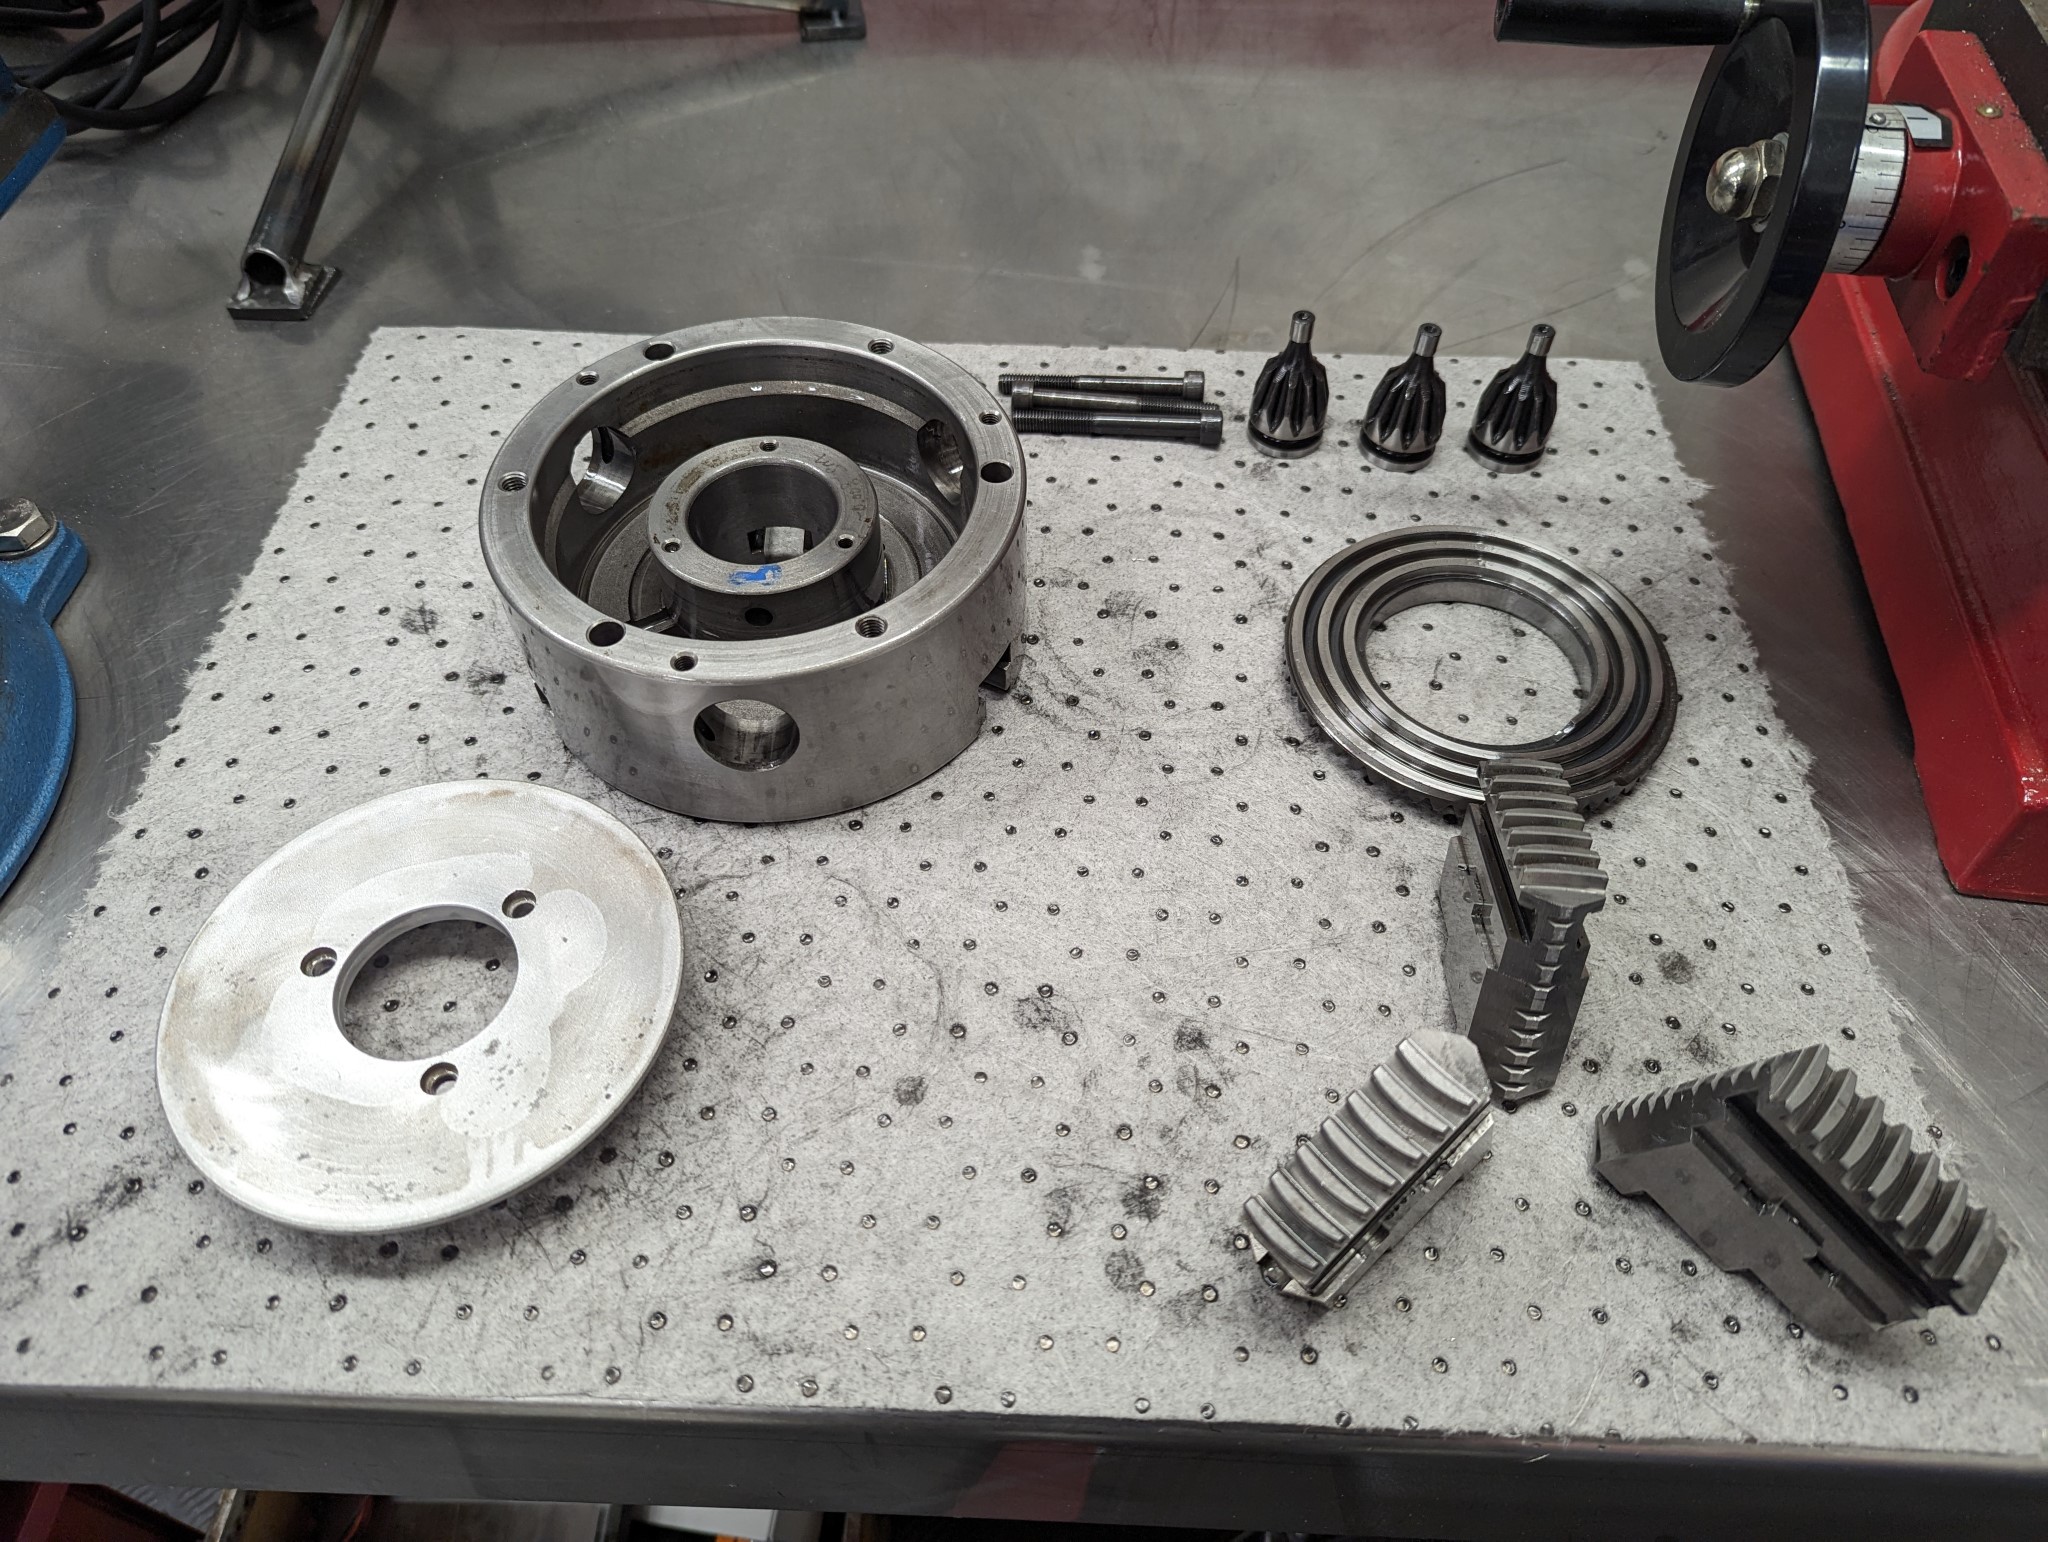
I had to use a very small depth of cut when making the center holes in the pulleys which caused very nasty dust like chips to form. The FogBuster blew those chips into the internals of the chuck on my rotary table. So when I was done with the pulleys I had to take the chuck apart and give it a through clean in the parts cleaner...
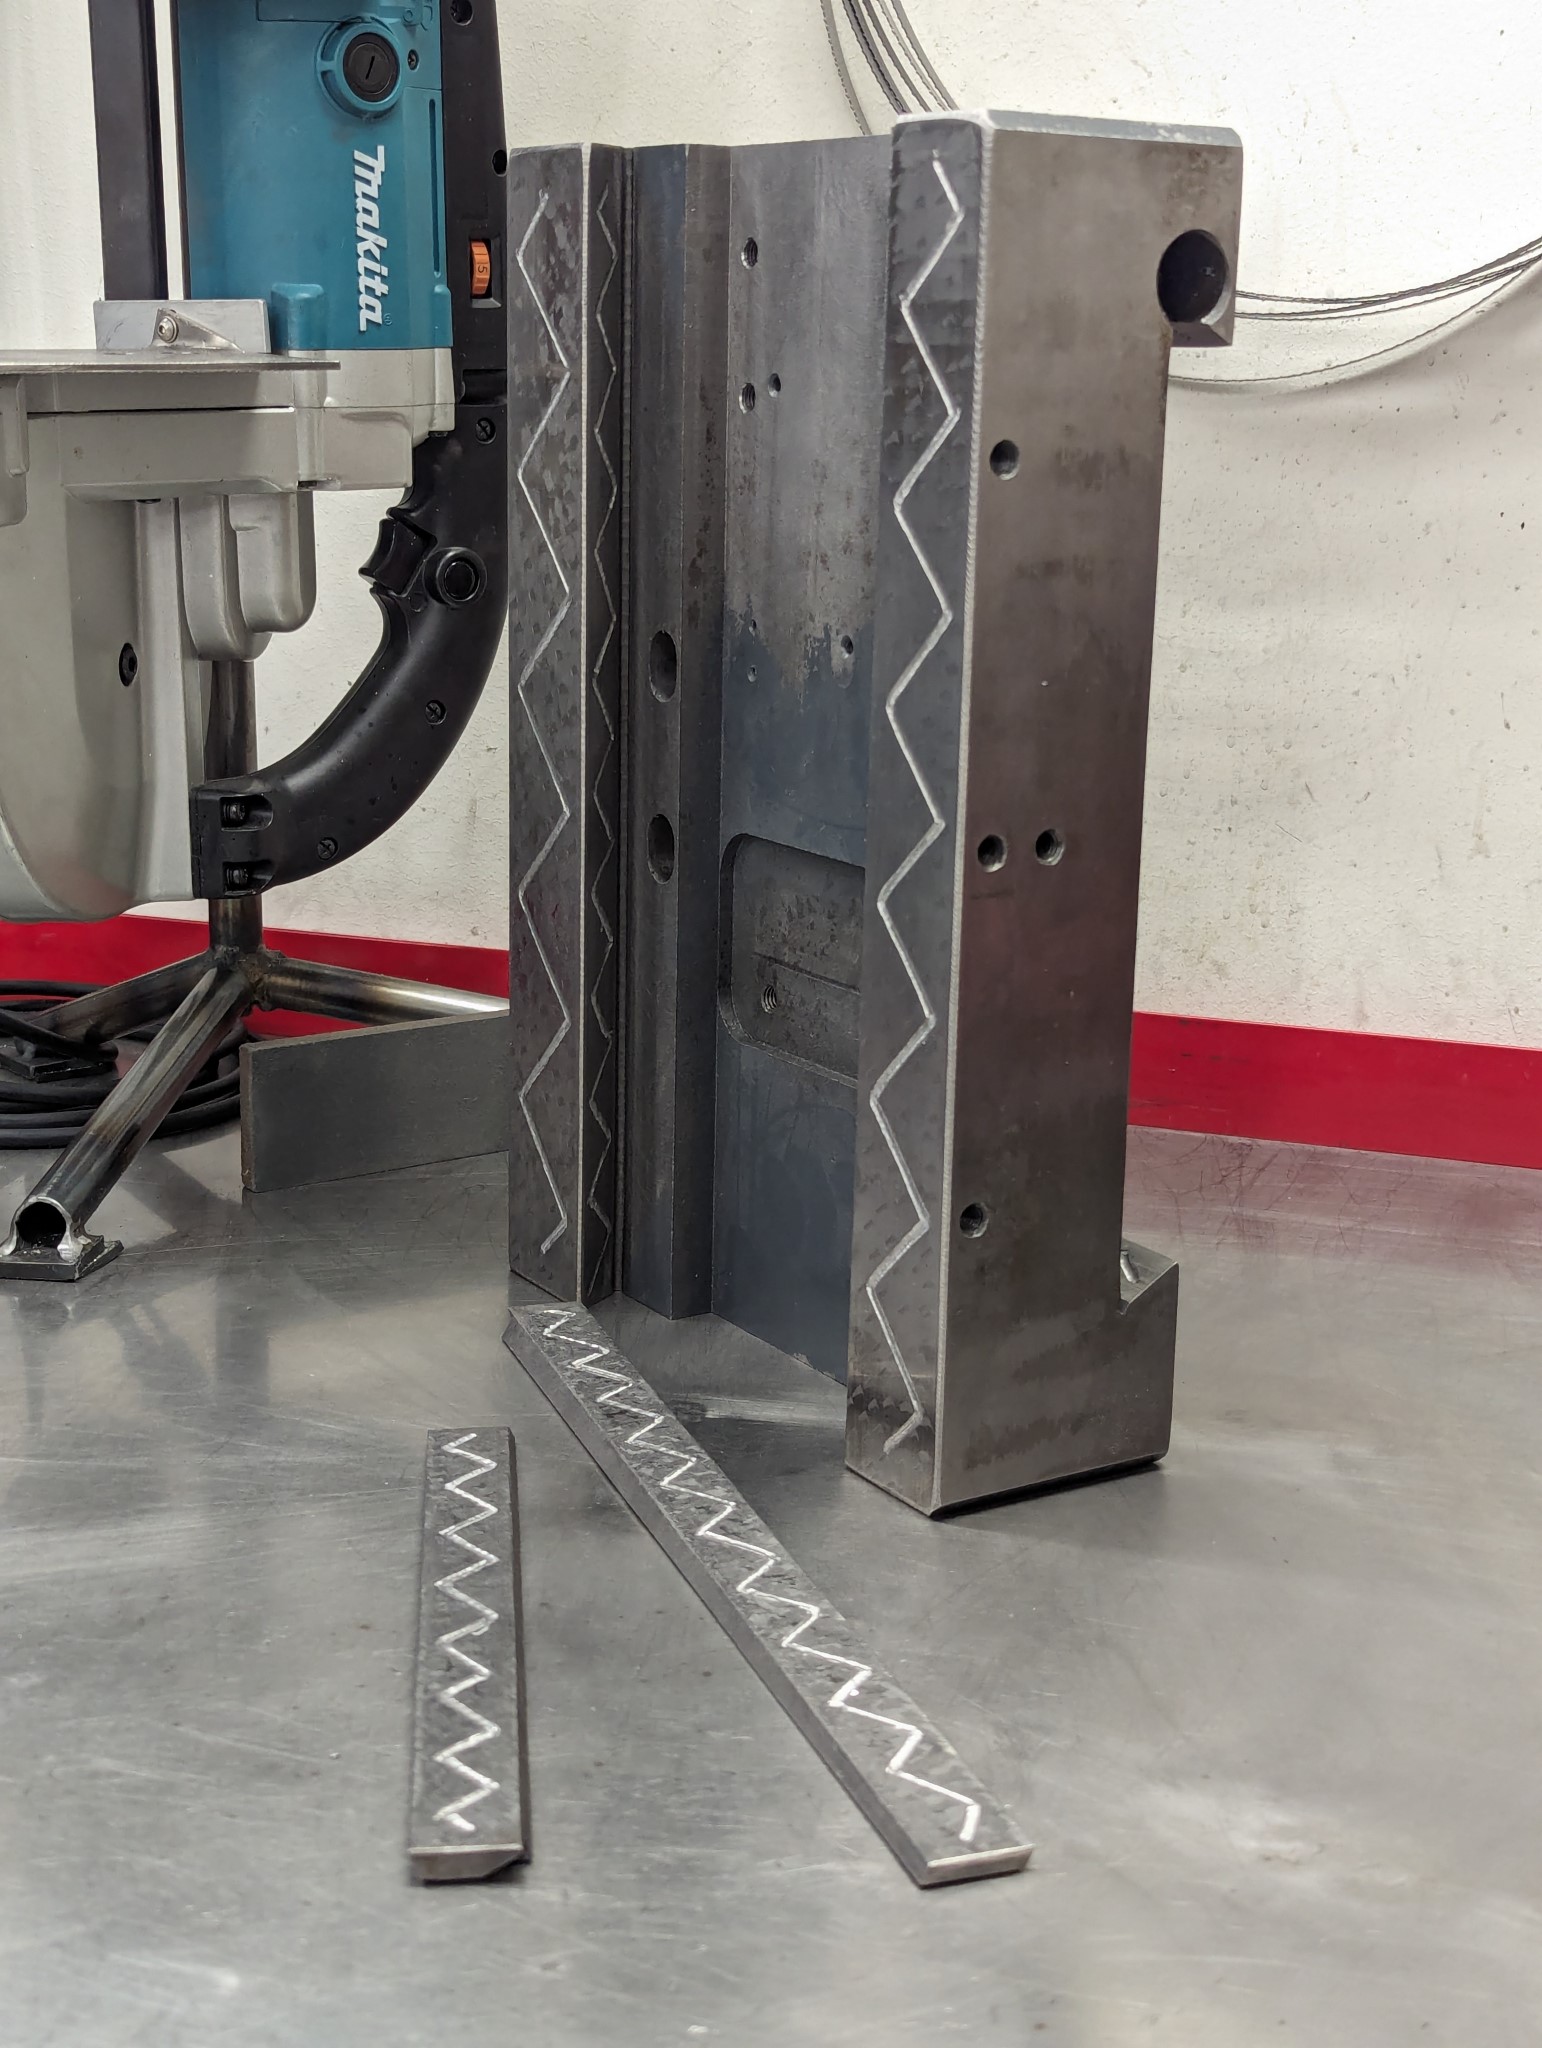
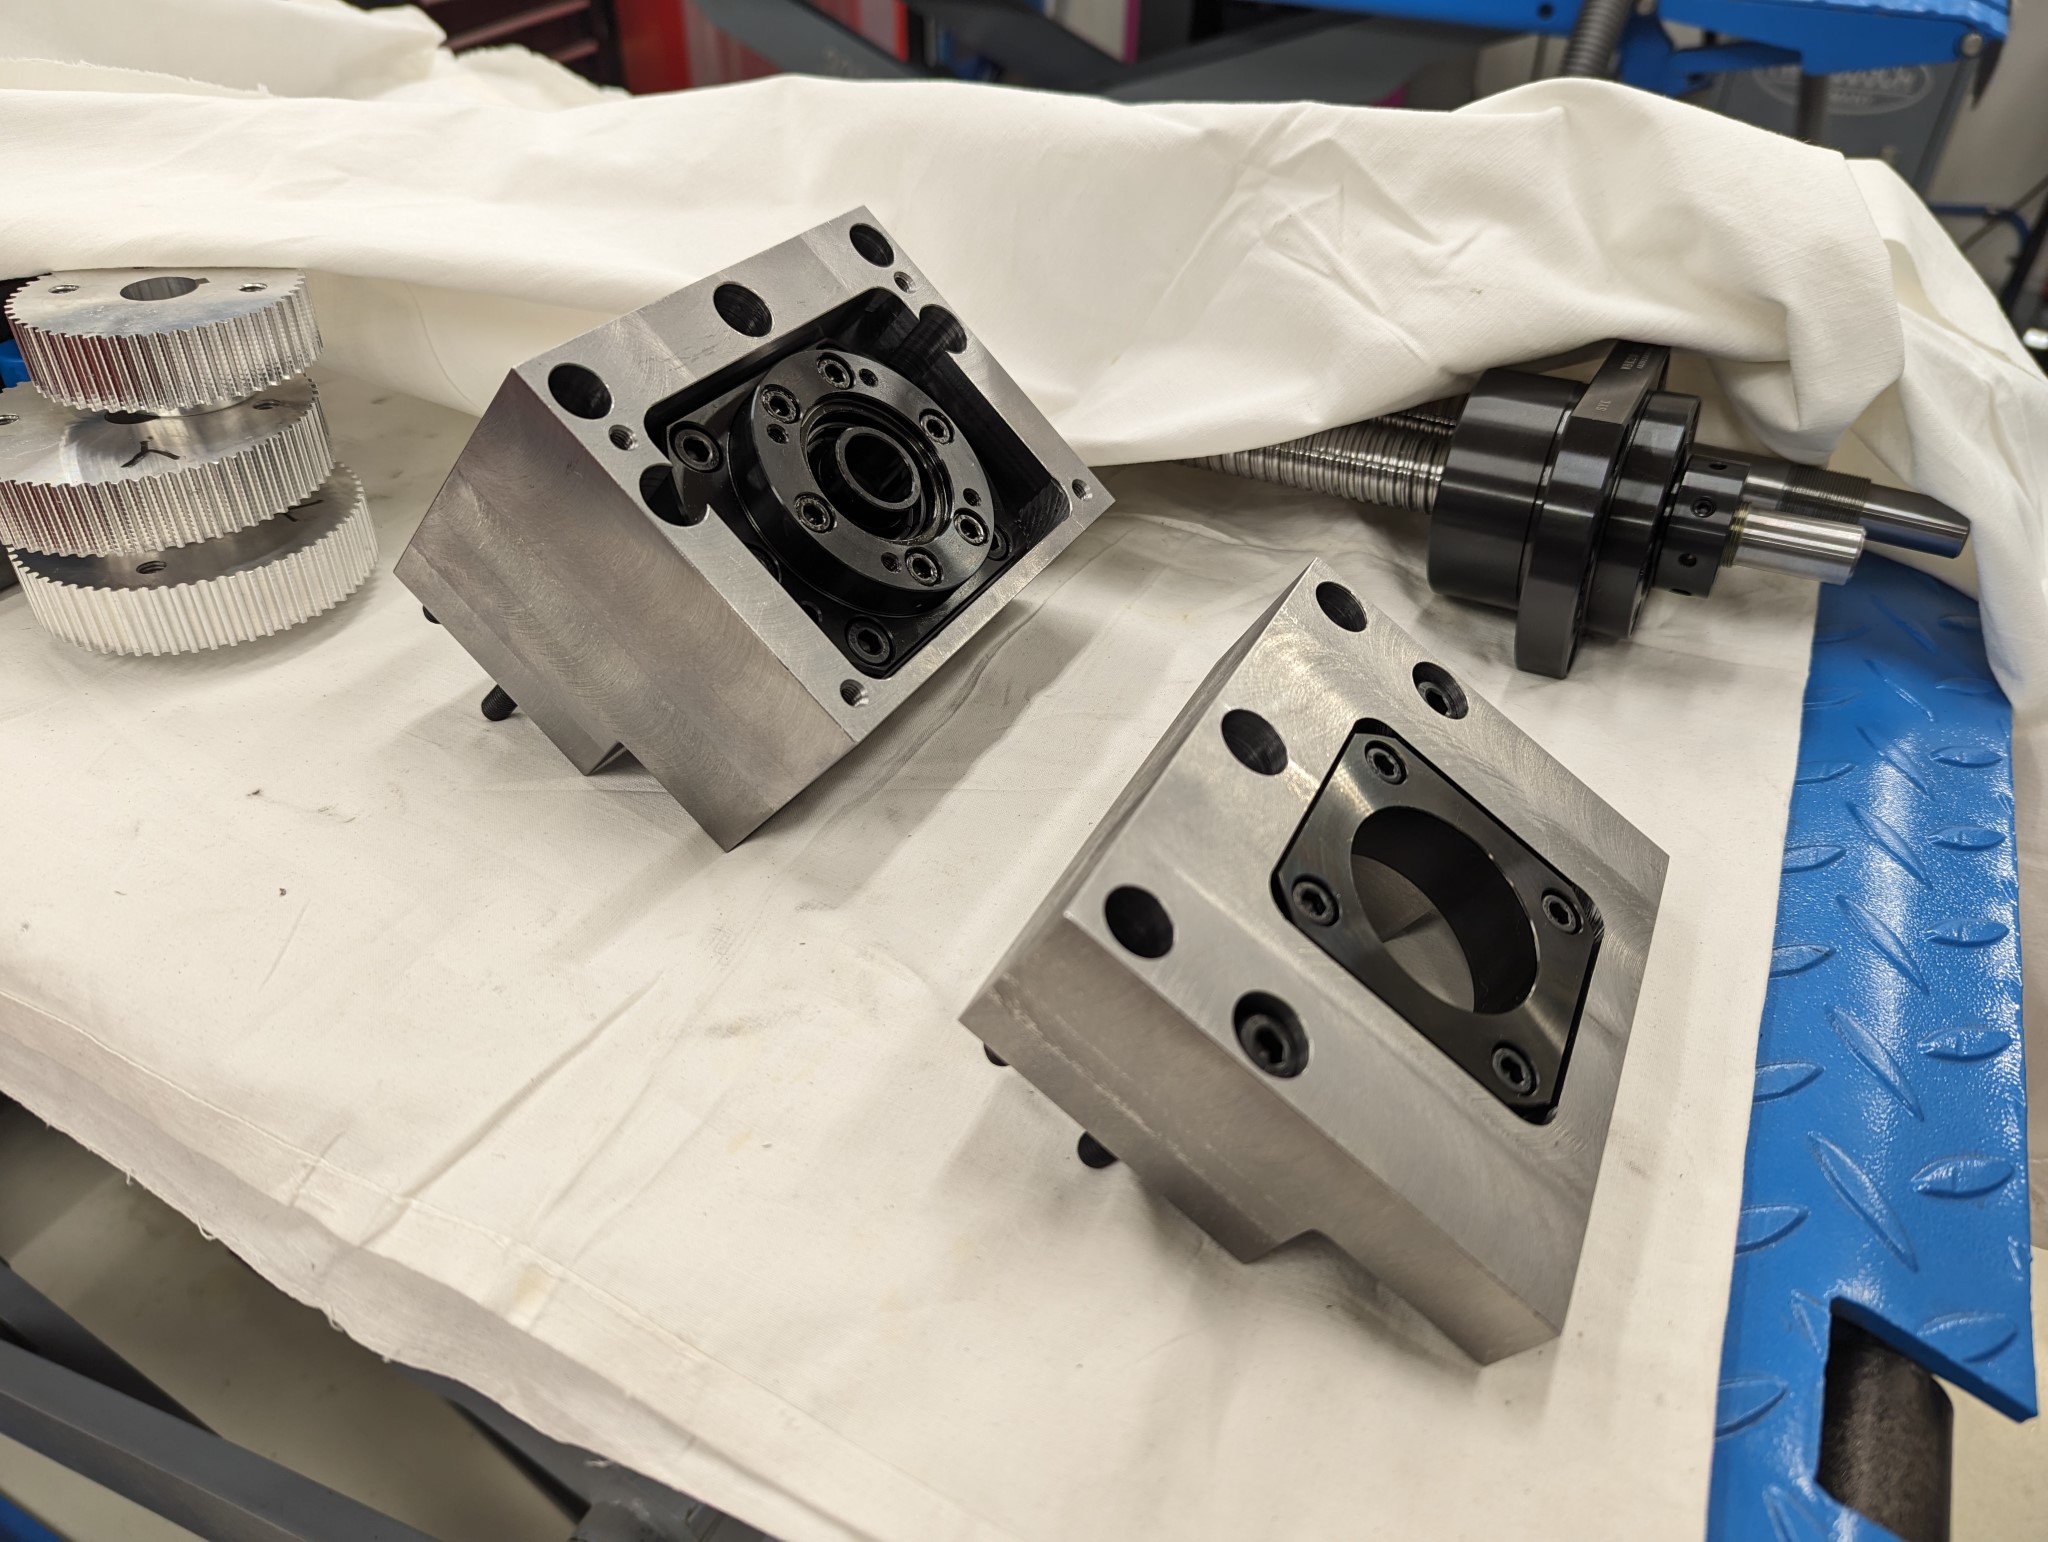
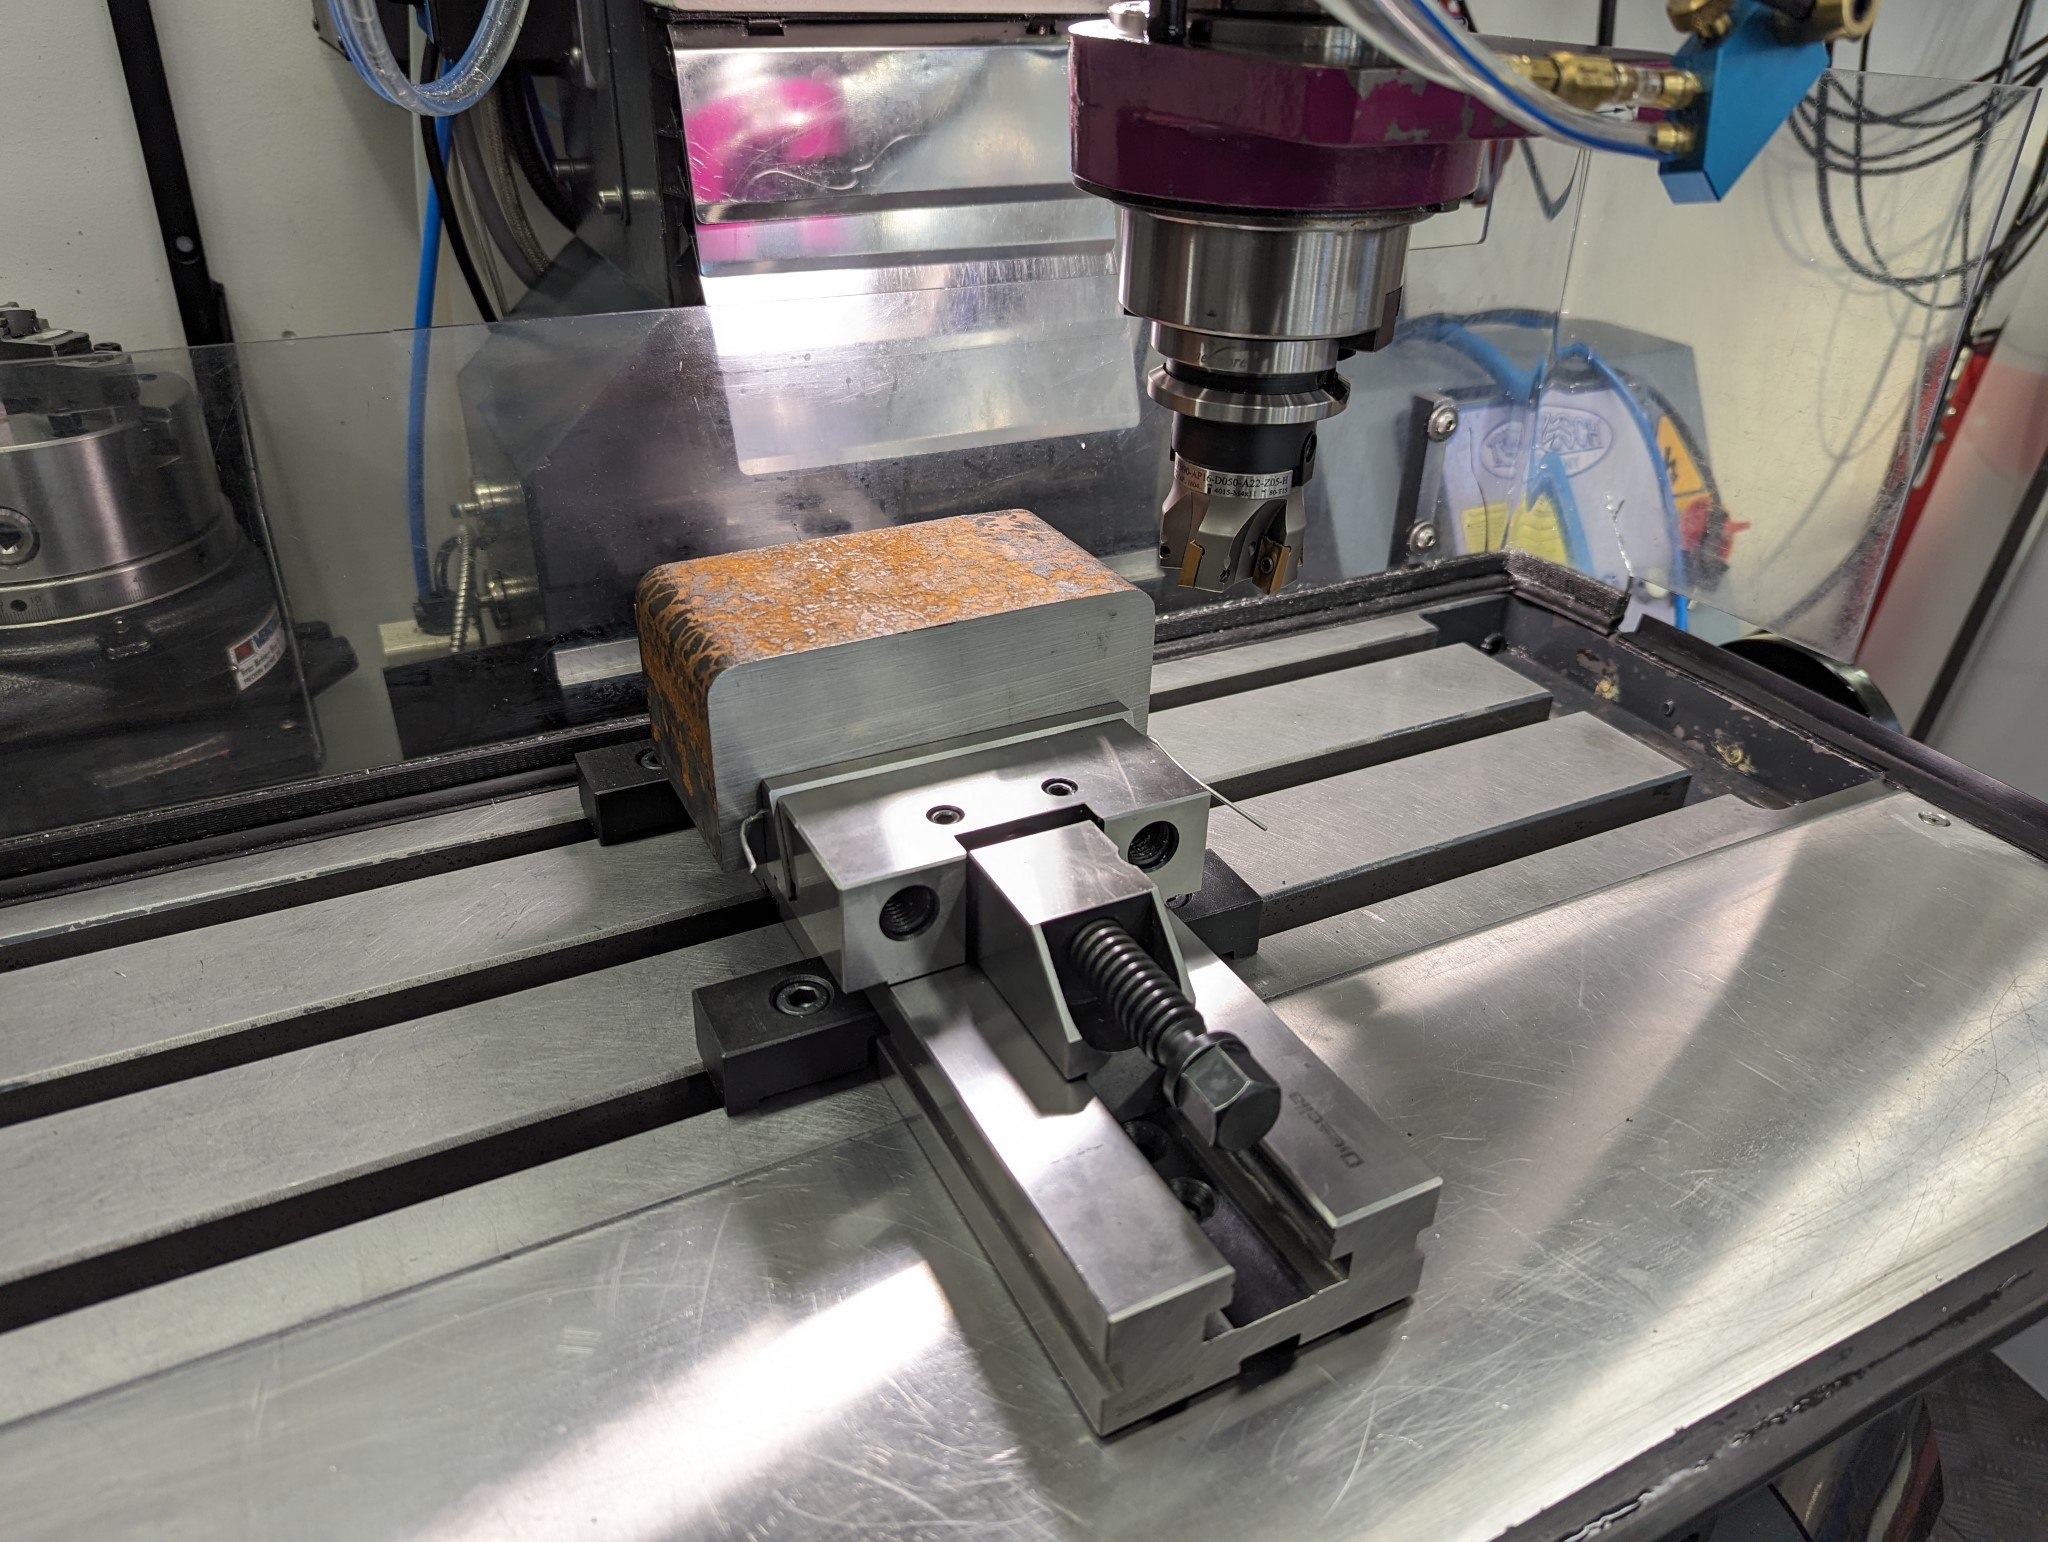
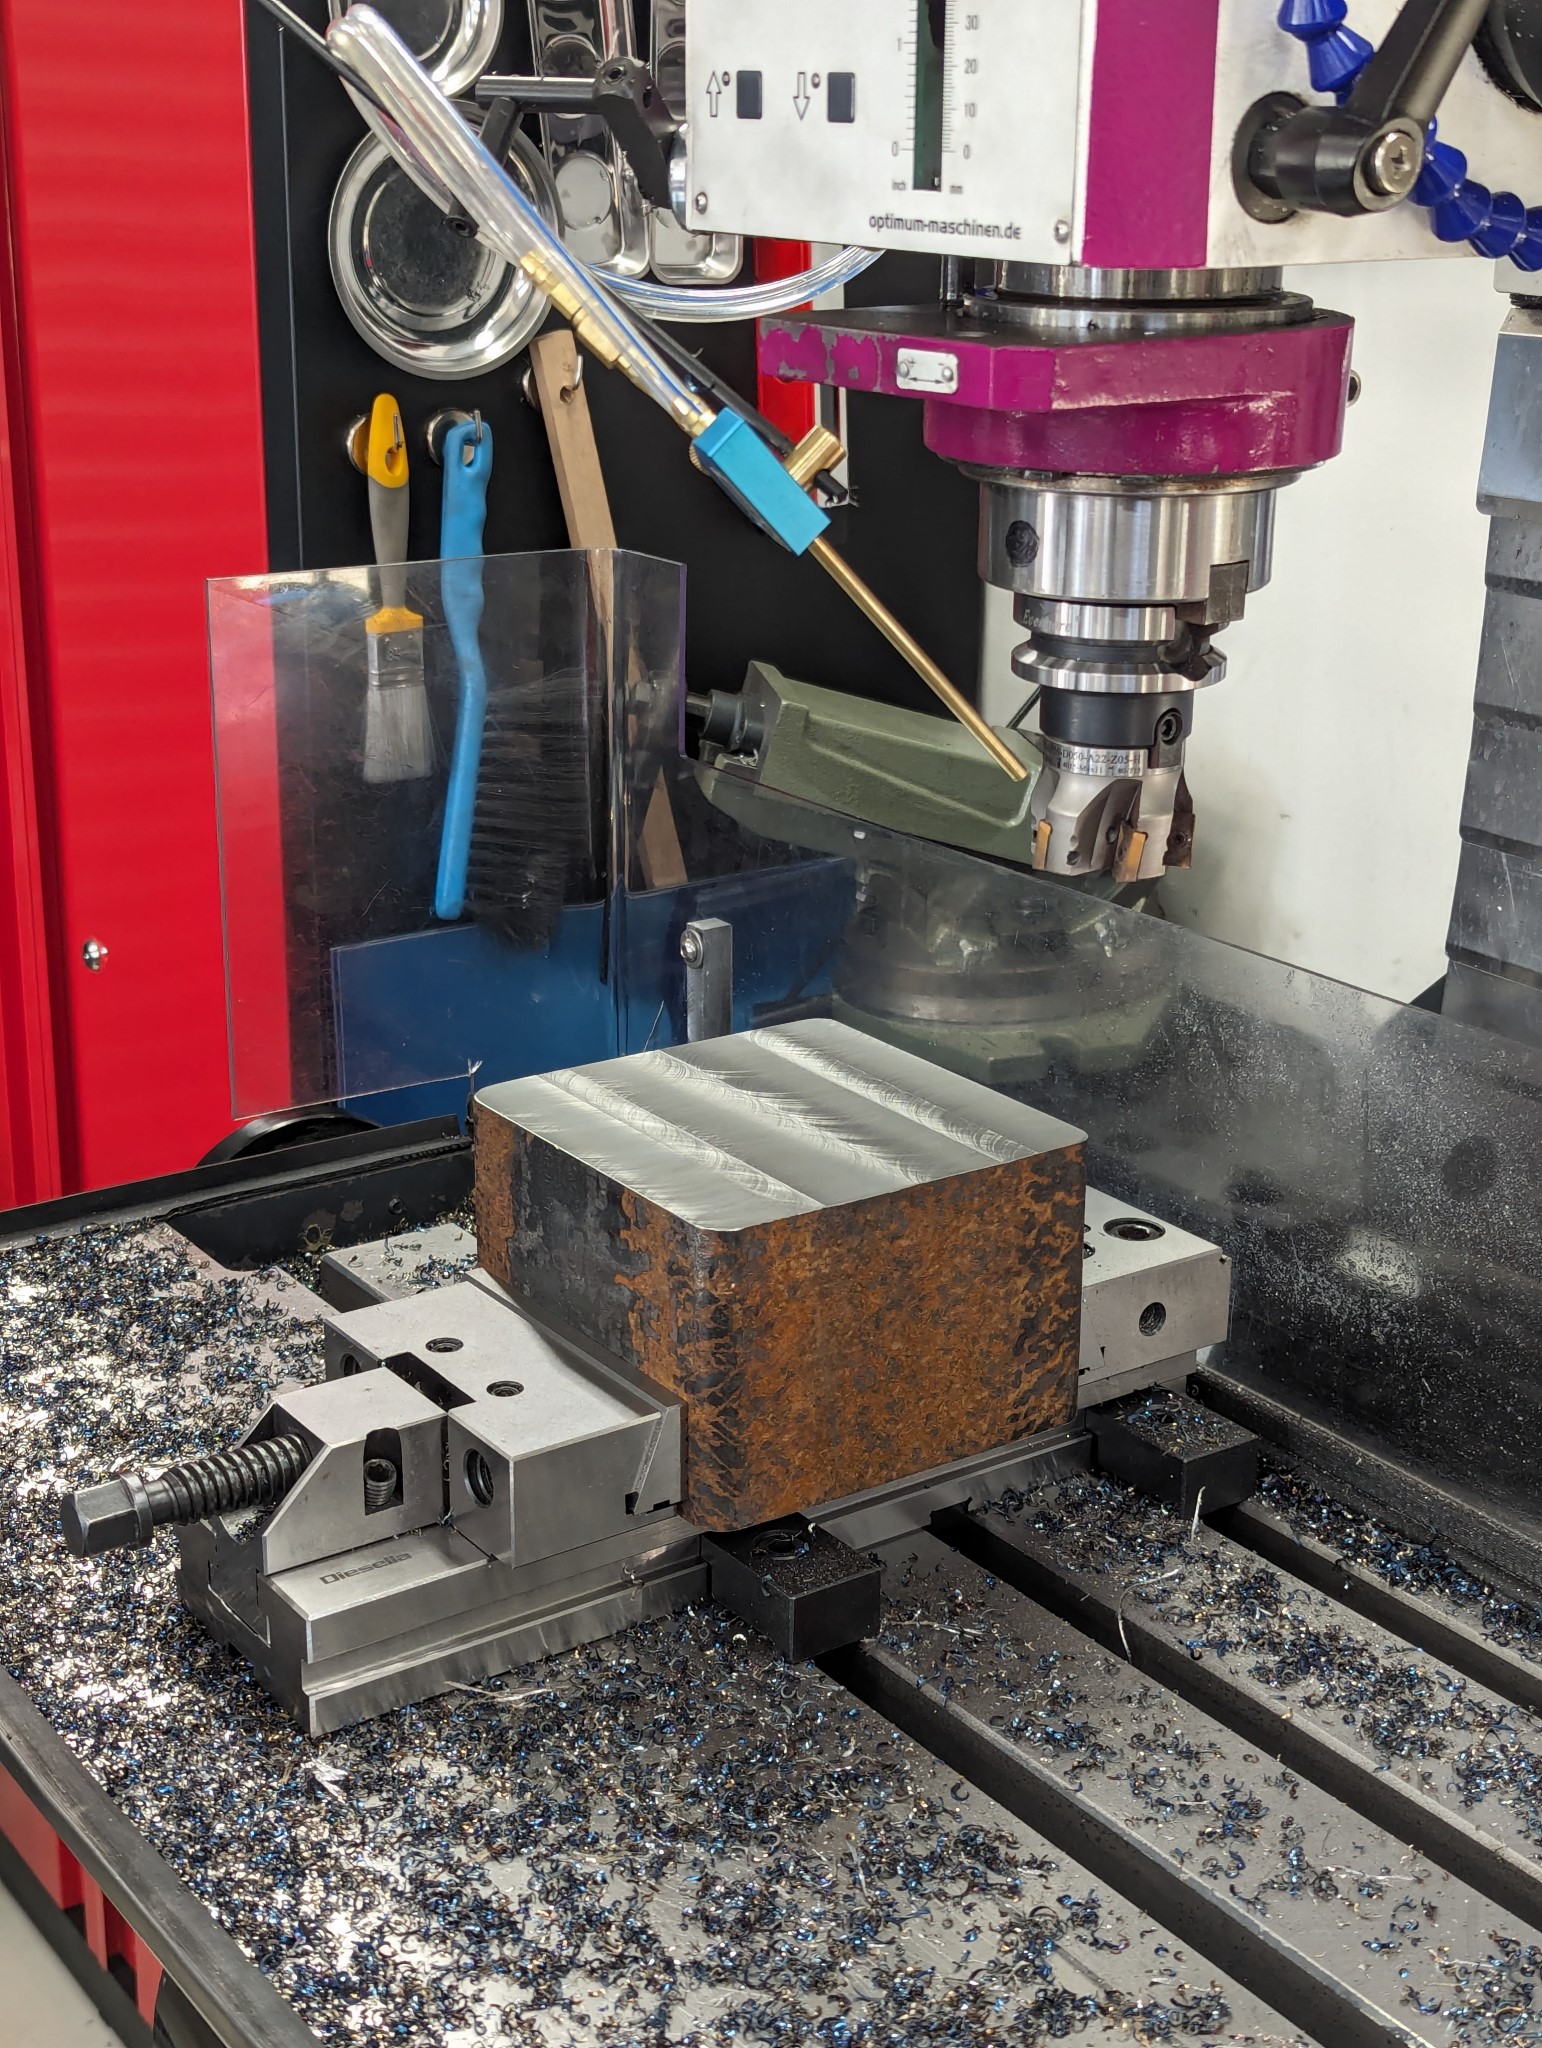
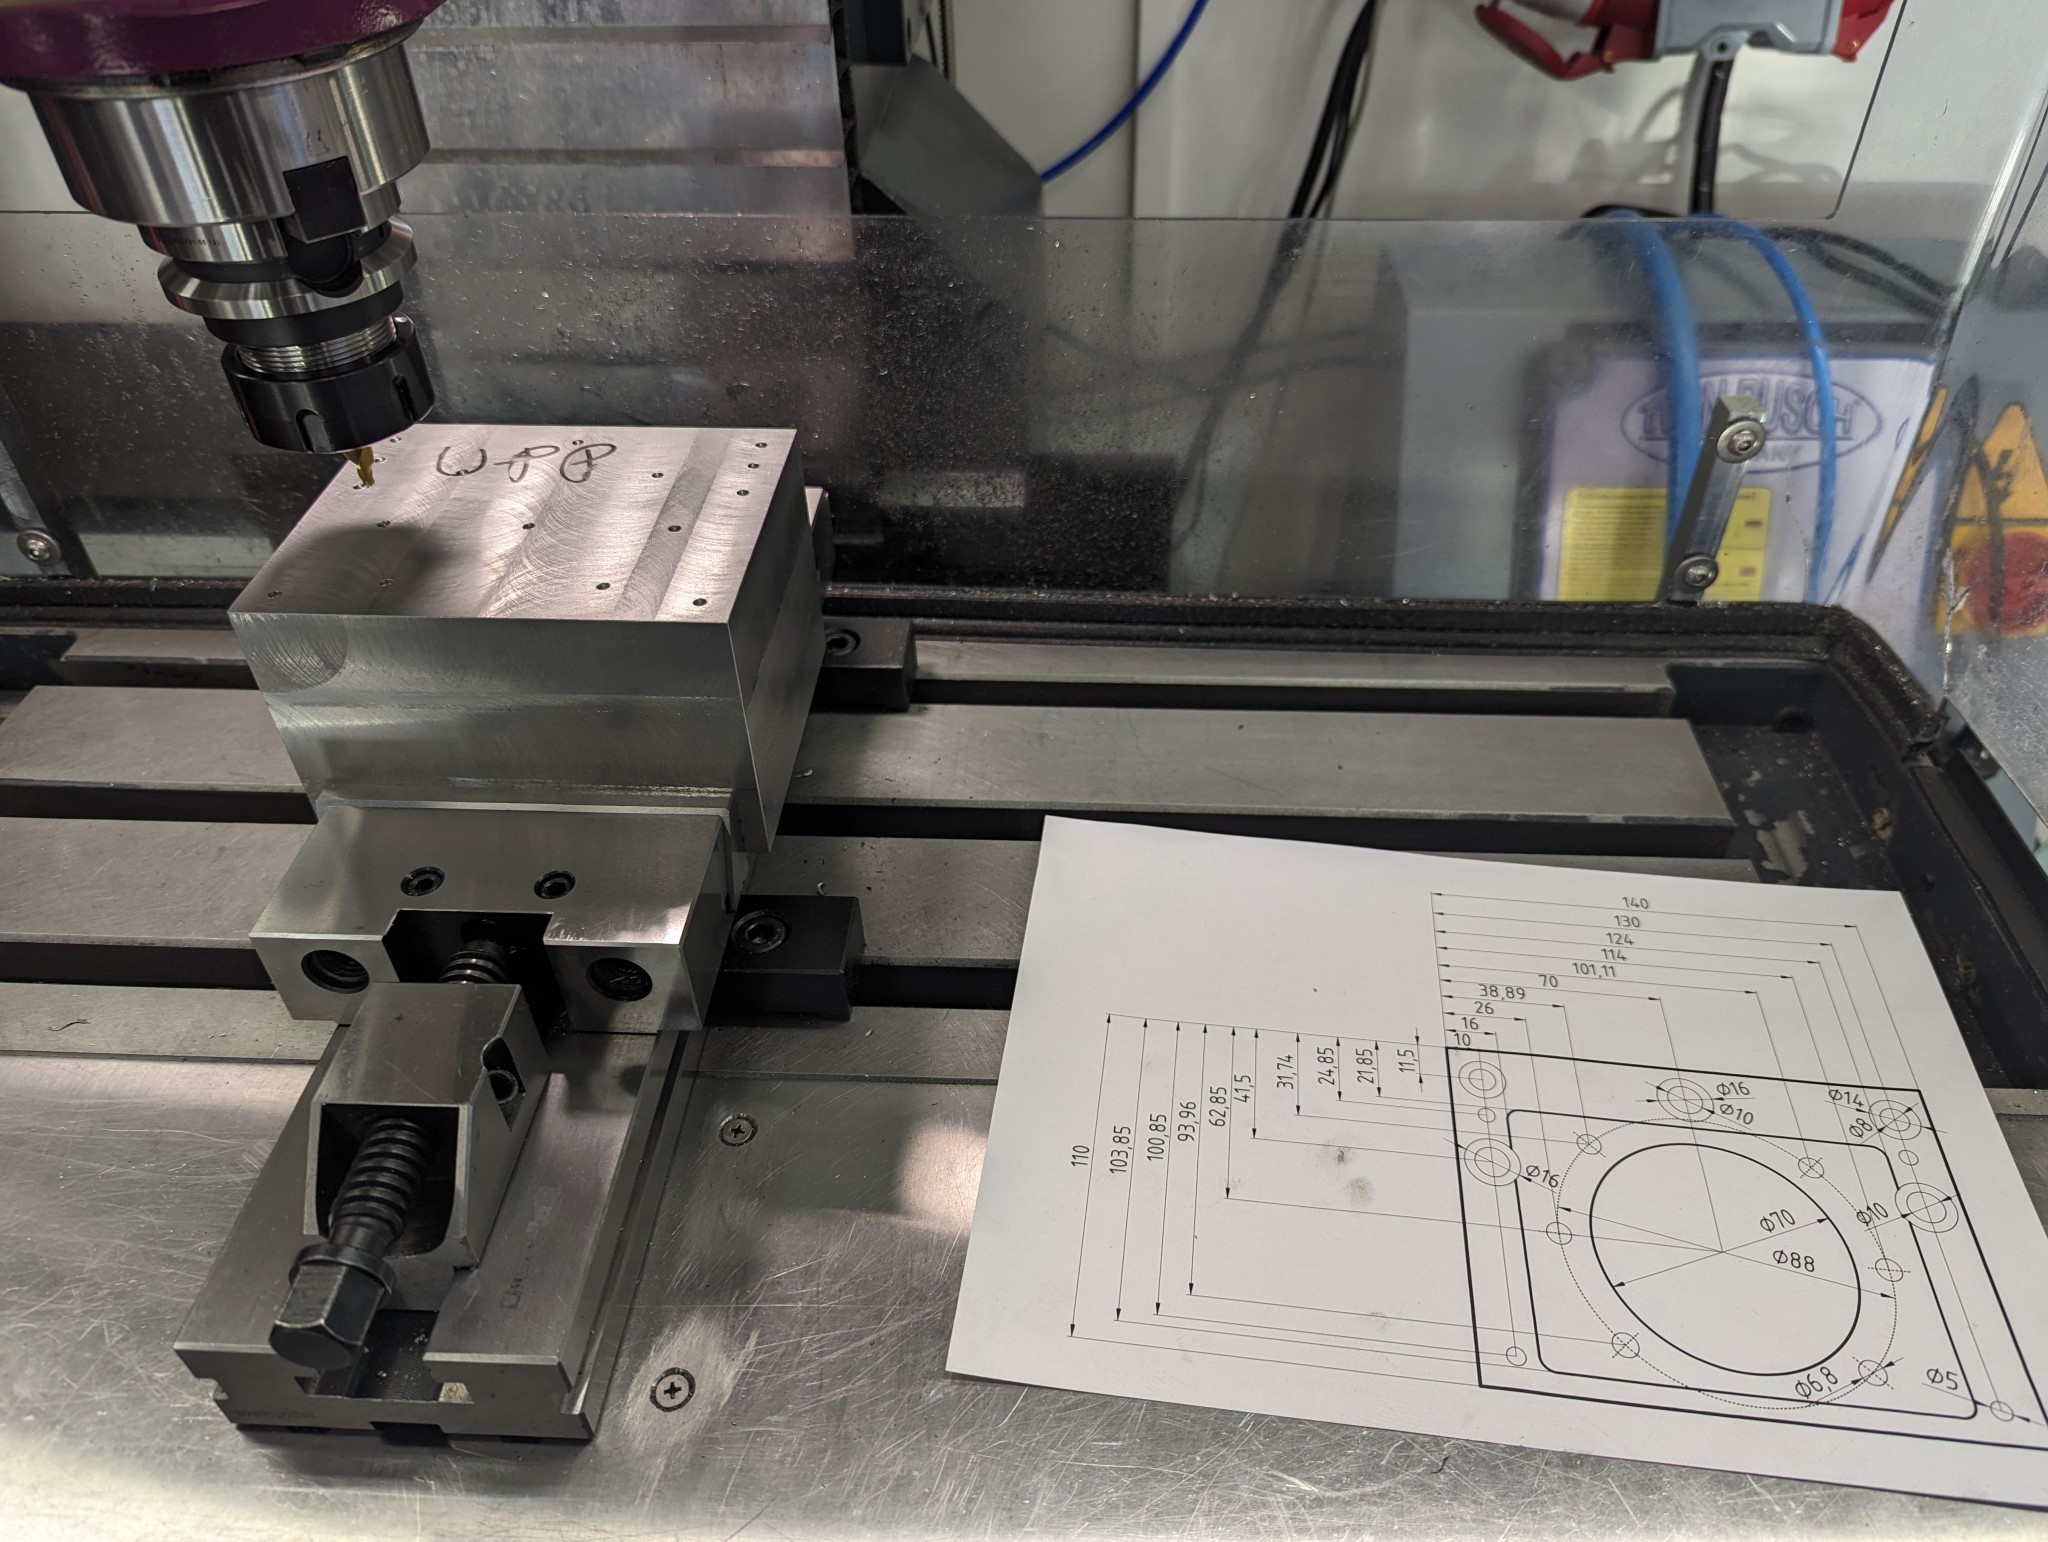
Next up it was time to start making the mount for the ball screws and bearing blocks. I did some rough measurements and then made drawings using in Visio which I then printed and tweaked until they fit on the machine.
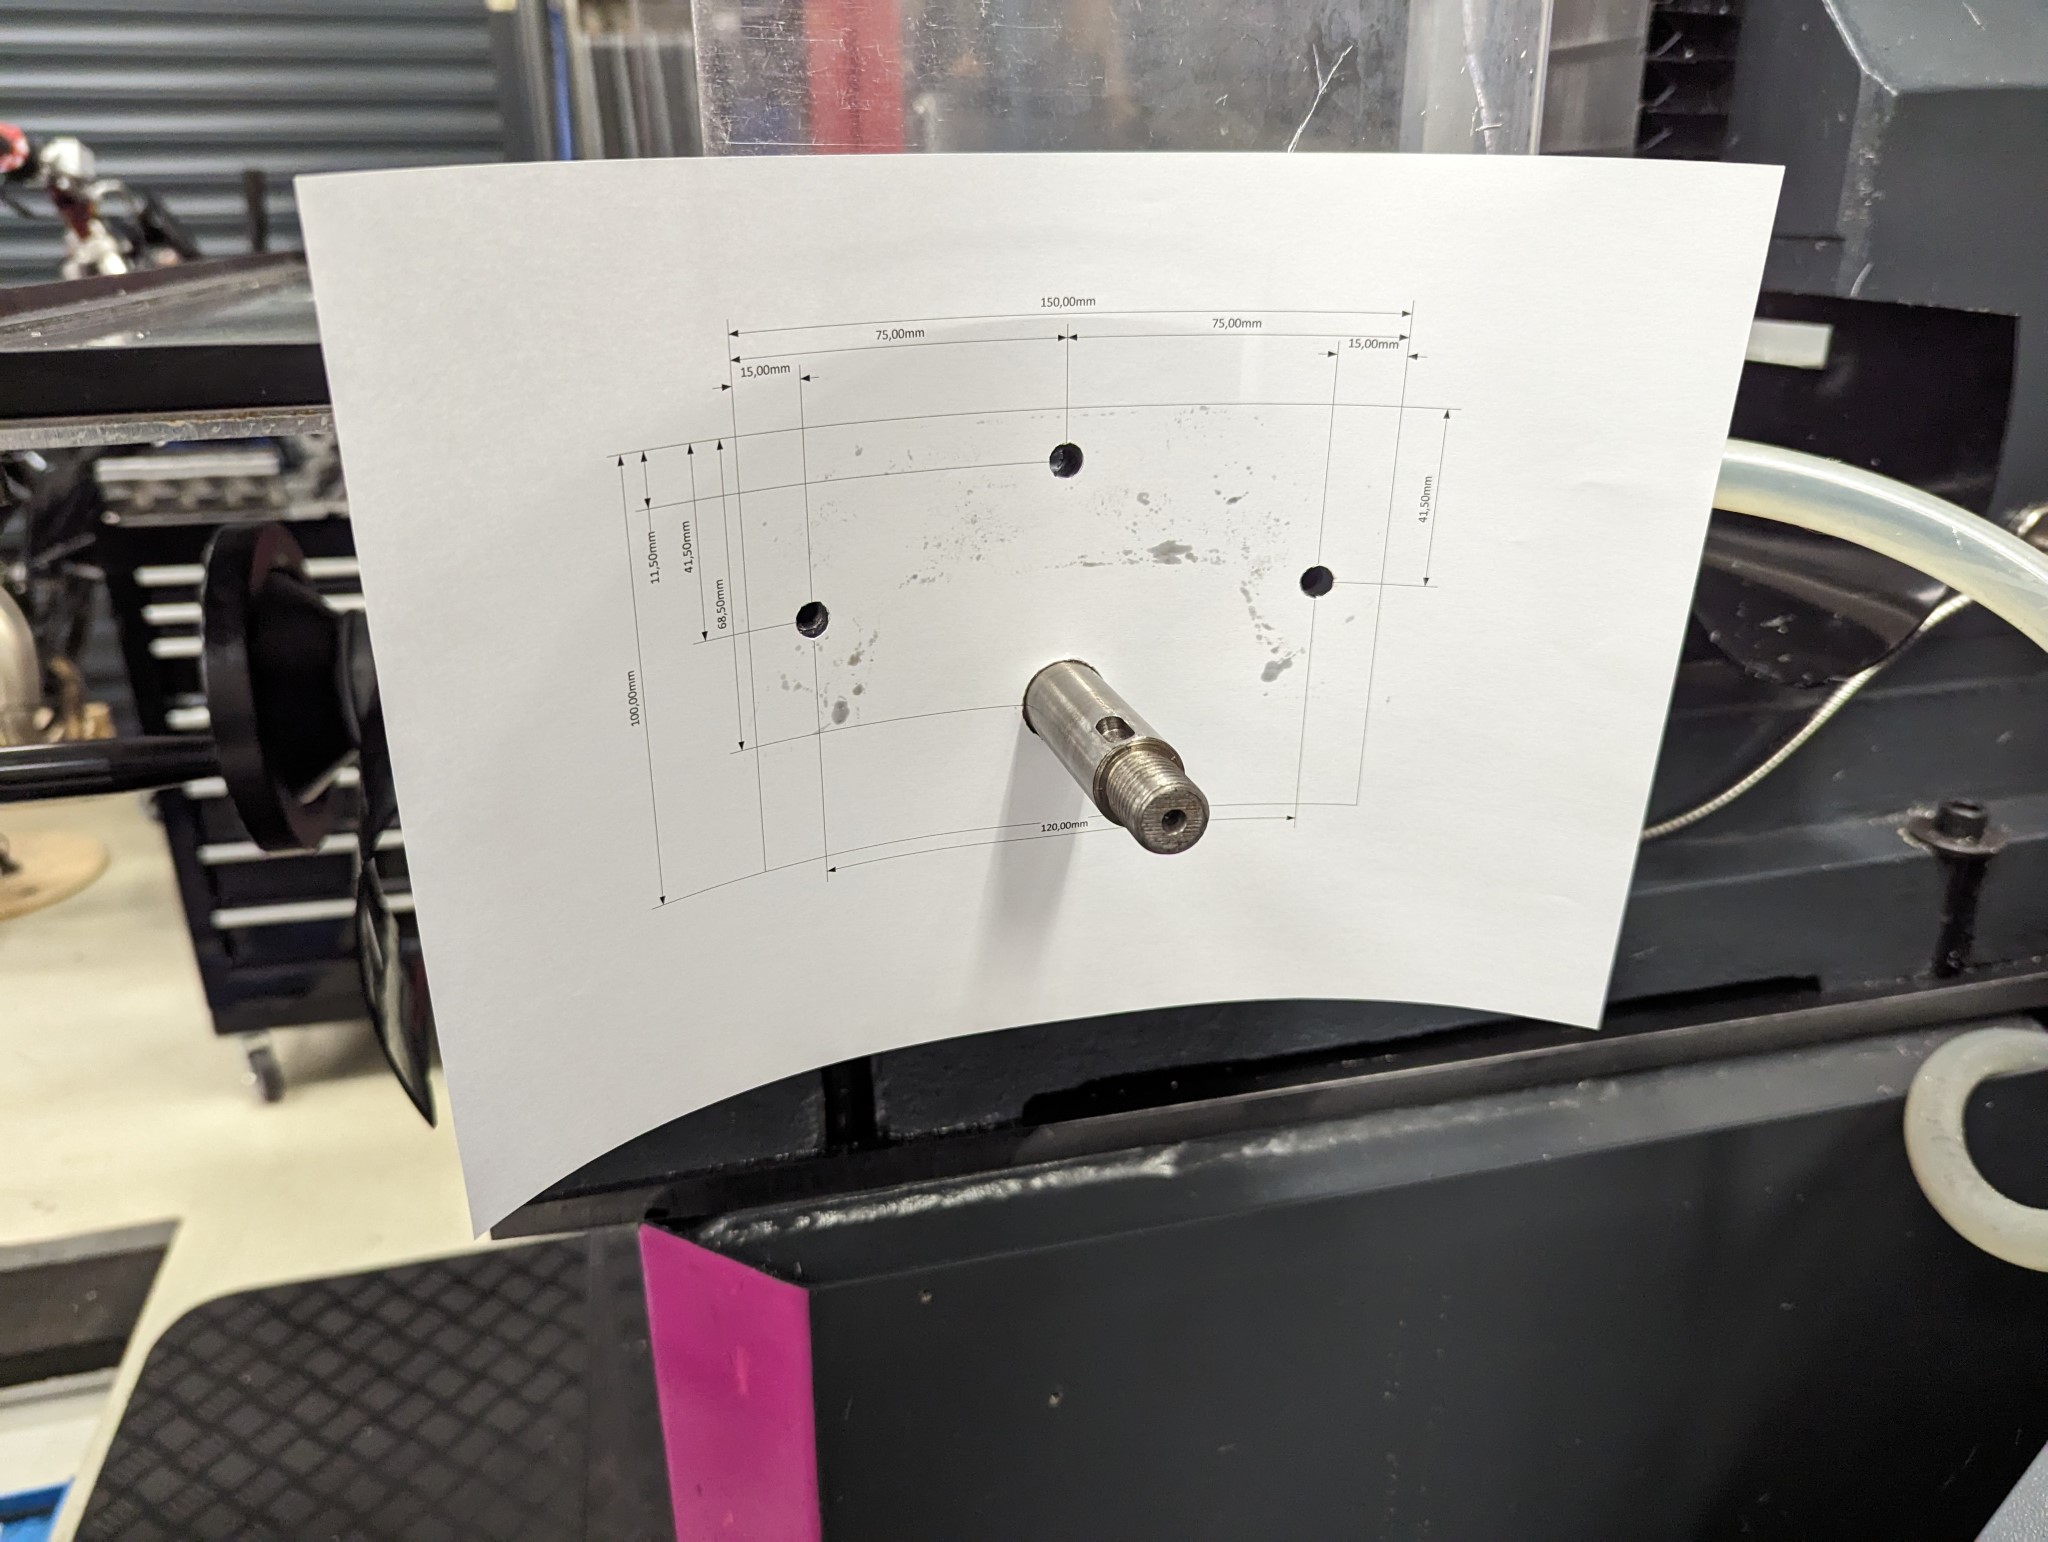
Halfway through this process I realized that Visio wasn't the right tool for this job and I decided to learn how to use FreeCAD.
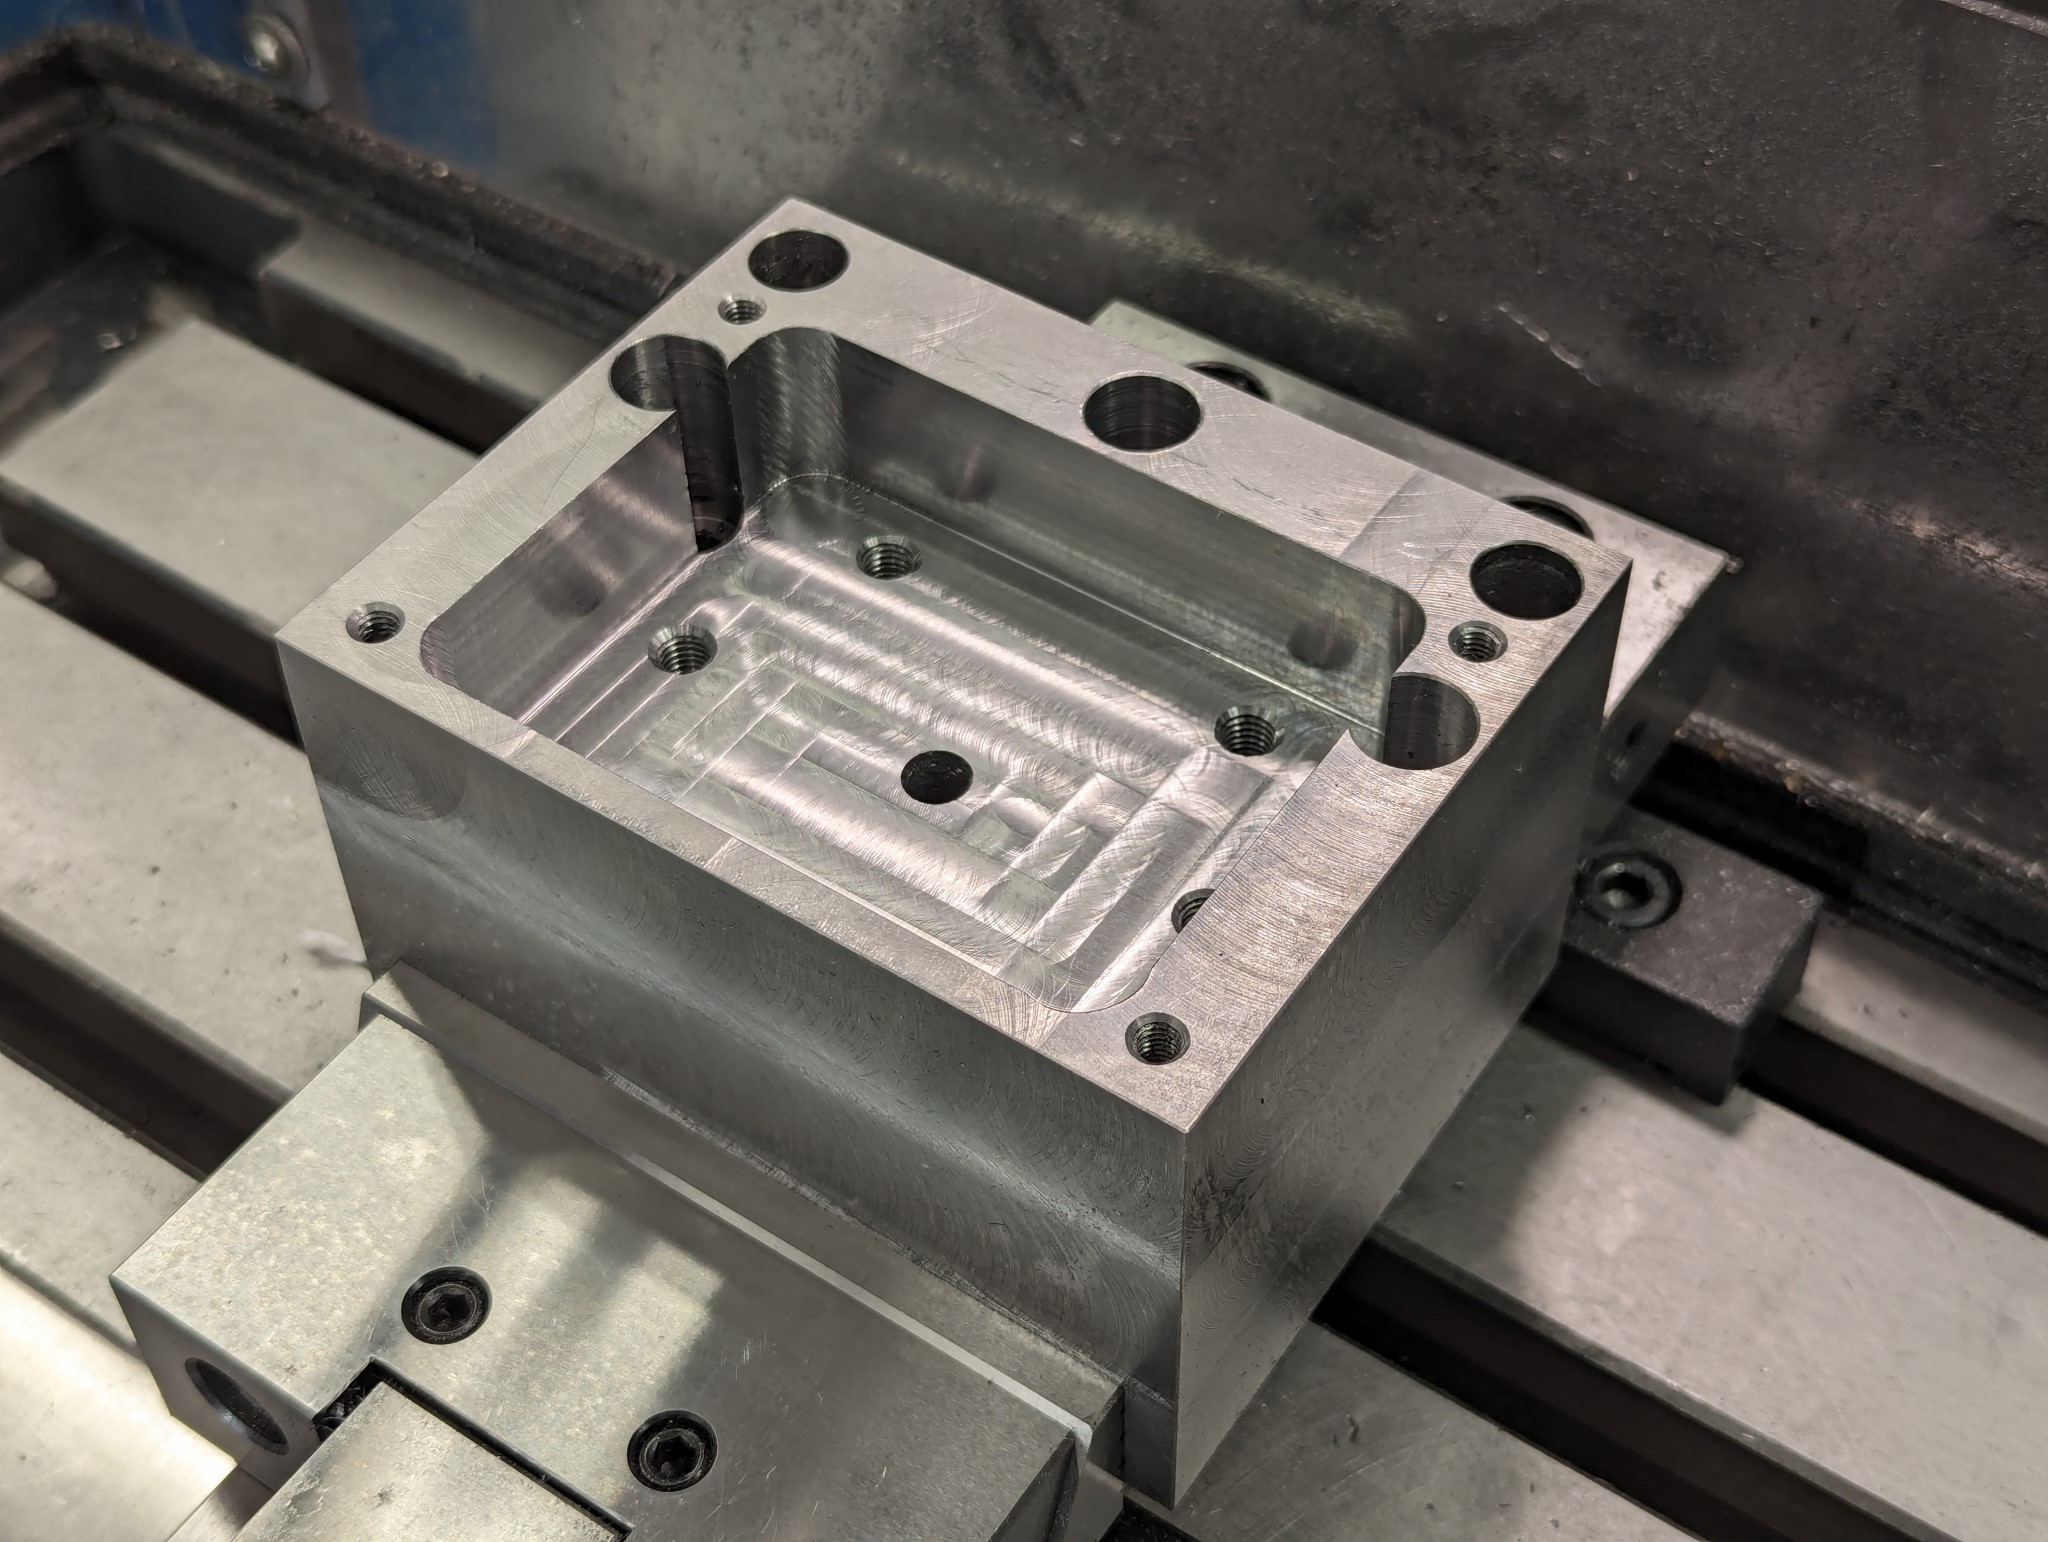
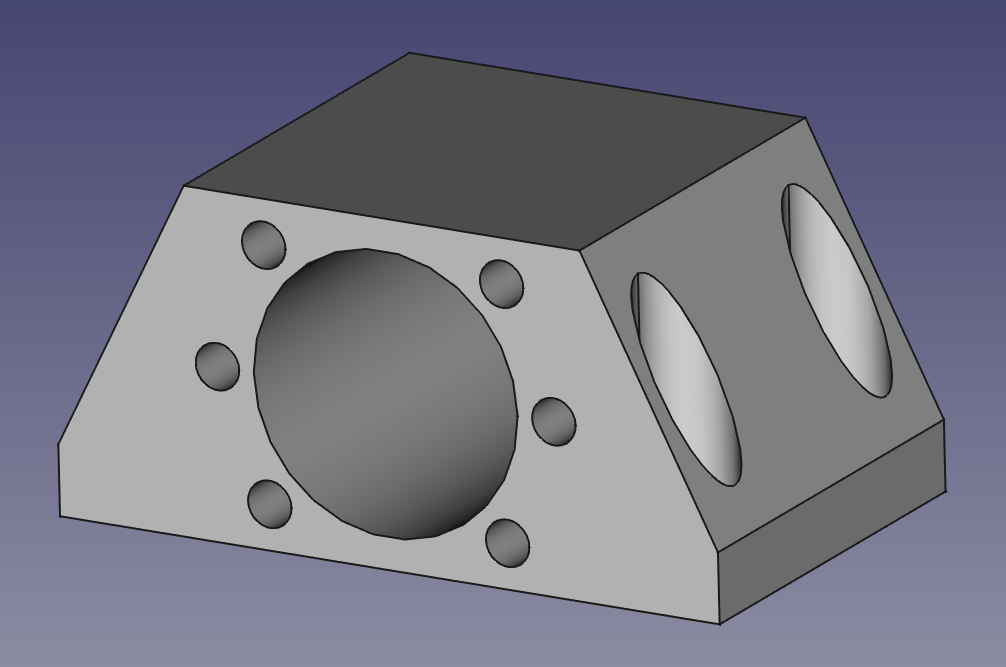
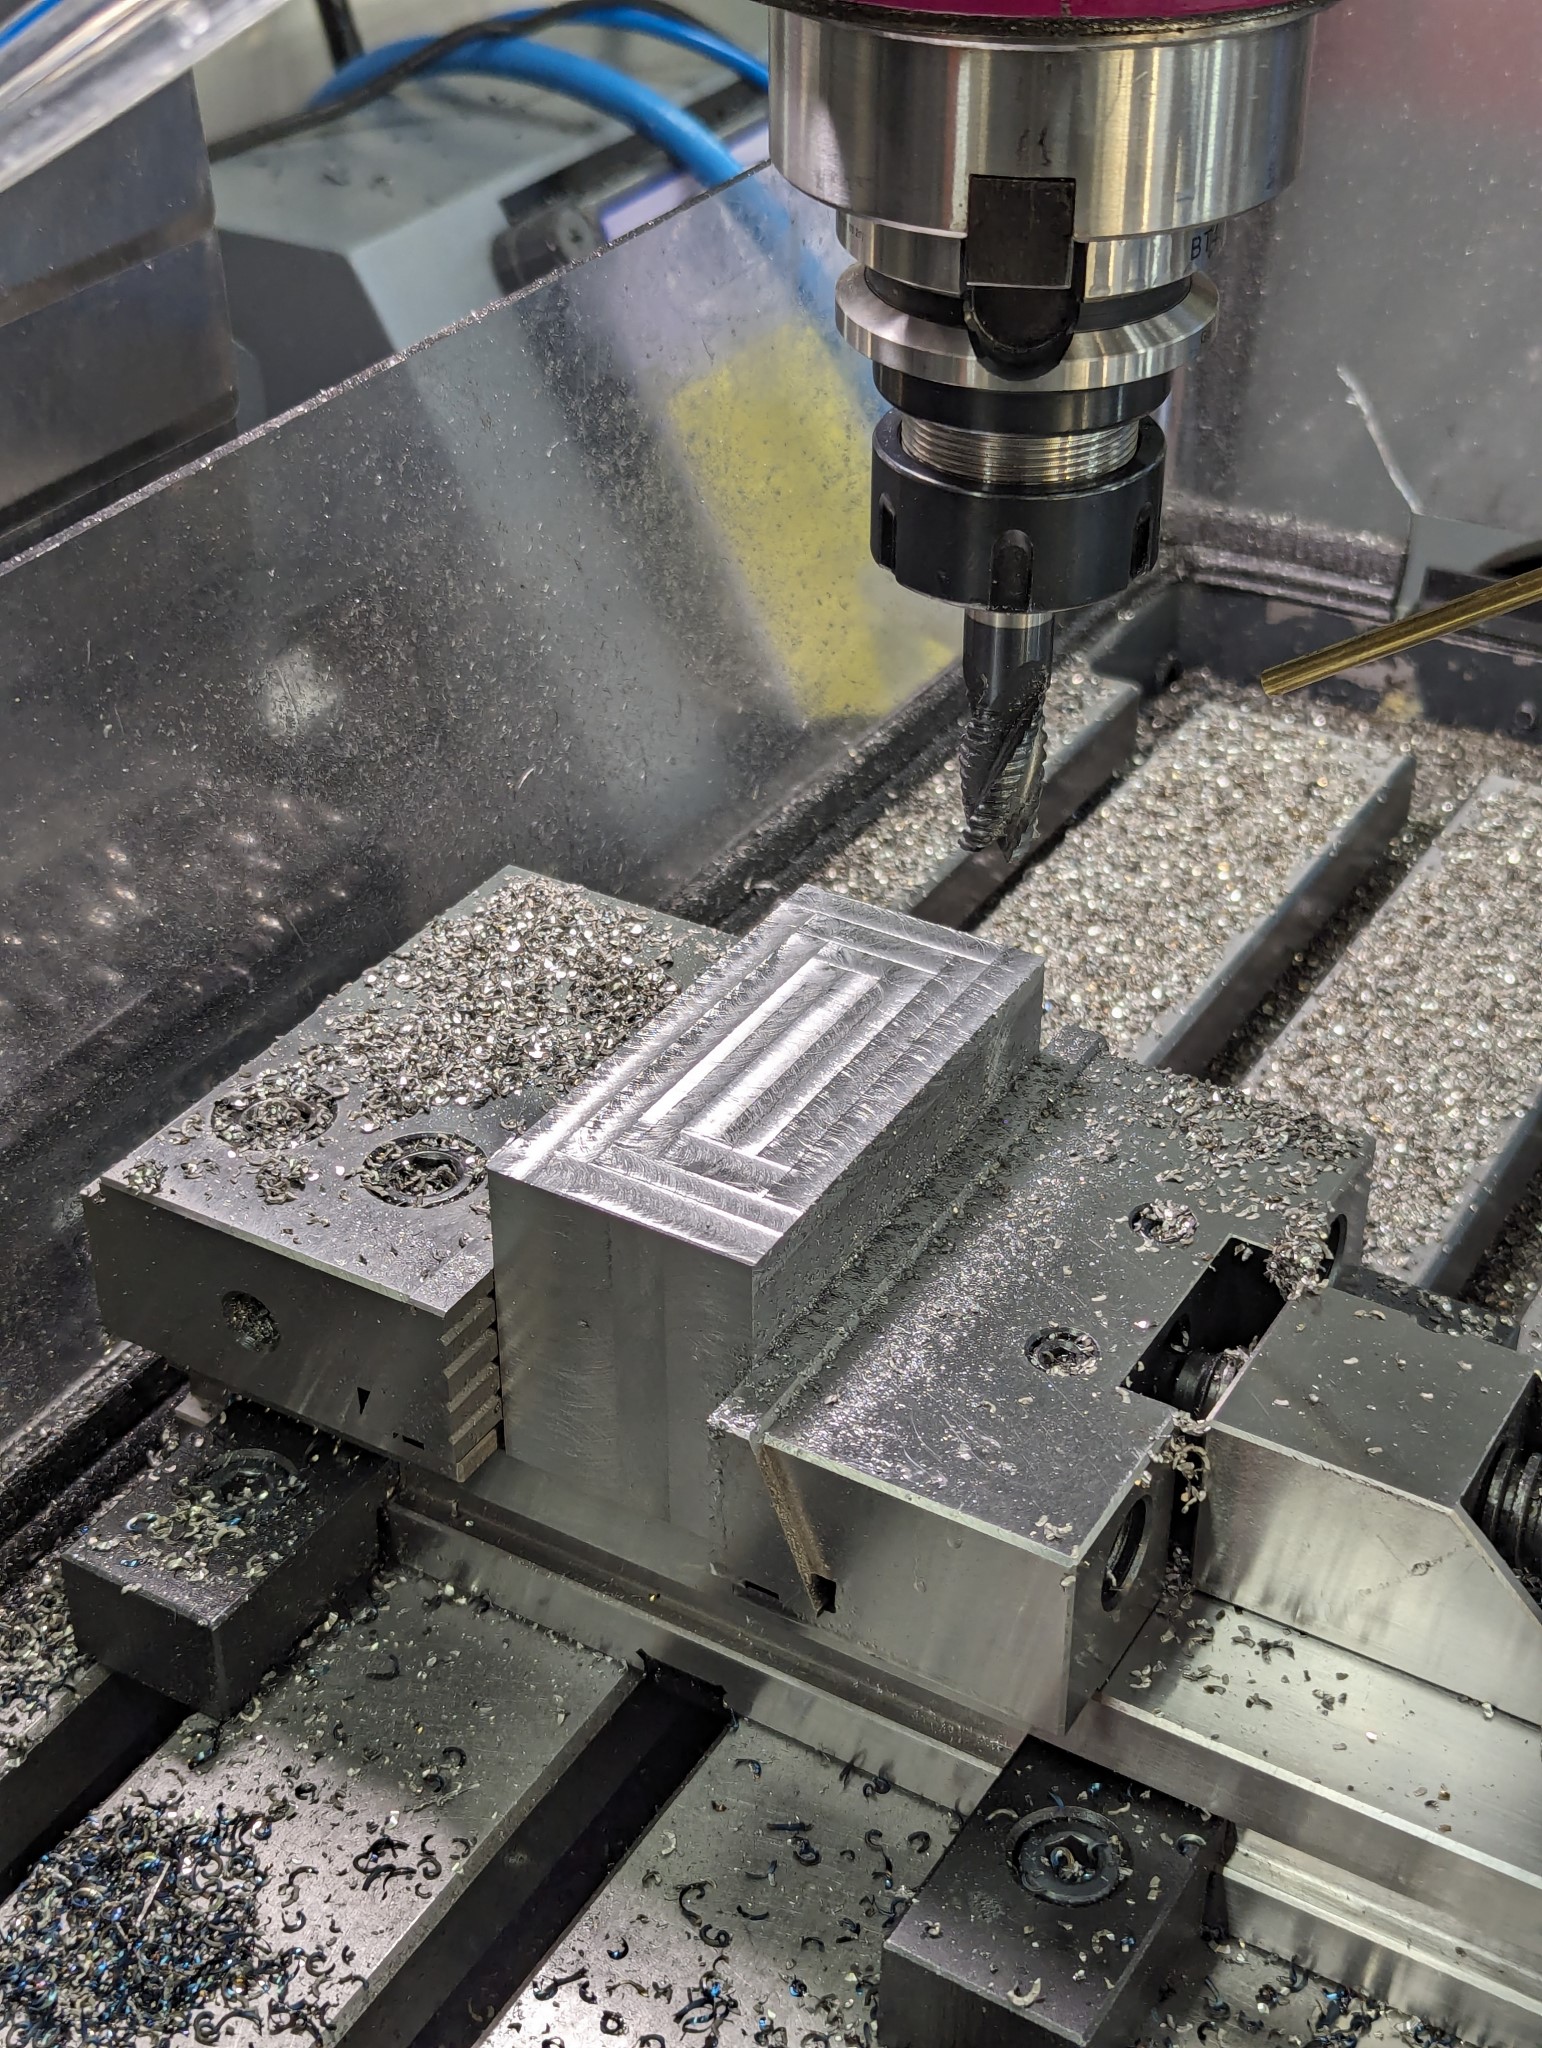
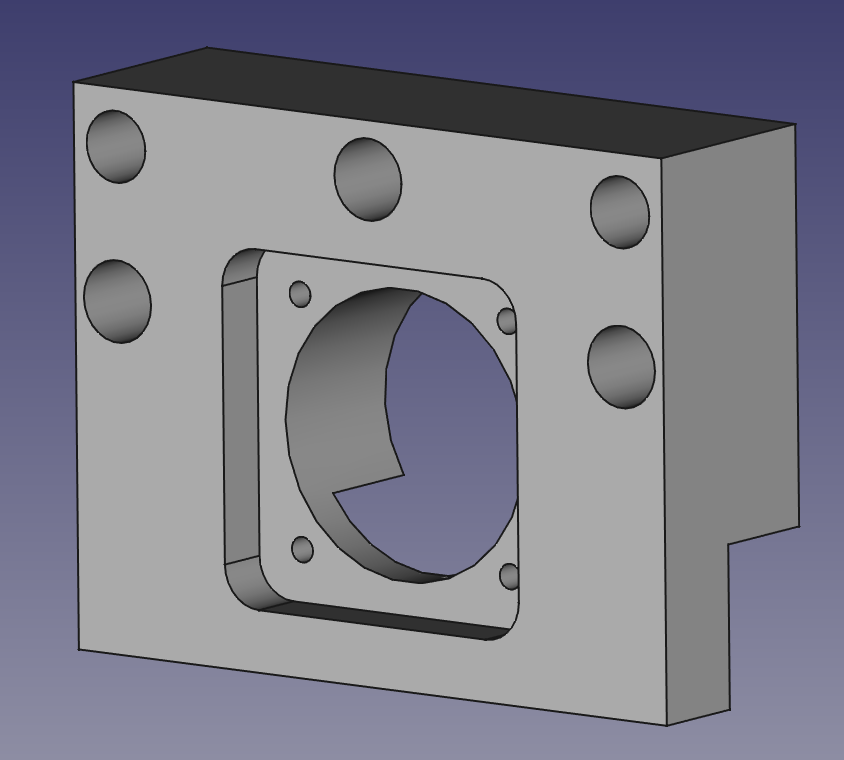
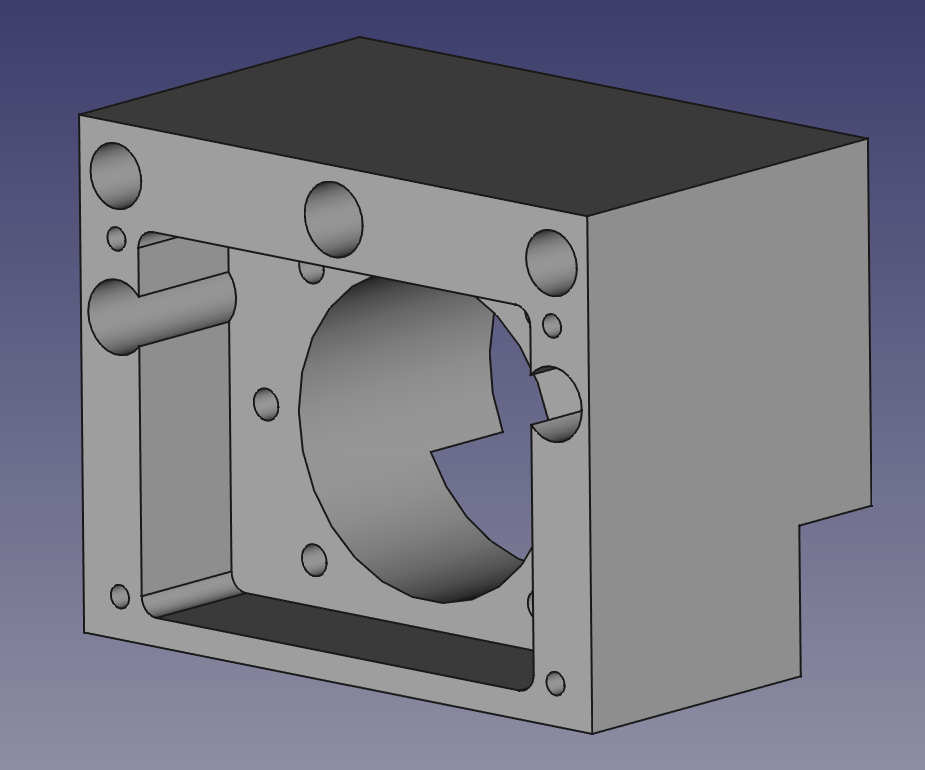
The first thing I designed in FreeCAD was the mount for the ball screw nut for the X axis which I then machined out of steel.
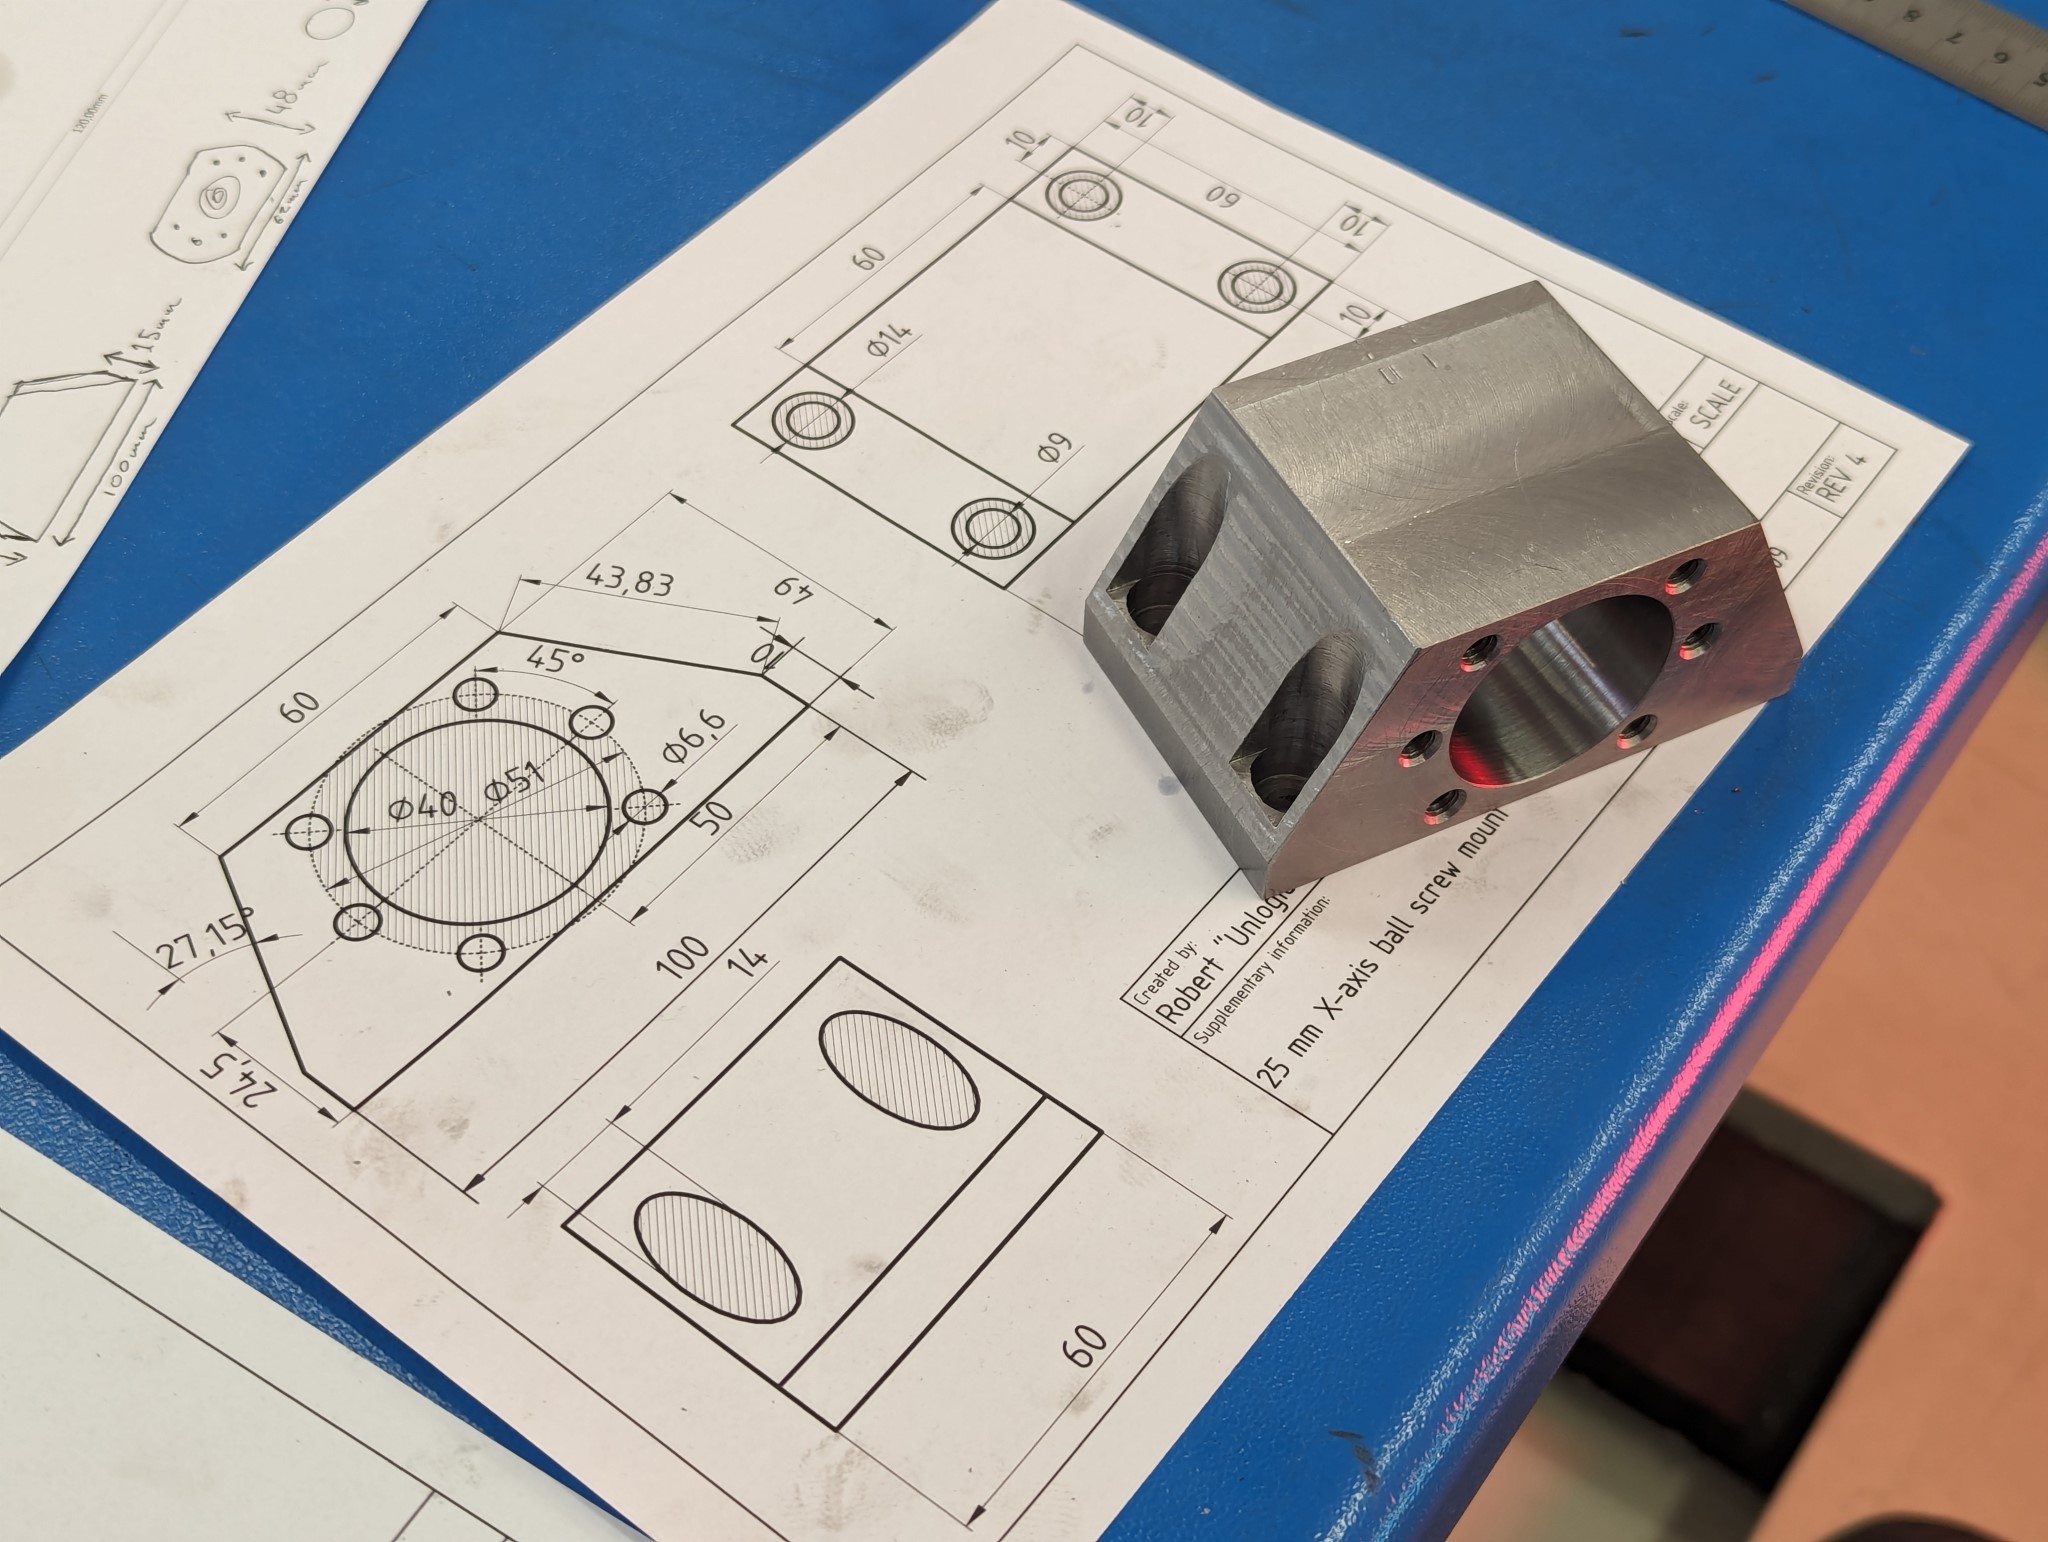
FreeCAD was really surprisingly easy and intuitive to get started with, much thanks to the great YouTube tutorials from MangoJelly Solutions (https://www.youtube.com/@MangoJellySolutions).
Next up it was time to start making the mount for the ball screws and bearing blocks. I did some rough measurements and then made drawings using in Visio which I then printed and tweaked until they fit on the machine.
Halfway through this process I realized that Visio wasn't the right tool for this job and I decided to learn how to use FreeCAD.
The first thing I designed in FreeCAD was the mount for the ball screw nut for the X axis which I then machined out of steel.
FreeCAD was really surprisingly easy and intuitive to get started with, much thanks to the great YouTube tutorials from MangoJelly Solutions (https://www.youtube.com/@MangoJellySolutions).
Attachments:
Please Log in or Create an account to join the conversation.
18 Feb 2024 18:51 #293697
by Unlogic
Replied by Unlogic on topic Optimum Optimill MH50V CNC conversion
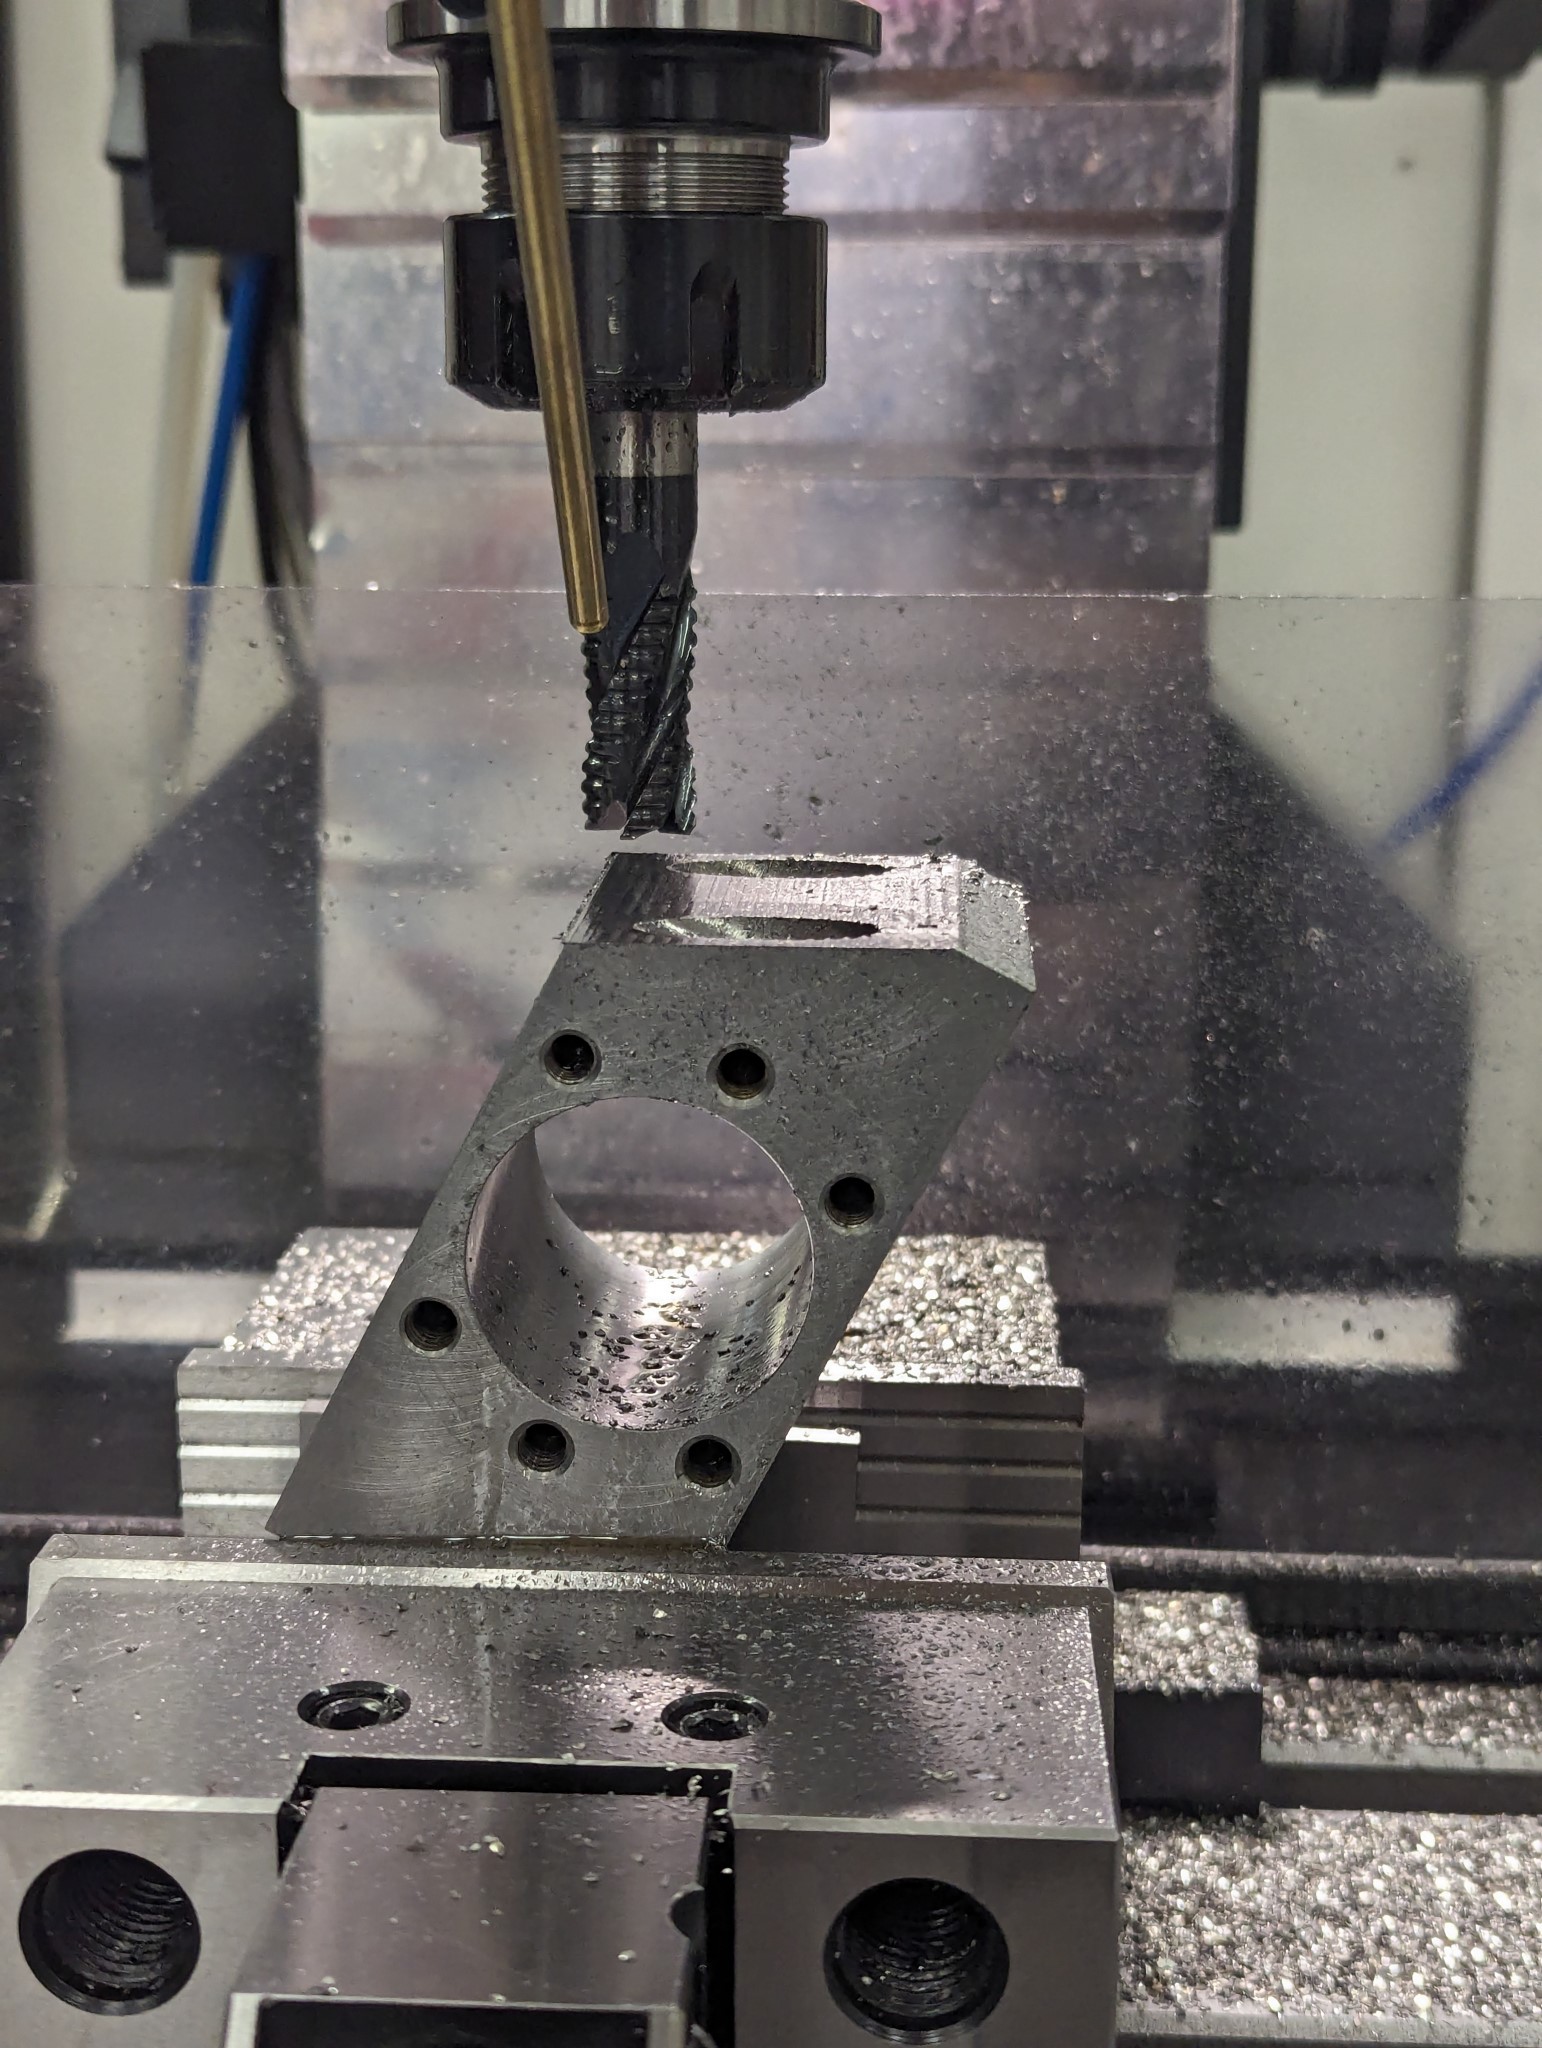
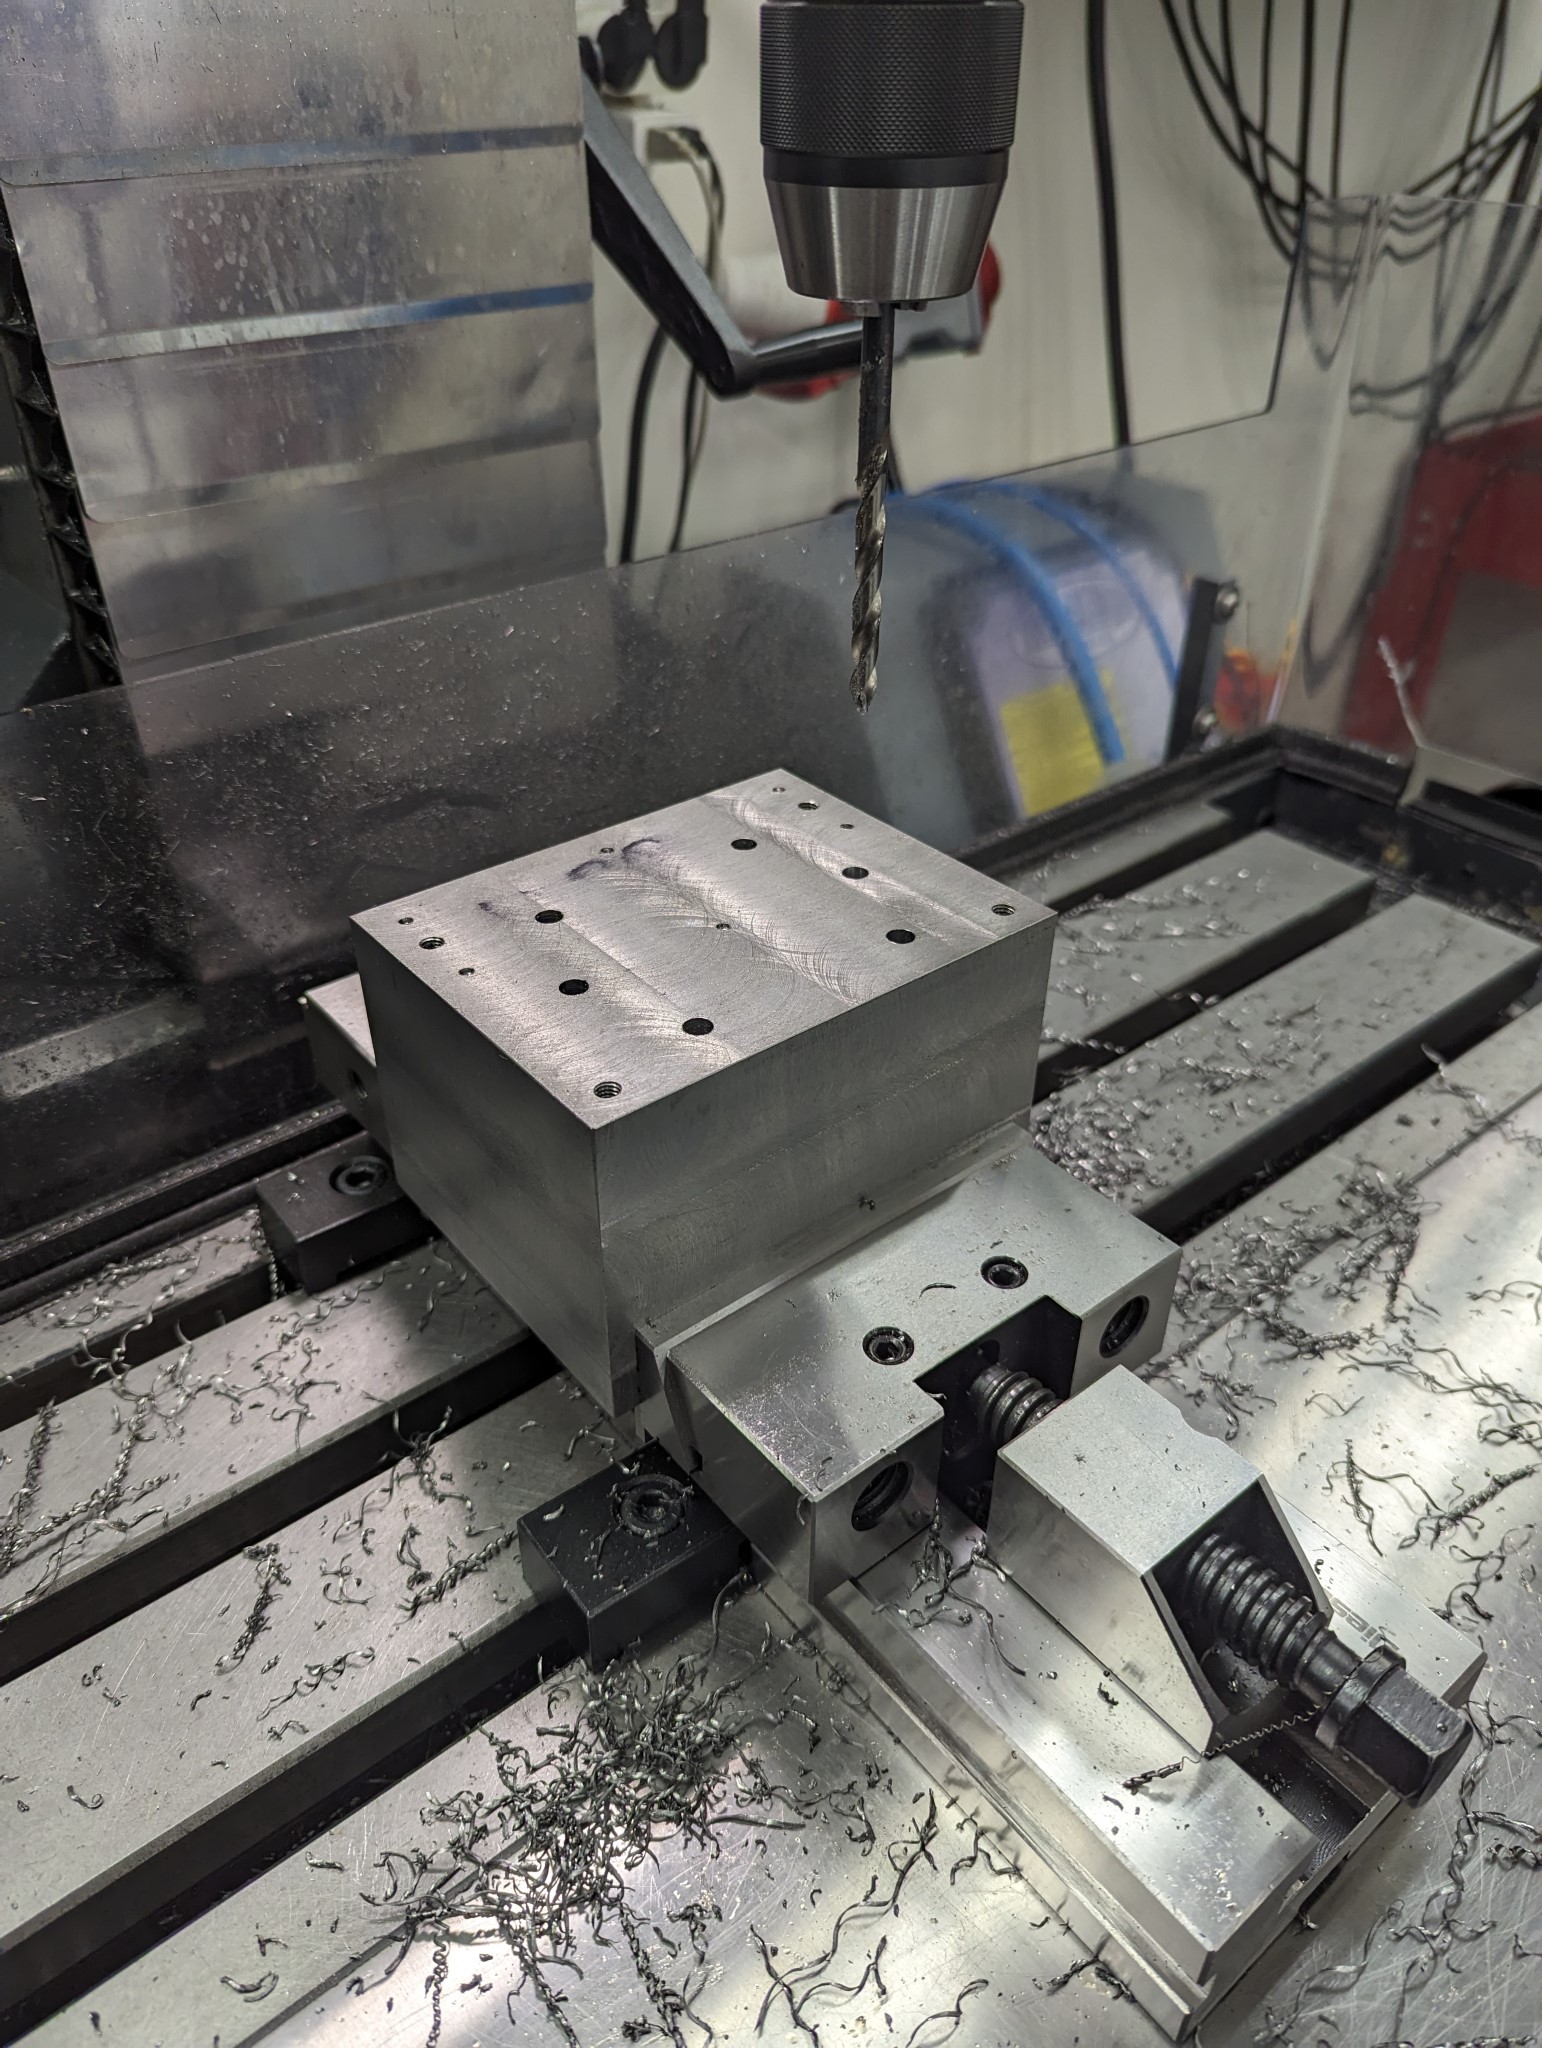
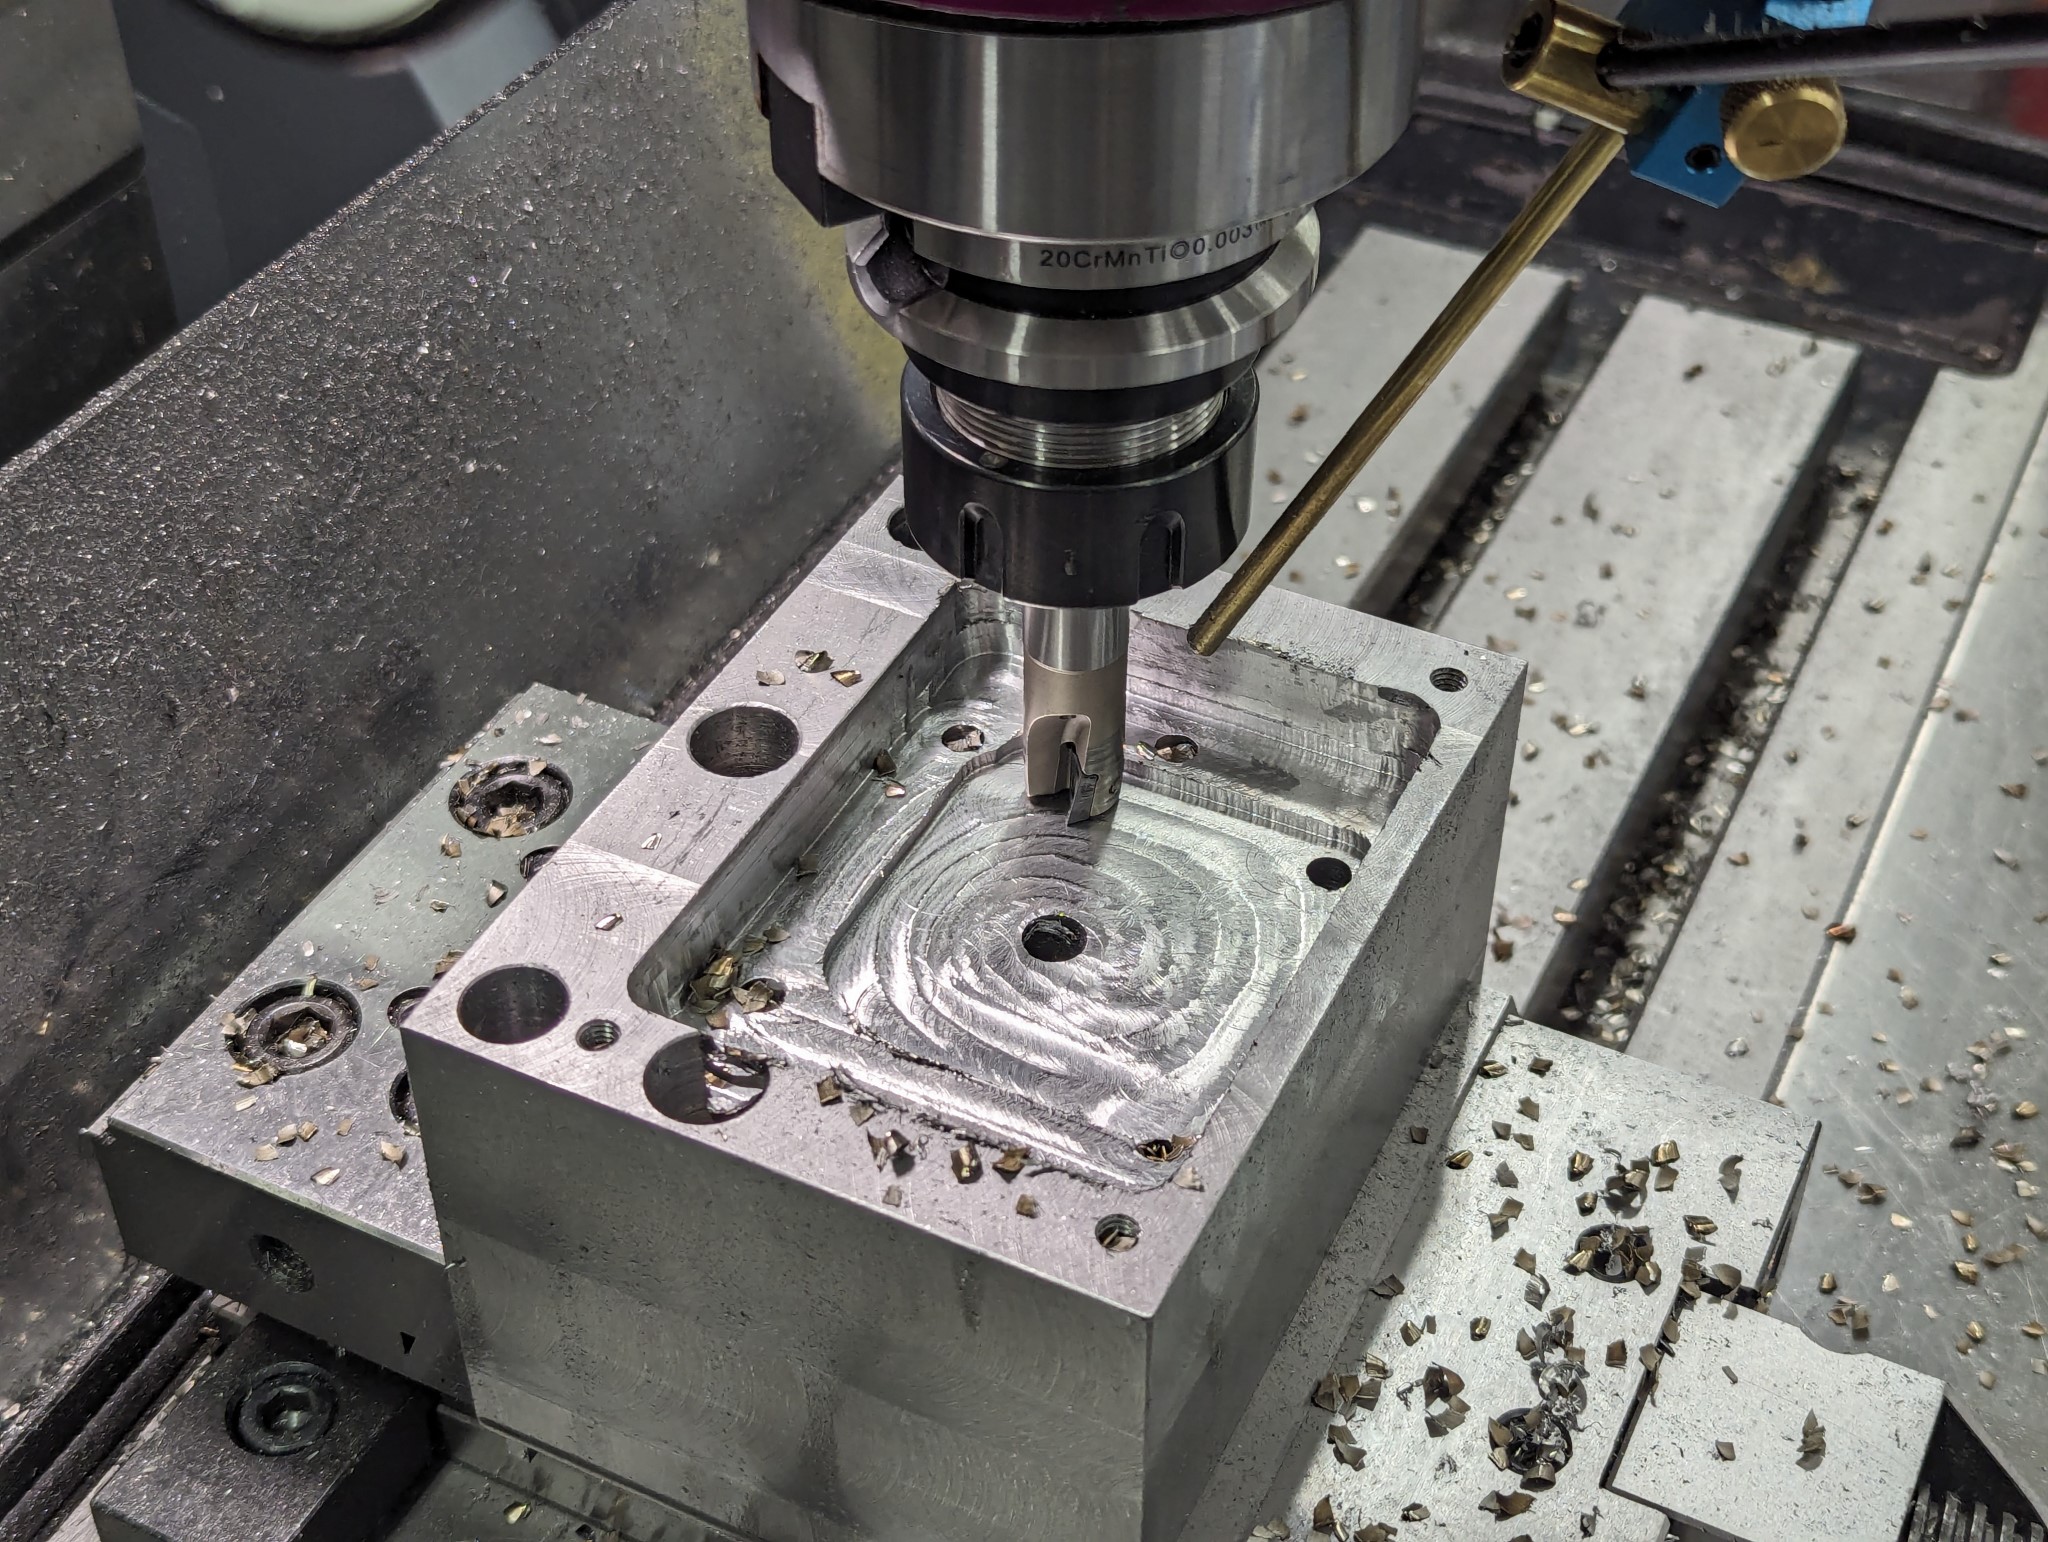
With the mount for the ball screw nut for the X axis done I could temporarily mount the ball screw and take some measurements for the bearing blocks and then design them in FreeCAD.
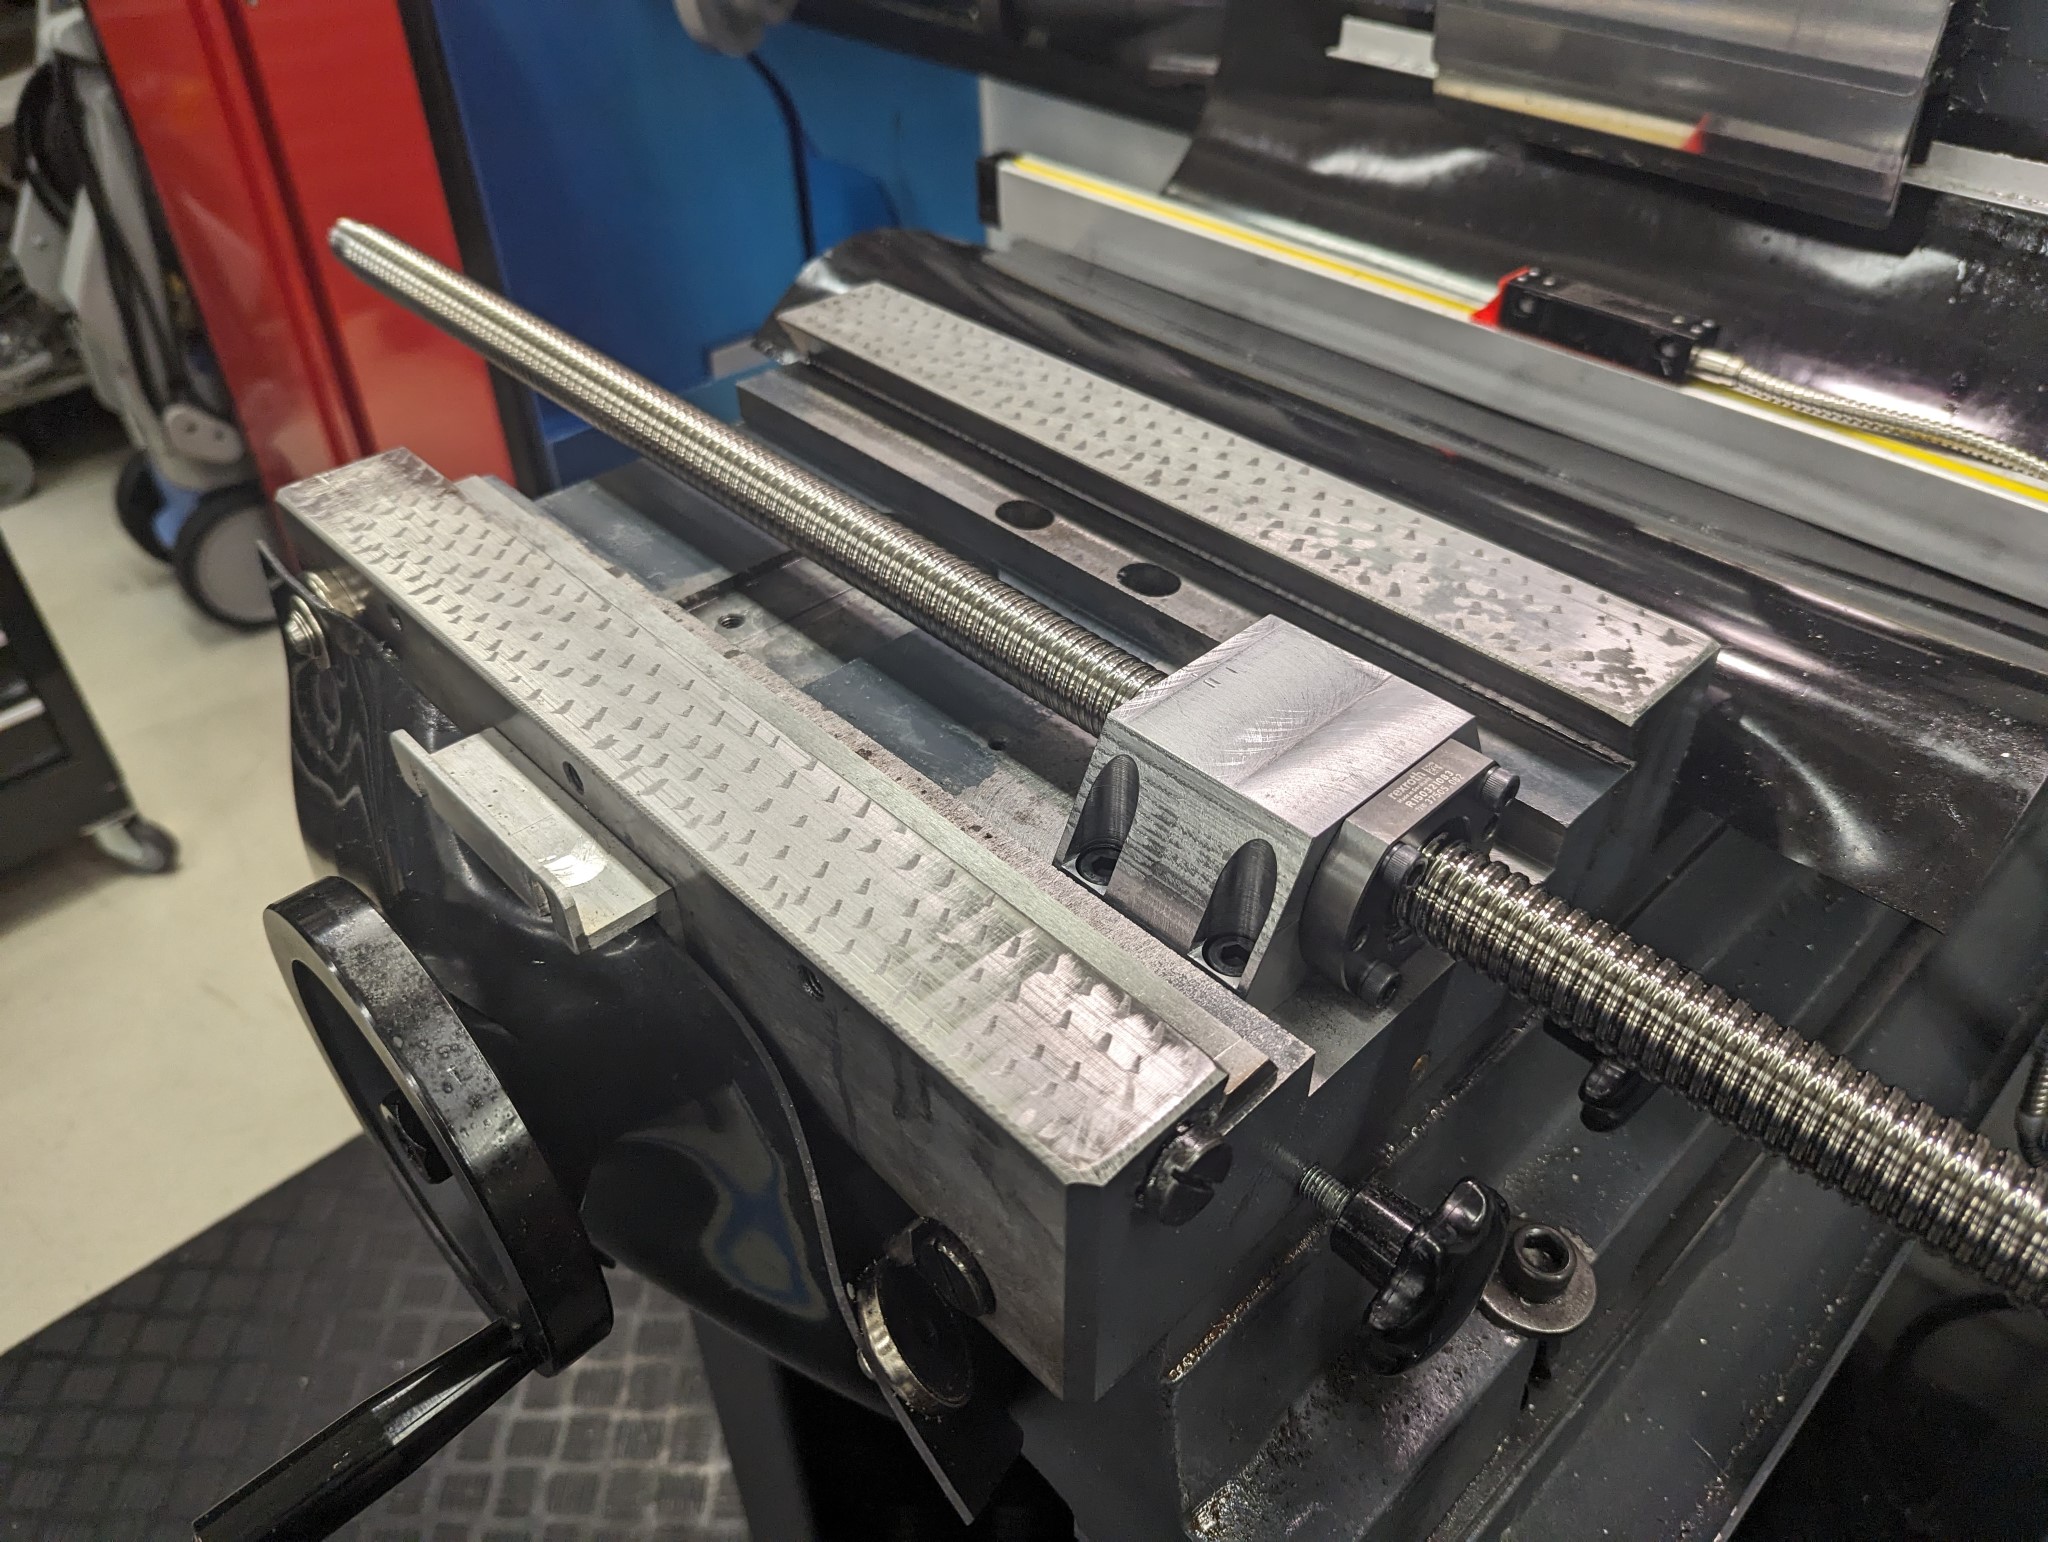
Then followed a lot more milling in steel...

Then followed a lot more milling in steel...
Attachments:
Please Log in or Create an account to join the conversation.
Moderators: piasdom
Time to create page: 1.062 seconds