×
Forum Header
Wantai SS880 drivers with DB25-1205 BOB
- hIGGI
- Offline
- New Member
-

Less
More
- Posts: 16
- Thank you received: 3
01 Mar 2019 21:06 #127459
by hIGGI
Wantai SS880 drivers with DB25-1205 BOB was created by hIGGI
Hello
I just got Wantai SS880 drivers, 86HBM80-1000-1 motors and DB25-1205 BOB
I wired it in and managed to get it turning in LinuxCNC.
Is there someone actually using this setup, and willing/able to provide best settings for both drivers, wiring and of course settings in linuxcnc configuration?
I am sure i will reach limits of the BOB and will eventually upgrade it to something more advance / faster (Mesa?), but for beginning, i would like to try setup i have now.
Plan is to use these motors in direct drive setup on RF45 clone benchtop milling machine, with double ballnut ballscrews (RM2005)
Thanks
Please Log in or Create an account to join the conversation.
- pl7i92
-

- Offline
- Platinum Member
-

Less
More
- Posts: 1872
- Thank you received: 358
02 Mar 2019 14:19 #127508
by pl7i92
Replied by pl7i92 on topic Wantai SS880 drivers with DB25-1205 BOB
your bob is limited to
2000
so best to go for stable is 2500 2500 5000 8000 in stepconf wizard
as on a BASE of 100000 Internal take your latency around 25000 up to max 150000
as on a Regular start tuning on 40 VEL 120ACC METRIC
go ut the ACC by 50 on a TEST movement 5mm +-
till it stals out
around 750 Shoudt be the MAX on 800Steps per mm
then set it to 550 ACC
and start Vel UP to the limit around 120mm/sec
reduce to 80 and you are a Fine working setup
Please Log in or Create an account to join the conversation.
- hIGGI
- Offline
- New Member
-
Less
More
- Posts: 16
- Thank you received: 3
19 Jan 2020 19:37 #155178
by hIGGI
Replied by hIGGI on topic Wantai SS880 drivers with DB25-1205 BOB
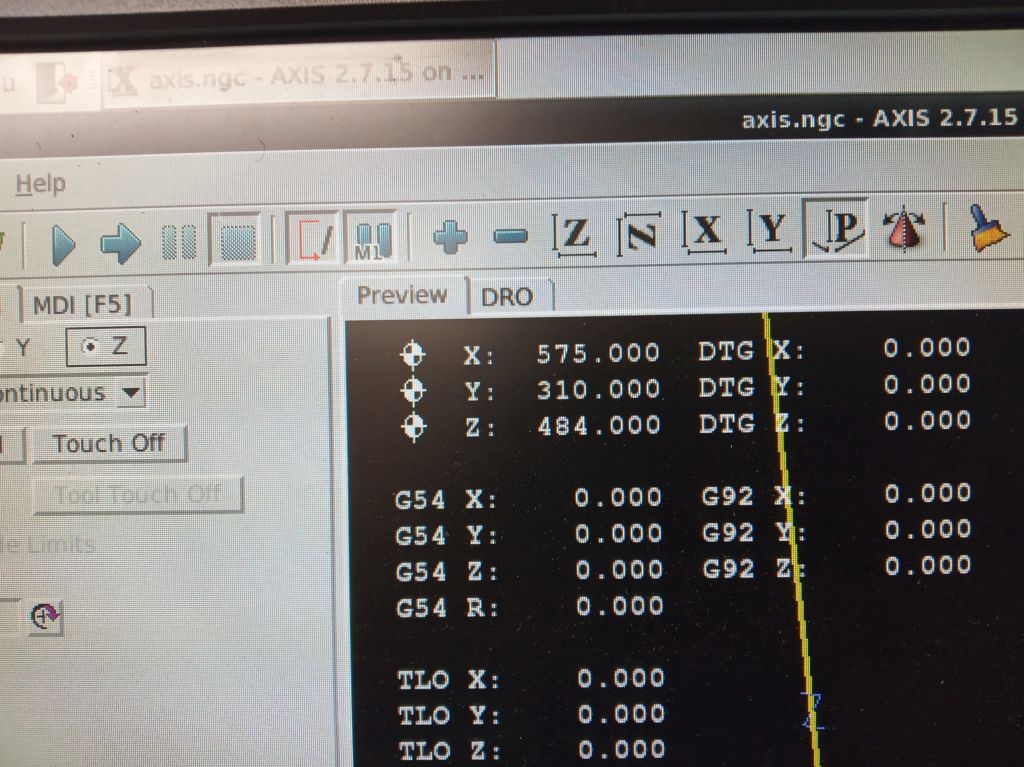
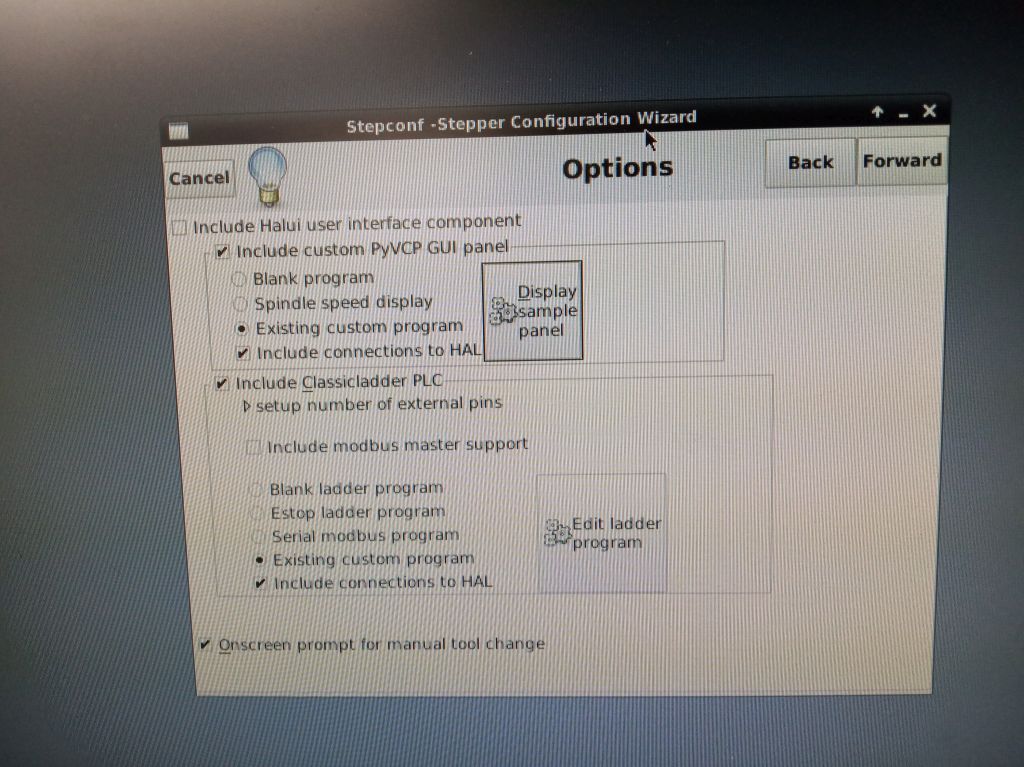
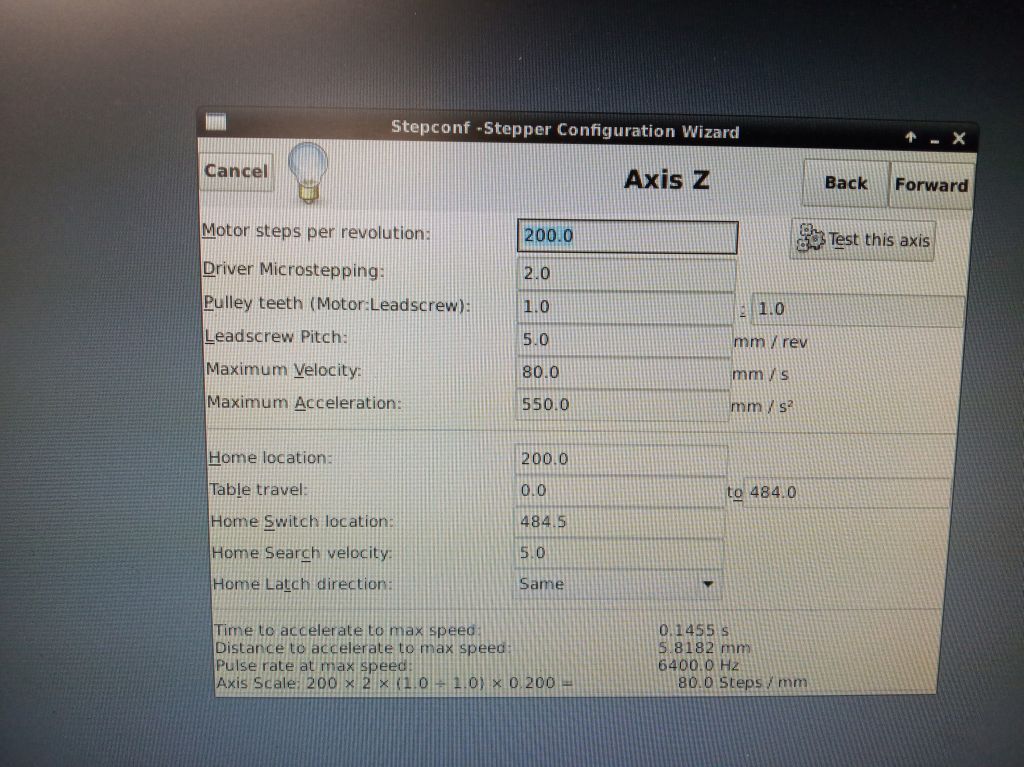
Here is my current setttings :
linuxcnc version 2.7.15
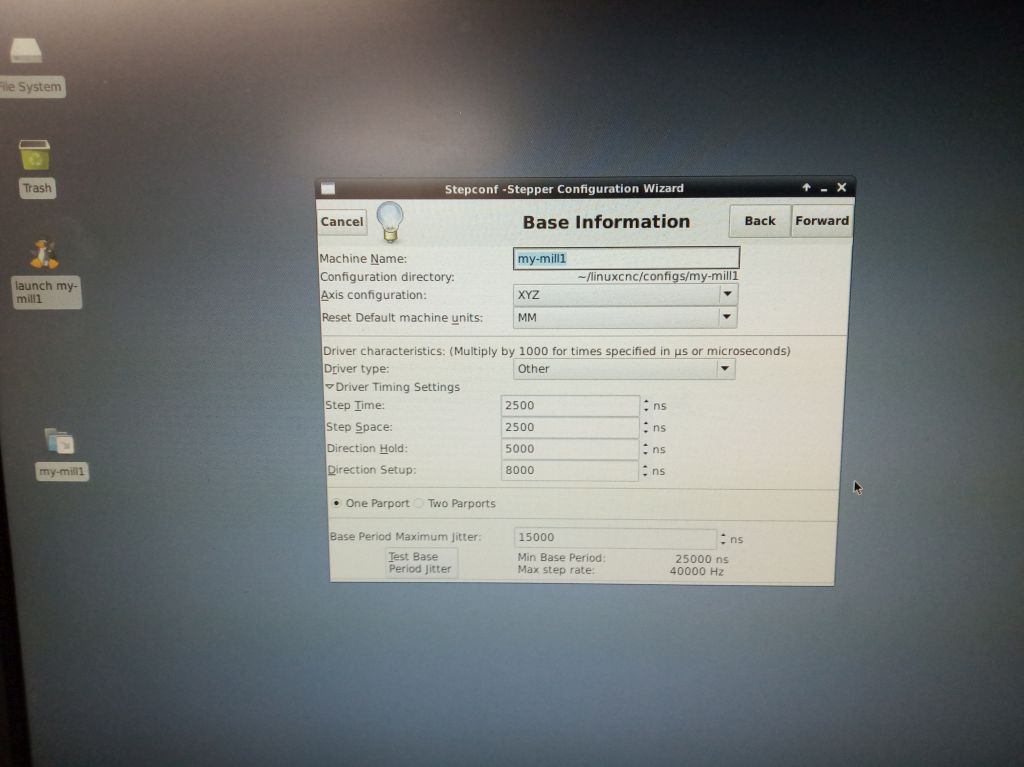
stepconf
base info :
XYZ
MM
Other
5000
5000
20000
20000
one parport
base period 15000
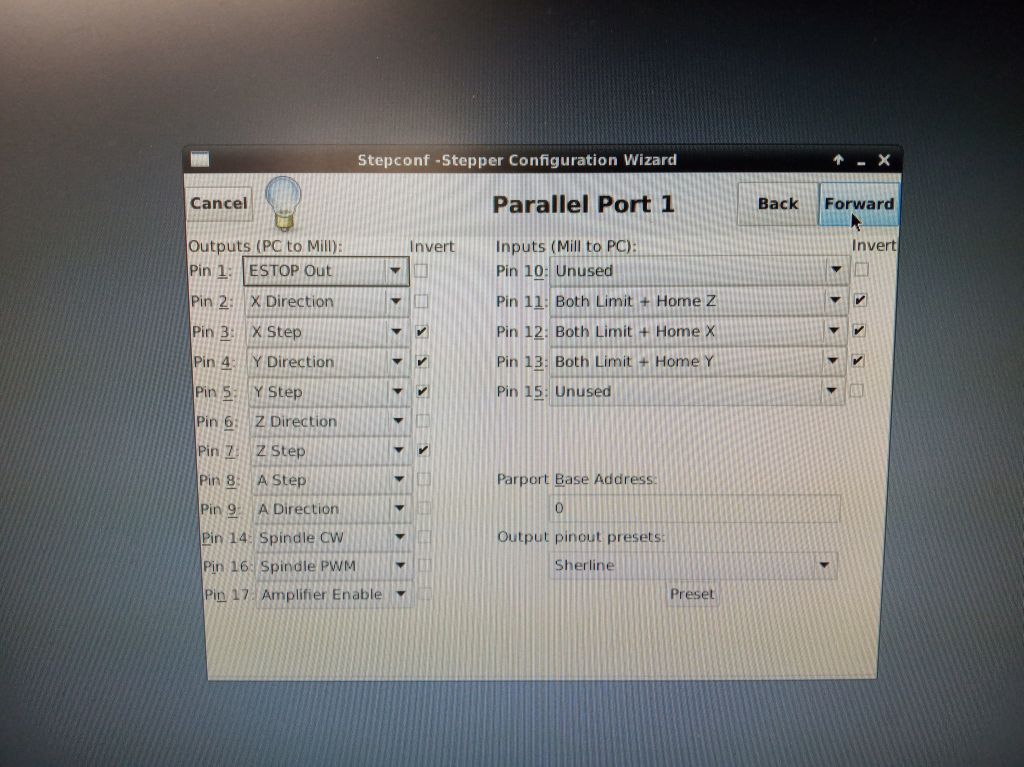
par port1
pin2 Y setp invert on
pin3 Y direction invert on
par port base 0
output pinout presets : Sherline
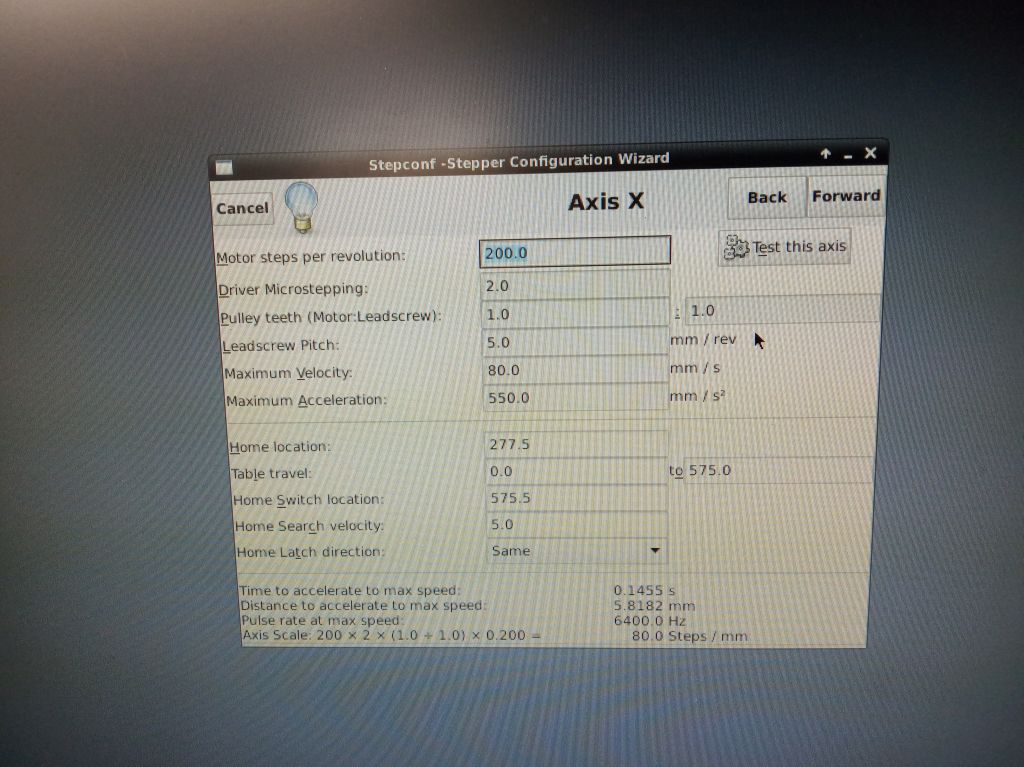
Axis Y setup
steps per revoltion 200
driver microstepping 2
ratio 1:1
pitch 5
max velocity 25
max accel 750
wiring :
on BOB P2 goes to PUL- , P3 goes to DIR-, 5V from BOB goes to PUL+ and DIR+
all dip switches on driver are down (ON)
SW1 = down edge
SW2 = CW
SW3,4,5,6 = default
things are moving, responding
next step is wiring and setting up proximity switches (PNP, NO) which i have mounted on each end of the travel ways
linuxcnc version 2.7.15
stepconf
base info :
XYZ
MM
Other
5000
5000
20000
20000
one parport
base period 15000
par port1
pin2 Y setp invert on
pin3 Y direction invert on
par port base 0
output pinout presets : Sherline
Axis Y setup
steps per revoltion 200
driver microstepping 2
ratio 1:1
pitch 5
max velocity 25
max accel 750
wiring :
on BOB P2 goes to PUL- , P3 goes to DIR-, 5V from BOB goes to PUL+ and DIR+
all dip switches on driver are down (ON)
SW1 = down edge
SW2 = CW
SW3,4,5,6 = default
things are moving, responding
next step is wiring and setting up proximity switches (PNP, NO) which i have mounted on each end of the travel ways
Please Log in or Create an account to join the conversation.
- hIGGI
- Offline
- New Member
-
Less
More
- Posts: 16
- Thank you received: 3
19 Jan 2020 20:32 #155187
by hIGGI
Replied by hIGGI on topic Wantai SS880 drivers with DB25-1205 BOB
PNP NO switches wired in via 4N35 optocoupler
lj12a3--4-Z/BY
2 limit switches per axis
12V power
1kOhm resistor
12V to brown wire of switch
gnd to blue wire of switch + pin2 of octocoupler
black wire of switch via 1k resistor to pin1 of optocoupler
pin 5 of optocoupler to gnd of BOB signal in part
pin 4 if optocoupler to P13 on BOB
2 switches wired in parallel (black to black, blue to blue, brown to brown), using one optocoupler per axis
so far tested on the table, seems to work ok
homing sequence on the Y axis tested, of course will need to adjust on the machine
i will try to write/document my setup here for future reference
of course, if anybody sees anything out of ordinary or wrong settings, please comment")
lj12a3--4-Z/BY
2 limit switches per axis
12V power
1kOhm resistor
12V to brown wire of switch
gnd to blue wire of switch + pin2 of octocoupler
black wire of switch via 1k resistor to pin1 of optocoupler
pin 5 of optocoupler to gnd of BOB signal in part
pin 4 if optocoupler to P13 on BOB
2 switches wired in parallel (black to black, blue to blue, brown to brown), using one optocoupler per axis
so far tested on the table, seems to work ok
homing sequence on the Y axis tested, of course will need to adjust on the machine
i will try to write/document my setup here for future reference
of course, if anybody sees anything out of ordinary or wrong settings, please comment
Please Log in or Create an account to join the conversation.
- hIGGI
- Offline
- New Member
-
Less
More
- Posts: 16
- Thank you received: 3
22 Jan 2020 21:15 #155456
by hIGGI
Replied by hIGGI on topic Wantai SS880 drivers with DB25-1205 BOB
cleaned up wiring, current setup on pics/video

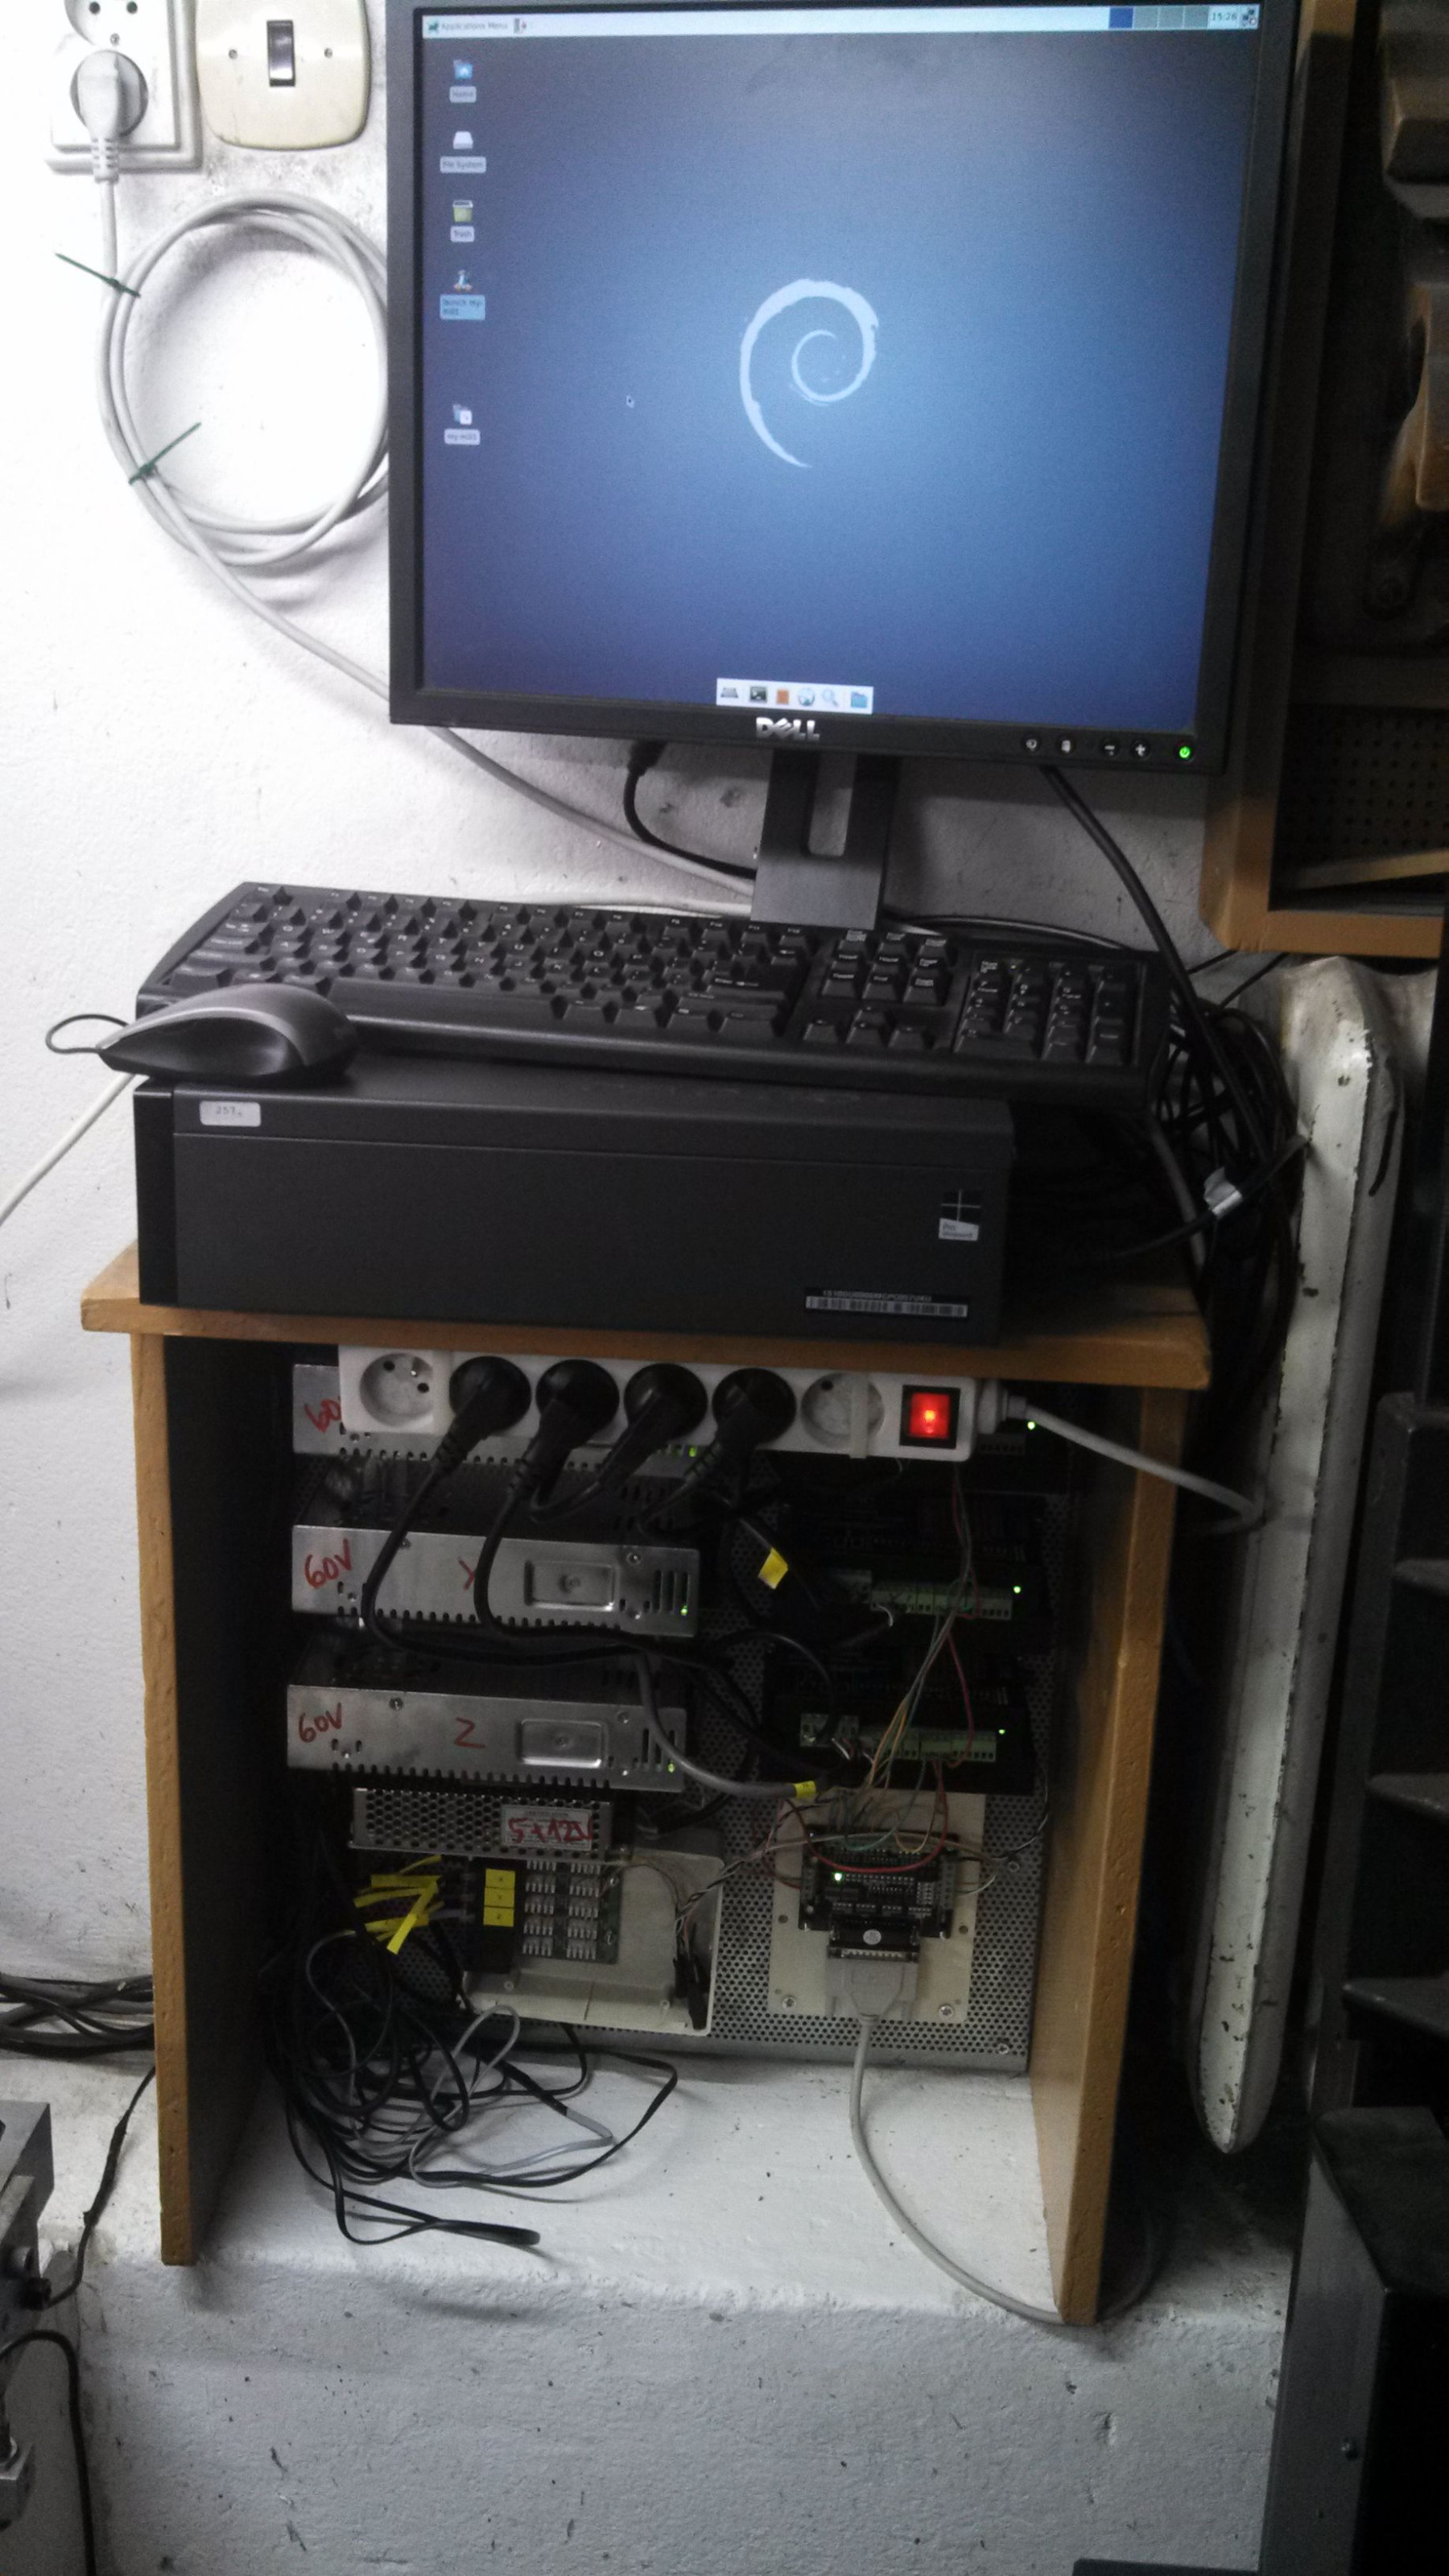
The following user(s) said Thank You: tommylight
Please Log in or Create an account to join the conversation.
- bbsr_5a
- Offline
- Platinum Member
-
Less
More
- Posts: 544
- Thank you received: 106
25 Jan 2020 17:05 #155737
by bbsr_5a
Replied by bbsr_5a on topic Wantai SS880 drivers with DB25-1205 BOB
Cool
why only 80steps per mm
get some Microstepping in to get over 100steps 0,01
on a RF45/50 you can use a Timing Belt system 20/25 Teeth I=1,25 to get the sfu2005 to a 400stepwide
dont forget to iincrease the BASE to 100000=100K as of the MACH3 5axis Board
and the REALY good Thing increase the MIN_Ferror to 0,25 and the Ferror to 4
You wont loose a Step but you can go G0 at full speed and as like a 3D printer BUF with very little StepsWIDTH in G1
doesent the 880 need 2800 MIN i got a Machine at 3200 running 6000mm/min at 1200ACC
Please Log in or Create an account to join the conversation.
- hIGGI
- Offline
- New Member
-
Less
More
- Posts: 16
- Thank you received: 3
25 Jan 2020 17:18 #155739
by hIGGI
Replied by hIGGI on topic Wantai SS880 drivers with DB25-1205 BOB
Honestly in lot of cases i am not sure about lot of things.
Right now i want to get gmoccapy and probe app running and there is still more hardware adjustments to be made. Not planning on belt drive.
By mircostepping u mean adjustmens in software or at the drivers? (dip switches)
I will try suggested changes, thanks!
Right now i want to get gmoccapy and probe app running and there is still more hardware adjustments to be made. Not planning on belt drive.
By mircostepping u mean adjustmens in software or at the drivers? (dip switches)
I will try suggested changes, thanks!
Please Log in or Create an account to join the conversation.
- bbsr_5a
- Offline
- Platinum Member
-
Less
More
- Posts: 544
- Thank you received: 106
26 Jan 2020 13:07 #155806
by bbsr_5a
Replied by bbsr_5a on topic Wantai SS880 drivers with DB25-1205 BOB
the DIP swiches and the software
if you got 400Steps Per Rev set and Scale is 80
use 800 DIP and 160 Software that will give yu more precice and Faster ACC
if you got 400Steps Per Rev set and Scale is 80
use 800 DIP and 160 Software that will give yu more precice and Faster ACC
Please Log in or Create an account to join the conversation.
- hIGGI
- Offline
- New Member
-
Less
More
- Posts: 16
- Thank you received: 3
27 Jan 2020 19:39 #155942
by hIGGI
Replied by hIGGI on topic Wantai SS880 drivers with DB25-1205 BOB
I just tried DIP settings to 800 and changed 160 scale and its maybe too fast, because its throwing out following error after sudden stop. Reverted back to 400/ 80
As well Z axis needs slow down, without air struts/counterweight its stalling motor/driver.
I am still fooling around with it, will post the ini files once i get it closer to useable state.
As well Z axis needs slow down, without air struts/counterweight its stalling motor/driver.
I am still fooling around with it, will post the ini files once i get it closer to useable state.
Please Log in or Create an account to join the conversation.
- bbsr_5a
- Offline
- Platinum Member
-
Less
More
- Posts: 544
- Thank you received: 106
28 Jan 2020 11:19 - 28 Jan 2020 11:23 #155994
by bbsr_5a
Replied by bbsr_5a on topic Wantai SS880 drivers with DB25-1205 BOB
if it is a small machine around 1meter less ad you are on Direct mount Steper no Timingbelt
yuu shoudt consider no more then VEL 40 and ACC 120
the MIN Ferror to 0,25 the MAX to 2
then you are able to get full speed within 0,3mm at 400steps 5mm pitch
from there you can go 800/160 and testout
the Z shoudt always be at 20VEL 80ACC with a 120StepgenACC
then it is up to you to test the max and do a 75% downconfig
if you want a High Speed drill press you need "more /Better gardware and Mashine Setings "
Like 72V DM556 or beter Mesa 7i96 /7i76 Timingbelt Driven 4Nm Nema 24 steppers or above to get to WORKNIG Milling 100VEL at 750ACC
THe RF50+ Mashine Type has quite a mass on Z
so the Direct Drive causes the Stepper in the First step to pull the max A out of the SS880 they dont provide this the internal on datasheet is 10%-25% 33% 50% 80% 100% stepup
from deep standby so take the ACC down and you wll be in good setup
AS Well as you dont need that mutch WAY
Last edit: 28 Jan 2020 11:23 by bbsr_5a.
Please Log in or Create an account to join the conversation.
Time to create page: 0.204 seconds