Datron M9 to LCNC Conversion
- Ritterchen
- Offline
- Junior Member
-

Less
More
- Posts: 34
- Thank you received: 18
20 Jun 2021 09:17 - 20 Jun 2021 09:25 #212469
by Ritterchen
Datron M9 to LCNC Conversion was created by Ritterchen
Hi together!
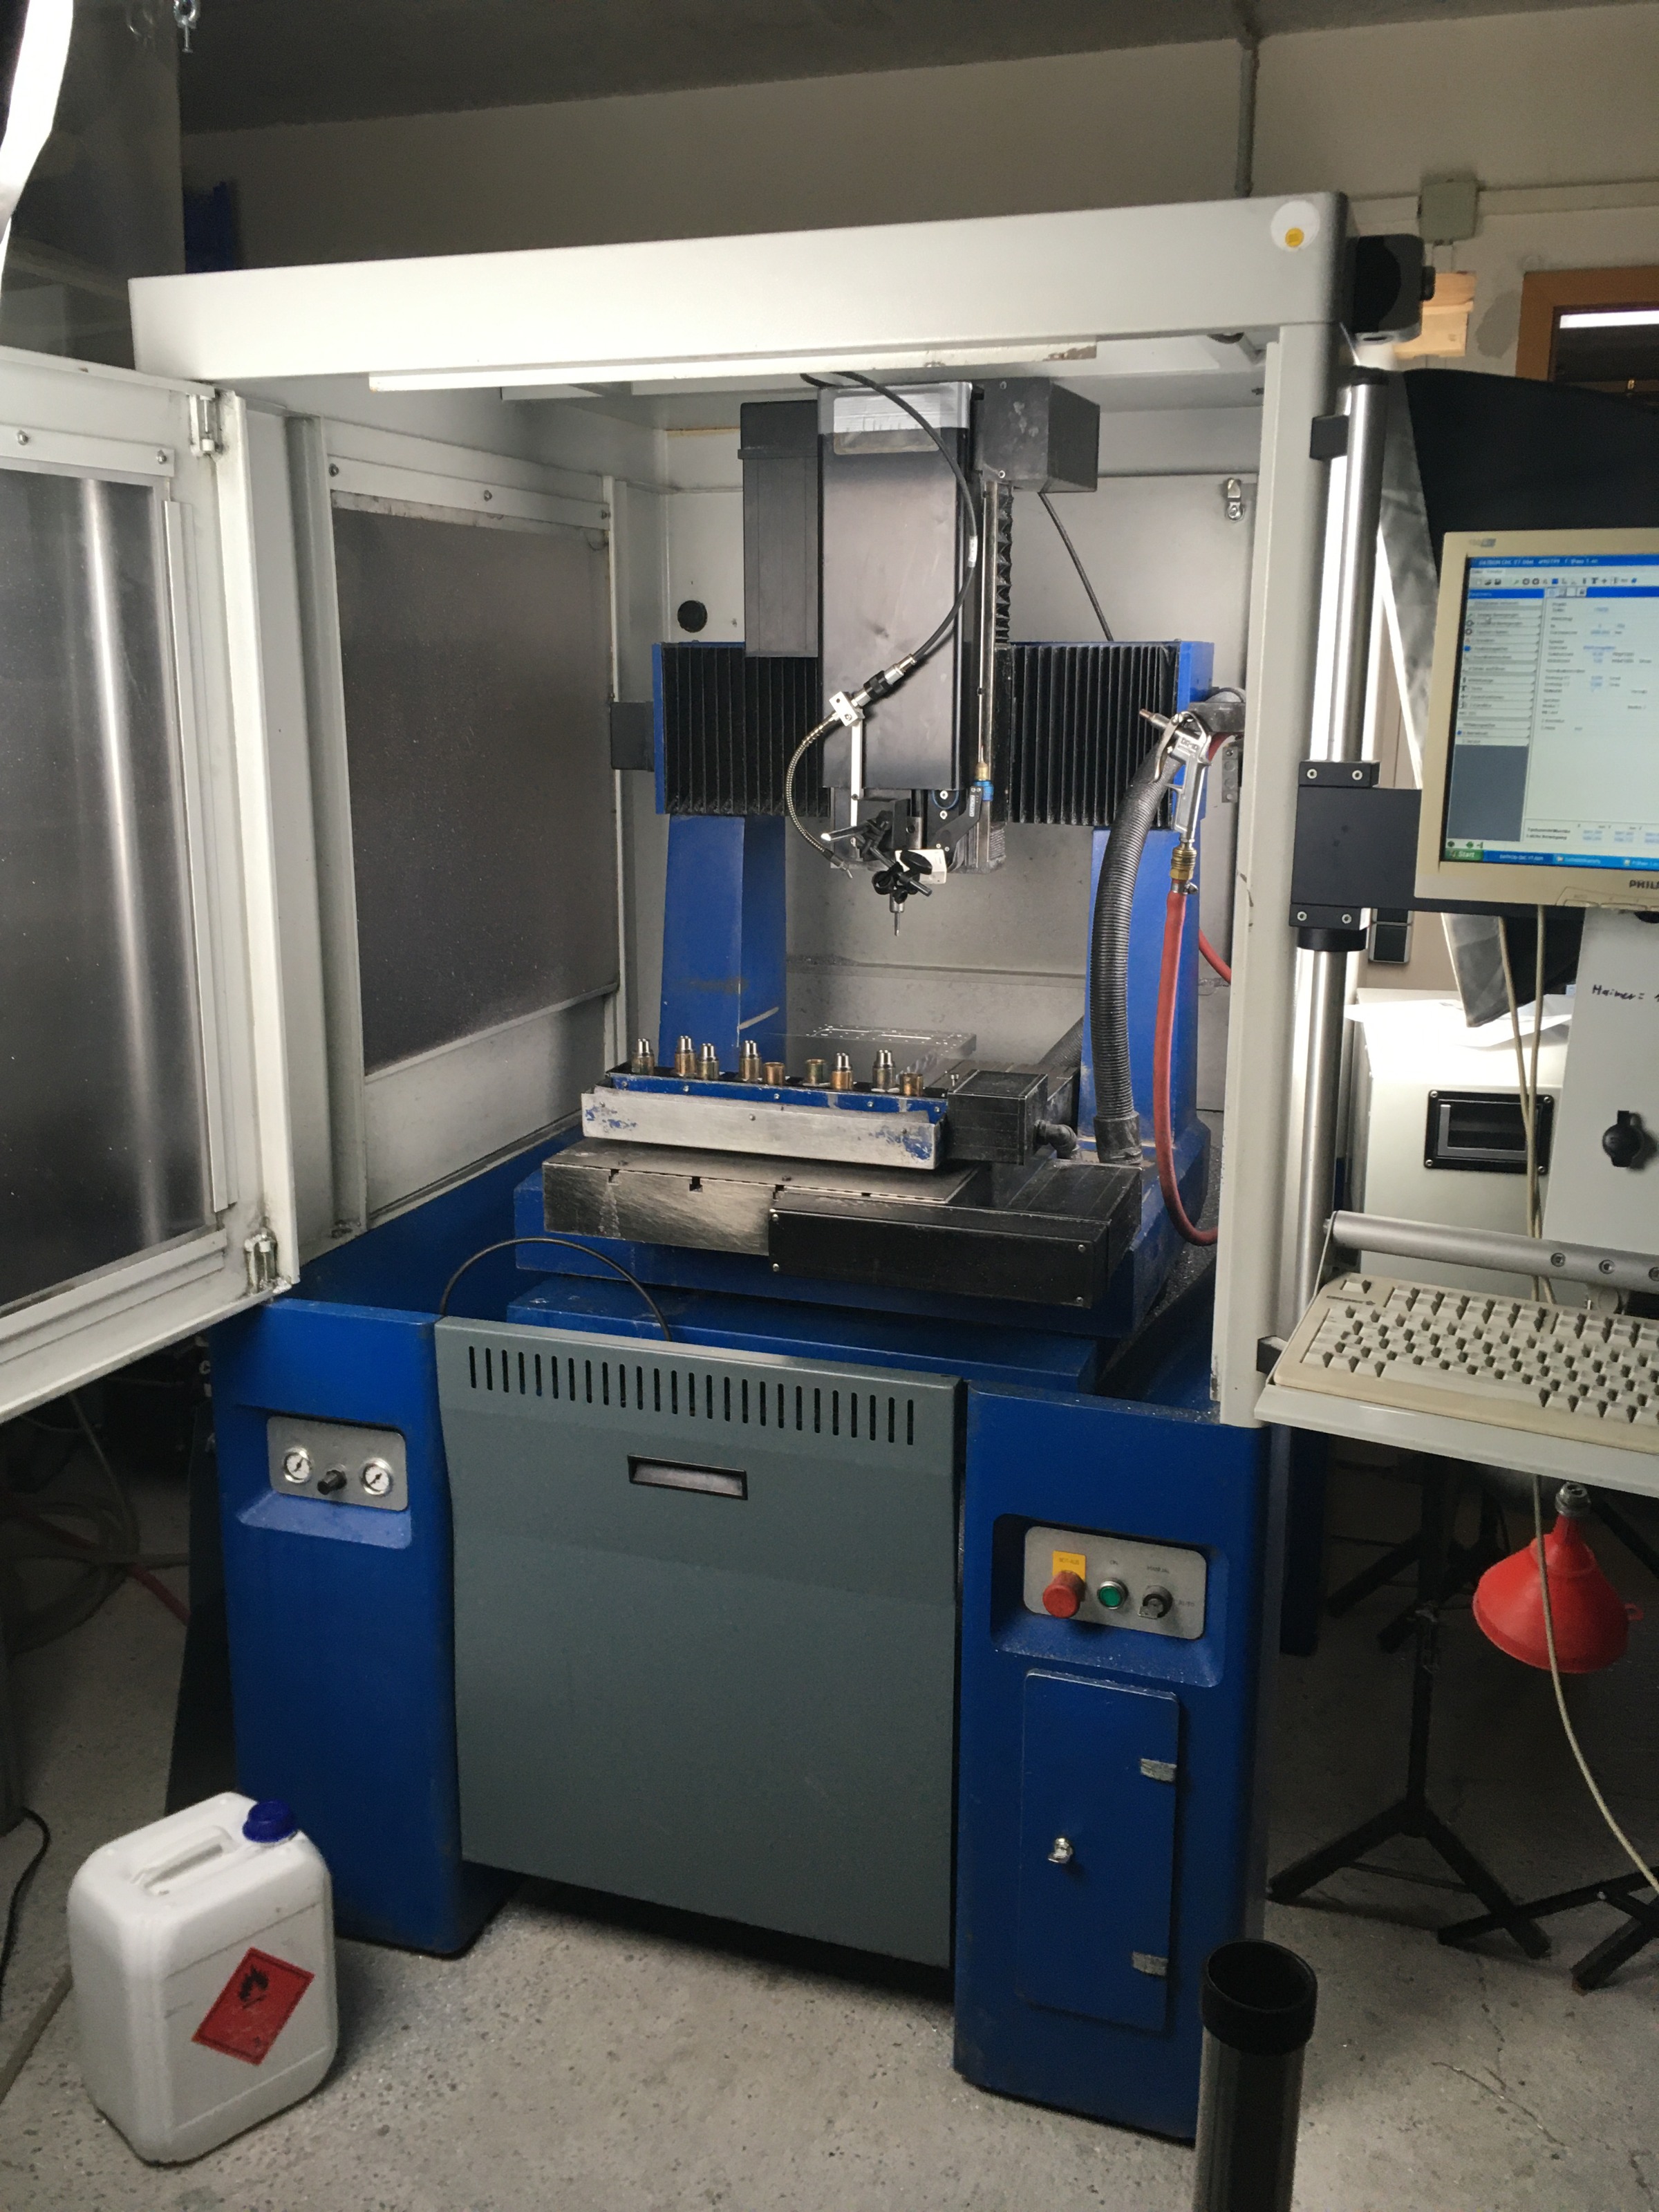
Wanted to show the process of converting a Datron M9 machine to Delta A3 Drives controlled by a Mesa 7i67E.
Intentions
I got the machine around a year ago and plan to use it as a production machine. It served me well over this year, and now I want to get it to the level of a Datron Neo in manner of speed, reliability and add some features.
Acceleration -> I hope for a bit better acceleration from the new drives. Also the DC drives were run on a CAN-Bus which made it hard for a non-expert in Bus Systems like me to operate them reliable.
Lets start- Hardware Modifications
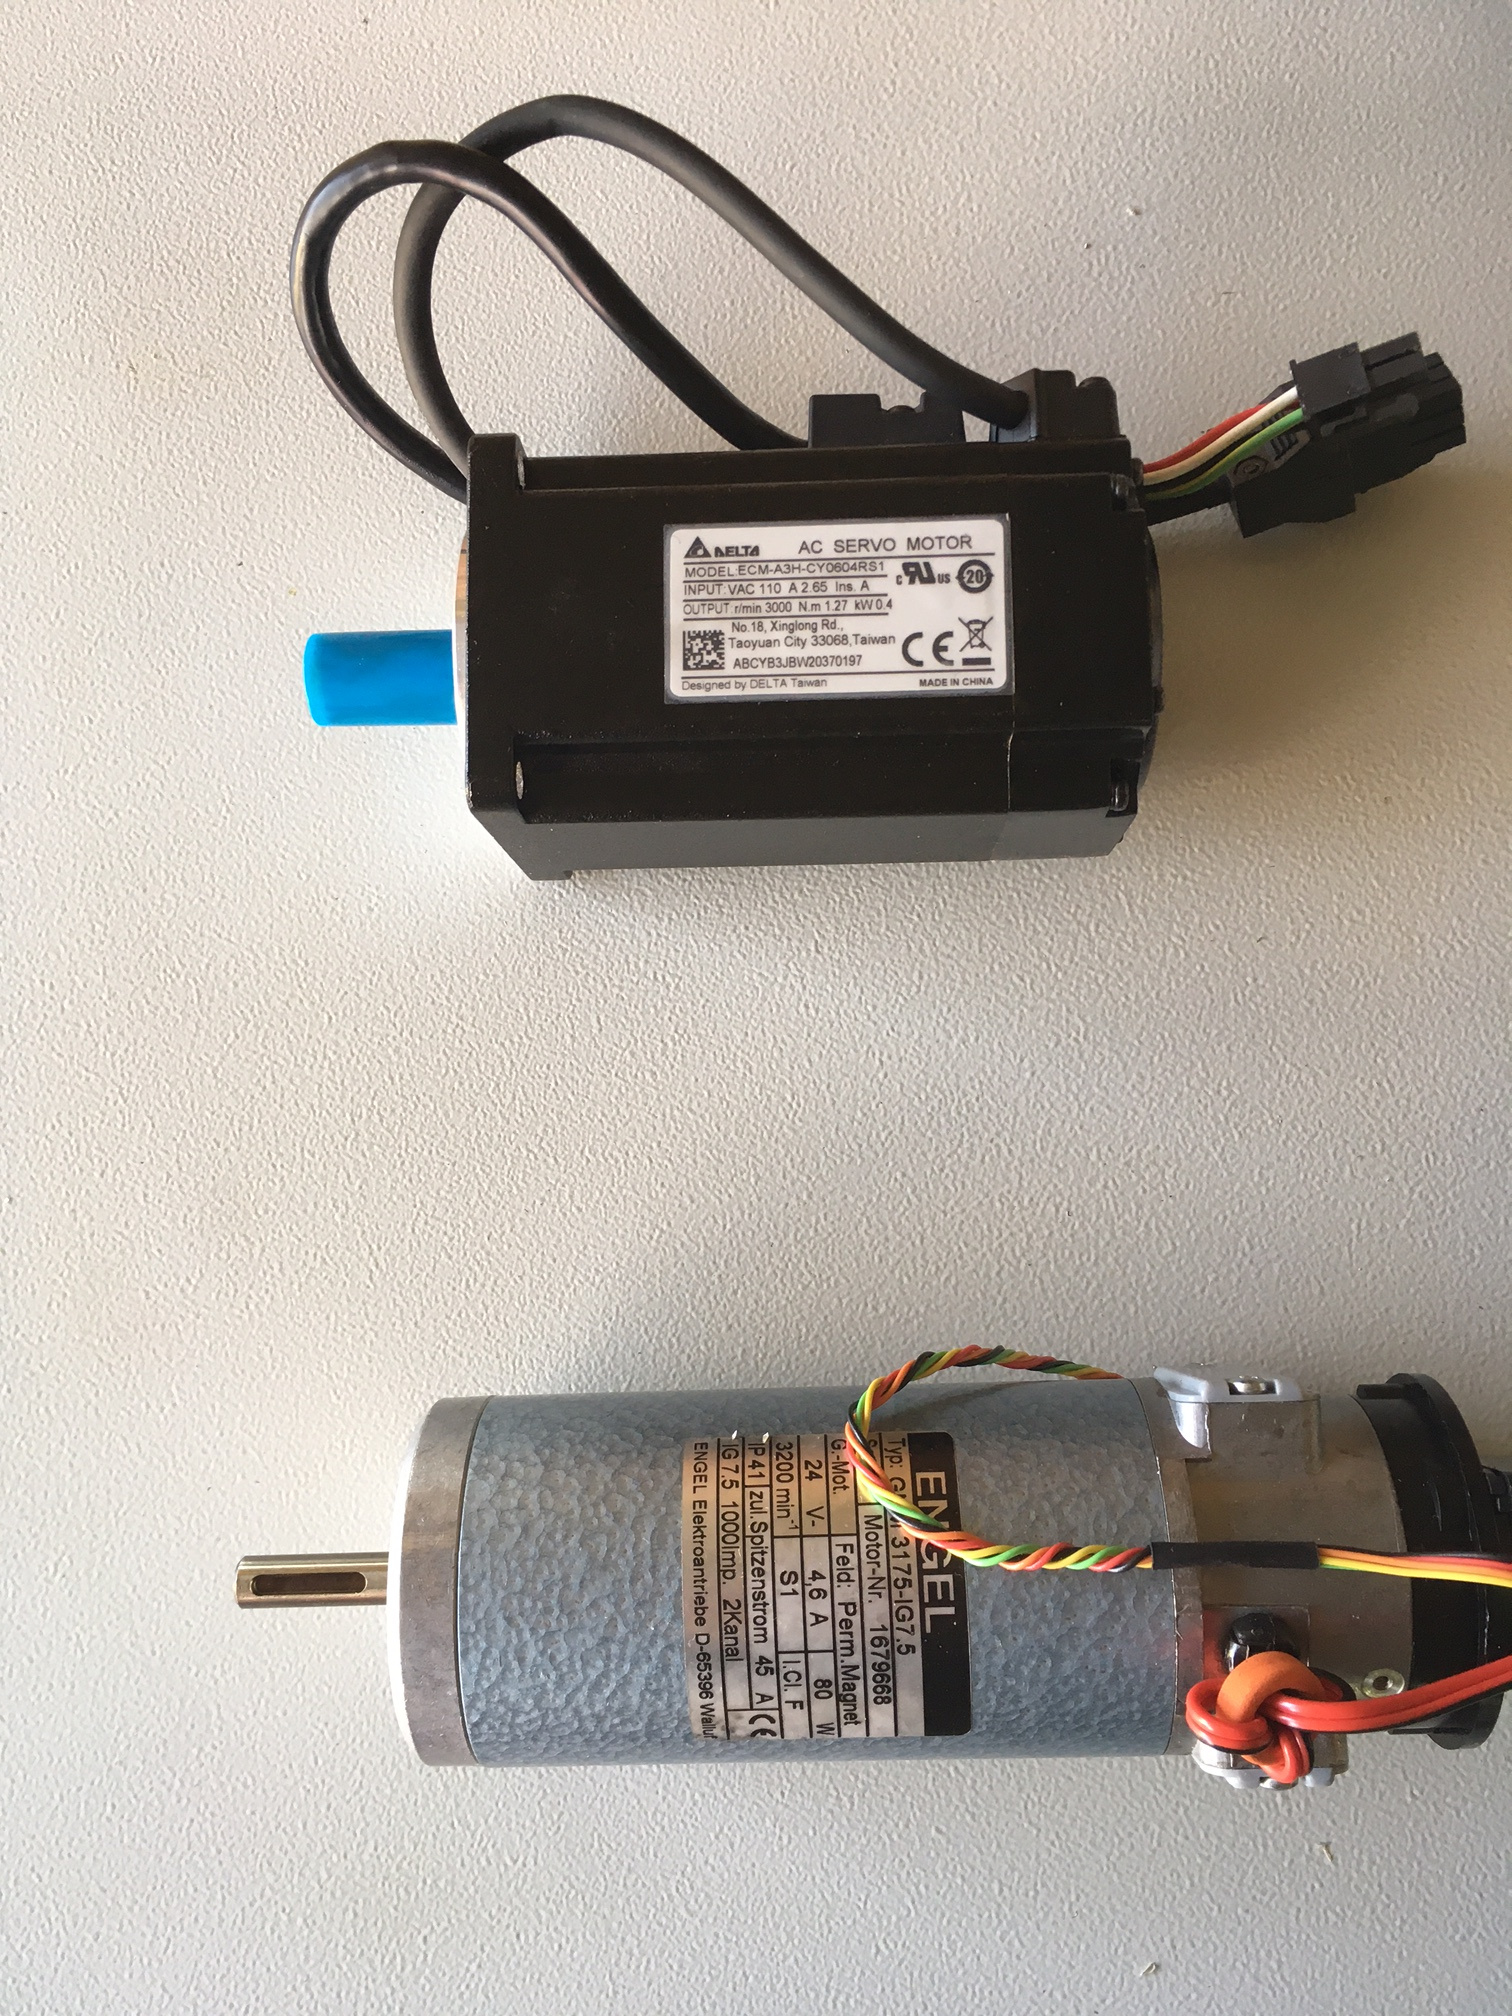
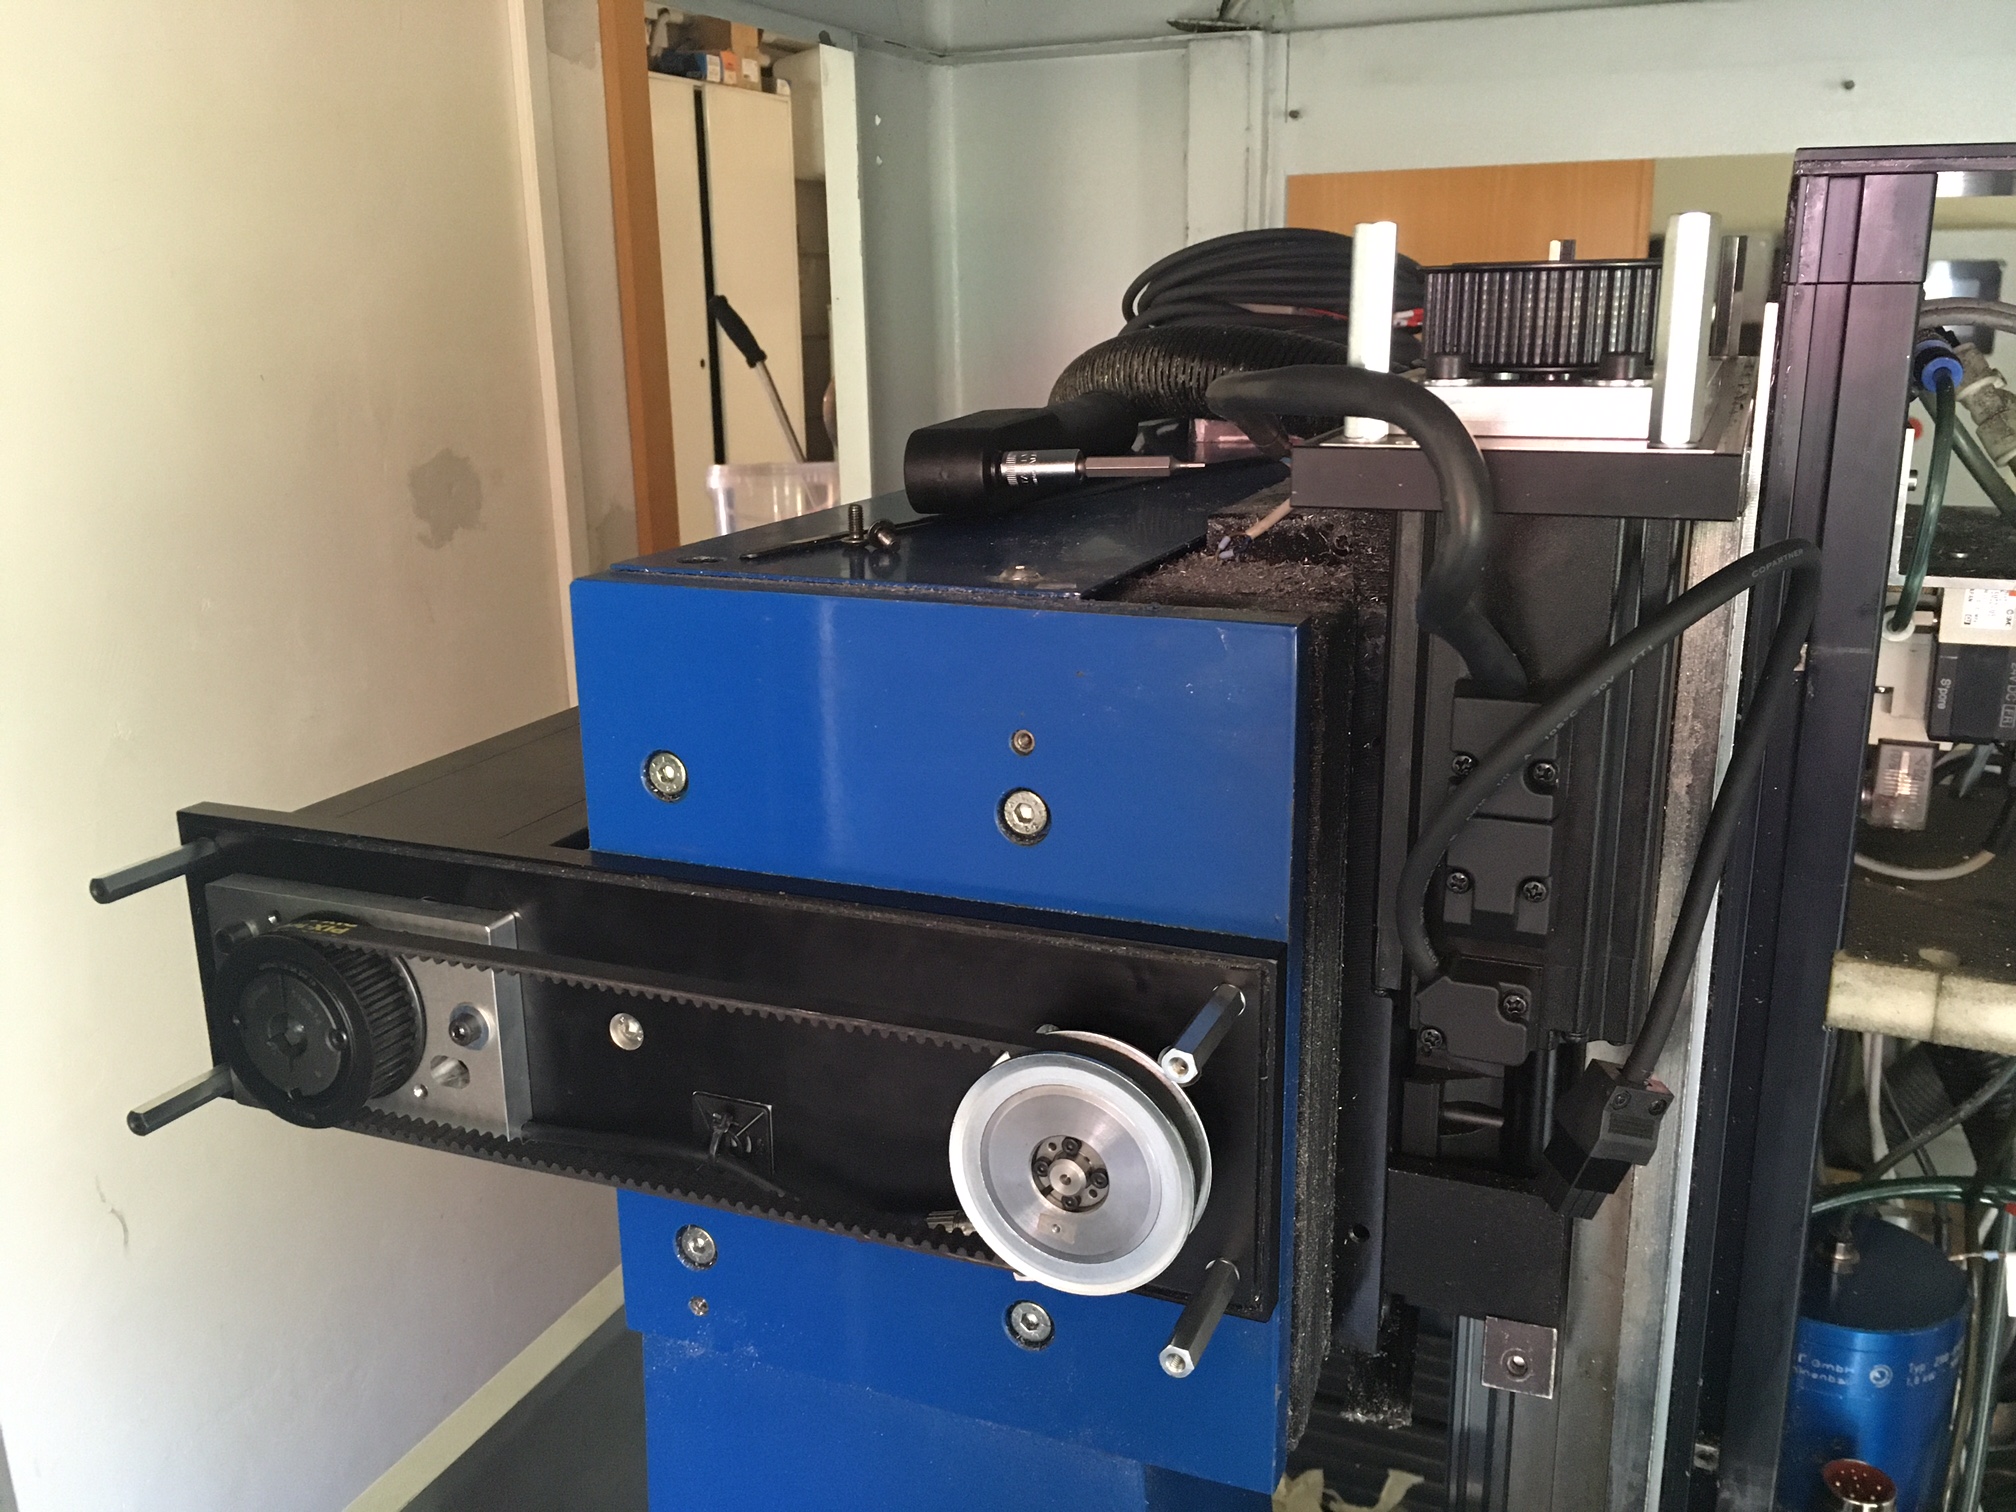
The first part was to swap out the existing 80W DC motors to 400W Delta drives. The motor fixture plates had to be modified and new tension plates were requried. The modifications were pretty straight forward and even the cases for the motors I was able to reuse.
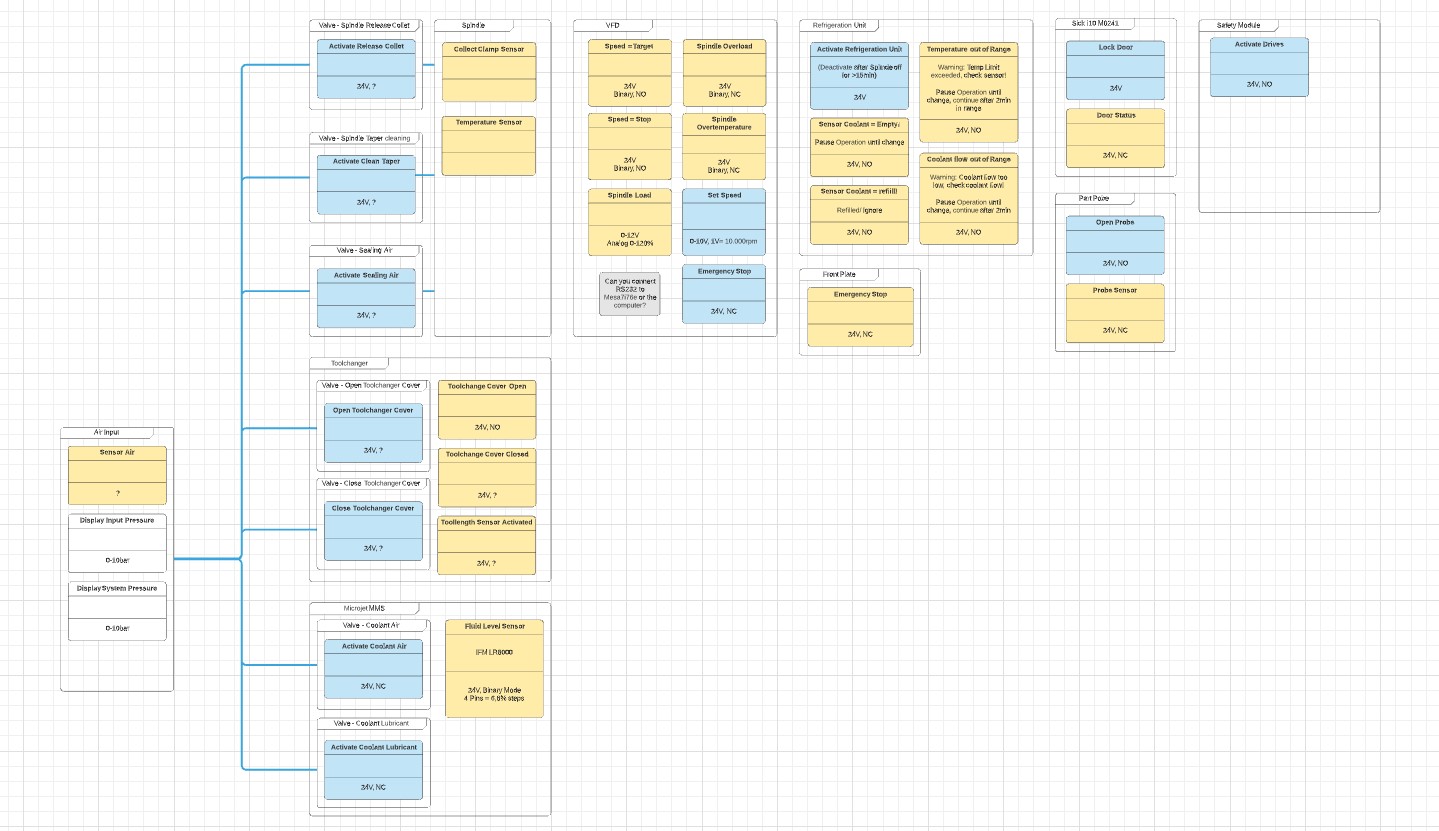
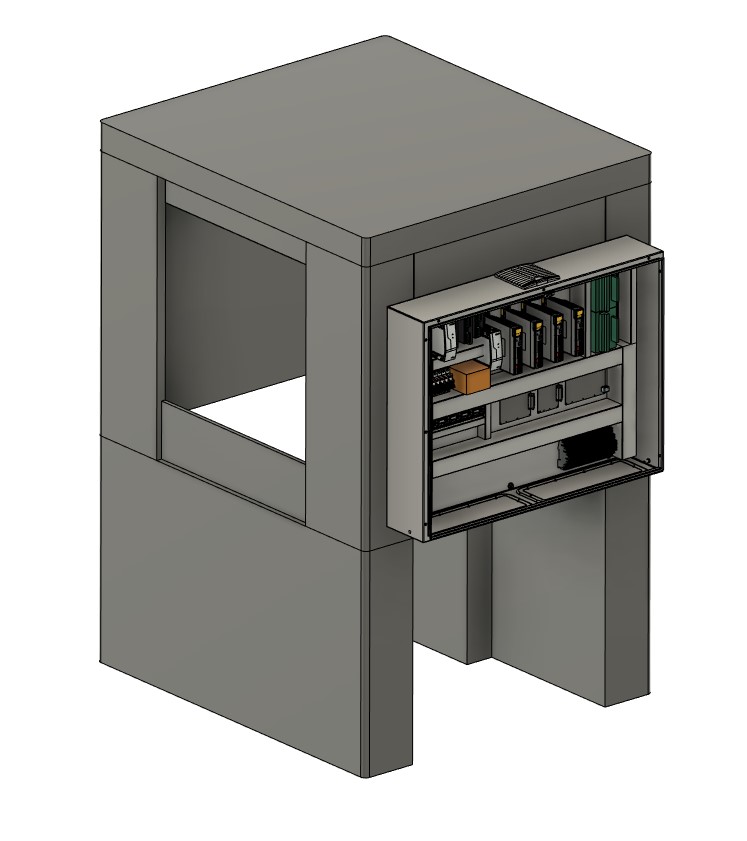
To plan the conversion a diagram software was used, to get an idea about the functions of the previous controller. It helped a lot to get an idea of what was implemented by default already and which parts would be required to implement manually in the configuration and user interface.
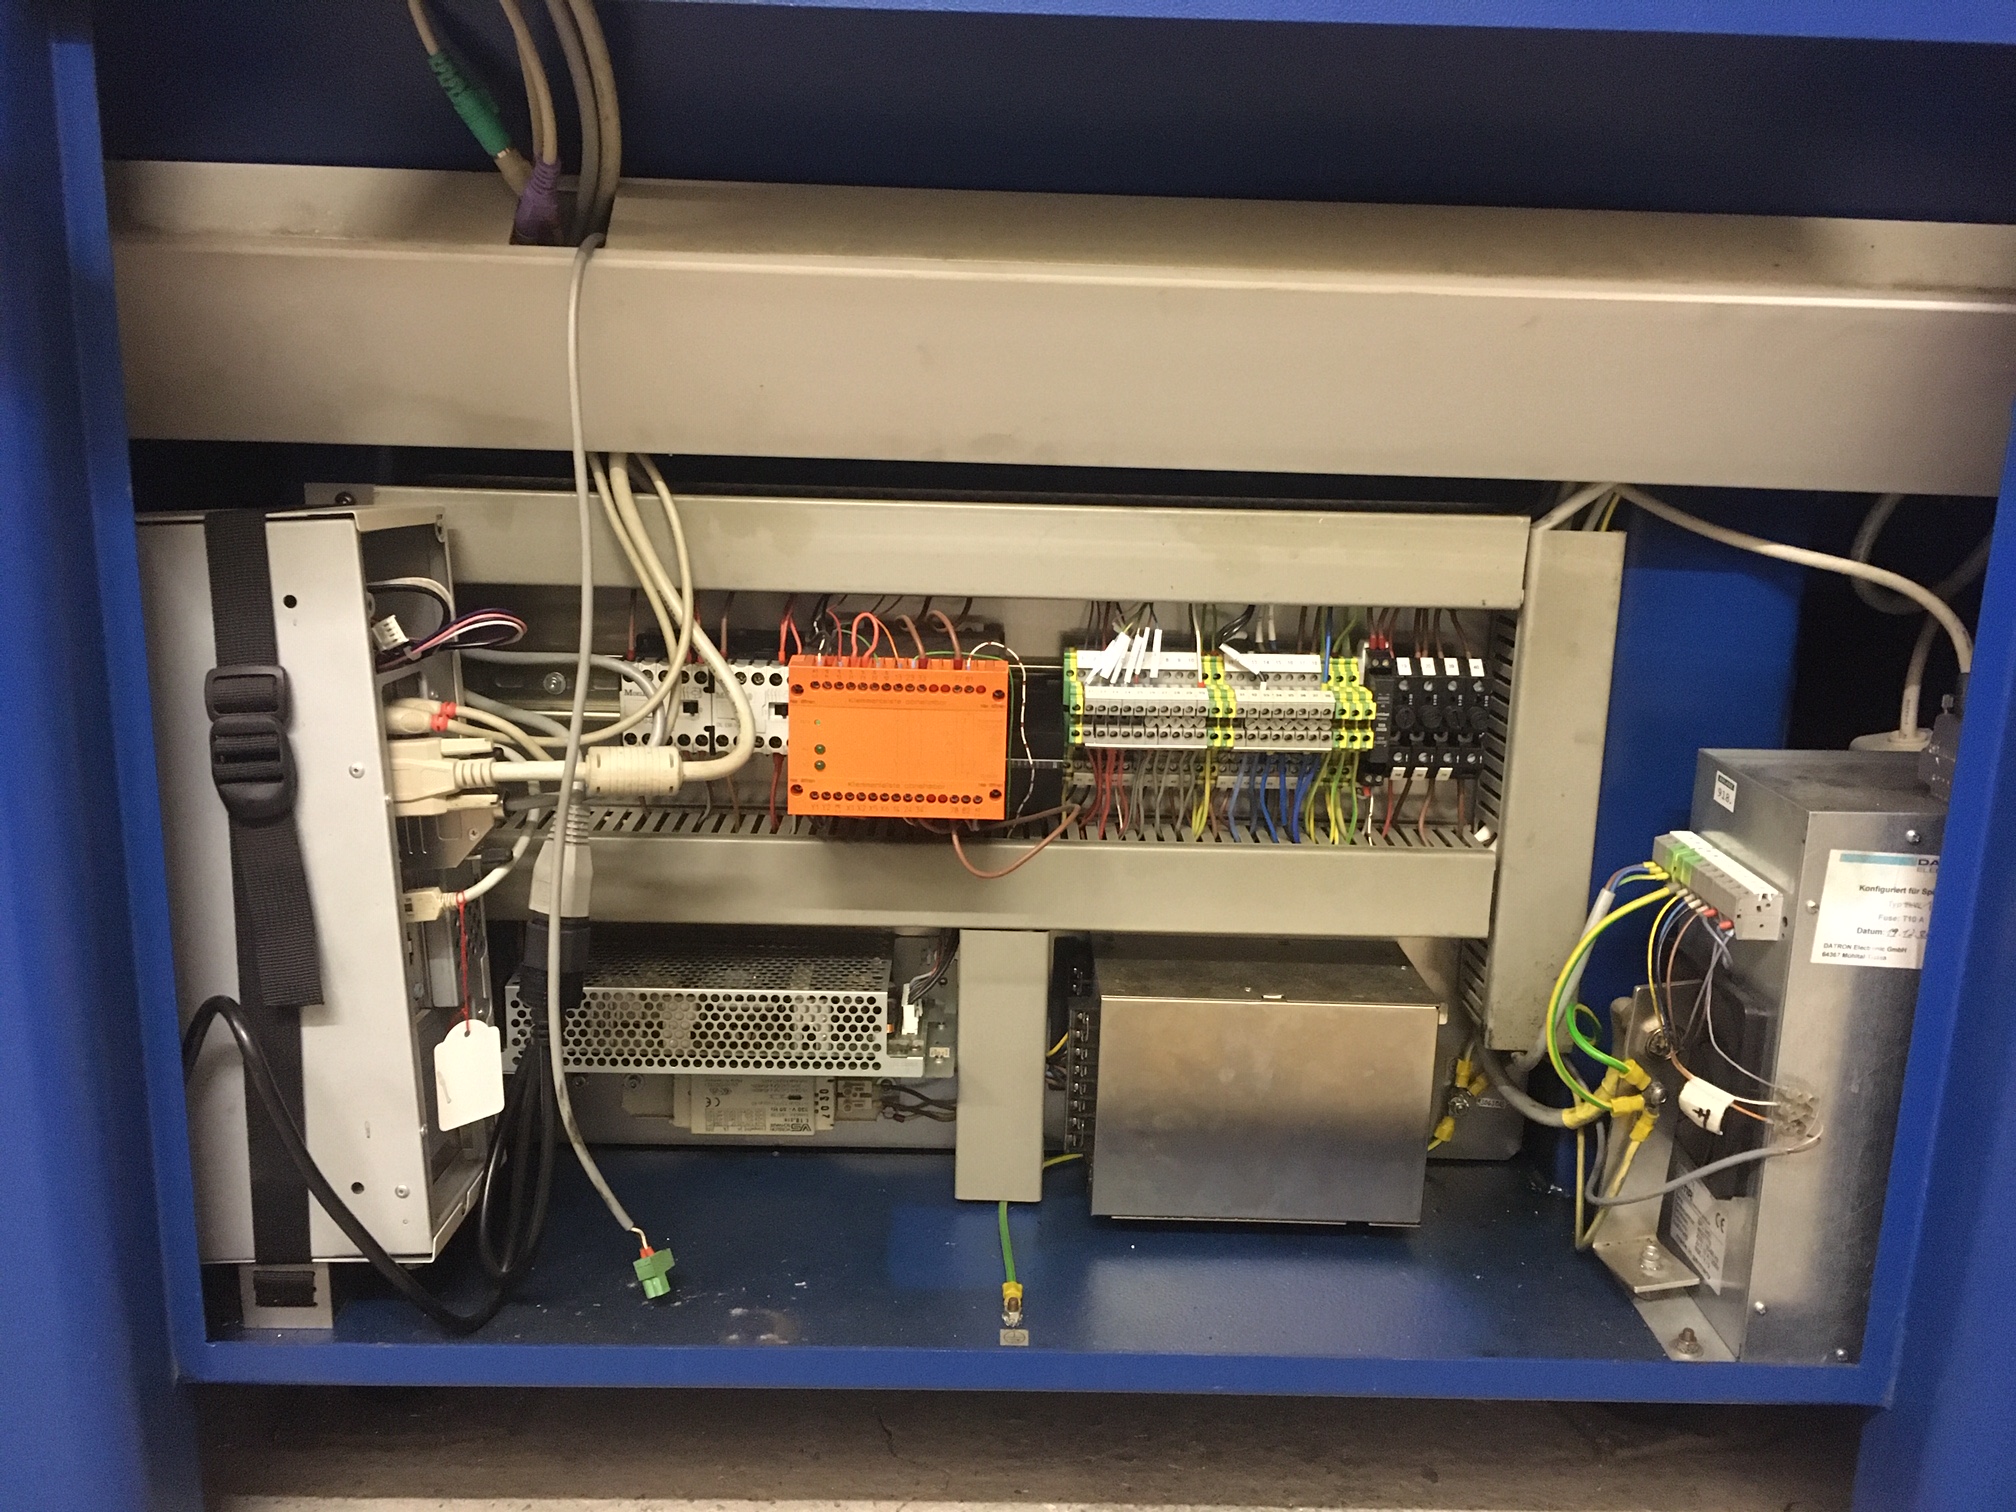
Electroncis
All the electronics were stripped and a easy to access switching cabinet was planned to be placed outside of the machine cabinet. Only the VFD will stay in place there.
Next up is installing the drives and setting the parameters. Never done before for a CNC, may the auto tune be with me^^
For the interface I will start with probe basic. I plan to design a new UI due the grouping of the functions can be a bit improved and optimized.
Wanted to show the process of converting a Datron M9 machine to Delta A3 Drives controlled by a Mesa 7i67E.
Intentions
I got the machine around a year ago and plan to use it as a production machine. It served me well over this year, and now I want to get it to the level of a Datron Neo in manner of speed, reliability and add some features.
- Increased reliability -> The previous controller worked fine but crashed programs every 2-3 weeks and became annoying not to rely on it.
- Larger tool changer -> Has currently a 9 pocket tool changer, not enough for some advanced parts. The goal is to get min. 30-60 tools (chain based) or even a 2,5/3 Axis ATC like its used on the side of Kern machines or the Datron MX
- Relocating tool changer -> The current tool pockets are placed within the work envelope and use up some space. On a 400x400 X/Y Travel that is quite a lot.
- 3D Preview -> The previous controller had no preview whatsoever, so kind of hard to get used to if you came from a LinuxCNC machine already. Some risk in crashes due the unpredictable toolpath location.
Lets start- Hardware Modifications
The first part was to swap out the existing 80W DC motors to 400W Delta drives. The motor fixture plates had to be modified and new tension plates were requried. The modifications were pretty straight forward and even the cases for the motors I was able to reuse.
To plan the conversion a diagram software was used, to get an idea about the functions of the previous controller. It helped a lot to get an idea of what was implemented by default already and which parts would be required to implement manually in the configuration and user interface.
Electroncis
All the electronics were stripped and a easy to access switching cabinet was planned to be placed outside of the machine cabinet. Only the VFD will stay in place there.
Next up is installing the drives and setting the parameters. Never done before for a CNC, may the auto tune be with me^^
For the interface I will start with probe basic. I plan to design a new UI due the grouping of the functions can be a bit improved and optimized.
Attachments:
Last edit: 20 Jun 2021 09:25 by Ritterchen.
The following user(s) said Thank You: arvidb, jtc, tommylight, besriworld
Please Log in or Create an account to join the conversation.
- jtc
-
- Offline
- Premium Member
-

Less
More
- Posts: 147
- Thank you received: 12
20 Jun 2021 18:04 #212506
by jtc
Replied by jtc on topic Datron M9 to LCNC Conversion
I'm a big fan of Datron cncs. That is a very interesting retrofit ")
Please Log in or Create an account to join the conversation.
- Ritterchen
- Offline
- Junior Member
-
Less
More
- Posts: 34
- Thank you received: 18
27 Jun 2021 08:53 #213011
by Ritterchen
Replied by Ritterchen on topic Datron M9 to LCNC Conversion
The motor brackets are done and mounted - I just used the original ones and made new tension plates for them.
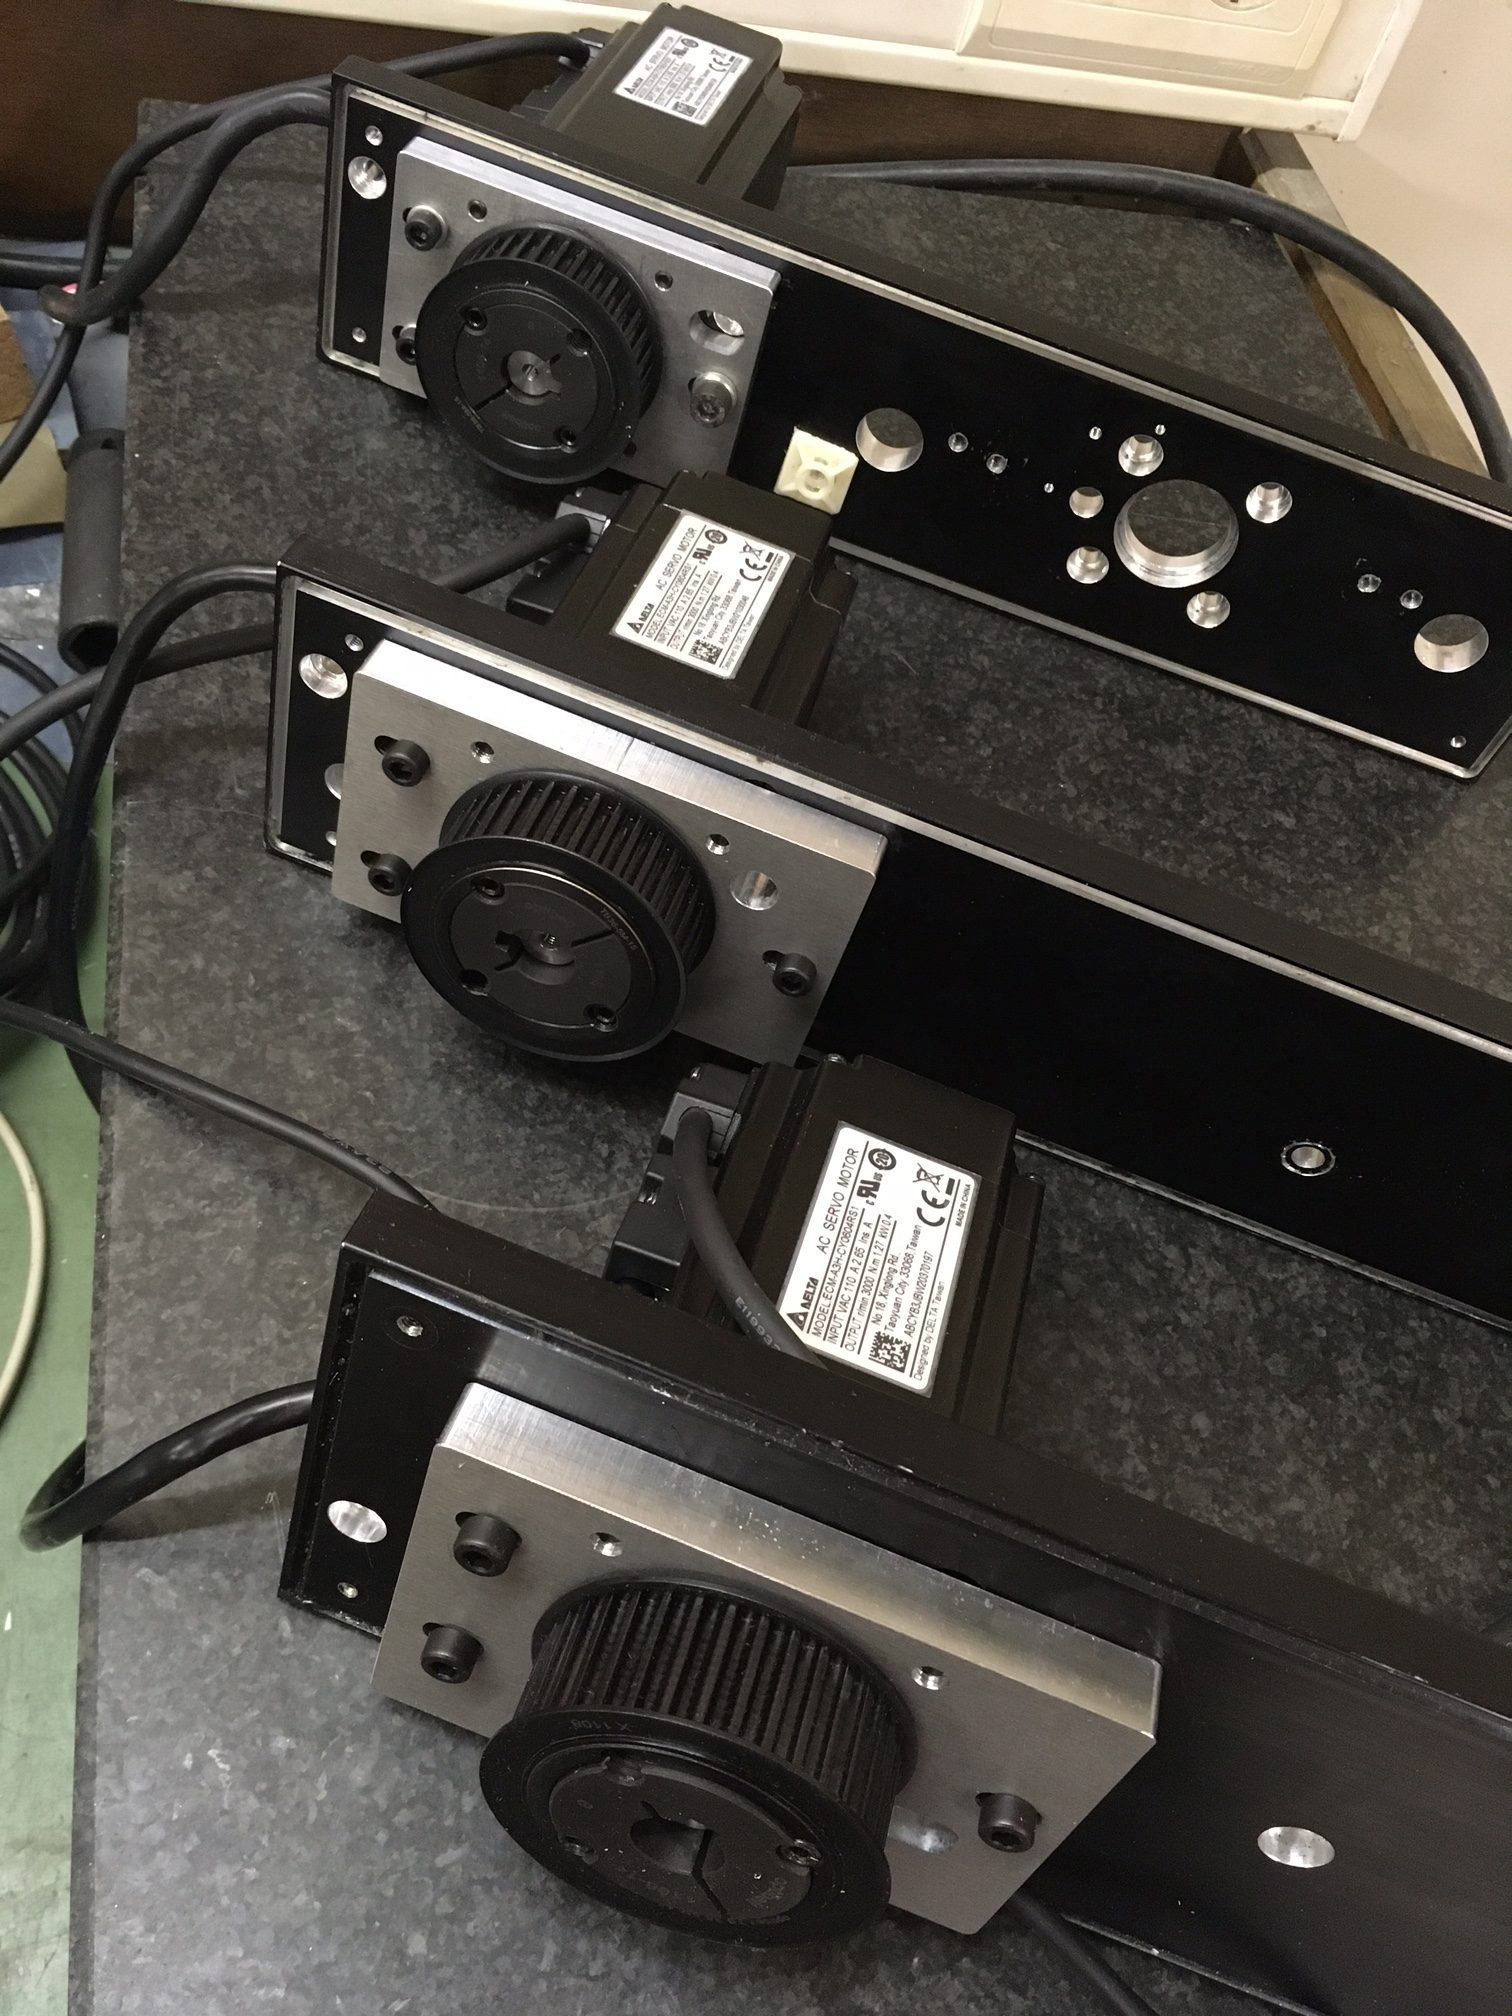
All the 400W Servo motors fitted perfectly into the existing motor housings.
Let the fun of wiring it begin now, hopefully to finish within the next days to go into building the software for it.
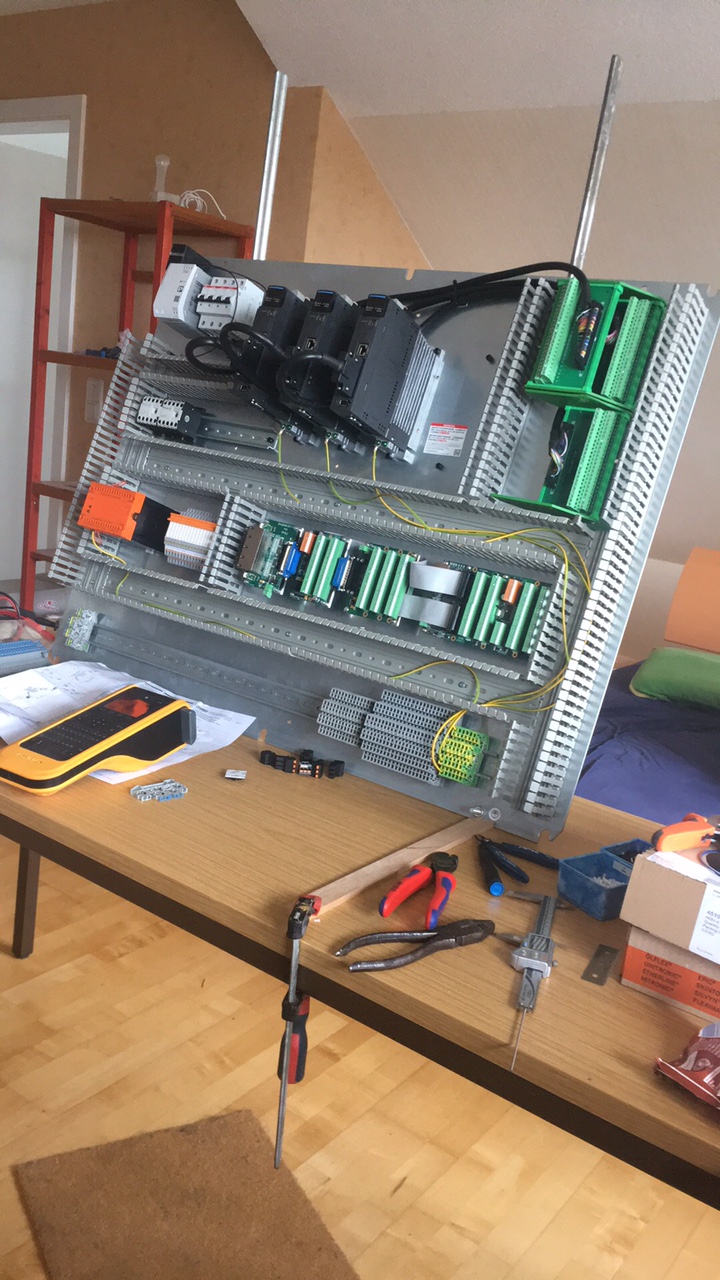
Excellent temporary wiring stand for your desktop, highly recommend it!
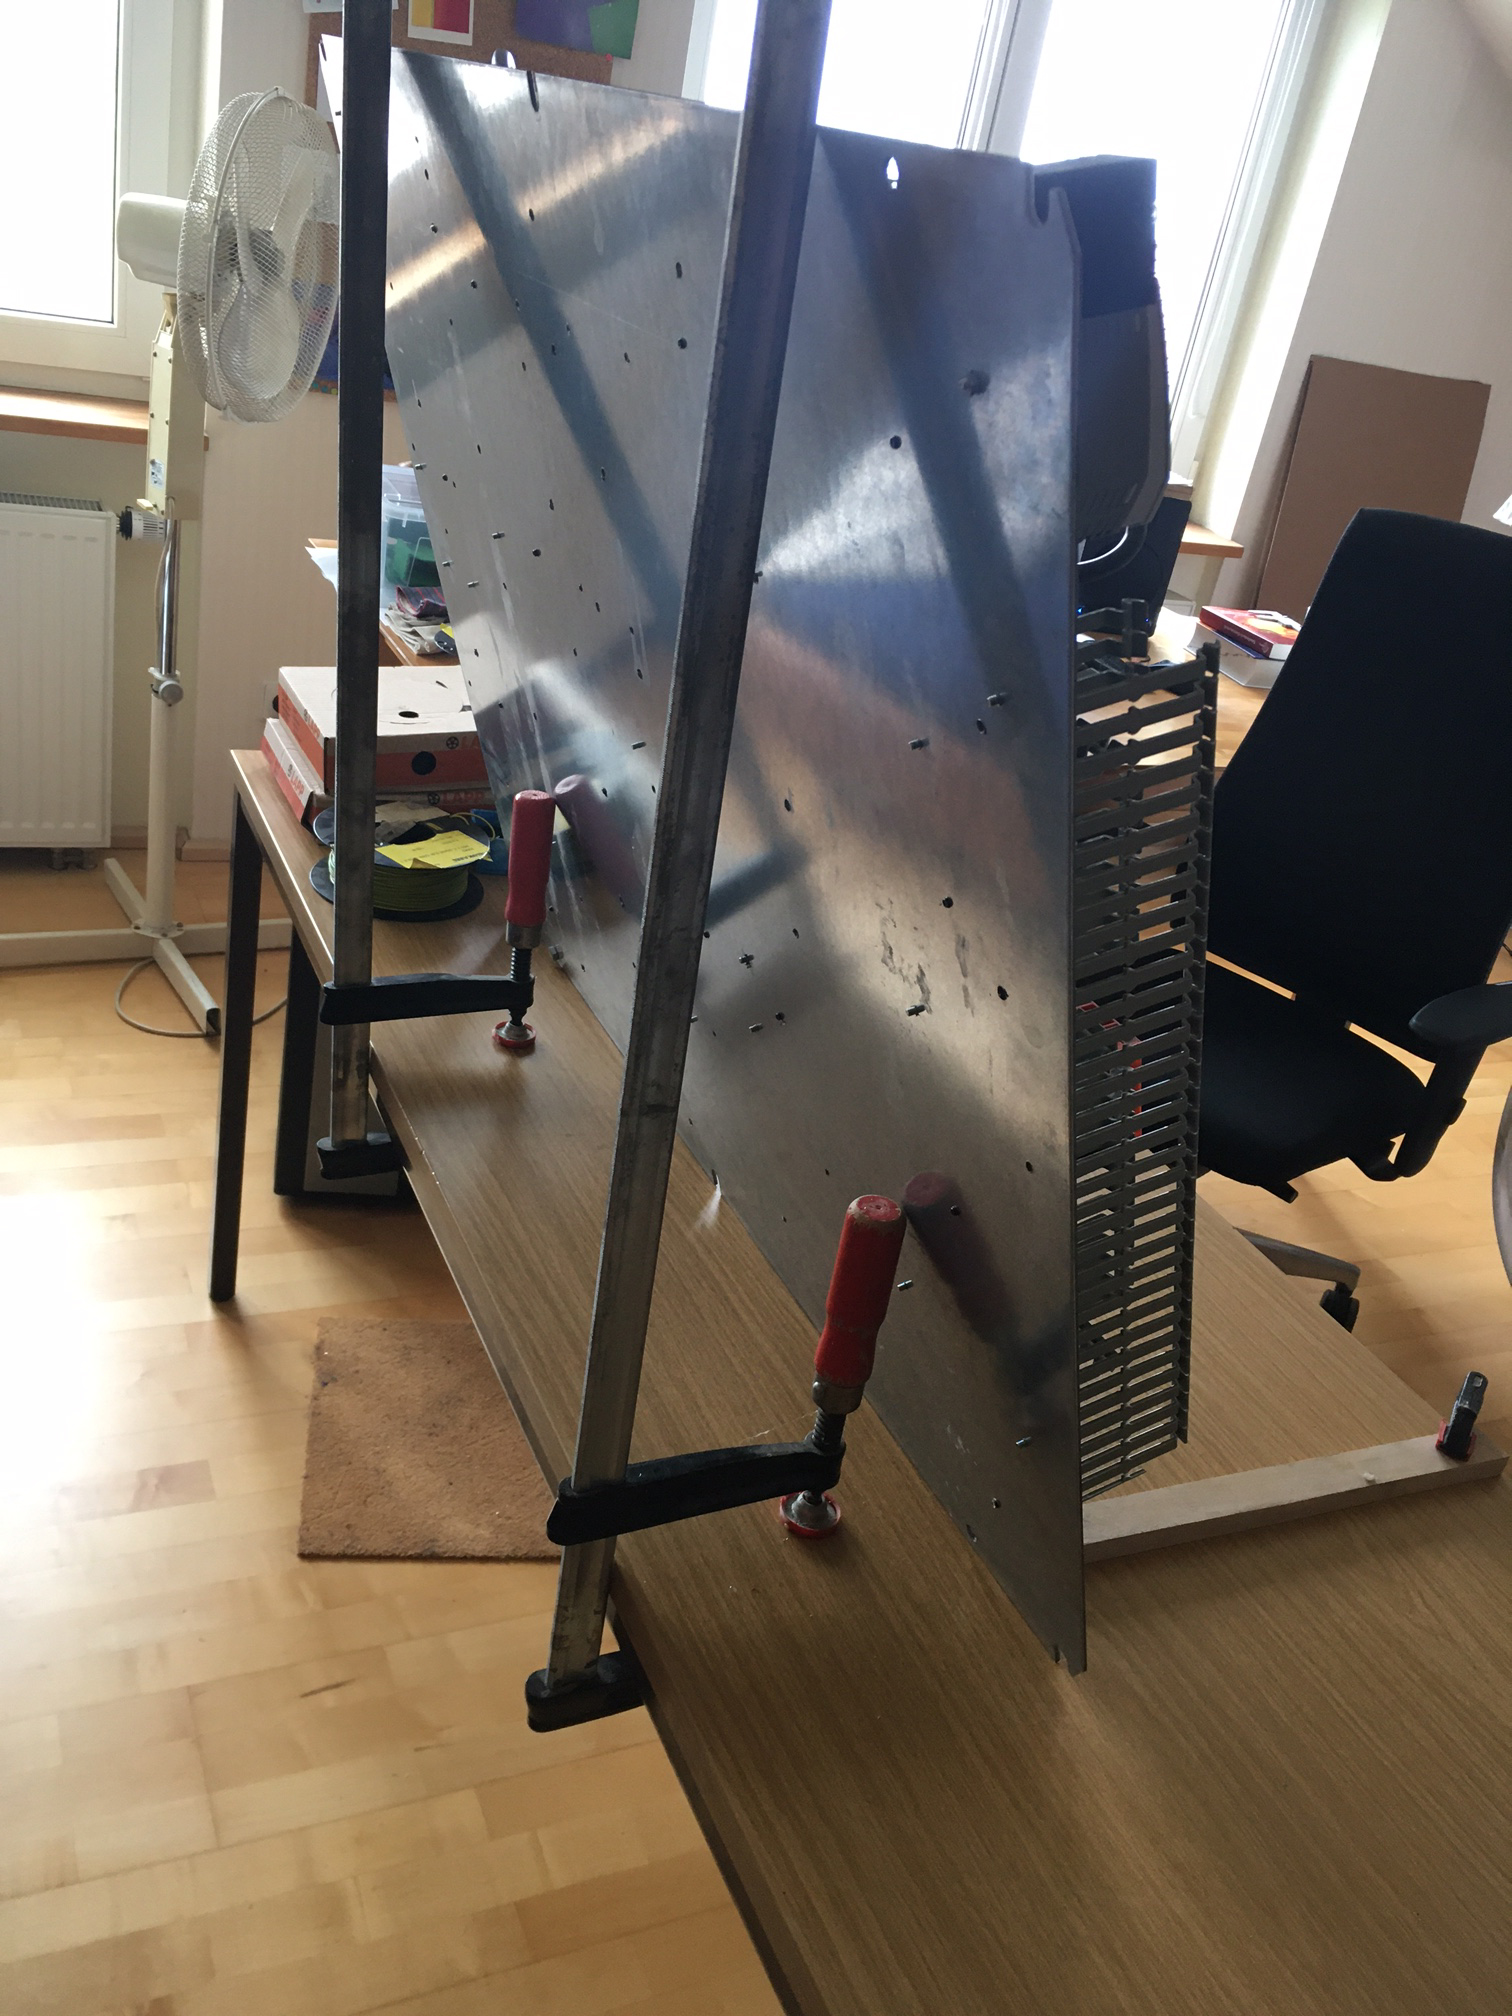
Have a good weekend!
Fritz
All the 400W Servo motors fitted perfectly into the existing motor housings.
Let the fun of wiring it begin now, hopefully to finish within the next days to go into building the software for it.
Excellent temporary wiring stand for your desktop, highly recommend it!
Have a good weekend!
Fritz
Attachments:
Please Log in or Create an account to join the conversation.
- Ritterchen
- Offline
- Junior Member
-
Less
More
- Posts: 34
- Thank you received: 18
27 Jun 2021 09:45 - 28 Jul 2021 09:04 #213013
by Ritterchen
Replied by Ritterchen on topic Datron M9 to LCNC Conversion
- Double Post -
Attachments:
Last edit: 28 Jul 2021 09:04 by Ritterchen.
The following user(s) said Thank You: arvidb, tommylight, eduard
Please Log in or Create an account to join the conversation.
- Ritterchen
- Offline
- Junior Member
-
Less
More
- Posts: 34
- Thank you received: 18
25 Feb 2025 13:43 - 25 Feb 2025 13:45 #322586
by Ritterchen
Replied by Ritterchen on topic Datron M9 to LCNC Conversion
Just wanted to share a small update on the configuration.
I used the MB2Hal Module in order to talk to a Delata MS300 VFD.
In the pdf file I highlighted all the relevant functions/parameters for most applications.
Here is the .ini file with all the relevant parameters and the .hal that makes use out of them.
Use at your own risk/ go ahead and configure them!
These commands can be used for testing in the HalShow execution window:
# setp mb2hal.00.command_input.int 010010
# setp mb2hal.01.frequency_input.int 400
Hope it saves some time to someone!
Fritz
Last edit: 25 Feb 2025 13:45 by Ritterchen.
The following user(s) said Thank You: jtrantow, Saggy_headliner
Please Log in or Create an account to join the conversation.
- RotarySMP
-

- Offline
- Platinum Member
-

Less
More
- Posts: 1633
- Thank you received: 595
25 Feb 2025 13:54 #322590
by RotarySMP
Replied by RotarySMP on topic Datron M9 to LCNC Conversion
Your retrofit is progressing nicely.
Please Log in or Create an account to join the conversation.
- Sziggy_NC
- Offline
- Junior Member
-
Less
More
- Posts: 37
- Thank you received: 1
26 Feb 2025 04:36 #322645
by Sziggy_NC
Replied by Sziggy_NC on topic Datron M9 to LCNC Conversion
I love the temp wiring stand. I will definitely use it going forward.
Please Log in or Create an account to join the conversation.
- Ritterchen
- Offline
- Junior Member
-
Less
More
- Posts: 34
- Thank you received: 18
27 Feb 2025 10:44 - 27 Feb 2025 10:57 #322781
by Ritterchen
Replied by Ritterchen on topic Datron M9 to LCNC Conversion
-to be deleted-
Attachments:
Last edit: 27 Feb 2025 10:57 by Ritterchen.
Please Log in or Create an account to join the conversation.
- Ritterchen
- Offline
- Junior Member
-
Less
More
- Posts: 34
- Thank you received: 18
27 Feb 2025 10:58 #322783
by Ritterchen
Replied by Ritterchen on topic Datron M9 to LCNC Conversion
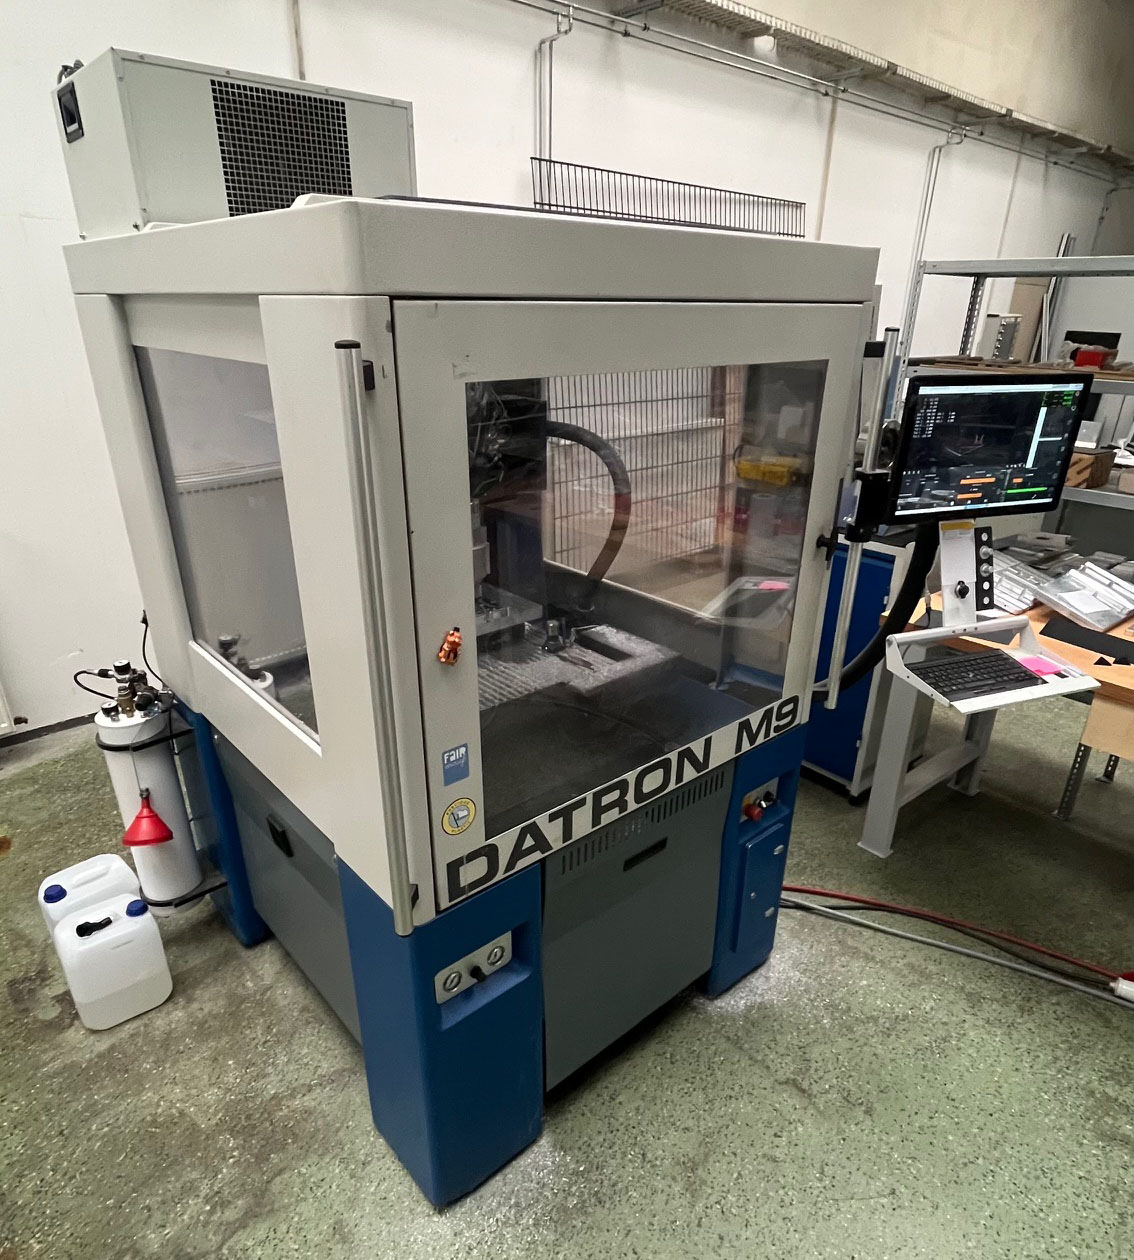
Ohh yes, there were no updates here. But mainly because the machine is running since 3 years production.
Plan to be better in the sharing-back side of things!Very happy with the system overall, not much left to do I think.
Only main thing I consider to upgrade it to an external ATC system, but this will be quite some work. I had some process reliability issues with the internal tool changer as I do a lot of micro machining with Aluminium dust on the tool holders ruining my HSK25 spindles, not so much fun.
So went back to manual spindles for a bit. Ahh and making the Datron probing work again, thats on the to do!
The build went pretty straight forward. Would always recommend Delta A3s again as their auto tune is very valuable.
Maybe next time I would give it a shot to go Ethercat, as a few years back it was not that well documented.
Made parts down to 0,01mm repeatable. Below that its a lot about how good your spindle is (ER collets suck there)
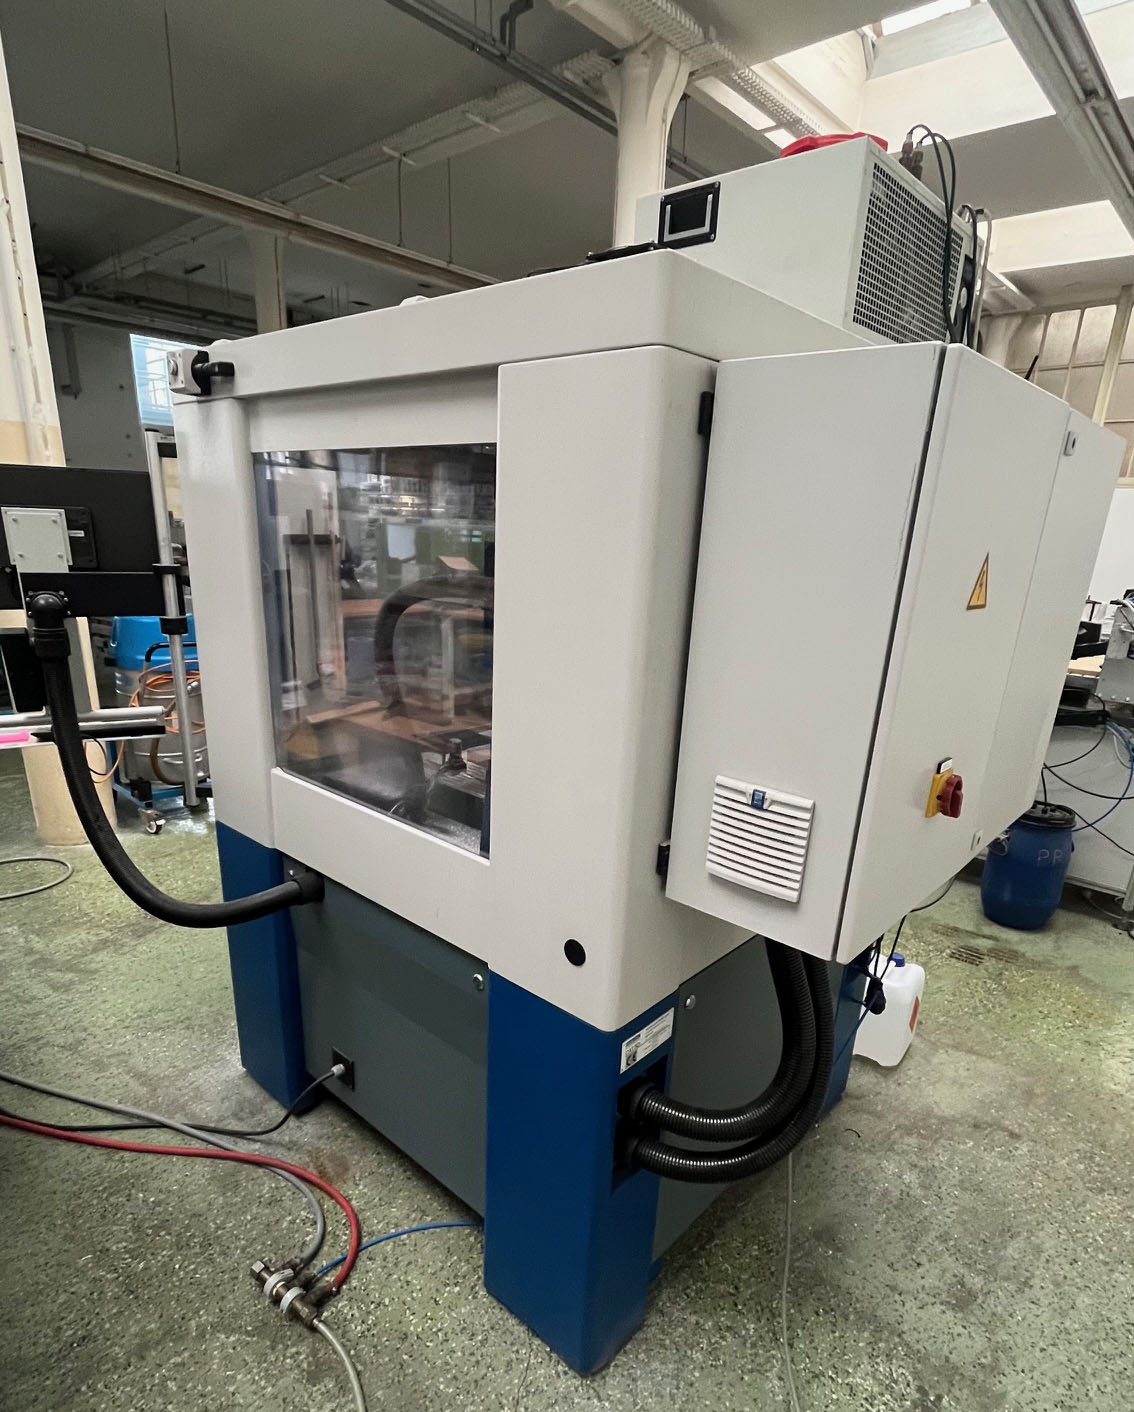
Mechanical changes
- removed top and replaced with PC to have daylight in the machine
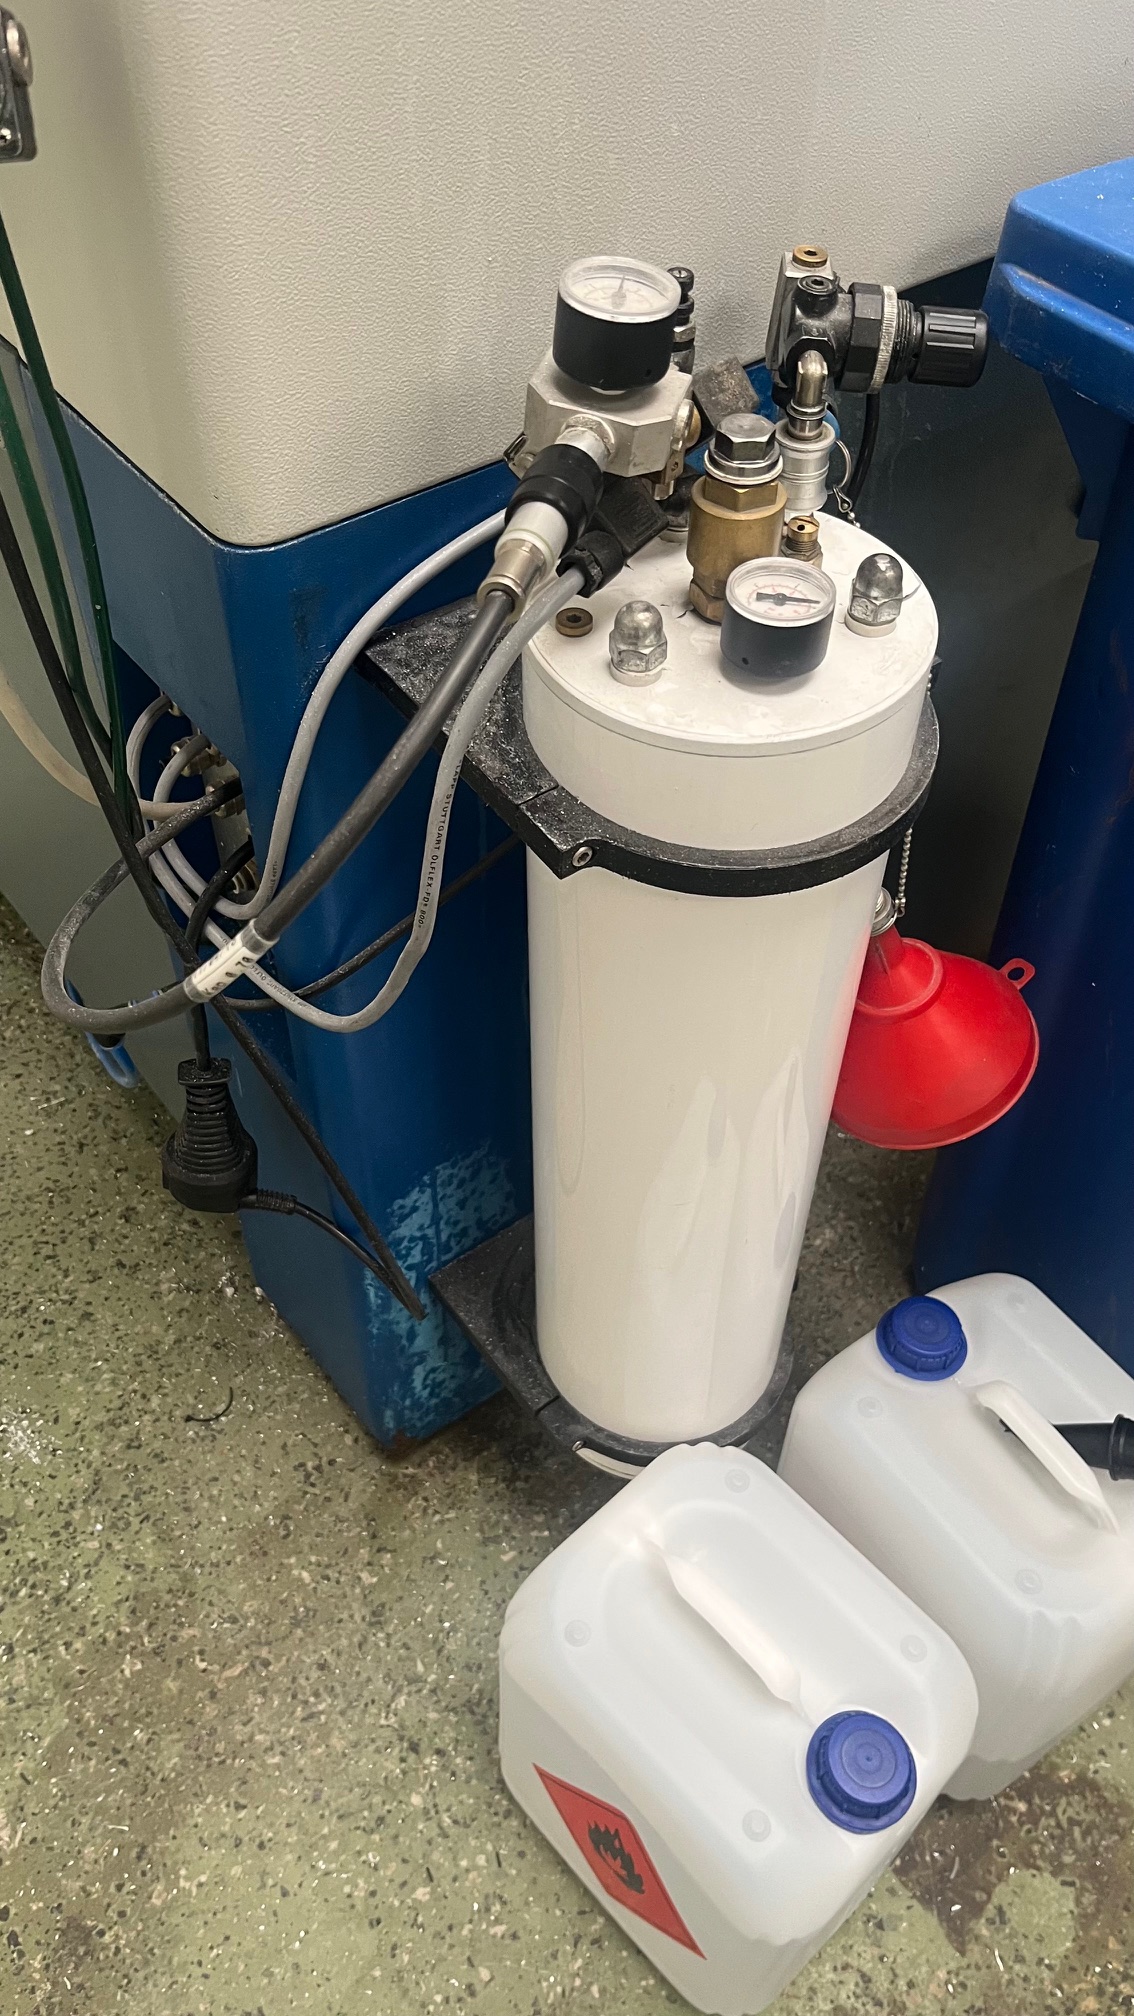
- Upgraded a Microjet 1L cooling system to make it 10L
- just bought a larger tube and sanded of the ends //don't do this at home^^
- Blum Z Nano for more Z-Precision between tool changes (required for sub 0,01mm)
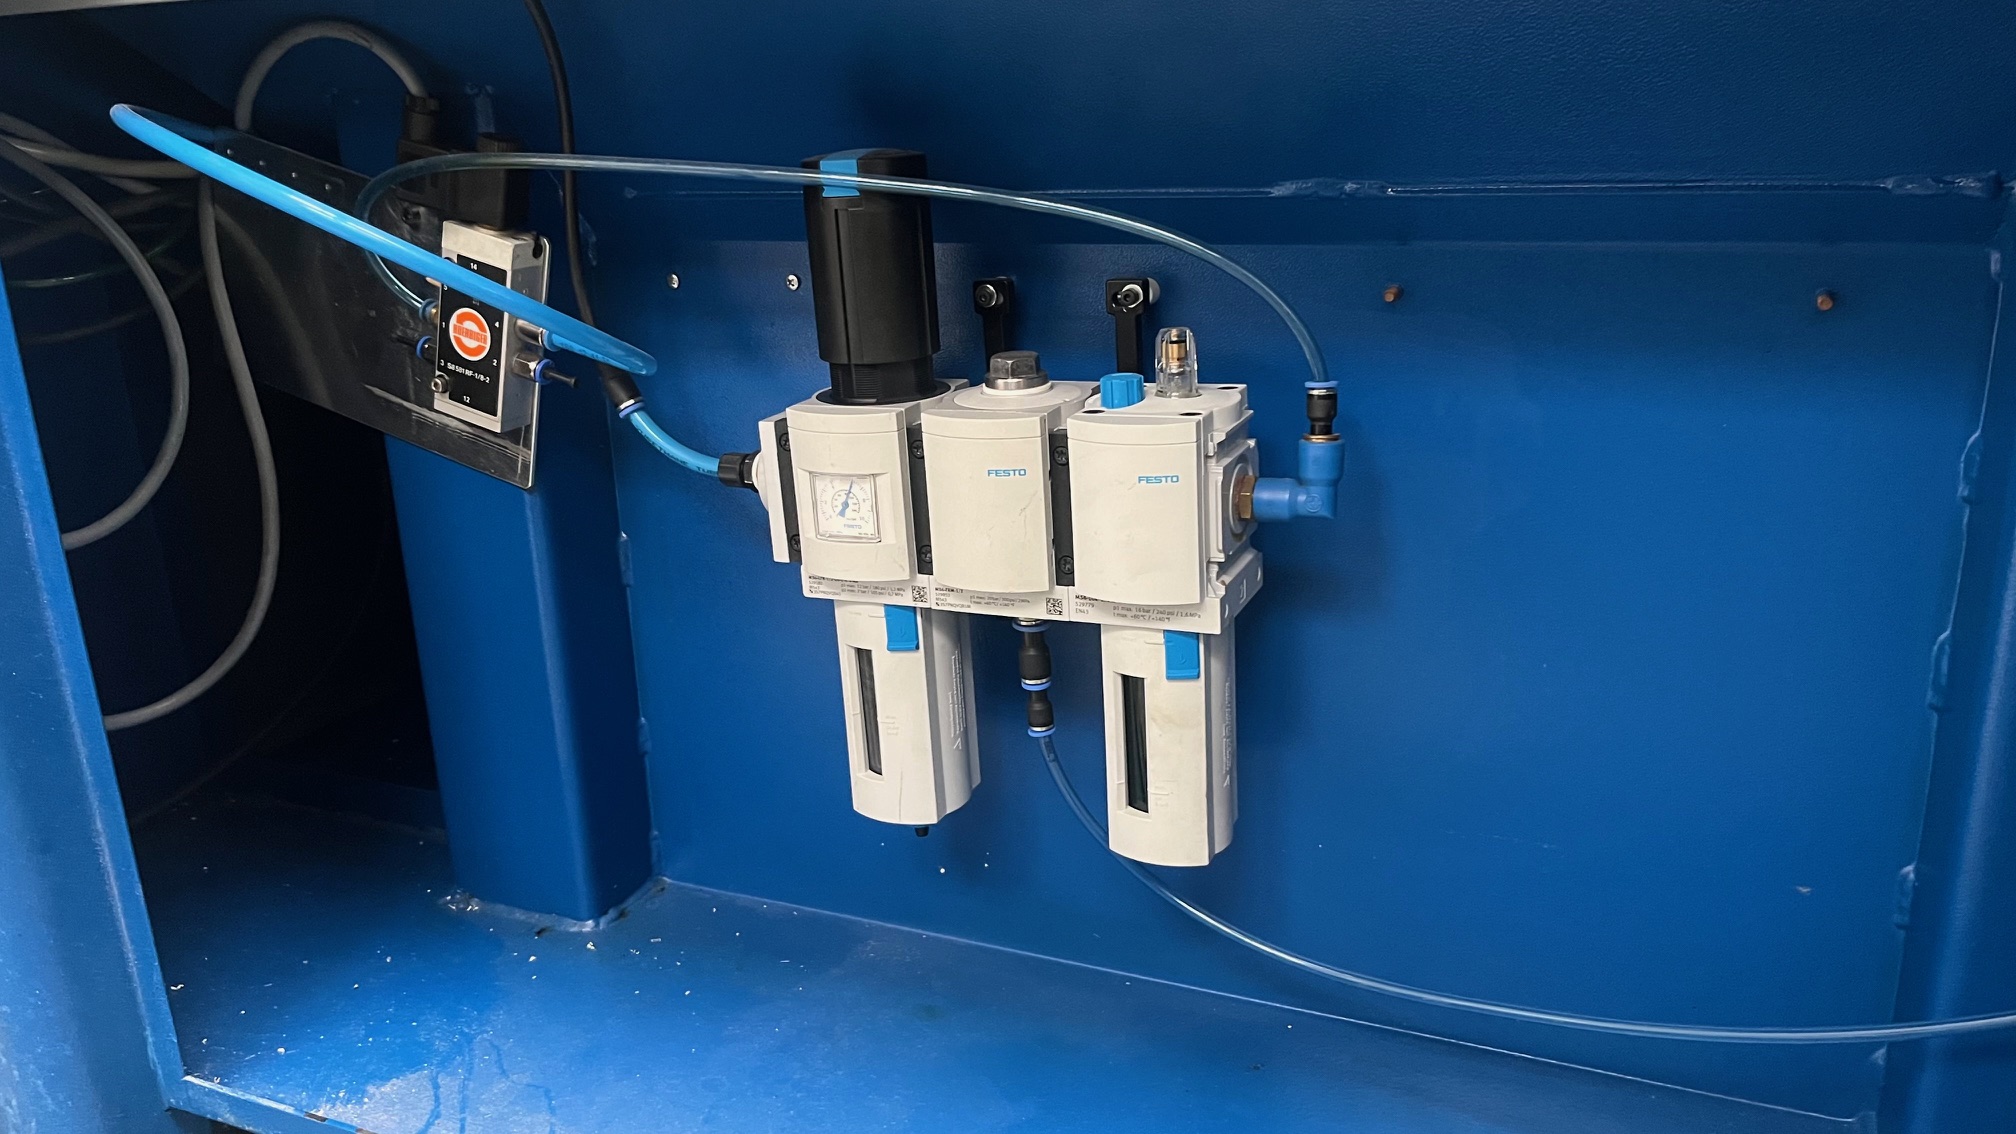
- Schunk Vero Tool Change palette, controlled by a switch next to the emergency-off, oiler unit in the pneumatic cabinet under the machine
- 3d printed chip covers on the sides, so the chips fall down
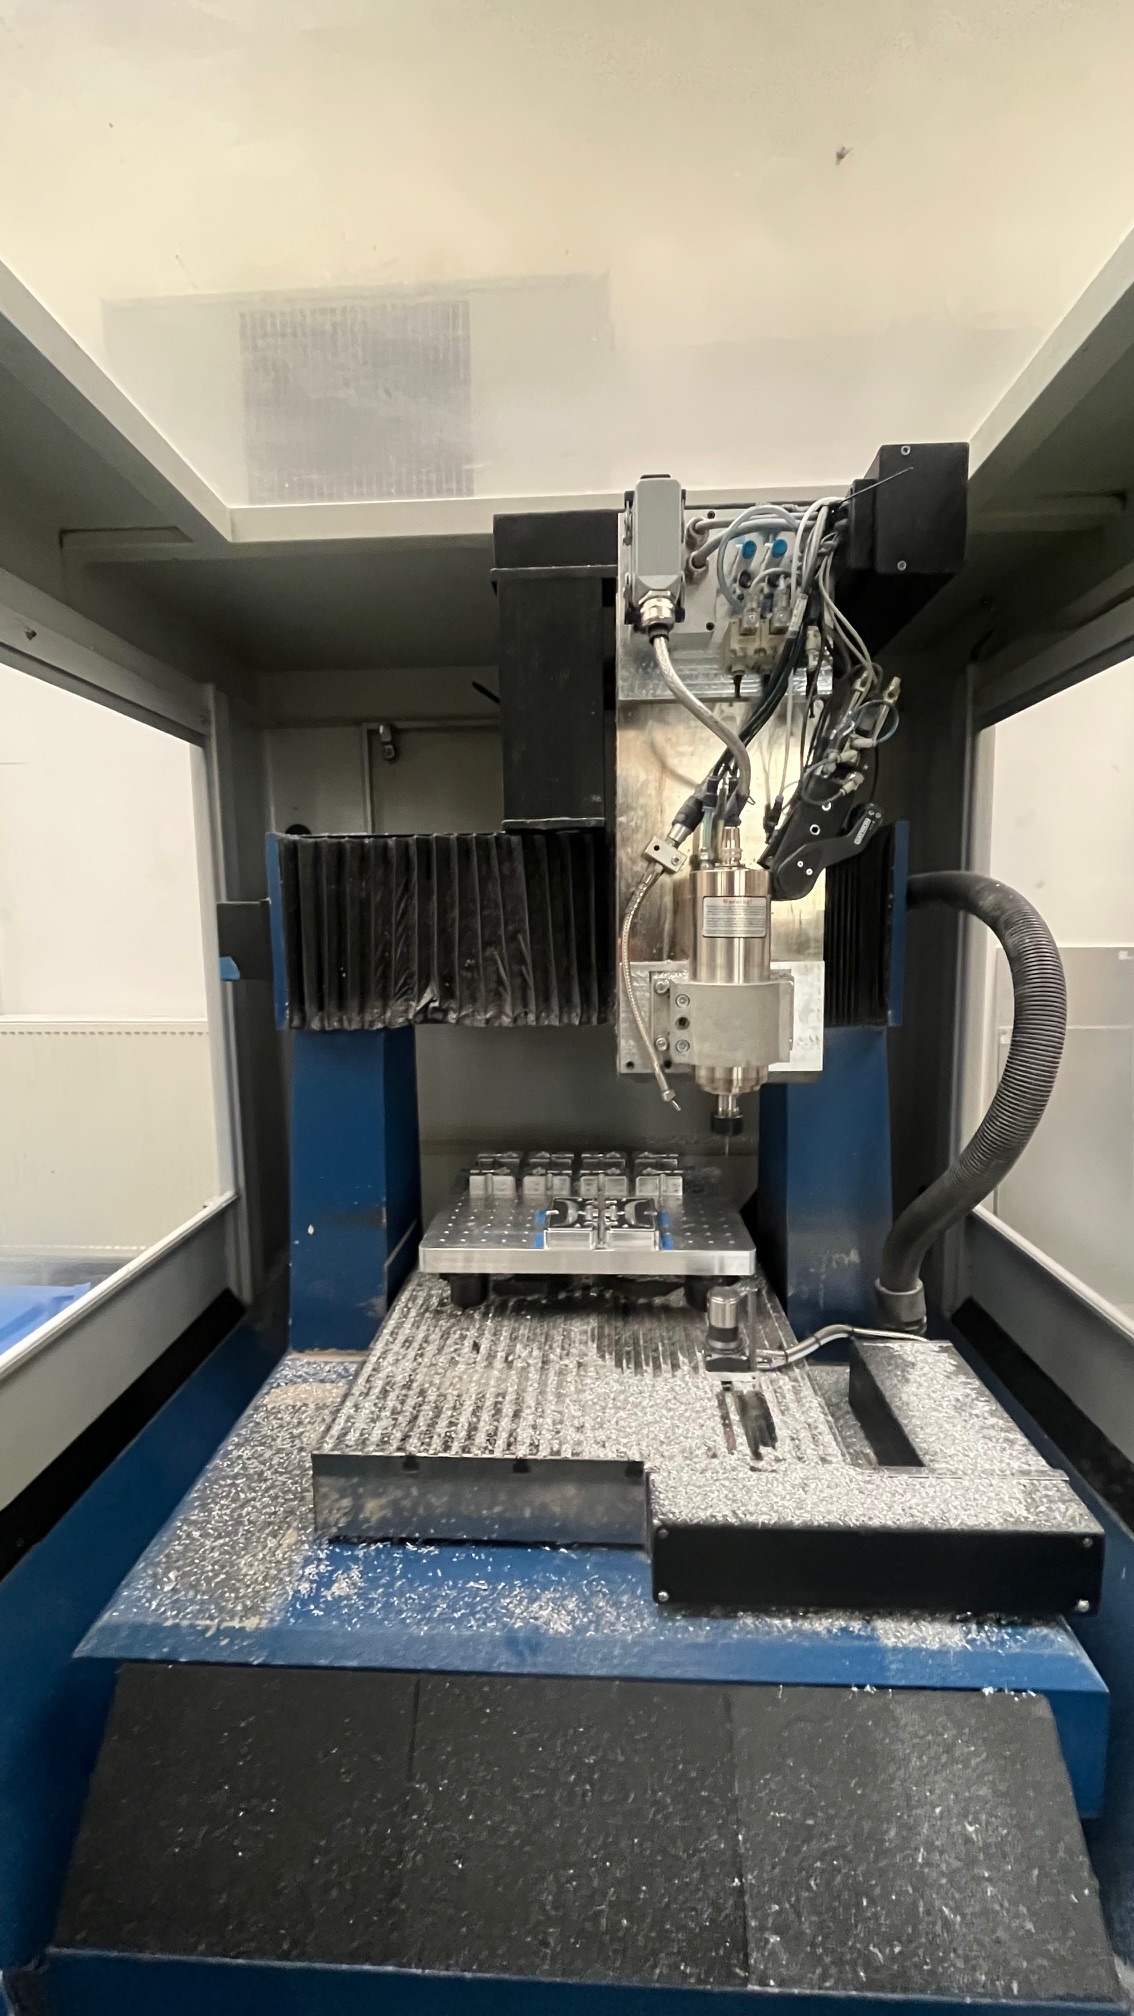
Z-Axis
- Completely changed because the previous one was really unpleasant to adjust and I needed a connector to quickly swap spindles
- Probe is still to be done, but not super relevant for the things I do
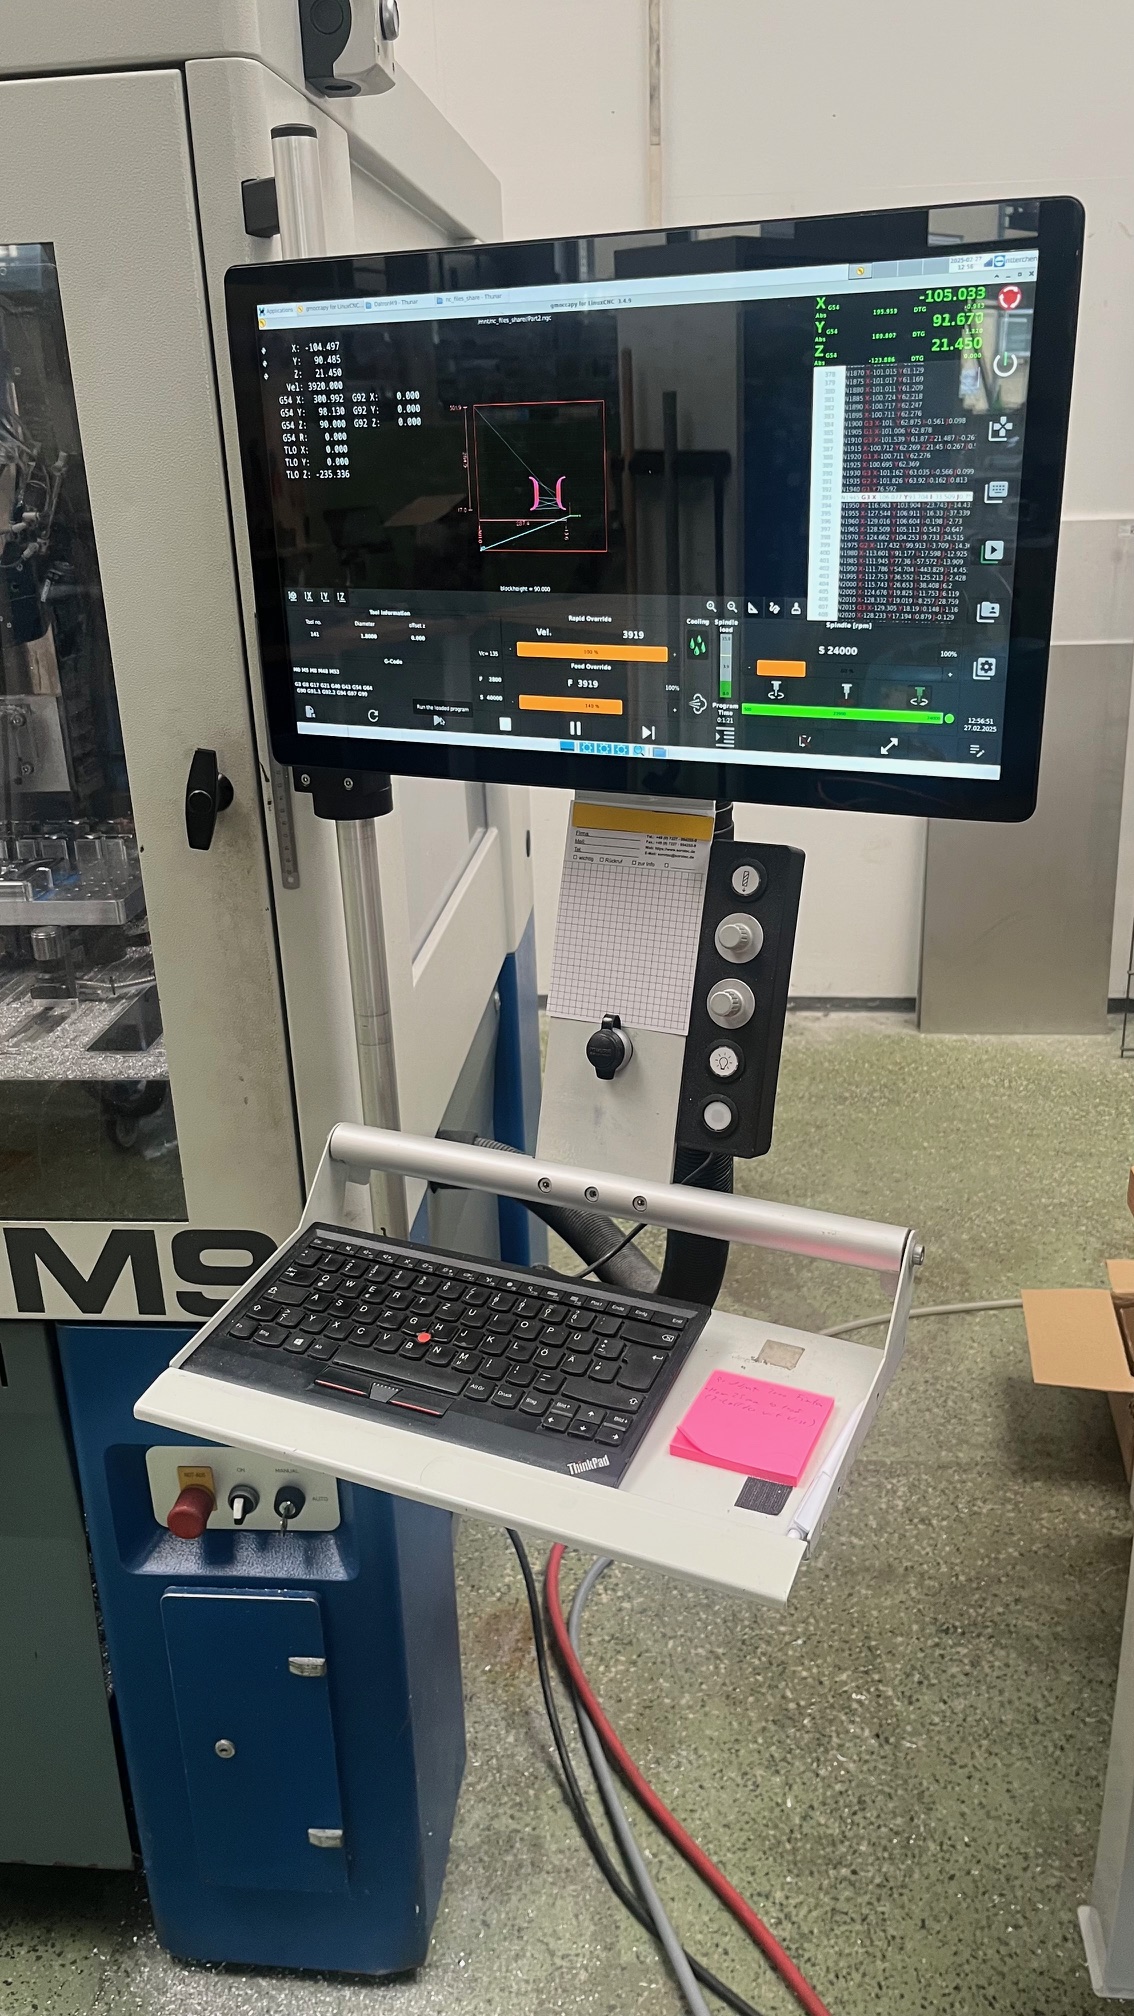
User Control panel
Went with a 22" Iiyama TF2215MC, touch works well, only a bit glossy, but just looks nice.
Thought about getting an older larger hardware interface panel with it, but as most functions are implemented nicely in the Gmoccapy UI, there was not much I was looking for.
I used mainly the tool eject as hardware button, light and one led for Low-Air alarm together with feed control encoders. The encoders work very well as you can adjust the value either by the UI (switch to 100% with one click) or fine tune it by the knobs in 5% steps.
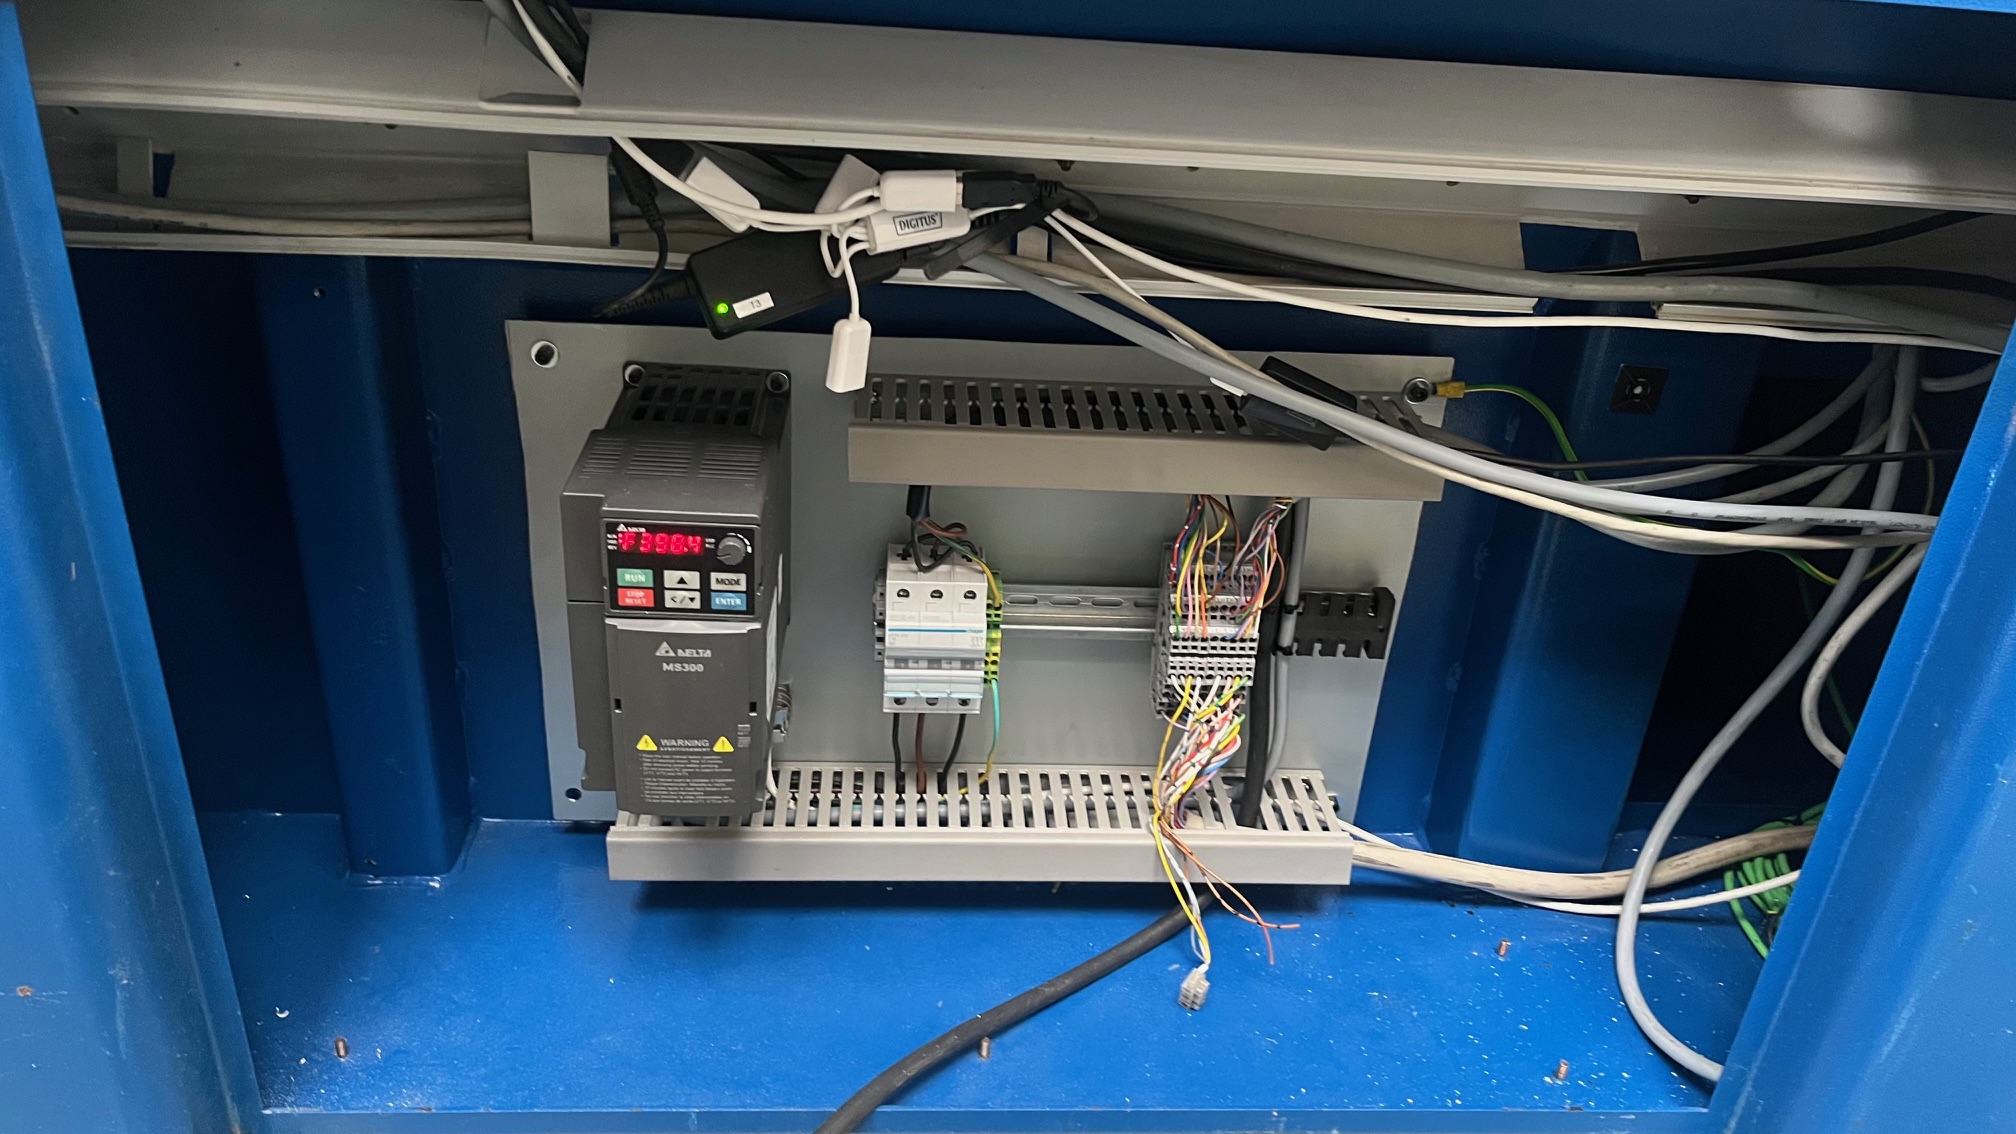
VFD
A bit more messy side of the machine, but works. Liked to have it seperate from the servo controls as I had troubles with that before. Not worth the trouble for solving it for 2m extra cable.
Started with cable based IO but Modbus is soo good with all the feedback, would never go back ;D
Only thing left is combine the 380V into the machine, as it originally ran on 220V.
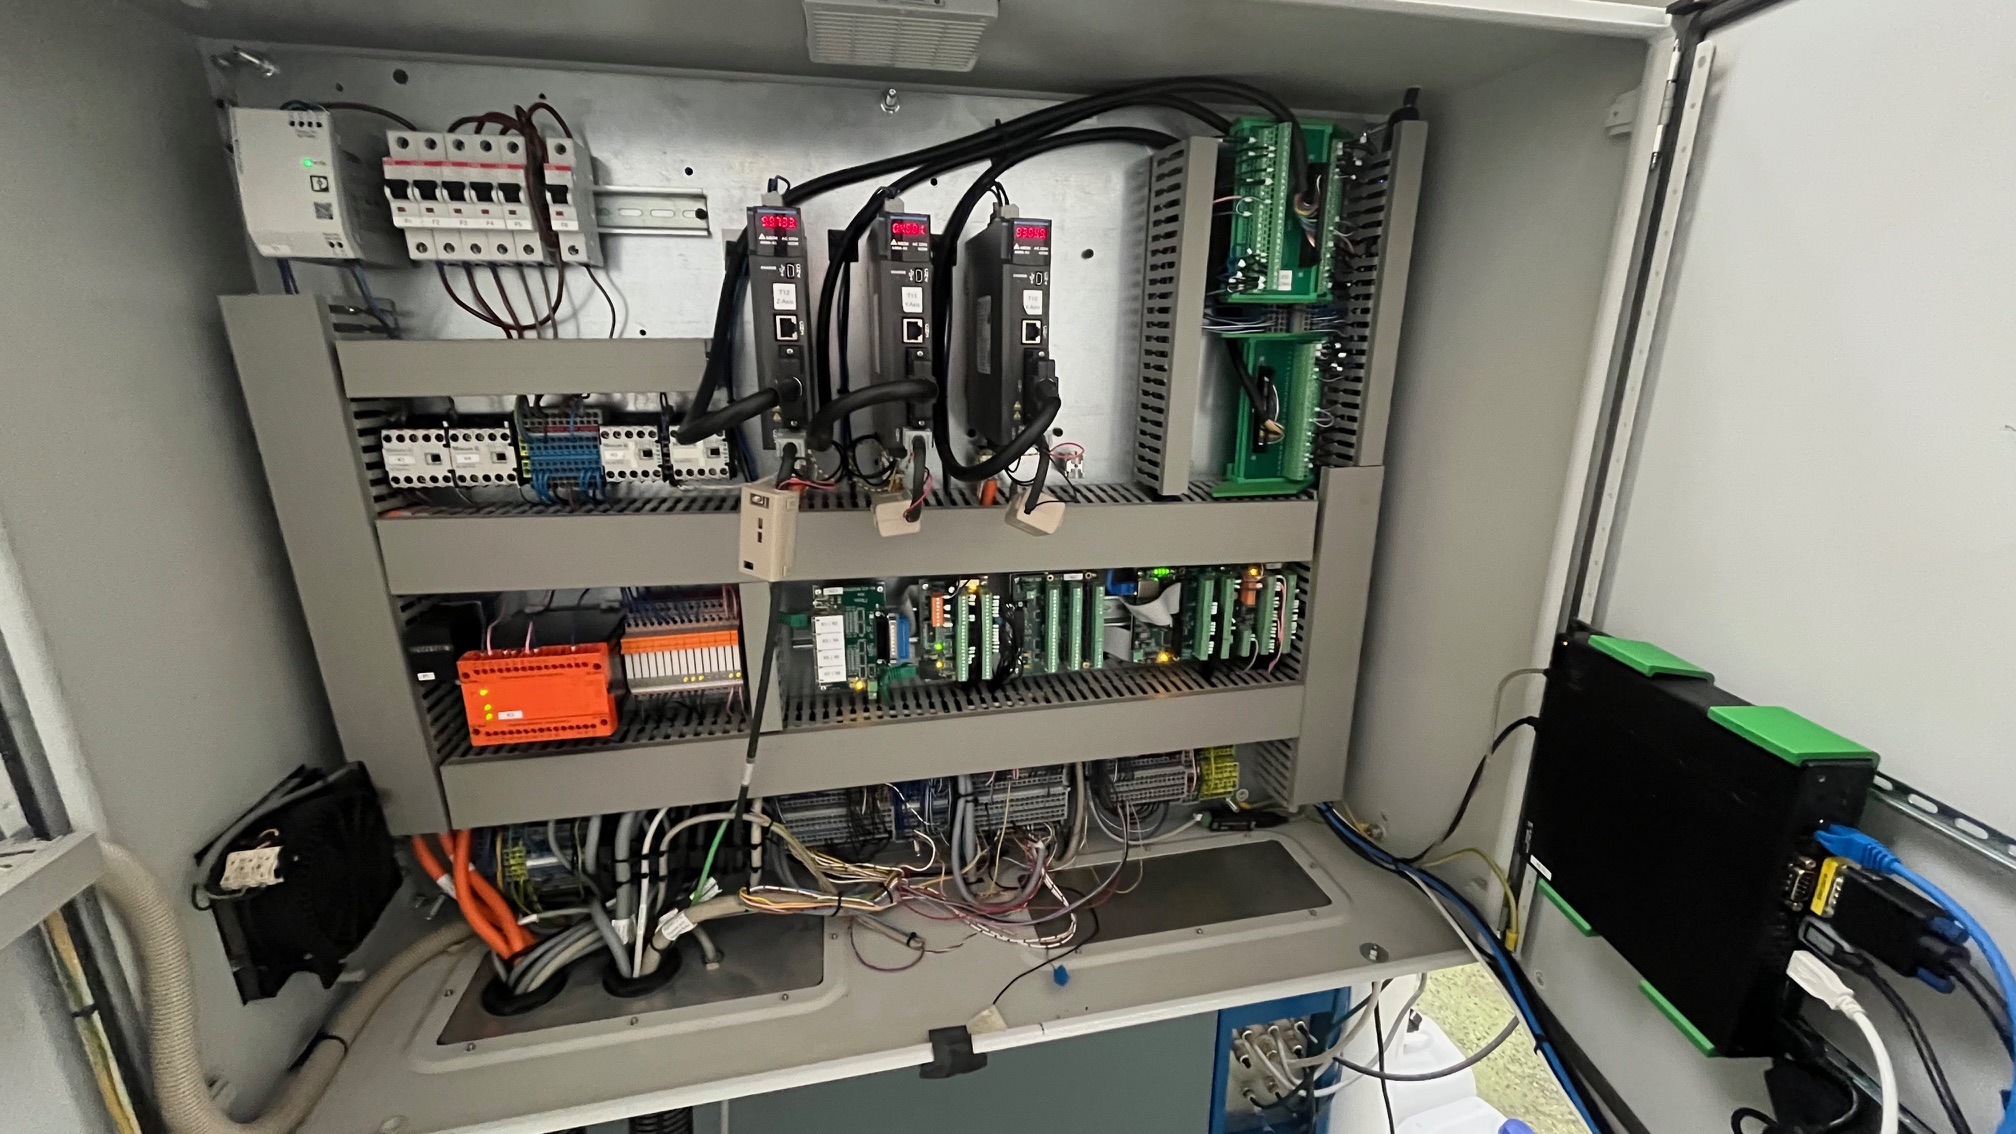
Electrical Cabinet
- generally very happy how it turned out, but would plan the cable-inlet section a bit better next time!
- used some flexible cable protection, really pricy (especially the end-parts) these things, but looks awesome and keep away the dirt -> really oversize them! Pushing in cables in undersized ones is really painful!!
- Control computer is a Lenovo Thinkcentre M73 with 16GB upgraded RAM, great performance only a second ethernet port is missing
Total conversion costs around 4k€ for the electronics, exclusive toolsetter zero plate fixture etc. not so much hobby budget, but still way cheaper than "professional" retrofits I never was down in 3 years for more than a day at 0€ technician costs. Maybe not so reasonable for a scaled business but great to start out as it is way cheaper to break things compared to a new machine. And once you did one machine I would feel comfy to implement it in another in a month of time.
Hope to give some inspiration to implement!
Plan to be better in the sharing-back side of things!Very happy with the system overall, not much left to do I think.
Only main thing I consider to upgrade it to an external ATC system, but this will be quite some work. I had some process reliability issues with the internal tool changer as I do a lot of micro machining with Aluminium dust on the tool holders ruining my HSK25 spindles, not so much fun.
So went back to manual spindles for a bit. Ahh and making the Datron probing work again, thats on the to do!
The build went pretty straight forward. Would always recommend Delta A3s again as their auto tune is very valuable.
Maybe next time I would give it a shot to go Ethercat, as a few years back it was not that well documented.
Made parts down to 0,01mm repeatable. Below that its a lot about how good your spindle is (ER collets suck there)
Mechanical changes
- removed top and replaced with PC to have daylight in the machine
- Upgraded a Microjet 1L cooling system to make it 10L
- just bought a larger tube and sanded of the ends //don't do this at home^^
- Blum Z Nano for more Z-Precision between tool changes (required for sub 0,01mm)
- Schunk Vero Tool Change palette, controlled by a switch next to the emergency-off, oiler unit in the pneumatic cabinet under the machine
- 3d printed chip covers on the sides, so the chips fall down
Z-Axis
- Completely changed because the previous one was really unpleasant to adjust and I needed a connector to quickly swap spindles
- Probe is still to be done, but not super relevant for the things I do
User Control panel
Went with a 22" Iiyama TF2215MC, touch works well, only a bit glossy, but just looks nice.
Thought about getting an older larger hardware interface panel with it, but as most functions are implemented nicely in the Gmoccapy UI, there was not much I was looking for.
I used mainly the tool eject as hardware button, light and one led for Low-Air alarm together with feed control encoders. The encoders work very well as you can adjust the value either by the UI (switch to 100% with one click) or fine tune it by the knobs in 5% steps.
VFD
A bit more messy side of the machine, but works. Liked to have it seperate from the servo controls as I had troubles with that before. Not worth the trouble for solving it for 2m extra cable.
Started with cable based IO but Modbus is soo good with all the feedback, would never go back ;D
Only thing left is combine the 380V into the machine, as it originally ran on 220V.
Electrical Cabinet
- generally very happy how it turned out, but would plan the cable-inlet section a bit better next time!
- used some flexible cable protection, really pricy (especially the end-parts) these things, but looks awesome and keep away the dirt -> really oversize them! Pushing in cables in undersized ones is really painful!!
- Control computer is a Lenovo Thinkcentre M73 with 16GB upgraded RAM, great performance only a second ethernet port is missing
Total conversion costs around 4k€ for the electronics, exclusive toolsetter zero plate fixture etc. not so much hobby budget, but still way cheaper than "professional" retrofits I never was down in 3 years for more than a day at 0€ technician costs. Maybe not so reasonable for a scaled business but great to start out as it is way cheaper to break things compared to a new machine. And once you did one machine I would feel comfy to implement it in another in a month of time.
Hope to give some inspiration to implement!
Attachments:
The following user(s) said Thank You: tommylight, besriworld, eduard, Sziggy_NC
Please Log in or Create an account to join the conversation.
- Zipdodar
- Offline
- New Member
-

Less
More
- Posts: 3
- Thank you received: 0
24 Sep 2025 08:26 #335357
by Zipdodar
Replied by Zipdodar on topic Datron M9 to LCNC Conversion
Hi thankyou for your post. Do you have any videos of it in action?
Please Log in or Create an account to join the conversation.
Time to create page: 0.460 seconds