Python OpenCV for linuxcnc
- Grotius
-
 Topic Author
- Offline
- Platinum Member
-

Less
More
- Posts: 2419
- Thank you received: 2348
01 Oct 2018 18:54 - 01 Oct 2018 19:02 #118310
by Grotius
Python OpenCV for linuxcnc was created by Grotius
Hi,
I was wondering if someone had already made a application for linuxcnc with Python OpenCV?
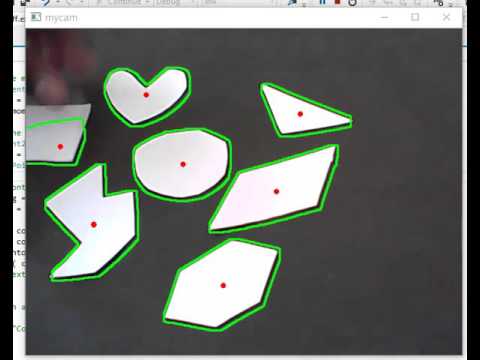

The idea is to make a possible radius 2 or 3mm on inox or steel with separate milling device in the back of the new to develop machine.
So therefor i need a high resolution webcam that can see how the product contour is defined. Next is then to mill the product on the moving belt.")
I was wondering if someone had already made a application for linuxcnc with Python OpenCV?
The idea is to make a possible radius 2 or 3mm on inox or steel with separate milling device in the back of the new to develop machine.
So therefor i need a high resolution webcam that can see how the product contour is defined. Next is then to mill the product on the moving belt.
Last edit: 01 Oct 2018 19:02 by Grotius.
Please Log in or Create an account to join the conversation.
- cmorley
- Offline
- Moderator
-

Less
More
- Posts: 7338
- Thank you received: 2162
02 Oct 2018 03:00 #118331
by cmorley
Replied by cmorley on topic Python OpenCV for linuxcnc
qtvcp uses opencv for webcam alignment of workpiece.
It does nothing fancy other then digital zoom.
IIRC Samco has played with opencv to move the machine to center of hole...
Chris M
It does nothing fancy other then digital zoom.
IIRC Samco has played with opencv to move the machine to center of hole...
Chris M
Please Log in or Create an account to join the conversation.
- Grotius
-
Topic Author
- Offline
- Platinum Member
-
Less
More
- Posts: 2419
- Thank you received: 2348
02 Oct 2018 15:15 #118357
by Grotius
Replied by Grotius on topic Python OpenCV for linuxcnc
Hi Chris,
I have installed a webcam software called : cheese on linux with terminal command : sudo apt-get install cheese
It's a very bad webcam, you can see at the picture that i took of a tv remote control pendant.

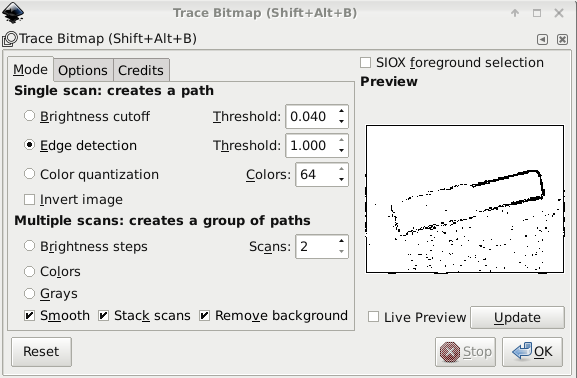
Then in the cheese software you can do edge detection, then you got this :

Very bad output.
In the end i got something in inkscape to produce g-code
I will try to get a better webcam.
I have installed a webcam software called : cheese on linux with terminal command : sudo apt-get install cheese
It's a very bad webcam, you can see at the picture that i took of a tv remote control pendant.
Then in the cheese software you can do edge detection, then you got this :
Very bad output.
In the end i got something in inkscape to produce g-code
I will try to get a better webcam.
Please Log in or Create an account to join the conversation.
- Grotius
-
Topic Author
- Offline
- Platinum Member
-
Less
More
- Posts: 2419
- Thank you received: 2348
02 Oct 2018 17:21 - 09 Oct 2018 23:18 #118367
by Grotius
Replied by Grotius on topic Python OpenCV for linuxcnc
Hi Chris,
I did install opencv on the command line :
sudo apt-get install python-opencv
sudo apt-get install python-matplotlib
in the grotius gui i added in the top level :
And i made a testbutton in glade ;
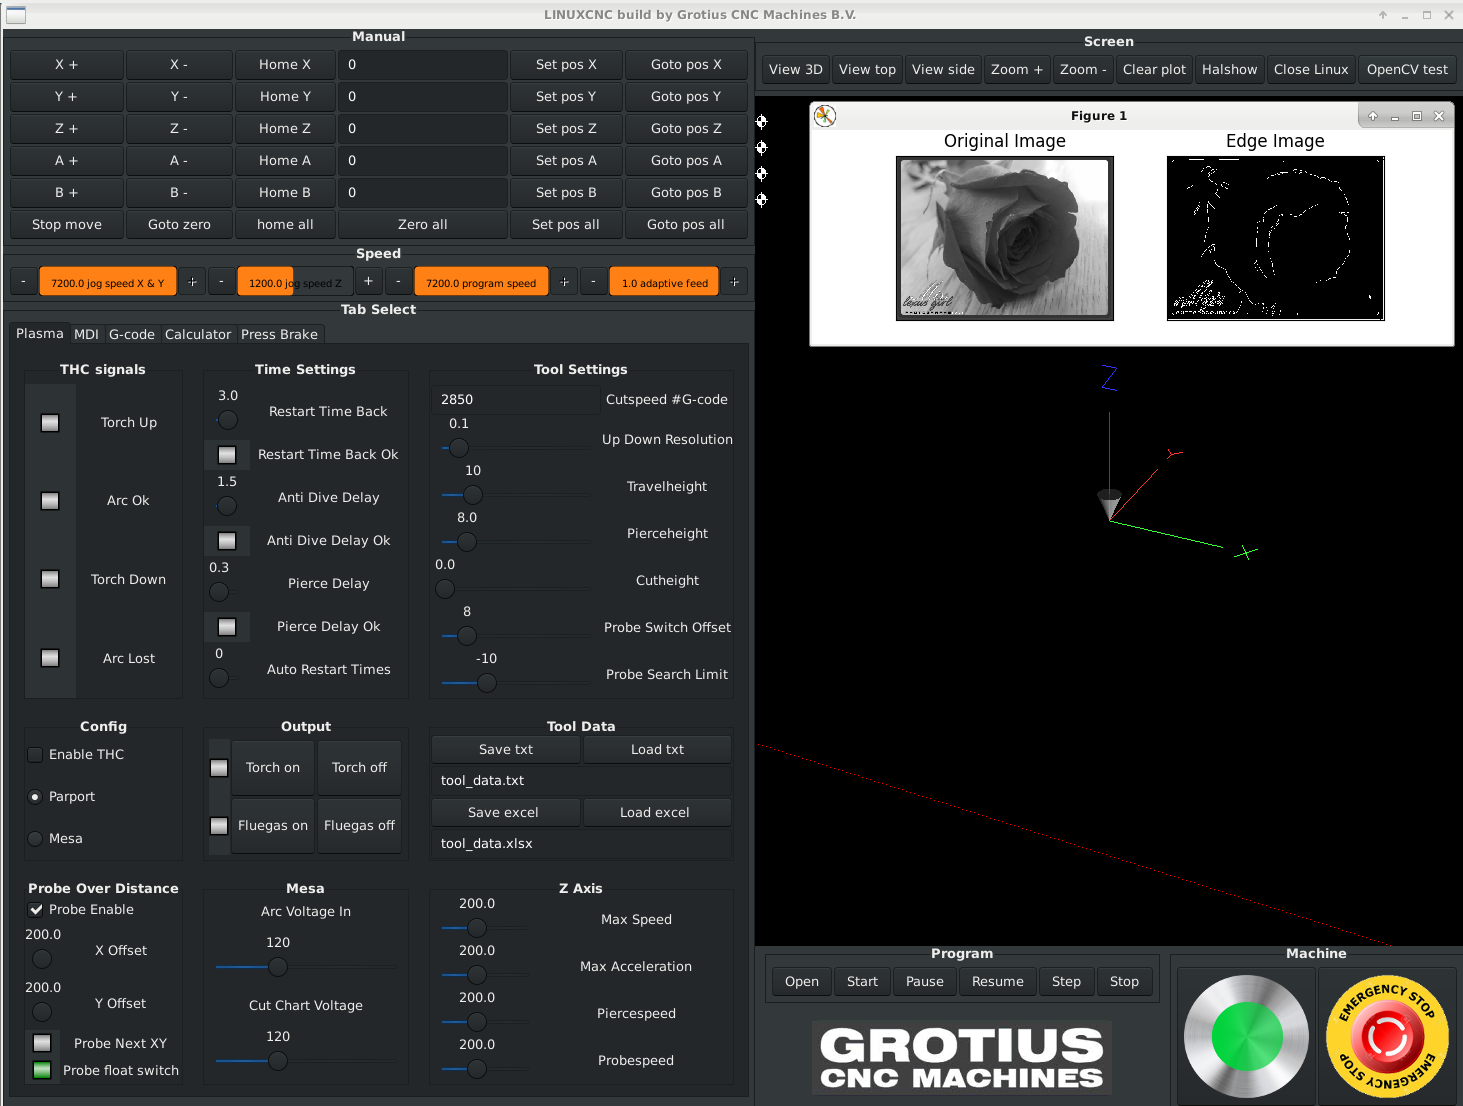
The file i used for example was a rose.jpg file.
So openCV it altready working in the linuxcnc gui within short time.
I like this.
My first test with openCV is based on this tutorial : opencv-python-tutroals.readthedocs.io/en..._canny/py_canny.html
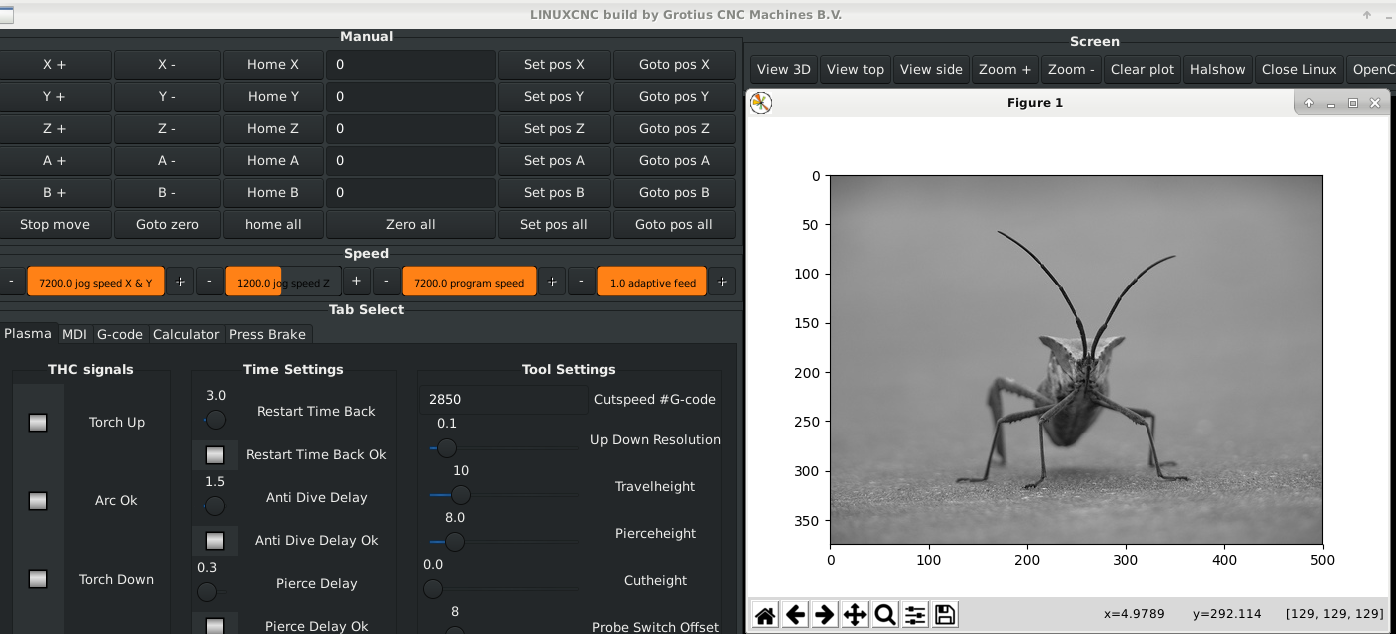
For today i ended with : matplotlib.org/users/image_tutorial.html
I think the matplot library has more opportunities to picture position's usable for cnc machine's.
The picture has x and y coordinates.
Tomorrow i make a clean github gui for this.
Update :
This line converts a bmp file into a dxf directly in linuxcnc :
In the top of the python file :
import subprocess
from subprocess import call
The output picture of the dxf file in draftsight :
This is nice to have. We go to the next step now.
This code is behind a user gui button and is ready in about 0.1 seconds.
I did install opencv on the command line :
sudo apt-get install python-opencv
sudo apt-get install python-matplotlib
in the grotius gui i added in the top level :
#opencv section :
import cv2
import numpy as np
from matplotlib import pyplot as plt
And i made a testbutton in glade ;
def on_OpenCV_test_pressed(self, widget, data=None):
      #test code :

      img = cv2.imread('rose.jpg',0)
      edges = cv2.Canny(img,100,200)

      plt.subplot(121),plt.imshow(img,cmap = 'gray')
      plt.title('Original Image'), plt.xticks([]), plt.yticks([])
      plt.subplot(122),plt.imshow(edges,cmap = 'gray')
      plt.title('Edge Image'), plt.xticks([]), plt.yticks([])

      plt.show()

      print " OpenCV pressed "
The file i used for example was a rose.jpg file.
So openCV it altready working in the linuxcnc gui within short time.
I like this.
My first test with openCV is based on this tutorial : opencv-python-tutroals.readthedocs.io/en..._canny/py_canny.html
For today i ended with : matplotlib.org/users/image_tutorial.html
I think the matplot library has more opportunities to picture position's usable for cnc machine's.
The picture has x and y coordinates.
Tomorrow i make a clean github gui for this.
Update :
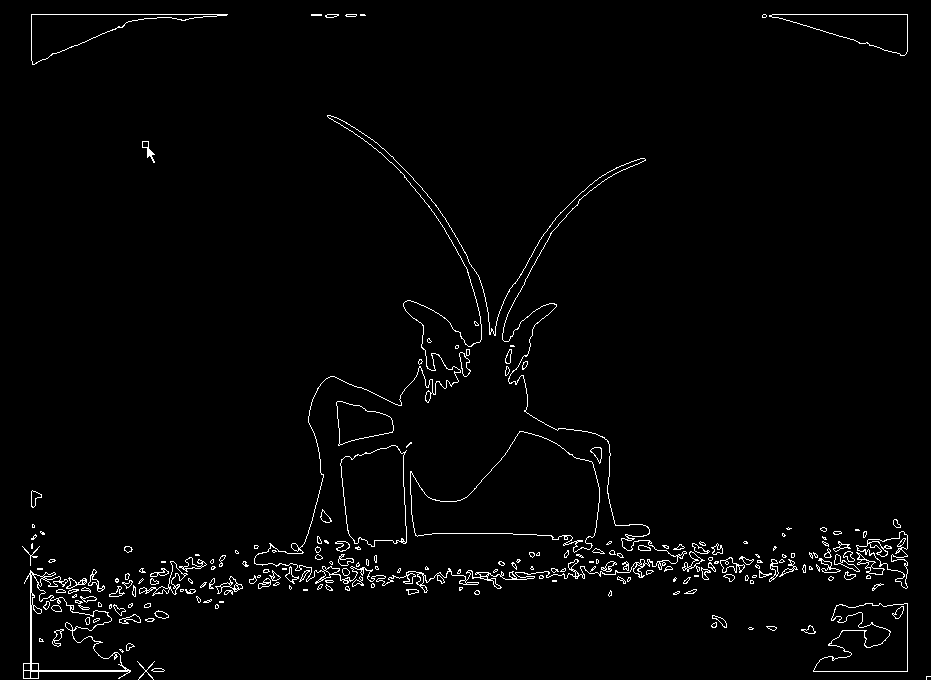
This line converts a bmp file into a dxf directly in linuxcnc :
def on_OpenCV_test_pressed(self, widget, data=None):
load =  subprocess.call(['/usr/bin/potrace', '-b', 'dxf', '/home/grotius/linuxcnc-external-reverse/configs/sim/grotius/stinkbug.bmp', '-o', '/home/grotius/linuxcnc-external-reverse/configs/sim/grotius/stinkbug.dxf'])
In the top of the python file :
import subprocess
from subprocess import call
The output picture of the dxf file in draftsight :
This is nice to have. We go to the next step now.
This code is behind a user gui button and is ready in about 0.1 seconds.
Last edit: 09 Oct 2018 23:18 by Grotius.
Please Log in or Create an account to join the conversation.
Time to create page: 0.415 seconds