LinuxCNC start, stop, pause buttons ?
- nkp
- Offline
- Premium Member
-

Less
More
- Posts: 143
- Thank you received: 39
08 Dec 2018 03:13 - 08 Dec 2018 04:27 #122031
by nkp
Replied by nkp on topic LinuxCNC start, stop, pause buttons ?
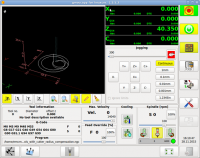
Gmoccapy will be the base.
without standart_keyboardwithout keyboard
Last edit: 08 Dec 2018 04:27 by nkp.
Please Log in or Create an account to join the conversation.
- newbynobi
-
- Offline
- Moderator
-

Less
More
- Posts: 1931
- Thank you received: 394
08 Dec 2018 09:54 #122045
by newbynobi
Replied by newbynobi on topic LinuxCNC start, stop, pause buttons ?
Most part of gmoccapy can used without keyboard or mouse!
All side and bottom button have theire own hal pin, so that part is easy.
You will neeed a num pad, i.e. to enter a value changing a tool by number or enter a coodinate system offset. Also you will need a possibility to enter mdi commands.
If you want every button to react to physical button, you will need to add a lot hal pin and code to mantain the widget syncronized with thehal pin.
What is the exact reason to do it the way you choosed?
I have pick and place running with a very, very basig GUI, on a 8 inch touch in industial application.
The user is only allowed to home the machine and after that the machine enters a auto run state, in case of an crash, an admin must unlock the GUI and can use jogging button etc. No preview or other stuff.
Norbert
Please Log in or Create an account to join the conversation.
- newbynobi
-
- Offline
- Moderator
-
Less
More
- Posts: 1931
- Thank you received: 394
08 Dec 2018 10:25 #122046
by newbynobi
Replied by newbynobi on topic LinuxCNC start, stop, pause buttons ?
the bottom button will react as follows:
in auto mode
gmoccapy.h-button.button-0 == open file
gmoccapy.h-button.button-1 == run
gmoccapy.h-button.button-2 == stop
gmoccapy.h-button.button-3 == pause
gmoccapy.h-button.button-4 == step by step
gmoccapy.h-button.button-5 == run from line if enabled in settings, otherwise Nothing
gmoccapy.h-button.button-6 == optional blocks
gmoccapy.h-button.button-7 == optional stops M1
gmoccapy.h-button.button-8 == full-size preview
gmoccapy.h-button.button-9 == edit code
in manual mode:
gmoccapy.h-button.button-0 == open homing button
gmoccapy.h-button.button-1 == open touch off stuff
gmoccapy.h-button.button-2 == Nothing
gmoccapy.h-button.button-3 == open tool dialogs
gmoccapy.h-button.button-4 == Nothing
gmoccapy.h-button.button-5 == Nothing
gmoccapy.h-button.button-6 == Nothing
gmoccapy.h-button.button-7 == Nothing
gmoccapy.h-button.button-8 == full-size preview
gmoccapy.h-button.button-9 == exit if machine is off, otherwise no reaction
in mdi mode:
gmoccapy.h-button.button-0 == macro_0 or nothing
gmoccapy.h-button.button-1 == macro_1 or nothing
gmoccapy.h-button.button-2 == macro_2 or nothing
gmoccapy.h-button.button-3 == macro_3 or nothing
gmoccapy.h-button.button-4 == macro_4 or nothing
gmoccapy.h-button.button-5 == macro_5 or nothing
gmoccapy.h-button.button-6 == macro_6 or nothing
gmoccapy.h-button.button-7 == macro_7 or nothing
gmoccapy.h-button.button-8 == macro_8 or nothing
gmoccapy.h-button.button-9 == open keyboard or abort if macro is running
in settings mode:
gmoccapy.h-button.button-0 == delete MDI history
gmoccapy.h-button.button-1 == nothing
gmoccapy.h-button.button-2 == nothing
gmoccapy.h-button.button-3 == nothing
gmoccapy.h-button.button-4 == open classic ladder
gmoccapy.h-button.button-5 == open hal scope
gmoccapy.h-button.button-6 == open hal status
gmoccapy.h-button.button-7 == open hal meter
gmoccapy.h-button.button-8 == open hal calibration
gmoccapy.h-button.button-9 == open hal show
in homing mode, if 3 axis machine:
gmoccapy.h-button.button-0 == nothing
gmoccapy.h-button.button-1 == home all
gmoccapy.h-button.button-2 == nothing
gmoccapy.h-button.button-3 == home x
gmoccapy.h-button.button-4 == home y
gmoccapy.h-button.button-5 == home z
gmoccapy.h-button.button-6 == nothing
gmoccapy.h-button.button-7 == nothing
gmoccapy.h-button.button-8 == unhome all
gmoccapy.h-button.button-9 == back
in touch off mode, if 3 axis machine:
gmoccapy.h-button.button-0 == edit offsets
gmoccapy.h-button.button-1 == touch X
gmoccapy.h-button.button-2 == touch Y
gmoccapy.h-button.button-3 == touch Z
gmoccapy.h-button.button-4 == nothing
gmoccapy.h-button.button-5 == nothing
gmoccapy.h-button.button-6 == zero G92
gmoccapy.h-button.button-7 == nothing
gmoccapy.h-button.button-8 == set selected
gmoccapy.h-button.button-9 == back
in tool mode, if 3 axis machine:
gmoccapy.h-button.button-0 == delete tool(s)
gmoccapy.h-button.button-1 == new tool
gmoccapy.h-button.button-2 == reload tool table
gmoccapy.h-button.button-3 == apply changes
gmoccapy.h-button.button-4 == change tool by number T? M6
gmoccapy.h-button.button-5 == set tool by number without change M61 Q?
gmoccapy.h-button.button-6 == change tool to the selected one
gmoccapy.h-button.button-7 == nothing
gmoccapy.h-button.button-8 == touch of tool in Z
gmoccapy.h-button.button-9 == back
in edit mode:
gmoccapy.h-button.button-0 == reload file
gmoccapy.h-button.button-1 == nothing
gmoccapy.h-button.button-2 == save
gmoccapy.h-button.button-3 == save as
gmoccapy.h-button.button-4 == nothing
gmoccapy.h-button.button-5 == nothing
gmoccapy.h-button.button-6 == new file
gmoccapy.h-button.button-7 == nothing
gmoccapy.h-button.button-8 == show keyboard
gmoccapy.h-button.button-9 == back
That result in 60 reactions with only 10 hal pin!
That is the strength of gmoccapy!
Norbert
The following user(s) said Thank You: Mike_Eitel
Please Log in or Create an account to join the conversation.
- nkp
- Offline
- Premium Member
-
Less
More
- Posts: 143
- Thank you received: 39
09 Dec 2018 18:54 #122109
by nkp
www.cnc-club.ru/forum/viewtopic.php?f=15...068&start=300#p40856
Replied by nkp on topic LinuxCNC start, stop, pause buttons ?
thanks, we used it (menu_buttons) before gmoccapyThat is the strength of gmoccapy!
www.cnc-club.ru/forum/viewtopic.php?f=15...068&start=300#p40856
Please Log in or Create an account to join the conversation.
- newbynobi
-
- Offline
- Moderator
-
Less
More
- Posts: 1931
- Thank you received: 394
09 Dec 2018 21:21 #122116
by newbynobi
Replied by newbynobi on topic LinuxCNC start, stop, pause buttons ?
I do not know your code and unfortunatelly i o not peak rushan easer, but it looks like you did the button reaction through hal connections not with the gui code.
Gmoccapy does change the button depending on the mode and do handle the same hal pin in the correct way, depending on the vissible button.
Norbert
P.s. i hope i did not use any ilegal idea or way to use a gui!
Gmoccapy does change the button depending on the mode and do handle the same hal pin in the correct way, depending on the vissible button.
Norbert
P.s. i hope i did not use any ilegal idea or way to use a gui!
Please Log in or Create an account to join the conversation.
- nkp
- Offline
- Premium Member
-
Less
More
- Posts: 143
- Thank you received: 39
10 Dec 2018 04:22 #122127
by nkp
(code:Nick,cnc-club.ru)
Replied by nkp on topic LinuxCNC start, stop, pause buttons ?
nobut it looks like you did the button reaction through hal connections not with the gui code.
                self.vtriggers = []
		self.htriggers = []
		for i in range(8) :
			self.vtriggers.append(hal_glib.GPin(self.halcomp.newpin('vbutton.%s'%i, hal.HAL_BIT, hal.HAL_IN)))
			self.vtriggers[-1].update()
			self.vtriggers[-1].connect('raise',self.click_button_v, self.widgets.notebook2, i)
		for i in range(8) :
			self.htriggers.append(hal_glib.GPin(self.halcomp.newpin('hbutton.%s'%i, hal.HAL_BIT, hal.HAL_IN)))
			self.htriggers[-1].update()
			self.htriggers[-1].connect('raise',self.click_button_h, self.widgets.notebook1, i)

		self.modes = {"mode_auto":0, "mode_referent":1, "mode_mdi":2, "mode_jogu":3, "mode_jogi":4, "mode_edit":5,"mode_mpg":6,}
		self.modetriggers = []
		for mode in self.modes :
			self.modetriggers.append(hal_glib.GPin(self.halcomp.newpin(mode, hal.HAL_BIT, hal.HAL_IN)))
			self.modetriggers[-1].update()
			self.modetriggers[-1].connect('raise', self.change_mode)
		panel = gladevcp.makepins.GladePanel( self.halcomp, xmlname, self.builder, None)
		self.builder.connect_signals(self)
self.halcomp.ready()Please Log in or Create an account to join the conversation.
Moderators: newbynobi, HansU
Time to create page: 0.151 seconds