
Search Results (Searched for: )
- Mark Kraus
I am curious if the mesa config is better than the pncconf and can I make a separate profile in it? I was working on getting the encoder working and at the same time I changed some settings and now my spindle does not work. I have the m3 come on and the vfd shows hz rising and then stabalizing but the fan on the vfd does not come on and i have no 3 phase coming out. I should not have been messing with the wiring and at the same time changing settings and will try not to do that again, but for now I dont know which one it is, the settings in pncconf or a wiring issue.
- rodw
-

- grandixximo
-

test with this, this is dlen2 code
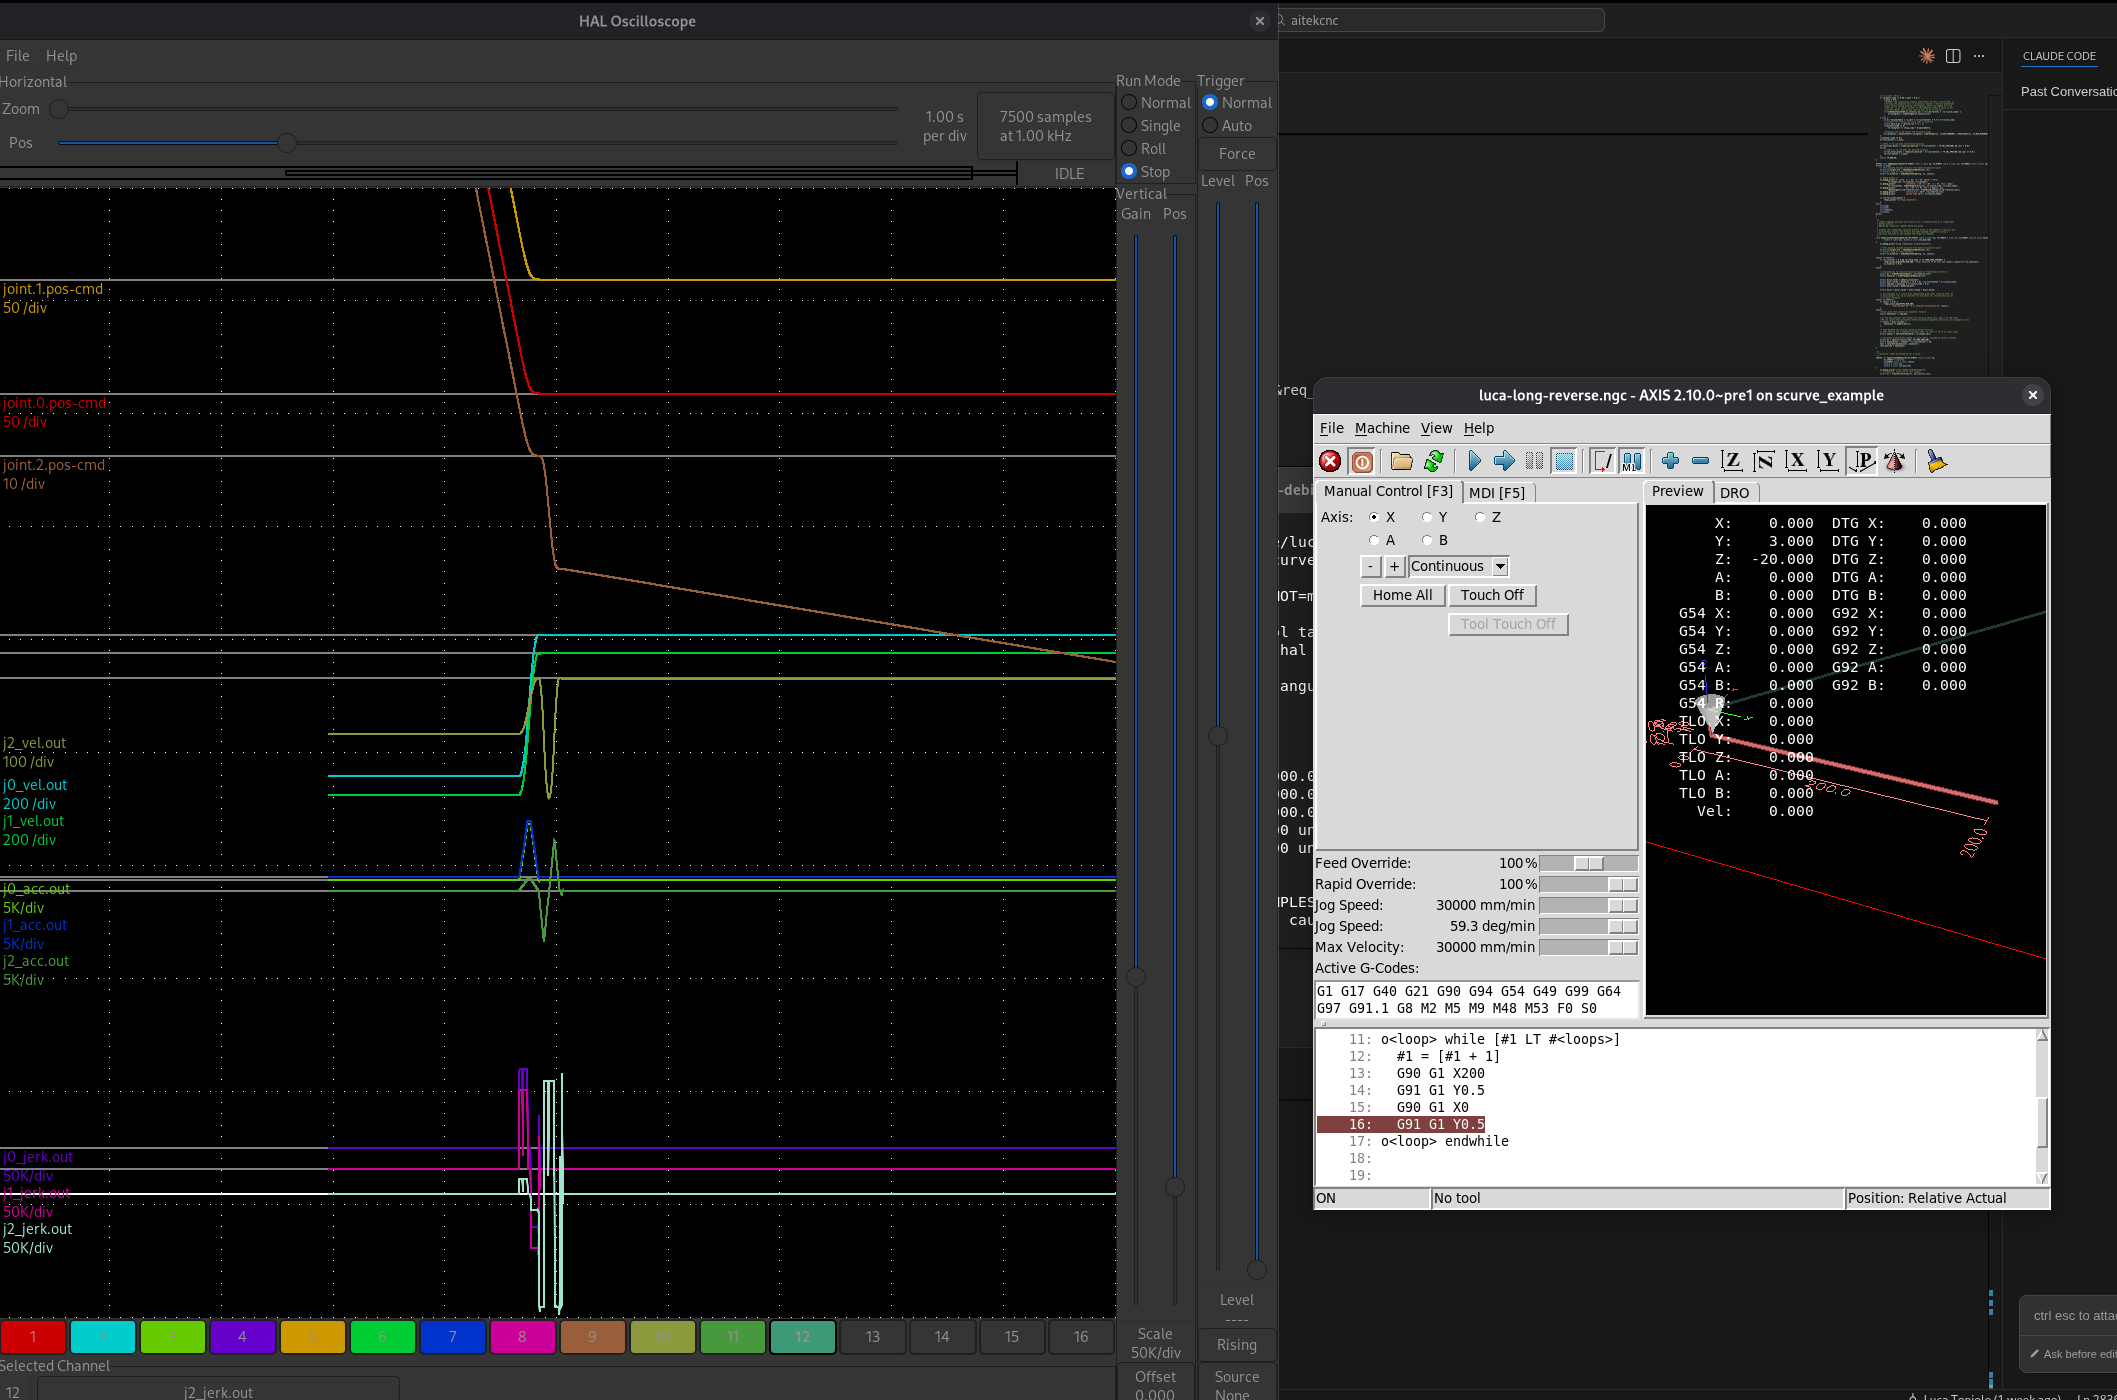
this is without
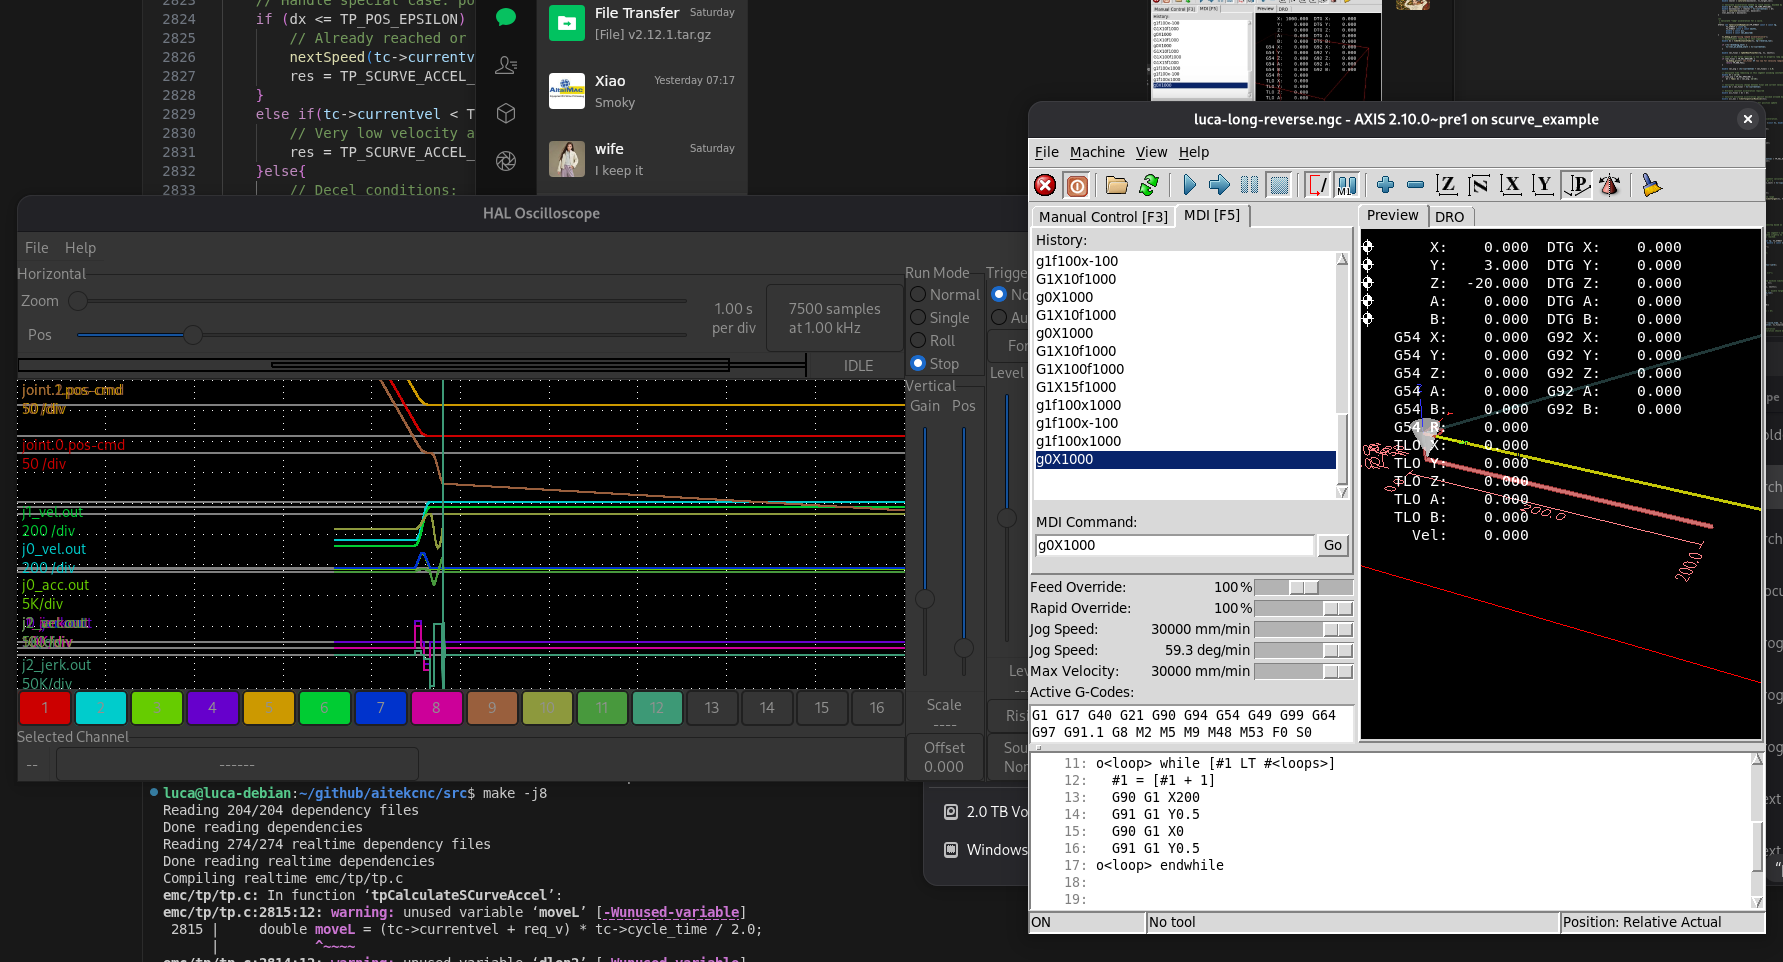
we know is not ideal, but at the moment, best we can do
- ruediger123
After commenting out " || (dx - moveL <= dlen2)", the scope looks like this.
- hhscott
- grandixximo
-
No apologies needed image missing /media/kunena/emoticons/wink.png, I discussed this with YangYang. We agree this is a real issue on some hardware, but it should not be in the TP.The TP's job is to generate a geometrically correct path with proper dynamics. It does that. The path is correct.Transport delay compensation is a communication/hardware layer problem. Different drives, different bus cycles, different delays. Some drives have 0x60B1, some don't. Some run 250µs, some run 1ms. This varies per setup.Your HAL component is the right approach. It sits between TP output and drive input, users can tune lead_cycles and kff for their specific hardware. People who need it use it, people whose drives handle it properly don't.Keep the TP clean, keep hardware compensation in HAL. Well defined purposes.
Code:My apologize ... sorry I can not show same speed test because I am currently weeks out of office but we can just multiply or devide values ... because it is linear dependecy during constant speed movemet ... I can just customize current images to show exact difference ... compensation off ferror = 0.125mm at 15m/min ... compensation on ferror = 0.00009028mm at 1m/min and multiply it by 15 we get 0,0013542mm which is significantly less then 0.125 .. What I remember from testing by my short eyes it whas something near 0.001mm during that 15m/min testing was done with bentch top setup without any load presented... just AX5106 with AM8xxx motor but I can go home for testing this weekend to create exact speed difference testing if it is neccessary
- Aciera
2.
Still have no clue what could be wrong. The at speed light comes on but nothing in halshow. Could someone please guide me?
We might be able to if you actually told us what your are trying to do. You maybe want to connect a encoder to your spindle and are not getting the 'spindle-at-speed' signal to work in hal? Hardware used (a MESA board maybe)? If so which one?
- meister
2. Closed Firmware & 'Over-engineering' I respect the Open Source philosophy, but io_decoder is a professional project that includes dedicated hardware. The 'over-engineering' you see in the HAL driver is actually optimization. While a user-space component can work, a dedicated C component ensures deterministic polling and much lower jitter. If you want a 'professional feel' on the handwheel, those milliseconds matter.
ahh, ok, This is what professional code looks like when compiling.
“Bare-Metal” Firmware (No Bootloader)
We have removed the Arduino bootloader for two critical reasons:
Safety: No random pin state changes during startup (typical of bootloaders).
Speed: The board is operational within a few milliseconds.
what about updates ?
- unknown

- NWE
-
of=/path/to/my/hardDiskBackup.img
first make sure your directory has enough free space to hold a file as large as your source disk.
writing that img file to a new empty drive then instead change the if= bit:
if=/path/to/hardDiskBackup.img
- NWE
-
There are various ways clone hard drives, I tend to use dd and make a bit-for-bit clone of the entire drive. Empty space and deleted files included. Takes longer but is the most reliable solution I've found.How do I create an image of the contents of one hard drive to install it on another? This is to avoid having to reinstall the additional applications I use with LCN.
The first time I did this was on a test machine containing no valuable data so I don't inadvertently destroy it. A little mistake in the following instructions could wipe your hard drive empty.
Important: the pc doing the cloning must not be booted from either drive; also, do not try booting the original or the clone while BOTH are connected to the pc. I learned that the hard way. Both drives' partitions will have identical UUID's which can be changed but it works as long as you don't boot one while both are connected to the same pc. I wouldn't even try mounting a partition while both are connected. Don't bother trying to clone nvme -> sata or sata -> nvme. I think it can be done, but I will not cover that complication. It is also possible to clone to a different sized drive, but I will not get into that here.
First make backups of everything in case this goes awry. You have been warned.
1: The linuxcnc pc is powered off. I connect an empty drive to it (same size as the original) and also a live-boot USB stick. The linuxcnc installer works great for this.
2: Boot the pc from the live-boot USB stick into the live-boot/testing. Do not launch the installer.
3: Find out which drive is which. One way to do that is to open Gparted and inspect the drives. On my system I might see that /dev/sda contains the installed linux os and /dev/sdb is the new empty drive. Your pc might be completely different. This is the most important detail.
4: Using the information gathered in step 3, I formulate the following terminal command:
be very careful of not copying the empty drive to the linuxcnc drive! You will then have two empty drives and no linuxcnc!
# dd if=/dev/sda of=/dev/sdb status=progress bs=1M conv=sync
I will not explain the very important "#" bit. If anyone reading this does not know what that is for, I would suggest to practice your terminal skills in less destructive ways before trying to do this.
if=/dev/sda is telling dd the "input file" is the sda disk
of=/dev/sdb tells it which is the "output file"
status=progress gives you some feedback what it is doing while it is busy
bs=1M sets the block size for copying I think default block size is 512B which copies insanely slowly. You can use block sizes larger than 1M, you might gain some speed, but if block size is set larger than the drive's internal cache space, your resulting copy will be botched. 1M seems to be a safe number that always works for me.
Depending what versions you're running, the status=progress bit will not work and will not display the progress. Just let it do its thing or find other ways to figure out if the hard drives are actively copying. Back when all I had was spinning rust, we didn't have status=progress, but I could HEAR it was doing its thing.
Depending on the size of your drives and their speed, this cloning can can take anywhere from a few minutes to a few weeks to complete. I've had 4GB spinning rust drives take a couple days. A 1TB ssd is usually way quicker than that.
graon
I just discovered there was already an answer to this question after I typed this up. If anyone has a problem with this I can remove it.
- endian
My apologize ...
Code:I tested it with Nidec N753(it has 0x60B1 avaible - but i did not implement the offset yet), Kollmorgen S343, Kollmorgen S7xx, Pilz pmcTendo, Beckhoff AX5106 hw2(https://codeberg.org/endian/Beckhoff_AX5ZYZZ_lcec_driver - here is working driver for AX5YZZ drivers with sercos.comp which is very similar to dominik cia's but only for AX with external trapeziodal homing based of high speed probing hw-input outside of master[lower cycle time at fpga]), Beckhoff el7221 and I will test it with @zmrdko's Delta ASDA drivers too ... pictures shows like that solution synchronize of timing lag of position mode of ethercat Can you show the same test at same velocity with compensation on and off? The two pictures are at very different speeds so it's hard to see what the compensation is actually doing.
sorry I can not show same speed test because I am currently weeks out of office but we can just multiply or devide values ... because it is linear dependecy during constant speed movemet ...
I can just customize current images to show exact difference ... compensation off ferror = 0.125mm at 15m/min ... compensation on ferror = 0.00009028mm at 1m/min and multiply it by 15 we get 0,0013542mm which is significantly less then 0.125 ..
What I remember from testing by my short eyes it whas something near 0.001mm during that 15m/min testing was done with bentch top setup without any load presented... just AX5106 with AM8xxx motor
but I can go home for testing this weekend to create exact speed difference testing if it is neccessary
- grandixximo
-
Can you show the same test at same velocity with compensation on and off? The two pictures are at very different speeds so it's hard to see what the compensation is actually doing.
Code:I tested it with Nidec N753(it has 0x60B1 avaible - but i did not implement the offset yet), Kollmorgen S343, Kollmorgen S7xx, Pilz pmcTendo, Beckhoff AX5106 hw2(https://codeberg.org/endian/Beckhoff_AX5ZYZZ_lcec_driver - here is working driver for AX5YZZ drivers with sercos.comp which is very similar to dominik cia's but only for AX with external trapeziodal homing based of high speed probing hw-input outside of master[lower cycle time at fpga]), Beckhoff el7221 and I will test it with @zmrdko's Delta ASDA drivers too ... pictures shows like that solution synchronize of timing lag of position mode of ethercat
- meister
the camjog plugin:
youtube.com/shorts/pnibjyDy1ZI
- NWE
-