Hardinge Super slant 3 axis
- Deckerjwd
-
 Topic Author
- Offline
- Premium Member
-

Less
More
- Posts: 95
- Thank you received: 3
26 Sep 2018 02:22 - 26 Sep 2018 04:18 #117983
by Deckerjwd
Replied by Deckerjwd on topic Hardinge Super slant 3 axis
This would be on the preview, think i am going to have to write some kins for a second tool.
Last edit: 26 Sep 2018 04:18 by Deckerjwd.
Please Log in or Create an account to join the conversation.
- Deckerjwd
-
Topic Author
- Offline
- Premium Member
-
Less
More
- Posts: 95
- Thank you received: 3
26 Sep 2018 04:40 #117989
by Deckerjwd
Replied by Deckerjwd on topic Hardinge Super slant 3 axis
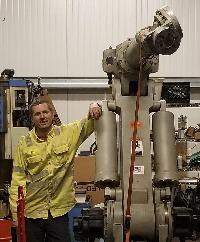
here is a view of the two turrets if it helps
drive.google.com/file/d/1uhy9ccdg-vIp7WpL601RFTncnIXu1N11/view
drive.google.com/file/d/1uhy9ccdg-vIp7WpL601RFTncnIXu1N11/view
Please Log in or Create an account to join the conversation.
- andypugh
-

- Offline
- Moderator
-

Less
More
- Posts: 19861
- Thank you received: 4636
26 Sep 2018 09:33 #117992
by andypugh
Can't you just ignore the preview? It just can't render two tools with only one tool on the display and assumes that W and Z are stacked.
it is _only_ the preview that makes this assumption.
The actual machine will work properly without any messing about.
Basically any W command in the G-code will appear on the joint.3.motor-pos-cmd pin, and you make that move the axis.
Replied by andypugh on topic Hardinge Super slant 3 axis
This would be on the preview, think i am going to have to write some kins for a second tool.
Can't you just ignore the preview? It just can't render two tools with only one tool on the display and assumes that W and Z are stacked.
it is _only_ the preview that makes this assumption.
The actual machine will work properly without any messing about.
Basically any W command in the G-code will appear on the joint.3.motor-pos-cmd pin, and you make that move the axis.
The following user(s) said Thank You: Deckerjwd
Please Log in or Create an account to join the conversation.
- Deckerjwd
-
Topic Author
- Offline
- Premium Member
-
Less
More
- Posts: 95
- Thank you received: 3
26 Sep 2018 11:02 #117993
by Deckerjwd
Replied by Deckerjwd on topic Hardinge Super slant 3 axis
hum going to have to think about that. if it is only the preview then maybe disabling the preview would be the way to go. I can just ignore it, but i feel like there a danger in that. if it is to hard to put a second tool in the preview, could run a separate linuxcnc that just handles the second Z. this is how the machine worked originally with two funuc nc controllers. im guessing there no provision to load a second instance of the software on the one computer.
Please Log in or Create an account to join the conversation.
- andypugh
-
- Offline
- Moderator
-
Less
More
- Posts: 19861
- Thank you received: 4636
26 Sep 2018 11:12 #117994
by andypugh
Replied by andypugh on topic Hardinge Super slant 3 axis
It might be simpler to not display the W in the preview.
Just leave it out of the [DISPLAY]GEOMETRY section
linuxcnc.org/docs/2.7/html/config/ini-co...tml#_display_section
Just leave it out of the [DISPLAY]GEOMETRY section
linuxcnc.org/docs/2.7/html/config/ini-co...tml#_display_section
The following user(s) said Thank You: Deckerjwd
Please Log in or Create an account to join the conversation.
- Deckerjwd
-
Topic Author
- Offline
- Premium Member
-
Less
More
- Posts: 95
- Thank you received: 3
26 Sep 2018 11:31 #117996
by Deckerjwd
Replied by Deckerjwd on topic Hardinge Super slant 3 axis
hum i will test that. this is the first lathe i have converted to linuxcnc, but would guess it is common to have a lathe with a tail stock. still getting the wiring and hardware sorted out, long way to go till i need to fix this. also going to look in to the hot wire sim think, i saw two tool points on that display.
Please Log in or Create an account to join the conversation.
- Deckerjwd
-
Topic Author
- Offline
- Premium Member
-
Less
More
- Posts: 95
- Thank you received: 3
26 Sep 2018 19:24 #118017
by Deckerjwd
Replied by Deckerjwd on topic Hardinge Super slant 3 axis
Andy that worked great.
Please Log in or Create an account to join the conversation.
- tommylight
-

- Offline
- Moderator
-
Less
More
- Posts: 21625
- Thank you received: 7383
26 Sep 2018 19:41 #118019
by tommylight
Thank you.
Replied by tommylight on topic Hardinge Super slant 3 axis
Can you elaborate on how you got that ? I would need to do that exact thing to a cnc with two X axis, one 300mm long and the other 6450mm long, basically a small 3 axis mill mounted on a long axis.Sorry after testing, the W seems to move the tool as an additive to Z, as if Z axis was mounted on W axis that is parallel. Im trying to have a parallel but independent Z and W(or Z2)
Thank you.
Please Log in or Create an account to join the conversation.
- Deckerjwd
-
Topic Author
- Offline
- Premium Member
-
Less
More
- Posts: 95
- Thank you received: 3
26 Sep 2018 20:26 - 26 Sep 2018 20:31 #118020
by Deckerjwd
Replied by Deckerjwd on topic Hardinge Super slant 3 axis
so to get it to work i had to turn on all 9axis otherwise i got and error,
so i would set up you small mill with xyz and all the standard stuff.
then mod the ini
in
[DISPLAY]
GEOMETRY = xyzu #this is if you want it to display the offset in the preview (thx andypugh)
then under
[TRAJ]
AXES = 7 #so mine = 9 because i wanted to use w not u uvw = xyz
COORDINATES = X Y Z U
then copy the whole [AXIS_0] section and paste it after the [AXIS_2] section then rename it [AXIS_6] mod all the info you need to in there
save and close that file, then open your .hal file if you used the pncconfig you may have to change you hm2_pci config line and add what you need
then mod the loadrt pid names=pid.x,pid.y,pid.z,pid.s add ,pid.u to then end mine was a few lines after the hm2_pci line
then a few more lines down there is a line addf pid.s.do-pid-calcs you need to add a new line there and put in "add pid.u.do-pid-calcs servo-thread"
now father down there should be a section that starts with
#***********************
# AXIS X
#***********************
Copy that whole section and past it after the Axis Z section
change the
# AXIS X to AXIS U
now there is a bunch of [AXIS_0] in this new section you have to change to [AXIS_6]
you also have to change the pid.x to pid.u, x- to u- and axis.0. to axis.6.
now im using pwmgen so yours maybe different but you will have to change all your outputs to the outputs your using for the long slide.
then mod your limit switch and your good to go.
if you get an error on start up you most likely missed one of the x or axis.0 in the hal file
hopes this helps let me know if you get stuck
Last edit: 26 Sep 2018 20:31 by Deckerjwd.
The following user(s) said Thank You: tommylight
Please Log in or Create an account to join the conversation.
- tommylight
-
- Offline
- Moderator
-
Less
More
- Posts: 21625
- Thank you received: 7383
27 Sep 2018 20:40 #118078
by tommylight
Replied by tommylight on topic Hardinge Super slant 3 axis
Will report back when and if i get a chance to give it a try, to darn busy.
Thank you.
Thank you.
Please Log in or Create an account to join the conversation.
Time to create page: 0.138 seconds