Late to the party....
I have a Renshaw MP3 that I bought from eBay a long time ago )because on eBay "Renshaw" probes go for lower prices than "Renishaw"
I once pressed tool release, with it in the spindle, so did get to see inside. At least with the MP3 there is nothing at all unusual in there, just the 6 balls and 3 bars that you would expect. It also had an inductive interface (just a coil that got connected / opened out by the probe contacts) that I never bothered to set up, instead I made a home-made magsafe connector and used it as a simple switch.
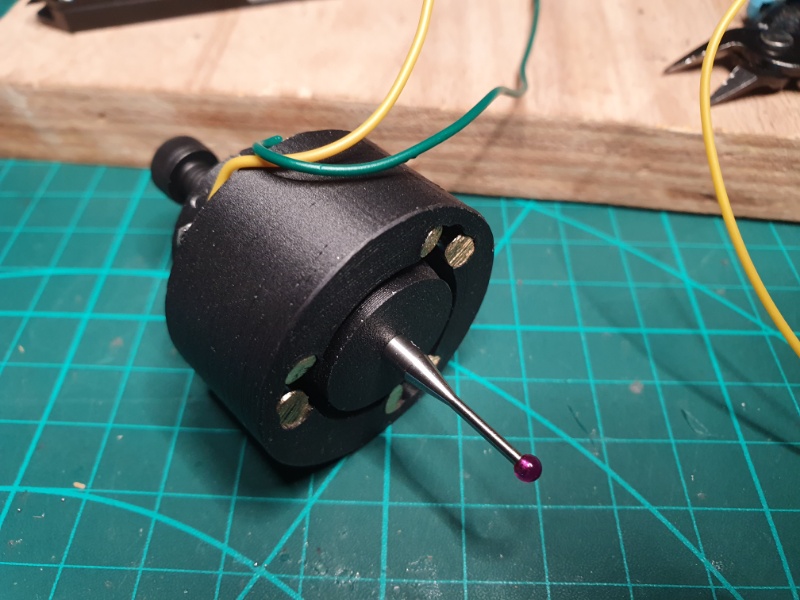
I then found half a dozen Zeiss CMM probes in a skip, and used those for a while (the MP3 was way oversized for my mill). These have an alternative to the Renishaw design, using rods rather than balls, of which more later.
These also have a piezo elemement in them, with the contacts being, presumably, a failsafe. I used these for a few years, but not with the piezo part, just as a conventional probe.
Another feature of these is that they have a parallel (and maybe series? I have forgotten) and series resistor, so that the restance changes, rather than going open-circuit. I wired them to a little interface circuit with a comparator on it to convert to digital output for LinuxCNC. I think that the parallel resistor probably prevents arcing, it feels like it should?
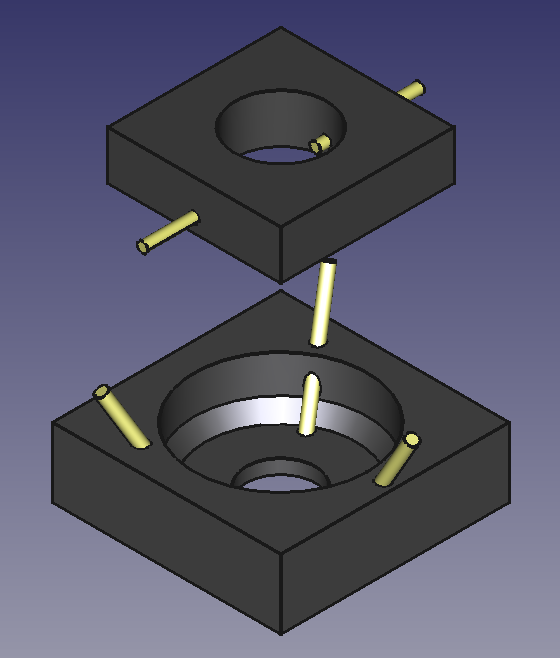
But I was intrugued by the design using rods, as it means that aslong as the _axis_ of the drillings is in the right place, the position of the rods is unimportant. And it's easier to solder to a rod too.
To investigate the robustmess of this design to machining inaccuracies, I made one using only a collet block and a drill press. And it worked farily well. If you make and assemble the body first, and add a screw to clamp it solid you can machine and drill the stylus mount hole into the pre-assembled body, and should get decent accuracy regardless of the internal accuracy.
I made two videos about this, one minimal-tools version, and one using all the fancy tools.