QT C++ code samples
- Grotius
-
 Topic Author
- Offline
- Platinum Member
-

Less
More
- Posts: 2419
- Thank you received: 2345
04 Nov 2019 01:06 #149513
by Grotius
Replied by Grotius on topic QT C++ code samples
Hi Tom,
Take your free time !
A little project update..
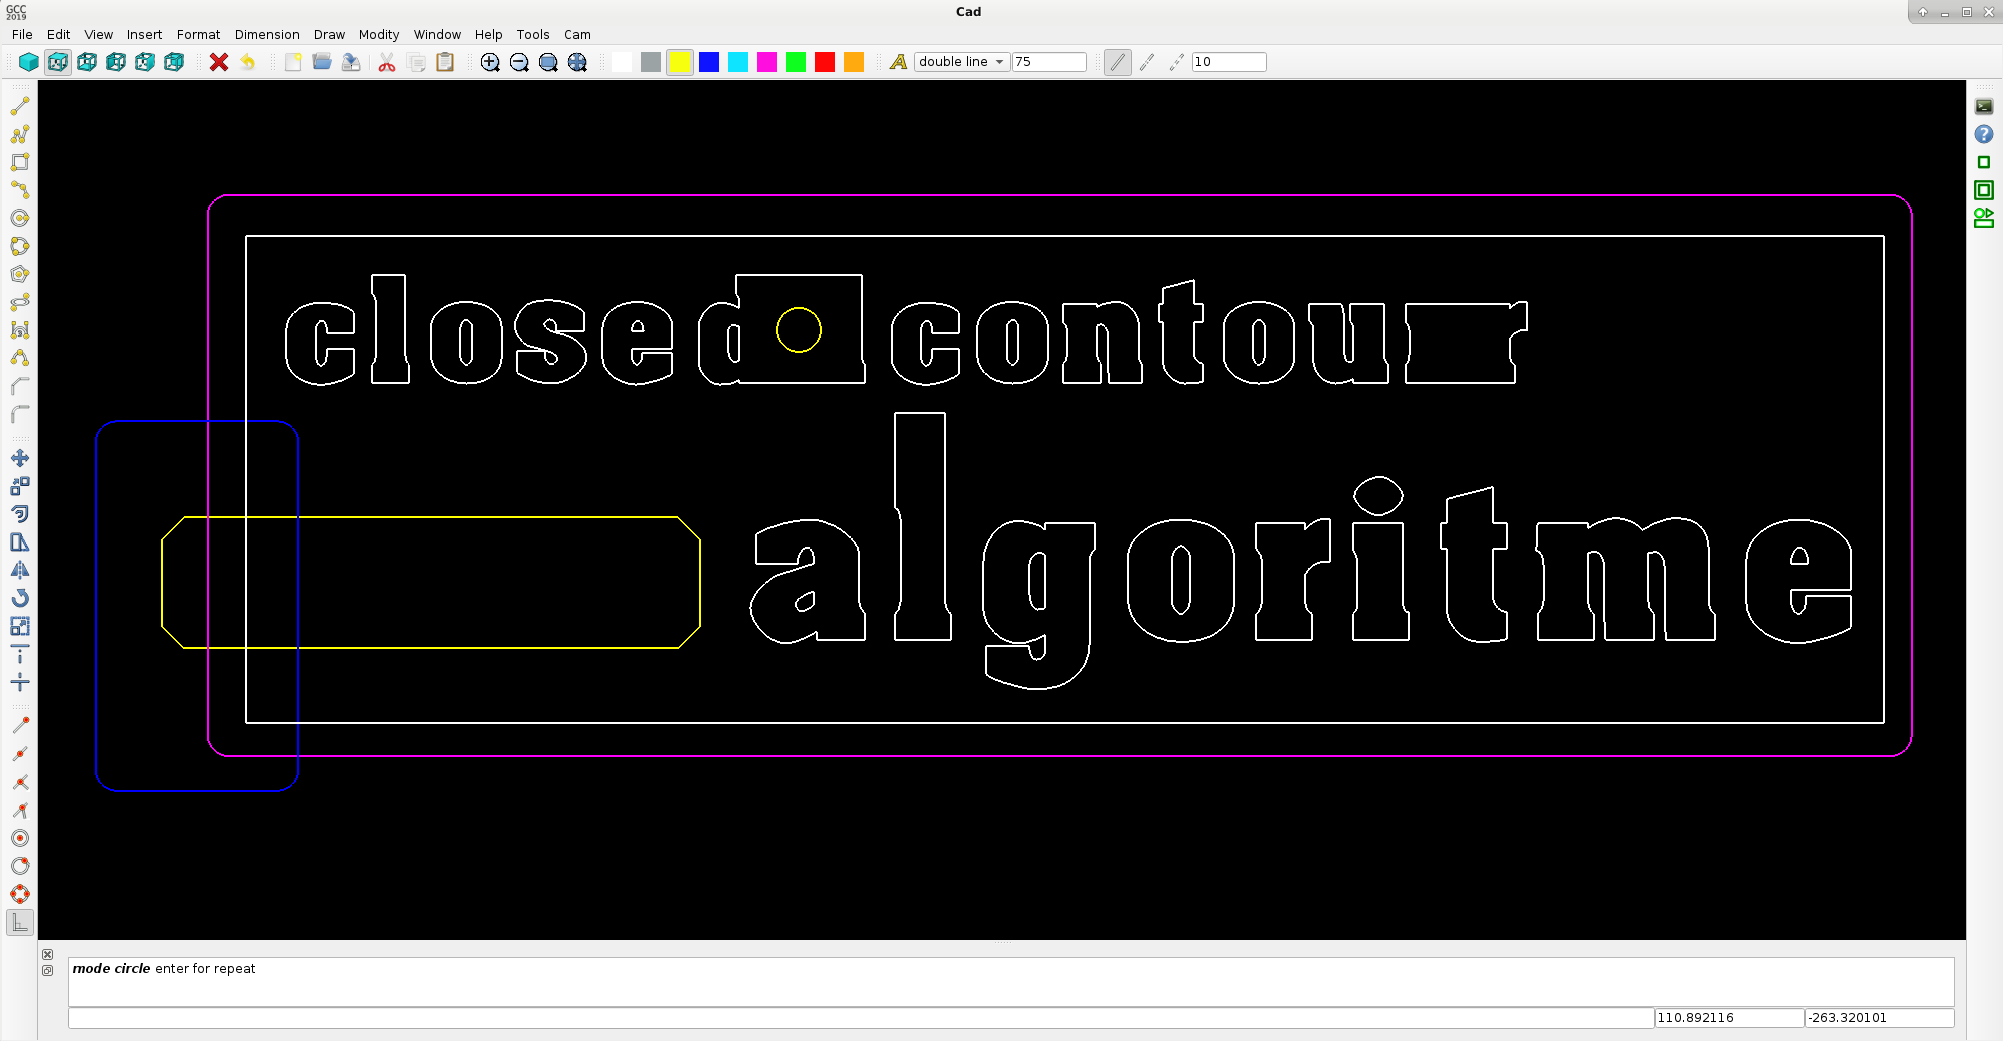
Picture one is a normal drawing.. 1128 objects..
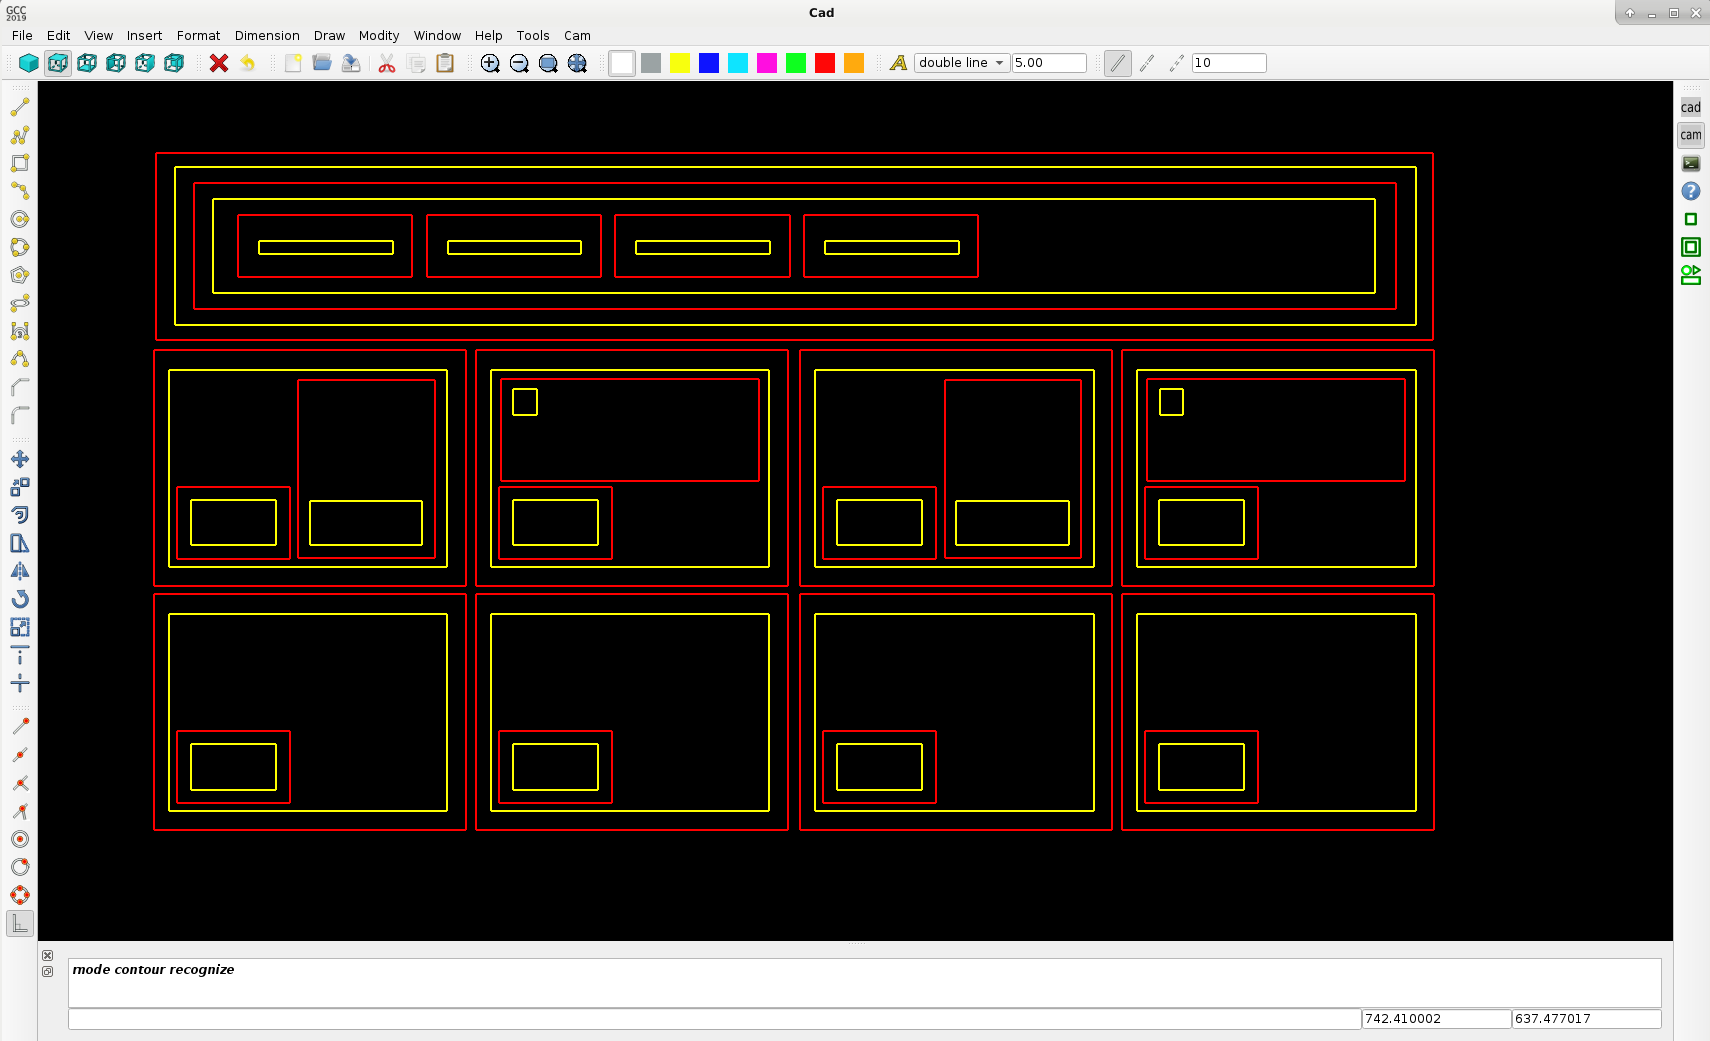
Picture two is the same drawing, but then calculated by the contour recognize class. It's an algoritme that took me about 2 - 3 day's.
I had to use the while c++ function's...
The cad array's stay orginal, unmodified & unsorted, but the output
is rearranged by the algoritme in one flow and can be directly converted to g-code later on in the process.
This contour recognize class is used after the contour offset class is done, wich i will make soon !!
The logic about smaller object's into the bigger objects has to be written coming time. Have to make some area calculations..
and see if contours are inside each other.. I hope this is easy..
This important logic works nice :
color yellow = rearranged to ccw
color red = rearranged to cw
color grey = no offset
the cw, ccw for circles has to be done.
When we know wich object is inside each other, we can change object direction to outside or inside offset,
because we now know the predefined rearranged direction, that is currently visible with different colors.
Anyone idea's about autonesting?
picture 1, raw cad drawing
picture 2, contour recognized..
Attachments:
The following user(s) said Thank You: phillc54, tommylight, Clive S
Please Log in or Create an account to join the conversation.
- tommylight
-

- Online
- Moderator
-

Less
More
- Posts: 21163
- Thank you received: 7226
04 Nov 2019 01:26 #149516
by tommylight
All i can think about is i have machine parts waiting to be painted and they are outside while it is raining since last night. Not good.
Thank you.
Regards,
Tom.
Replied by tommylight on topic QT C++ code samples
Nope ! Sorry.Anyone idea's about autonesting?
All i can think about is i have machine parts waiting to be painted and they are outside while it is raining since last night. Not good.
Thank you.
Regards,
Tom.
The following user(s) said Thank You: Grotius
Please Log in or Create an account to join the conversation.
- Grotius
-
 Topic Author
- Offline
- Platinum Member
-

Less
More
- Posts: 2419
- Thank you received: 2345
05 Nov 2019 02:13 #149570
by Grotius
Replied by Grotius on topic QT C++ code samples
Hi Tom,
I hope your machine parts will look nice after painting !
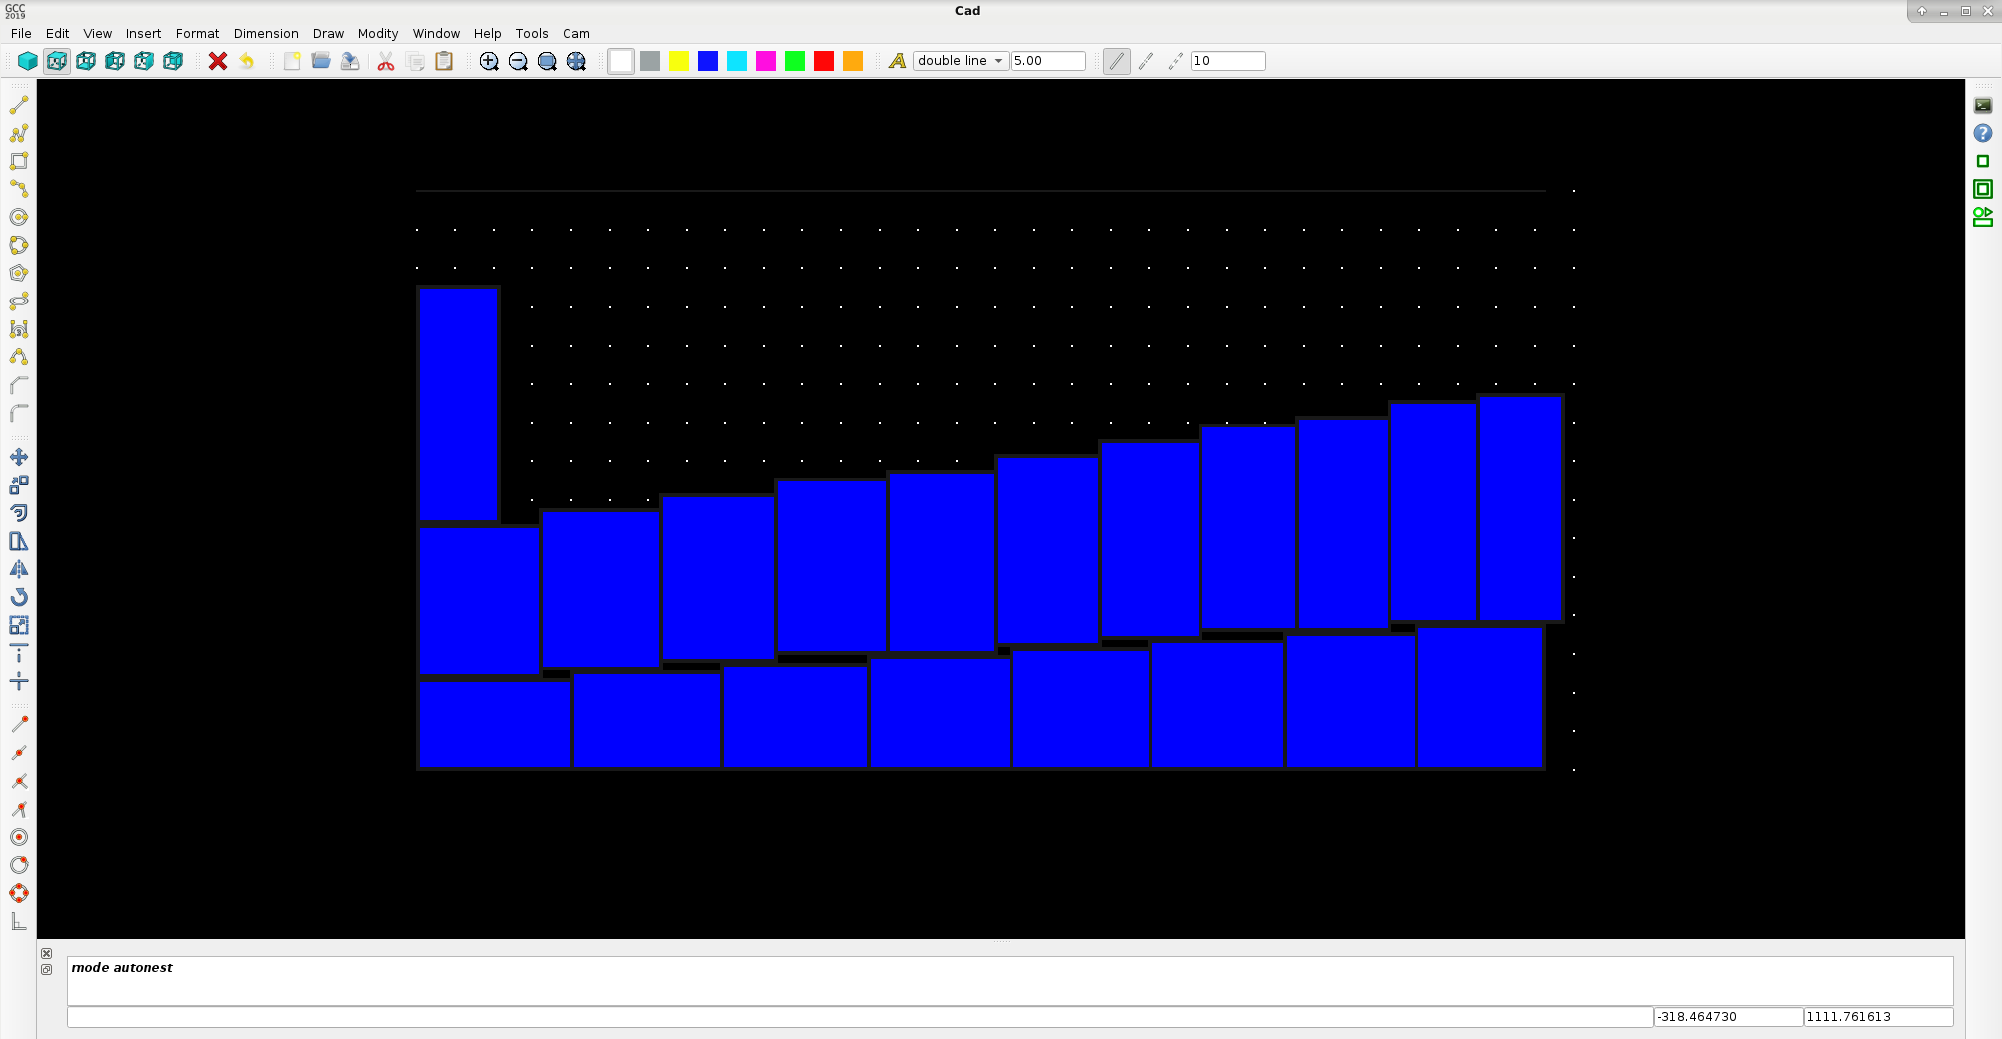
Today i did my first autonest experiment.
After a long time thinking how to start this. I had an idea.
What you see on the picture are in fact tiny dot's or points, to visualise the output for this moment.
Behind the scene i started with an 2 dimensional array.
for x, the array is 3000 places / mm points.
for y, the array is 1500 places / mm points.
like : int mm_points[3000][1500];
The idea is, every mm xy position (like pixel position) has a point with a identity. for example : empty space id, object id number, etc.
During auto nesting we can scan each x- and y row of the table for free space.. and where to start the next object.
Scanning example :
Also we can calculate how much space is left in x and y direction though the scanning of free mm point's that are beside each other.
Wich can result in a reqtangular or circular space that can be used for placing a dxf object later on in the process.
This is my first example.. Not bad.. It has not really a good logic at this moment. Just started up. But i think this way of programming can result in nice output's in the future.
First autonest attempt :
I hope your machine parts will look nice after painting !
Today i did my first autonest experiment.
After a long time thinking how to start this. I had an idea.
What you see on the picture are in fact tiny dot's or points, to visualise the output for this moment.
Behind the scene i started with an 2 dimensional array.
for x, the array is 3000 places / mm points.
for y, the array is 1500 places / mm points.
like : int mm_points[3000][1500];
The idea is, every mm xy position (like pixel position) has a point with a identity. for example : empty space id, object id number, etc.
During auto nesting we can scan each x- and y row of the table for free space.. and where to start the next object.
Scanning example :
Warning: Spoiler!
for(int x=start_x+10; x<start_x+width; x+=10){
for(int y=0; y<1500; y++){
if(mm_points[x][y]==0){
qDebug()<< "0 found at y : " << y;
break;
}
if(y>temp_y){
temp_y = y;
}
start_y = temp_y;
}
}
for(int y=0; y<1500; y++){
if(mm_points[x][y]==0){
qDebug()<< "0 found at y : " << y;
break;
}
if(y>temp_y){
temp_y = y;
}
start_y = temp_y;
}
}
Also we can calculate how much space is left in x and y direction though the scanning of free mm point's that are beside each other.
Wich can result in a reqtangular or circular space that can be used for placing a dxf object later on in the process.
This is my first example.. Not bad.. It has not really a good logic at this moment. Just started up. But i think this way of programming can result in nice output's in the future.
First autonest attempt :
Attachments:
The following user(s) said Thank You: phillc54, Clive S
Please Log in or Create an account to join the conversation.
- tommylight
-

- Online
- Moderator
-

Less
More
- Posts: 21163
- Thank you received: 7226
05 Nov 2019 10:16 #149587
by tommylight
Replied by tommylight on topic QT C++ code samples
Furniture builders use a software that does nothing more than that, namely you enter part dimensions and it arranges them so the minimum material is waisted. I have no idea what it is called, there might be several versions of it, i just know it exist and they use it since i have serviced a lot of wood cnc routers for them,.
The following user(s) said Thank You: Grotius
Please Log in or Create an account to join the conversation.
- Todd Zuercher
-

- Offline
- Platinum Member
-

Less
More
- Posts: 4693
- Thank you received: 1438
05 Nov 2019 15:22 #149605
by Todd Zuercher
Replied by Todd Zuercher on topic QT C++ code samples
It is called "nesting" and I have yet to find a program that can do it better than a person (quicker yes, but better no.)
(This is one of the main things I do at work all day.)
(This is one of the main things I do at work all day.)
The following user(s) said Thank You: tommylight, Grotius
Please Log in or Create an account to join the conversation.
- mozmck
- Offline
- Administrator
-

Less
More
- Posts: 49
- Thank you received: 58
05 Nov 2019 15:38 #149609
by mozmck
Replied by mozmck on topic QT C++ code samples
The following user(s) said Thank You: tommylight, Grotius
Please Log in or Create an account to join the conversation.
- Grotius
-
 Topic Author
- Offline
- Platinum Member
-

Less
More
- Posts: 2419
- Thank you received: 2345
15 Nov 2019 19:10 #150438
by Grotius
Replied by Grotius on topic QT C++ code samples
Hi there,
A little project update..
The outside and inside contour recognize is almost done.
It works for nested inner-inner-inner.. objects. I want to add the logic that the g-code will start at the most inner product.
This logic is not available in sheetcam at the moment.
When i am satisfied i go on with triangelation of the objects (solid). This will give a nice look..The triangulation is already tested, so can be finished quite quickly.
After making the solids, we do the contour offset class. This class is quite easy to do. The most difficult part's are done, exept the autonesting !
For autonesting i can advise you to use plater. It works for stl drawings. It can be downloaded at github. The algoritme they used
is has my interests.My interest's are also to inplement the stl file format into the cad program. Stl file format is not as accurate
as a dxf file, but i think i can combine stl with dxf. More about this later on.
Have a good day !
Attachments:
The following user(s) said Thank You: phillc54, tommylight, Clive S
Please Log in or Create an account to join the conversation.
- Todd Zuercher
-

- Offline
- Platinum Member
-

Less
More
- Posts: 4693
- Thank you received: 1438
15 Nov 2019 20:30 #150440
by Todd Zuercher
Replied by Todd Zuercher on topic QT C++ code samples
Wouldn't it make more sense to start from the outside and work in, because the outer cut should always be a male cut, but the inside could be female or male.
if you are cutting a piece with a window the inner cut is female, if you are cutting a piece out of the scrap in the window, the inner cut would be male.
if you are cutting a piece with a window the inner cut is female, if you are cutting a piece out of the scrap in the window, the inner cut would be male.
The following user(s) said Thank You: Grotius
Please Log in or Create an account to join the conversation.
- Grotius
-
 Topic Author
- Offline
- Platinum Member
-

Less
More
- Posts: 2419
- Thank you received: 2345
16 Nov 2019 12:35 - 16 Nov 2019 13:13 #150471
by Grotius
Replied by Grotius on topic QT C++ code samples
Hi Todd, thanks for your input..
Wouldn't it make more sense to start from the outside and work in.
When using sheetcam for example you will mention that the cut order is not from inner products to outher related products. I mean
nested product logic is not available. The only logic wich is usefull in sheetcam is "keep parts together" and "cut direction" for tube cutters. The problem is, when outher related products are cut off (and have inner nested products inside), the inner related product's will lose position very easy when they have no microjoints (taps) or trough thermal distortion heat input.
if you are cutting a piece with a window the inner cut is female, if you are cutting a piece out of the scrap in the window, the inner cut would be male.
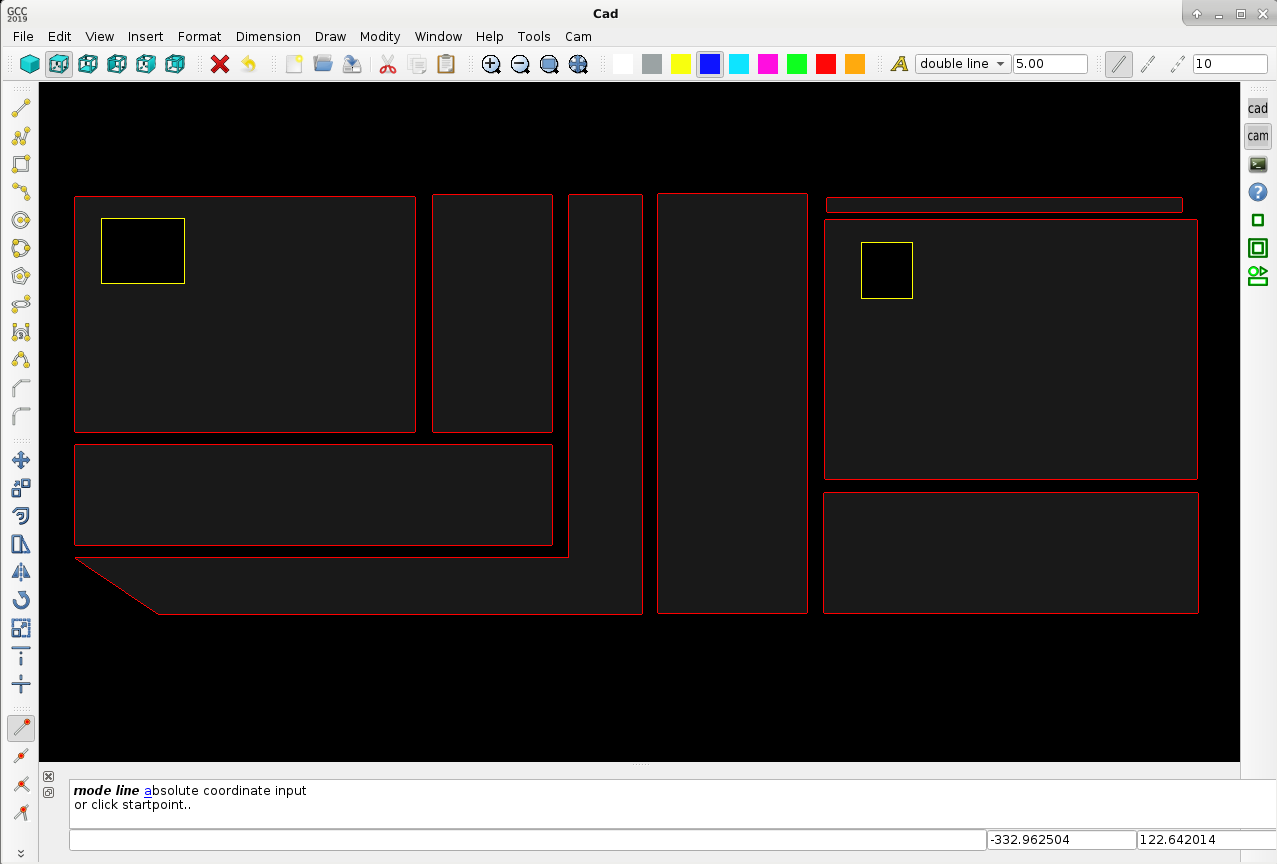
Yes, exactly. In the picture :
1. Red color is cw (clockwise) wich is => outside cut.
2. Yellow color is ccw (counter clockwise) wich is => inside cut.
3. Grey is triangulation to view the product output easy..
4. This example does not contain any inside nested products, wich will be better cutted first. Todd if you think not, please let me know.
5. In the yellow holes can be put a second object for cutting. Sheetcam does not have the logic to start there with cutting.
Attached a code snipped for setting up and use 2d vector / list array's in c++.
There is quite less info how to excess a 2d vector array or list 2d array on the net, especially how to find info in the
second array row with the use of a pointer. Vector array's are nice to use. The Qt library has nice features as "contains" to find
a value very quickly. If you don't use Qt, you can use the std library with "find". Just for info a code snipped :
Warning: Spoiler!
#include <stdio.h>
using namespace std;
vector<vector <int>> array;
vector<int>::iterator itv;
vector<vector <int>>::iterator itvv;
array.push_back({100,3});
array.push_back({110,4});
array.push_back({120,5});
array.push_back({130,130});

//C language printout style :
printf("array: %i\n", array[0][0]); //100

//Qt C++ language printout style :
qDebug()<< "array :" << array.at(0); //std::vector(100, 3)
qDebug()<< "array :" << array.at(1); //std::vector(110, 4)
qDebug()<< "array :" << array.at(2); //std::vector(120, 5)

qDebug()<< "array :" << array[0][0]; //100
qDebug()<< "array :" << array[1][0]; //110
qDebug()<< "array :" << array[2][0]; //120

qDebug()<< "array :" << array[0][1]; //3
qDebug()<< "array :" << array[1][1]; //4
qDebug()<< "array :" << array[2][1]; //5

//work with counters :
for(unsigned int i = 0; i < array.size(); ++i){
    qDebug()<< "array at pos : " << i << " value : " << array[i][0]; //100, 110, 120..
}

for(unsigned int i = 0; i < array.size(); ++i){
    qDebug()<< "array at pos : " << i << " value : " << array[i][1]; //3, 4 ,5
}

//work with pointers :
for(itvv = array.begin(); itvv != array.end(); ++itvv){
    qDebug()<< "pointer *itv : " << *itvv;
    //output :
    //pointer *itv :  std::vector(100, 3)
    //pointer *itv :  std::vector(110, 4)
    //pointer *itv :  std::vector(120, 5)
}

for(itvv = array.begin(); itvv != array.end(); ++itvv){

    qDebug()<< "first row :" << (*itvv)[0];
    //output :
    //100
    //110
    //120
    qDebug()<< "second row :" << (*itvv)[1];
    //output :
    //3
    //4
    //5

    if((*itvv)[1] == (*itvv)[0]){ //if first row value = second row value.
        qDebug()<< "match found for value : " << *itvv;
        //output:
        //std::vector(130, 130)

    }
}

//don't forget to clean up memory space..
array.empty();
array.shrink_to_fit();
Attachments:
Last edit: 16 Nov 2019 13:13 by Grotius.
Please Log in or Create an account to join the conversation.
- Todd Zuercher
-

- Offline
- Platinum Member
-

Less
More
- Posts: 4693
- Thank you received: 1438
16 Nov 2019 13:08 #150472
by Todd Zuercher
Replied by Todd Zuercher on topic QT C++ code samples
I agree the pieces should be cut from inside to out. I was thinking of how your program should calculate the process.
Please Log in or Create an account to join the conversation.
Time to create page: 0.178 seconds

