Search Results (Searched for: raspberry)
- adhamamer
- adhamamer
11 Apr 2026 20:04 - 11 Apr 2026 20:06
Replied by adhamamer on topic Mesa 7I76EU TB2 not working right (TB3 works fine) – need help diagnosing
Mesa 7I76EU TB2 not working right (TB3 works fine) – need help diagnosing
Category: Driver Boards
- n_ne
- n_ne
10 Apr 2026 08:00
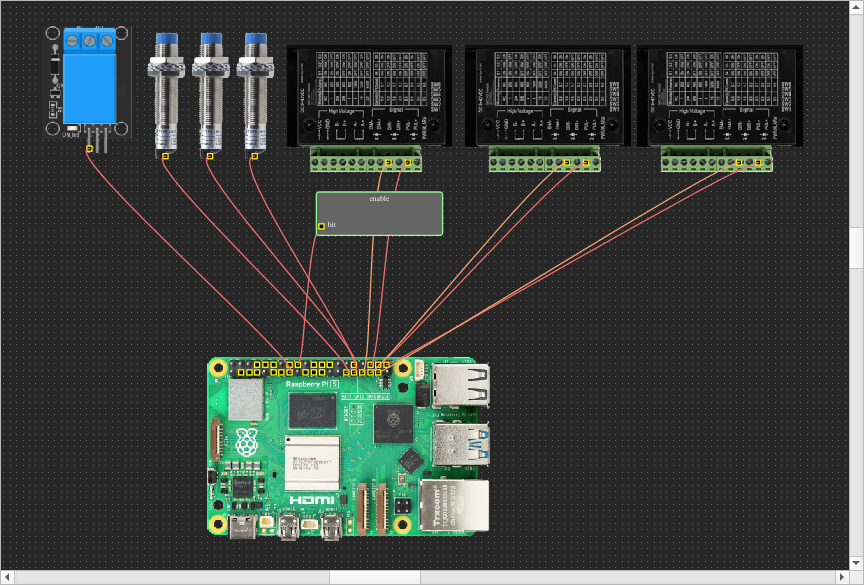
Replied by n_ne on topic RRW Lab SPI with raspberry pi 5
RRW Lab SPI with raspberry pi 5
Category: Driver Boards
- amanker
- amanker
09 Apr 2026 13:27
Crash on loading large file was created by amanker
Crash on loading large file
Category: General LinuxCNC Questions
- meister
- meister
07 Apr 2026 06:38
Replied by meister on topic Raspberry with LinuxCNC direct interface
Raspberry with LinuxCNC direct interface
Category: Computers and Hardware
- masawee
- masawee
07 Apr 2026 06:15 - 07 Apr 2026 06:17
Replied by masawee on topic Raspberry with LinuxCNC direct interface
Raspberry with LinuxCNC direct interface
Category: Computers and Hardware
- andypugh

06 Apr 2026 17:32
Replied by andypugh on topic RRW Lab SPI with raspberry pi 5
RRW Lab SPI with raspberry pi 5
Category: Driver Boards
- Drustar
- Drustar
05 Apr 2026 09:09
- NWE

05 Apr 2026 04:15
Replied by NWE on topic RRW Lab SPI with raspberry pi 5
RRW Lab SPI with raspberry pi 5
Category: Driver Boards
- andypugh
04 Apr 2026 19:46
Replied by andypugh on topic RRW Lab SPI with raspberry pi 5
RRW Lab SPI with raspberry pi 5
Category: Driver Boards
- n_ne
- n_ne
30 Mar 2026 14:14
RRW Lab SPI with raspberry pi 5 was created by n_ne
RRW Lab SPI with raspberry pi 5
Category: Driver Boards
- alangibson
- alangibson
25 Mar 2026 09:58 - 26 Mar 2026 12:40
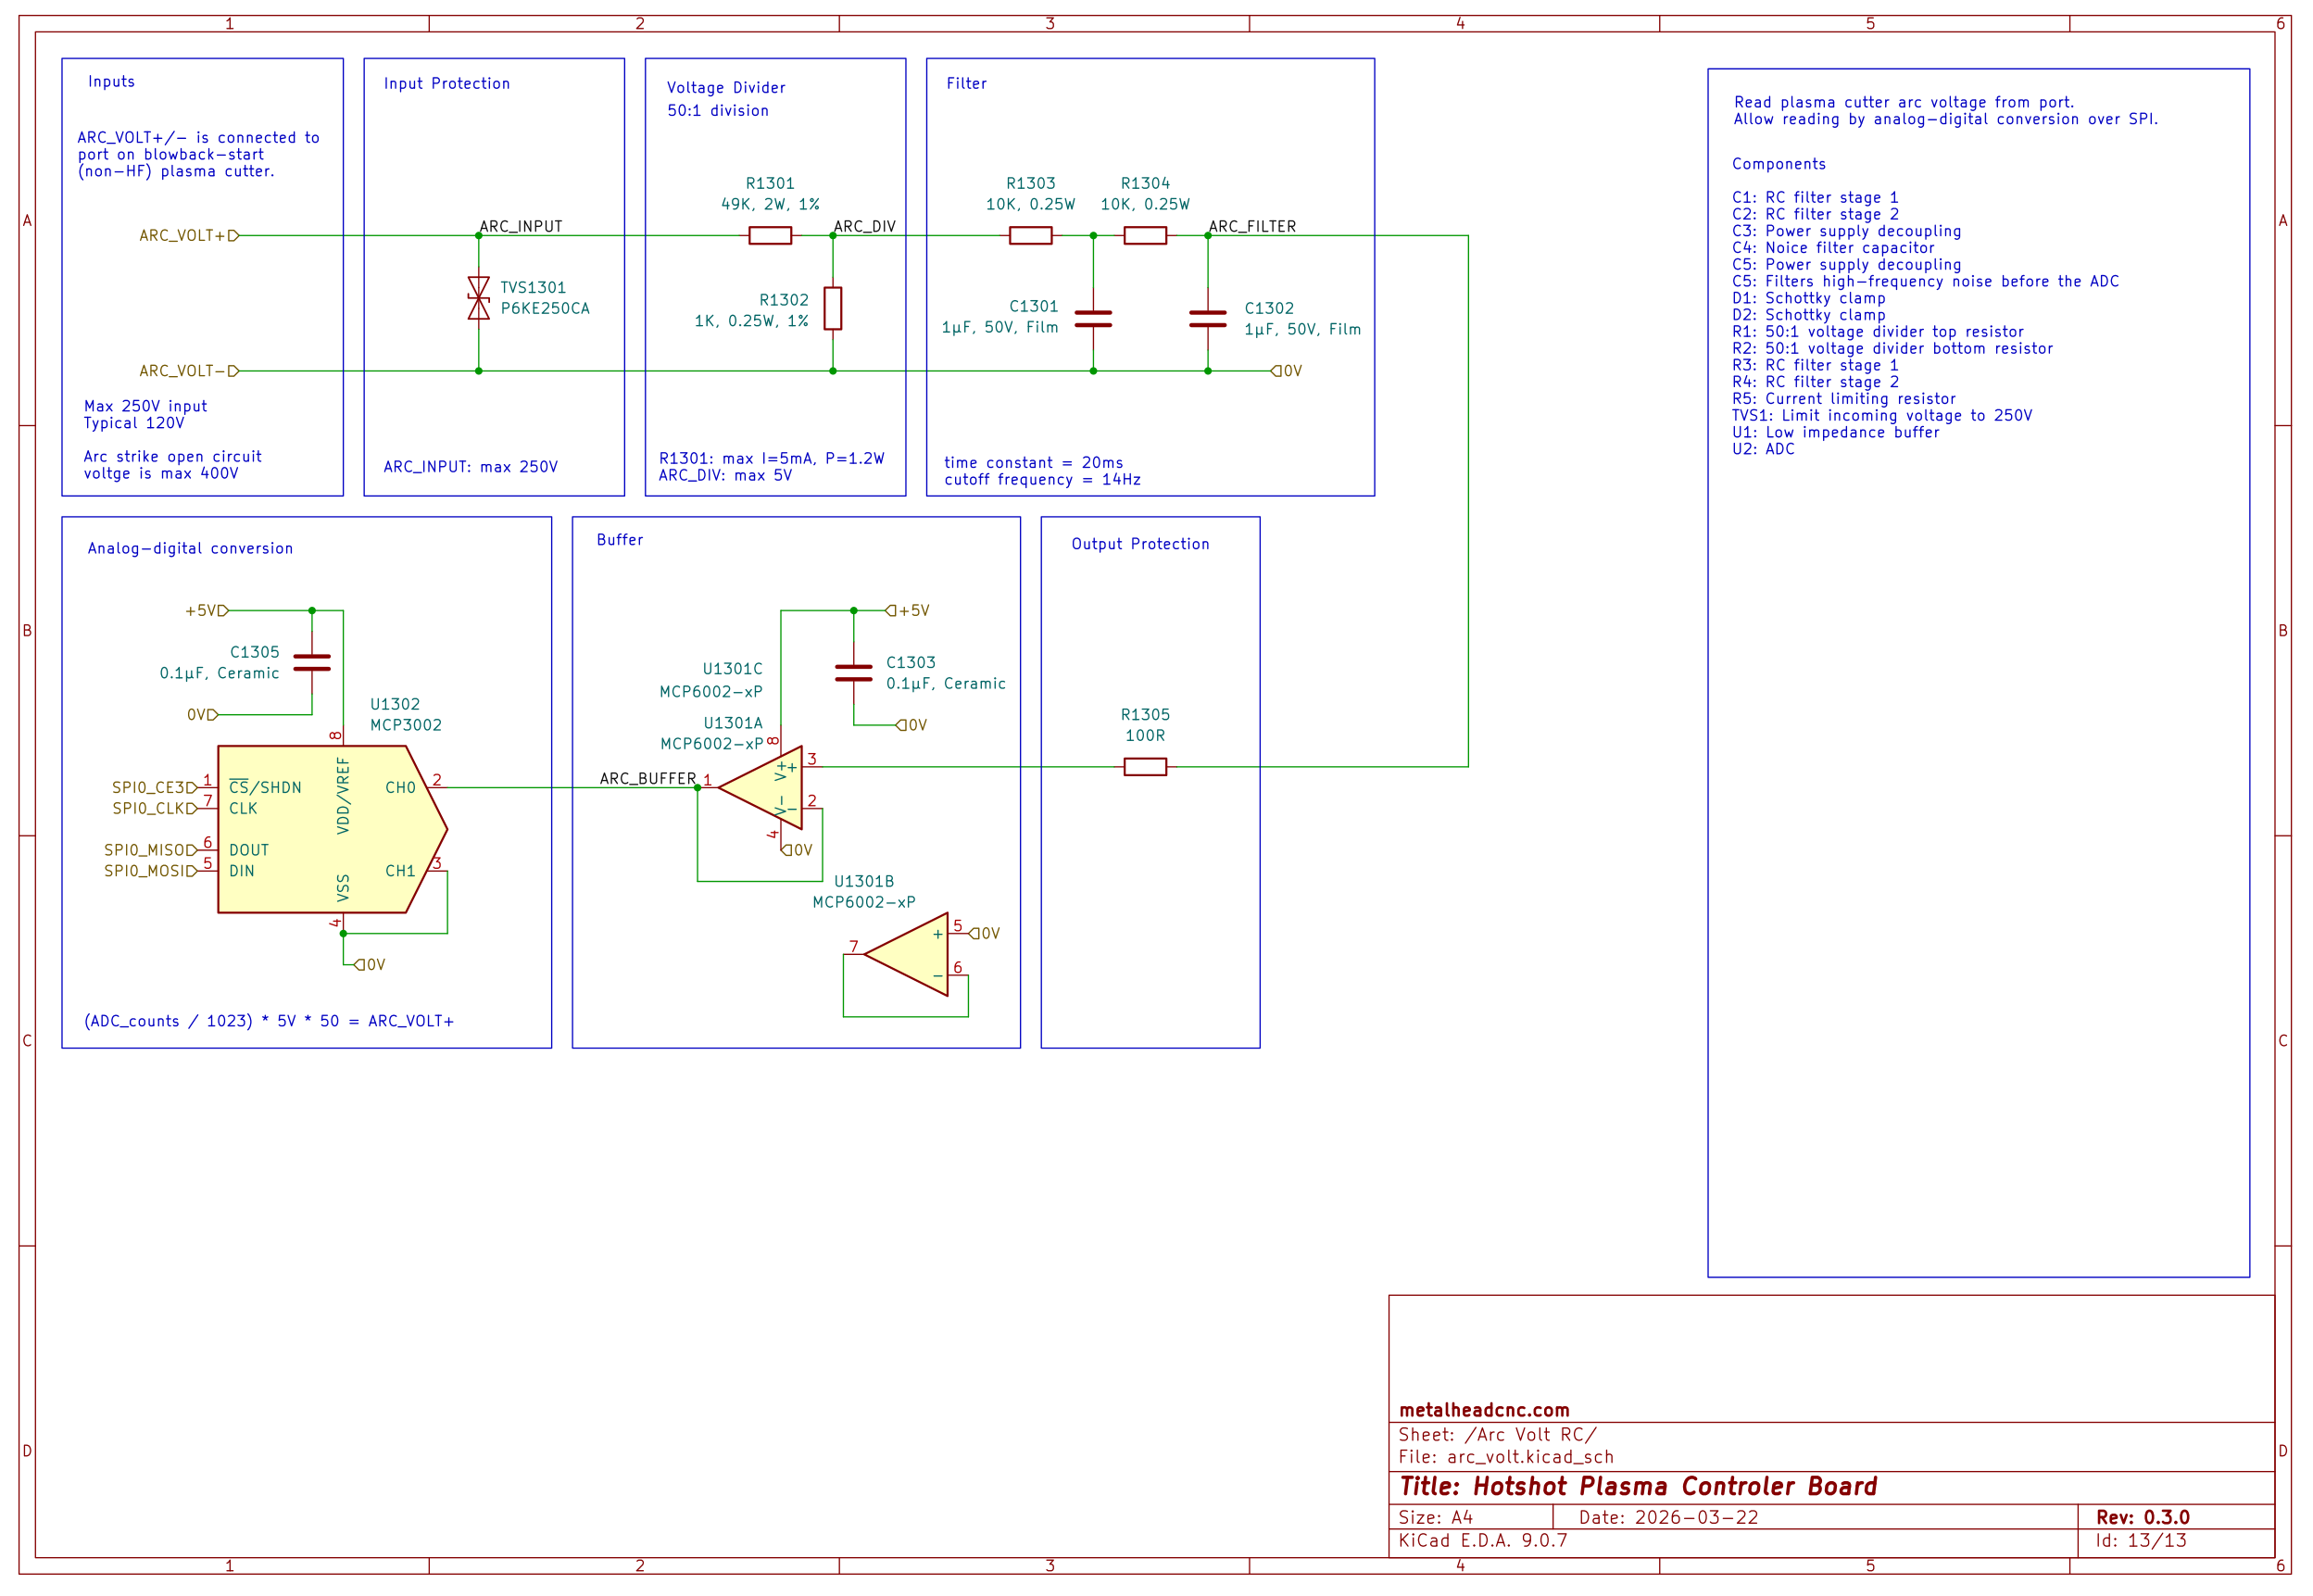
Review Request for Arc Volt Sensor Schematic was created by alangibson
Review Request for Arc Volt Sensor Schematic
Category: Plasma & Laser
- AntonioT
- AntonioT
23 Mar 2026 19:05
- Pierangelo
- Pierangelo
22 Mar 2026 09:48
4-Axis RP5 with Bigtreetech Octopus Pro- How to make axis indipendent was created by Pierangelo
4-Axis RP5 with Bigtreetech Octopus Pro- How to make axis indipendent
Category: Driver Boards
- hitchhiker
- hitchhiker
22 Mar 2026 08:24
Dragon q6a from Radxa was created by hitchhiker
Dragon q6a from Radxa
Category: General LinuxCNC Questions
- Nik
- Nik
21 Mar 2026 21:17
LinuxCNC to upgrade old lathes drive train was created by Nik
LinuxCNC to upgrade old lathes drive train
Category: General LinuxCNC Questions


Time to create page: 0.860 seconds