Puma 560 simulation using pumakins
- robottom
- Offline
- Senior Member
-

Less
More
- Posts: 53
- Thank you received: 4
08 Mar 2015 02:37 #56538
by robottom
Puma 560 simulation using pumakins was created by robottom
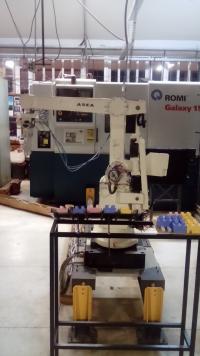
I'm currently working on a new project to build a new controller for my Unimation Puma 560 6-axis robot arm with LinuxCNC.
Before I'm ready with the boards I'm trying to setup the right kinematics. For this I installed the Puma 560 simulation (e.g. from github linuxcnc/configs/puma with the nice simulation window.
The configuration uses the general genserkins kinematics with hal parameters for the Puma 560. Basically it works but it has some issues. The source code of the genserkins seems to be very complicated if you don't understand the DH logic. Additionally it freezes the whole LinuxCNC if the robot comming to a singularity (or somethimes out of range). Only a restart of the whole system can solve it.
I tried to exchange the genserkins with the pumakins kinematics and uses the default parameters for pumakins. The pumakins looks a lot easier and does not freezes the systems in the situations out of range/singularity.
Unfortunately I missed to set up correctly. If I try simple G1 moves in Axis (e.g. G1 X100 F100) it does not do a linear move on the X-axis but a move in all axis X,Y,Z (incorrect move). Additionally the F100 is much much slower than with the genserkins. For me it looks like an error in the setup (e.g. parameters). All the parameter A2, A3, D3, D4 I found in the internet for the pumakins are the same as the default values.
Unfortunately I do not understand enough of the LinuxCNC, DH kinematics approach and how to use genserkins and pumakins to find the issue.
Any help appreiciated.
Please Log in or Create an account to join the conversation.
- andypugh
-

- Offline
- Moderator
-

Less
More
- Posts: 19875
- Thank you received: 4642
09 Mar 2015 23:41 #56576
by andypugh
Are you sure that this is incorrect?
There are two operation modes, "Joint Mode" and "World Mode". In the former mode you can move a single joint, and all moves will be arcs in XYZ space. In the latter mode the moves will be straight lines in XYZ space and more than one motor will move.
So, it might just be that you are not in the mode you think you are in.
Replied by andypugh on topic Puma 560 simulation using pumakins
Unfortunately I missed to set up correctly. If I try simple G1 moves in Axis (e.g. G1 X100 F100) it does not do a linear move on the X-axis but a move in all axis X,Y,Z (incorrect move).
Are you sure that this is incorrect?
There are two operation modes, "Joint Mode" and "World Mode". In the former mode you can move a single joint, and all moves will be arcs in XYZ space. In the latter mode the moves will be straight lines in XYZ space and more than one motor will move.
So, it might just be that you are not in the mode you think you are in.
Please Log in or Create an account to join the conversation.
- robottom
- Offline
- Senior Member
-
Less
More
- Posts: 53
- Thank you received: 4
09 Mar 2015 23:54 #56581
by robottom
Replied by robottom on topic Puma 560 simulation using pumakins
When I do the same G1 codes with the genserkins module it works fine. G1 X... is doing a straight move of the TCP only in the x direction (in AXIS GUI as well as in the simulation window). When I exchange the loadrt genserkins with loadrt pumakins (and using the default parameters) the move of the different joins is not resulting in a straight move of the TCP. After the command execution on the X;Y;Z coordinates displayed in the AXIS GUI there is only a change in the X corrsponding to my G1 X... command (as expected) but in the simulation window I see the displayed robot TCP is doing moves along X, Y and Z (curved line) with not only changing the X position but also a different Y and Z at the end.
The correct diplay in the AXIS GUI I guess is only because the direct kinematics fits to the inverse kinematics. So any kinematics of any robot would lead to the same result. But the wrong move in the simulation window leads me to the conclusion that there is something wrong (e.g. the calculated join values for the Puma are not fitting to the requested move). Or is my conclusion wrong?
The correct diplay in the AXIS GUI I guess is only because the direct kinematics fits to the inverse kinematics. So any kinematics of any robot would lead to the same result. But the wrong move in the simulation window leads me to the conclusion that there is something wrong (e.g. the calculated join values for the Puma are not fitting to the requested move). Or is my conclusion wrong?
Please Log in or Create an account to join the conversation.
- andypugh
-
- Offline
- Moderator
-
Less
More
- Posts: 19875
- Thank you received: 4642
10 Mar 2015 00:01 #56586
by andypugh
Do the joint-lengths in the pumakins setup match the "physical" joint lengths in the Vismach model? If the Axis display and the Vismach model display disagree then this seems like the most likely explanation.
Replied by andypugh on topic Puma 560 simulation using pumakins
The correct diplay in the AXIS GUI I guess is only because the direct kinematics fits to the inverse kinematics. So any kinematics of any robot would lead to the same result. But the wrong move in the simulation window leads me to the conclusion that there is something wrong (e.g. the calculated join values for the Puma are not fitting to the requested move). Or is my conclusion wrong?
Do the joint-lengths in the pumakins setup match the "physical" joint lengths in the Vismach model? If the Axis display and the Vismach model display disagree then this seems like the most likely explanation.
Please Log in or Create an account to join the conversation.
- robottom
- Offline
- Senior Member
-
Less
More
- Posts: 53
- Thank you received: 4
10 Mar 2015 02:42 #56598
by robottom
Replied by robottom on topic Puma 560 simulation using pumakins
Sounds reasonable.
I don't understand enough of the Vismach and the DH convention of the kinematics (genserkins and the pumakins) to judge where the issue is. If I compare the parameter Setup for the genserkins and the pumakins I don't see how this can match.
The genserkins Parameters are:
setp genserkins.A-0 0
setp genserkins.A-1 0
setp genserkins.A-2 17
setp genserkins.A-3 0
setp genserkins.A-4 0
setp genserkins.A-5 0
setp genserkins.ALPHA-0 0
setp genserkins.ALPHA-1 1.570796326
setp genserkins.ALPHA-2 0
setp genserkins.ALPHA-3 1.570796326
setp genserkins.ALPHA-4 -1.570796326
setp genserkins.ALPHA-5 1.570796326
setp genserkins.D-0 26.45
setp genserkins.D-1 -5.5
setp genserkins.D-2 0
setp genserkins.D-3 17.05
setp genserkins.D-4 0
setp genserkins.D-5 2.2
and Defaults for the pumakins are only:
/* the default values for a PUMA 560 type robot, these can be changed as HAL parameters */
#define DEFAULT_PUMA560_A2 300.0
#define DEFAULT_PUMA560_A3 50.0
#define DEFAULT_PUMA560_D3 70.0
#define DEFAULT_PUMA560_D4 400.0
just take the A2, A3, D3, D4 from the genserkins and put it in the corresponding Parameters of the pumakins is not working (no surprise). Any other idea. The pumakins Parameters are the only I could find.
Please Log in or Create an account to join the conversation.
- andypugh
-
- Offline
- Moderator
-
Less
More
- Posts: 19875
- Thank you received: 4642
10 Mar 2015 04:07 #56603
by andypugh
Replied by andypugh on topic Puma 560 simulation using pumakins
I guess that the numbers have to match the Vismach .obj file geometry, but I don't actually know what those files mean.
git.linuxcnc.org/gitweb?p=linuxcnc.git;a...194a4d06bed8a3a42d1f
git.linuxcnc.org/gitweb?p=linuxcnc.git;a...194a4d06bed8a3a42d1f
Please Log in or Create an account to join the conversation.
- jstoquica
-
- Offline
- Premium Member
-

Less
More
- Posts: 117
- Thank you received: 8
11 Apr 2015 03:15 #57670
by jstoquica
Replied by jstoquica on topic Puma 560 simulation using pumakins
Good Day,
I think you have to read a Hal & Integrator manual, the key is in the Signal's HAL. I am currently working with a real Robotic Arm, and I got link 1 DOF of my Robotic Arm with Vismach simulation (PUMA 560). It's easy, but you must read a properly documentation. Regards.
I think you have to read a Hal & Integrator manual, the key is in the Signal's HAL. I am currently working with a real Robotic Arm, and I got link 1 DOF of my Robotic Arm with Vismach simulation (PUMA 560). It's easy, but you must read a properly documentation. Regards.
Please Log in or Create an account to join the conversation.
- robottom
- Offline
- Senior Member
-
Less
More
- Posts: 53
- Thank you received: 4
21 Apr 2015 21:01 #57970
by robottom
Replied by robottom on topic Puma 560 simulation using pumakins
Hi jstoquica,
sorry for my late reply. Thanks for your comments. Can you please give me some more hints where you would expect the issue or mismatch? To my best knowledge the Signal's HAL is basically caring about the definition of the signals and how they are wired up.
This part of the configuartion is the same for both kinematics modules I'm using. I just reuse all parts of the working configuration with the working kinematics (genserkins). I only exchanged the kinematics module to the simpler one (pumakins). Currently I don't see where the HAL signals could have an influence on this. The input/output for the kinematics is just the joint angles and the coordinates (depending on the direction of the kinematics: direct or inverse).
Maybe there is a mismatch with the home coordinates and home joint angles for the different modules - what do you think?
Please Log in or Create an account to join the conversation.
- jstoquica
-
- Offline
- Premium Member
-
Less
More
- Posts: 117
- Thank you received: 8
12 Sep 2015 04:09 - 12 Sep 2015 04:12 #62482
by jstoquica
Replied by jstoquica on topic Puma 560 simulation using pumakins
Hi,
I dont klnow if you still need help about this topic. Anyway, this is like I did the link with vismach and one servomotor(with enconder and gecko drive). Only remember that the acis scale chages with the gear relation between motor and joint.
Regards.
I dont klnow if you still need help about this topic. Anyway, this is like I did the link with vismach and one servomotor(with enconder and gecko drive). Only remember that the acis scale chages with the gear relation between motor and joint.
# core HAL config file for simulation - 6 axis

# load RT modules
loadrt genserkins
loadrt [EMCMOT]EMCMOT base_period_nsec=[EMCMOT]BASE_PERIOD servo_period_nsec=[EMCMOT]SERVO_PERIOD traj_period_nsec=[EMCMOT]TRAJ_PERIOD num_joints=[TRAJ]AXES

loadrt probe_parport
loadrt hal_parport cfg="0x378 out  "
setp parport.0.reset-time 1000
loadrt stepgen step_type=0,0,0

addf parport.0.read base-thread
addf stepgen.make-pulses base-thread
addf parport.0.write base-thread
addf parport.0.reset base-thread

addf stepgen.capture-position servo-thread
#addf motion-command-handler servo-thread
#addf motion-controller servo-thread
addf stepgen.update-freq servo-thread
net spindle-cmd <= motion.spindle-speed-out

net estop-out => parport.0.pin-01-out #sent the value in estop-out to pin-01
net xdir => parport.0.pin-02-out #sent the value in xdir to pin-02
net xstep => parport.0.pin-03-out #sent the value in xstep to pin-03
setp parport.0.pin-03-out-reset 1
net ydir => parport.0.pin-04-out #sent the value in ydir to pin-04
net ystep => parport.0.pin-05-out #sent the value in ystep to pin-05
setp parport.0.pin-05-out-reset 1
net zdir => parport.0.pin-06-out #sent the value in zdir to pin-06
net zstep => parport.0.pin-07-out #sent the value in zstep to pin-07
setp parport.0.pin-07-out-reset 1

setp stepgen.0.position-scale [AXIS_0]SCALE
setp stepgen.0.steplen 1
setp stepgen.0.stepspace 0
setp stepgen.0.dirhold 15200
setp stepgen.0.dirsetup 15200
setp stepgen.0.maxaccel [AXIS_0]STEPGEN_MAXACCEL
net xpos-cmd axis.0.motor-pos-cmd => stepgen.0.position-cmd
net xpos-fb stepgen.0.position-fb => axis.0.motor-pos-fb
net xstep <= stepgen.0.step
net xdir <= stepgen.0.dir
net xenable axis.0.amp-enable-out => stepgen.0.enable

net estop-out <= iocontrol.0.user-enable-out
net estop-out => iocontrol.0.emc-enable-in

loadusr -W hal_manualtoolchange
net tool-change iocontrol.0.tool-change => hal_manualtoolchange.change
net tool-changed iocontrol.0.tool-changed <= hal_manualtoolchange.changed
net tool-number iocontrol.0.tool-prep-number => hal_manualtoolchange.number
net tool-prepare-loopback iocontrol.0.tool-prepare => iocontrol.0.tool-prepared

# add motion controller functions to servo thread
addf motion-command-handler servo-thread
addf motion-controller servo-thread

# create HAL signals for position commands from motion module
net xpos-cmd <= axis.0.motor-pos-cmd
net J1pos <= axis.1.motor-pos-cmd
net J2pos <= axis.2.motor-pos-cmd
net J3pos <= axis.3.motor-pos-cmd
net J4pos <= axis.4.motor-pos-cmd
net J5pos <= axis.5.motor-pos-cmd


# loop position commands back to motion module feedback
net xpos-fb => axis.0.motor-pos-fb
net J1pos => axis.1.motor-pos-fb
net J2pos => axis.2.motor-pos-fb
net J3pos => axis.3.motor-pos-fb
net J4pos => axis.4.motor-pos-fb
net J5pos => axis.5.motor-pos-fb

# estop loopback
net estop-out iocontrol.0.user-enable-out iocontrol.0.emc-enable-in

# create signals for tool loading loopback

#net tool-prep-loop iocontrol.0.tool-prepare iocontrol.0.tool-prepared
net tool-prepare-loopback iocontrol.0.tool-prepare iocontrol.0.tool-prepared
#net tool-change-loop iocontrol.0.tool-change iocontrol.0.tool-changed
net tool-change iocontrol.0.tool-change
net tool-changed iocontrol.0.tool-changed

loadusr -W puma560gui

setp genserkins.A-0 0
setp genserkins.A-1 0
setp genserkins.A-2 17
setp genserkins.A-3 0
setp genserkins.A-4 0
setp genserkins.A-5 0

setp genserkins.ALPHA-0 0
setp genserkins.ALPHA-1 1.570796326
setp genserkins.ALPHA-2 0
setp genserkins.ALPHA-3 1.570796326
setp genserkins.ALPHA-4 -1.570796326
setp genserkins.ALPHA-5 1.570796326

setp genserkins.D-0 26.45
setp genserkins.D-1 -5.5
setp genserkins.D-2 0
setp genserkins.D-3 17.05
setp genserkins.D-4 0
setp genserkins.D-5 2.2


loadrt scale count=6

addf scale.0 servo-thread
addf scale.1 servo-thread
addf scale.2 servo-thread
addf scale.3 servo-thread
addf scale.4 servo-thread
addf scale.5 servo-thread

#net J0pos scale.0.in
net xpos-fb scale.0.in
net J1pos scale.1.in
net J2pos scale.2.in
net J3pos scale.3.in
net J4pos scale.4.in
net J5pos scale.5.in

setp scale.0.gain 1
setp scale.1.gain 1
setp scale.2.gain 1
setp scale.3.gain 1
setp scale.4.gain 1
setp scale.5.gain 1

net J0scaled scale.0.out puma560gui.joint1
net J1scaled scale.1.out puma560gui.joint2
net J2scaled scale.2.out puma560gui.joint3
net J3scaled scale.3.out puma560gui.joint4
net J4scaled scale.4.out puma560gui.joint5
net J5scaled scale.5.out puma560gui.joint6
Regards.
Last edit: 12 Sep 2015 04:12 by jstoquica.
Please Log in or Create an account to join the conversation.
- robottom
- Offline
- Senior Member
-
Less
More
- Posts: 53
- Thank you received: 4
13 Sep 2015 19:56 #62516
by robottom
Replied by robottom on topic Puma 560 simulation using pumakins
Hi jstoquica,
thanks a lot for your reply. Still I need some help. In the meanwhile I have connected all the 6 axis of my Puma robot arm to the linuxcnc and this is basically working fine (my real robot arm and the simulation is running simultaneously). So I don't think that there is any issue with the HAL connections. I can control the robot with G-code commands. But my current issue is very similar to the original one:
When I do straight moves in the x- or y- direction the Puma in the simulation is doing a straight move and my Puma is slightly deviating from a straight line. Also the length of the move is not the same as indicated in the G1 command (e.g. a 800mm move is on the real Puma a 900mm move). Only a move in the z-directions seems to be correct (straight line and correct length - roughly measured).
I also checked the single joint controls in LinuxCNC and it seems that the settings for axis seems to be correct (gear relation, resolution of the encoder). There a 90 degree move is also a 90 degree on the puma.
I assume that there is either an issue with the genserkins calculation or the parameter set is no fitting with my Puma. I'm owning 3 Puma arms from different productions (an old brown one (I guess before 1985), a white one when the company was just taken over by Stäubli (end of 80th - I guess 1988) and a newer one that is slightly different in the construction (from 1992 - I guess one of the last models). From the dimensions they all seems to be the same (or very similar - hard to measure with normal measurement possibilities).
Since the x,y having issues while the z seems to work as intended it looks like the parameters for joint 1 might cause trouble. But I can't find the issue there. I took the same parameters as in your hal file (same as you can find nearly everwhere in the net).
Any hints you can give to find the root cause.
Many thanks, Thomas
Please Log in or Create an account to join the conversation.
Time to create page: 0.302 seconds