1982 Matsuura MC-500v Retrofit
- chopper79
-
 Topic Author
- Offline
- Elite Member
-

Less
More
- Posts: 193
- Thank you received: 44
10 Mar 2017 13:18 - 10 Mar 2017 18:35 #89326
by chopper79
Replied by chopper79 on topic 1982 Matsuura MC-500v Retrofit
I will give it a go after I design a mount for the sensors. I will post my results.
Thanks
Thanks
Last edit: 10 Mar 2017 18:35 by chopper79.
Please Log in or Create an account to join the conversation.
- andypugh
-

- Offline
- Moderator
-

Less
More
- Posts: 19875
- Thank you received: 4642
10 Mar 2017 17:31 #89351
by andypugh
Replied by andypugh on topic 1982 Matsuura MC-500v Retrofit
Here is one I did. Drilled holes and epoxy.
goo.gl/photos/umzFVy4JqTYQJMcH9
Kapton tape to keep the leads off the base plate.
goo.gl/photos/umzFVy4JqTYQJMcH9
Kapton tape to keep the leads off the base plate.
The following user(s) said Thank You: chopper79
Please Log in or Create an account to join the conversation.
- chopper79
-
Topic Author
- Offline
- Elite Member
-
Less
More
- Posts: 193
- Thank you received: 44
10 Mar 2017 18:39 #89359
by chopper79
Replied by chopper79 on topic 1982 Matsuura MC-500v Retrofit
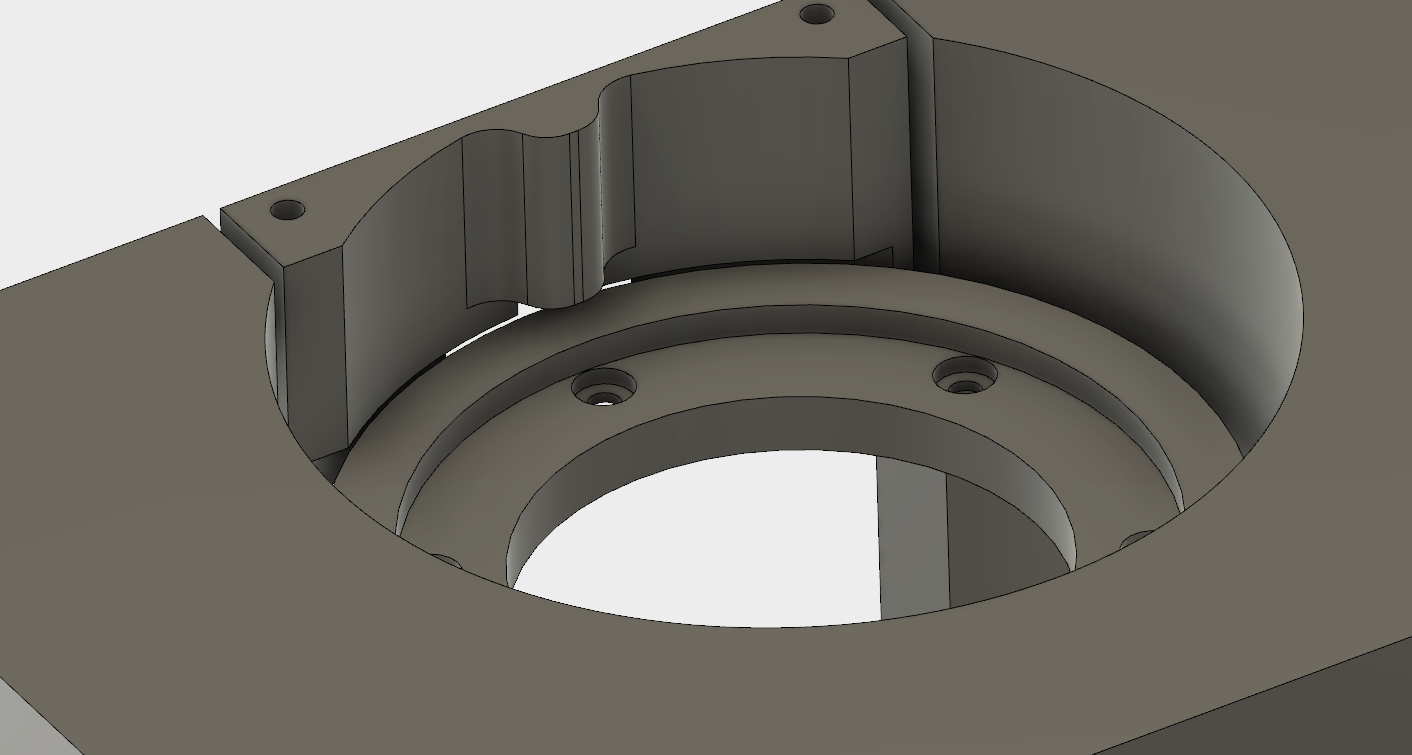
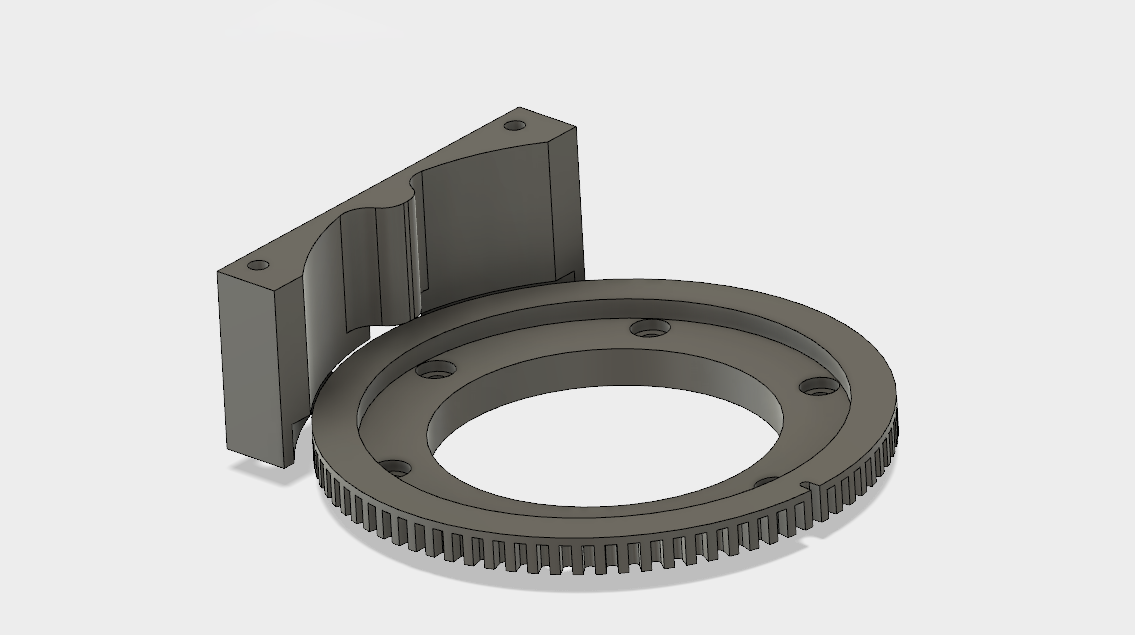
Have a basic idea on how I want to mount my sensors. Need to model a few more thing fist and then I will make the mount and see how it fits. The mount is the left piece with the two holes. This will allow me to mount one sensor on top to pick up my index mark and the other two sensors will have more then enough adjustment are for me to dial it in.
This is just a concept at the moment.
This is just a concept at the moment.
Please Log in or Create an account to join the conversation.
- andypugh
-
- Offline
- Moderator
-
Less
More
- Posts: 19875
- Thank you received: 4642
10 Mar 2017 19:27 #89364
by andypugh
Replied by andypugh on topic 1982 Matsuura MC-500v Retrofit
Looks like it will work. But it seems significantly more elaborate than necessary. Is it visible? If not, then some simple bits of bent metal would be perfectly adequate.
The following user(s) said Thank You: chopper79
Please Log in or Create an account to join the conversation.
- skunkworks
- Online
- Moderator
-
Less
More
- Posts: 350
- Thank you received: 153
10 Mar 2017 19:33 #89366
by skunkworks
Replied by skunkworks on topic 1982 Matsuura MC-500v Retrofit
Bits of bent metal.. Check!
electronicsam.com/images/matsuura/zsensor.JPG
electronicsam.com/images/matsuura/sensors1.jpg
electronicsam.com/images/matsuura/zsensor.JPG
electronicsam.com/images/matsuura/sensors1.jpg
The following user(s) said Thank You: chopper79
Please Log in or Create an account to join the conversation.
- chopper79
-
Topic Author
- Offline
- Elite Member
-
Less
More
- Posts: 193
- Thank you received: 44
10 Mar 2017 19:49 - 10 Mar 2017 19:52 #89370
by chopper79
Replied by chopper79 on topic 1982 Matsuura MC-500v Retrofit
I agree Andy and Skunk. I like to build things that fit locations and seem purpose built. I am very fond of simple solutions, but I need this mill to be able to run production and withstand the use over a long period of time. This is also the reason I made the gear. Could have made the timing pulley work, but it just did not feel right to me. Even though it would have worked fine.
If this fails then I will make a simple bracket with bent metal.
Oh and Andy.... No it is not visible to anyone else but is to me. I am kinda a pain in the a** when it come to stuff like that. Still not sure how my wife puts up with me.
If this fails then I will make a simple bracket with bent metal.
Oh and Andy.... No it is not visible to anyone else but is to me. I am kinda a pain in the a** when it come to stuff like that. Still not sure how my wife puts up with me.
Last edit: 10 Mar 2017 19:52 by chopper79.
Please Log in or Create an account to join the conversation.
- chopper79
-
Topic Author
- Offline
- Elite Member
-
Less
More
- Posts: 193
- Thank you received: 44
10 Mar 2017 22:28 - 10 Mar 2017 22:42 #89378
by chopper79
Replied by chopper79 on topic 1982 Matsuura MC-500v Retrofit
Well here is the final sensor mount design. Do the sensors generate any heat?
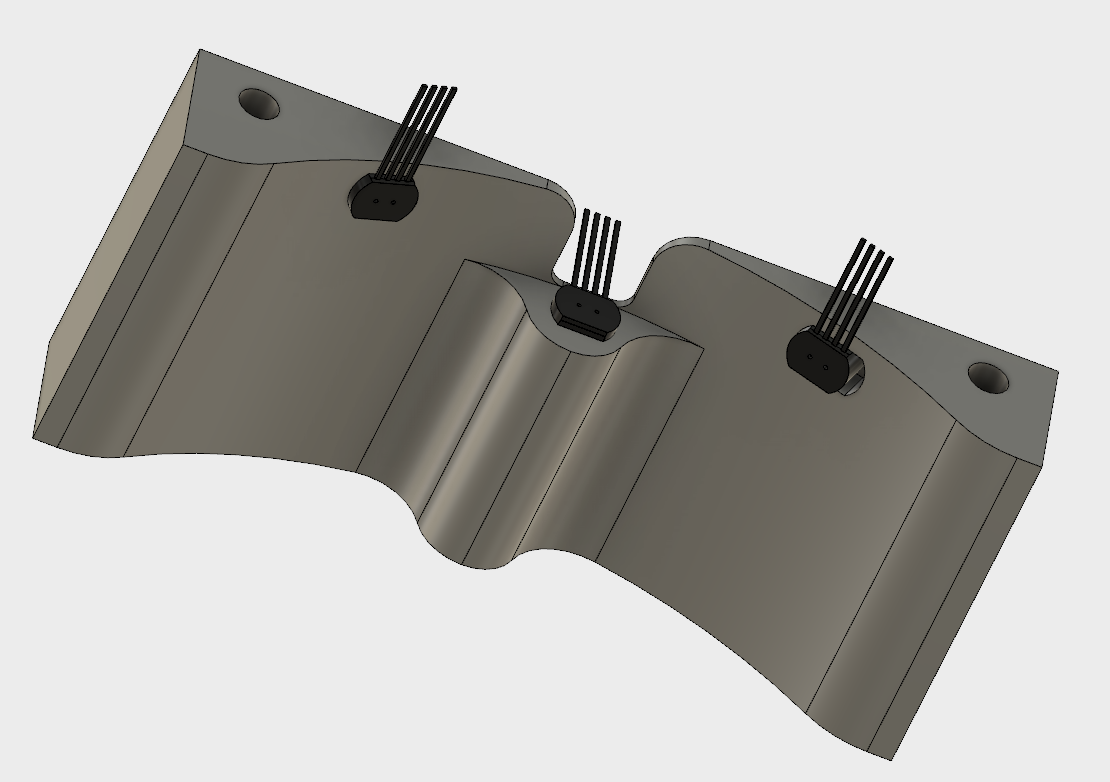
Does anybody see any issue with the placement here?
One sensor is on the edge of a tooth and the other sensor would be either between two teeth.

Does anybody see any issue with the placement here?
One sensor is on the edge of a tooth and the other sensor would be either between two teeth.
Last edit: 10 Mar 2017 22:42 by chopper79.
Please Log in or Create an account to join the conversation.
- chopper79
-
Topic Author
- Offline
- Elite Member
-
Less
More
- Posts: 193
- Thank you received: 44
11 Mar 2017 00:07 - 11 Mar 2017 00:09 #89386
by chopper79
Replied by chopper79 on topic 1982 Matsuura MC-500v Retrofit
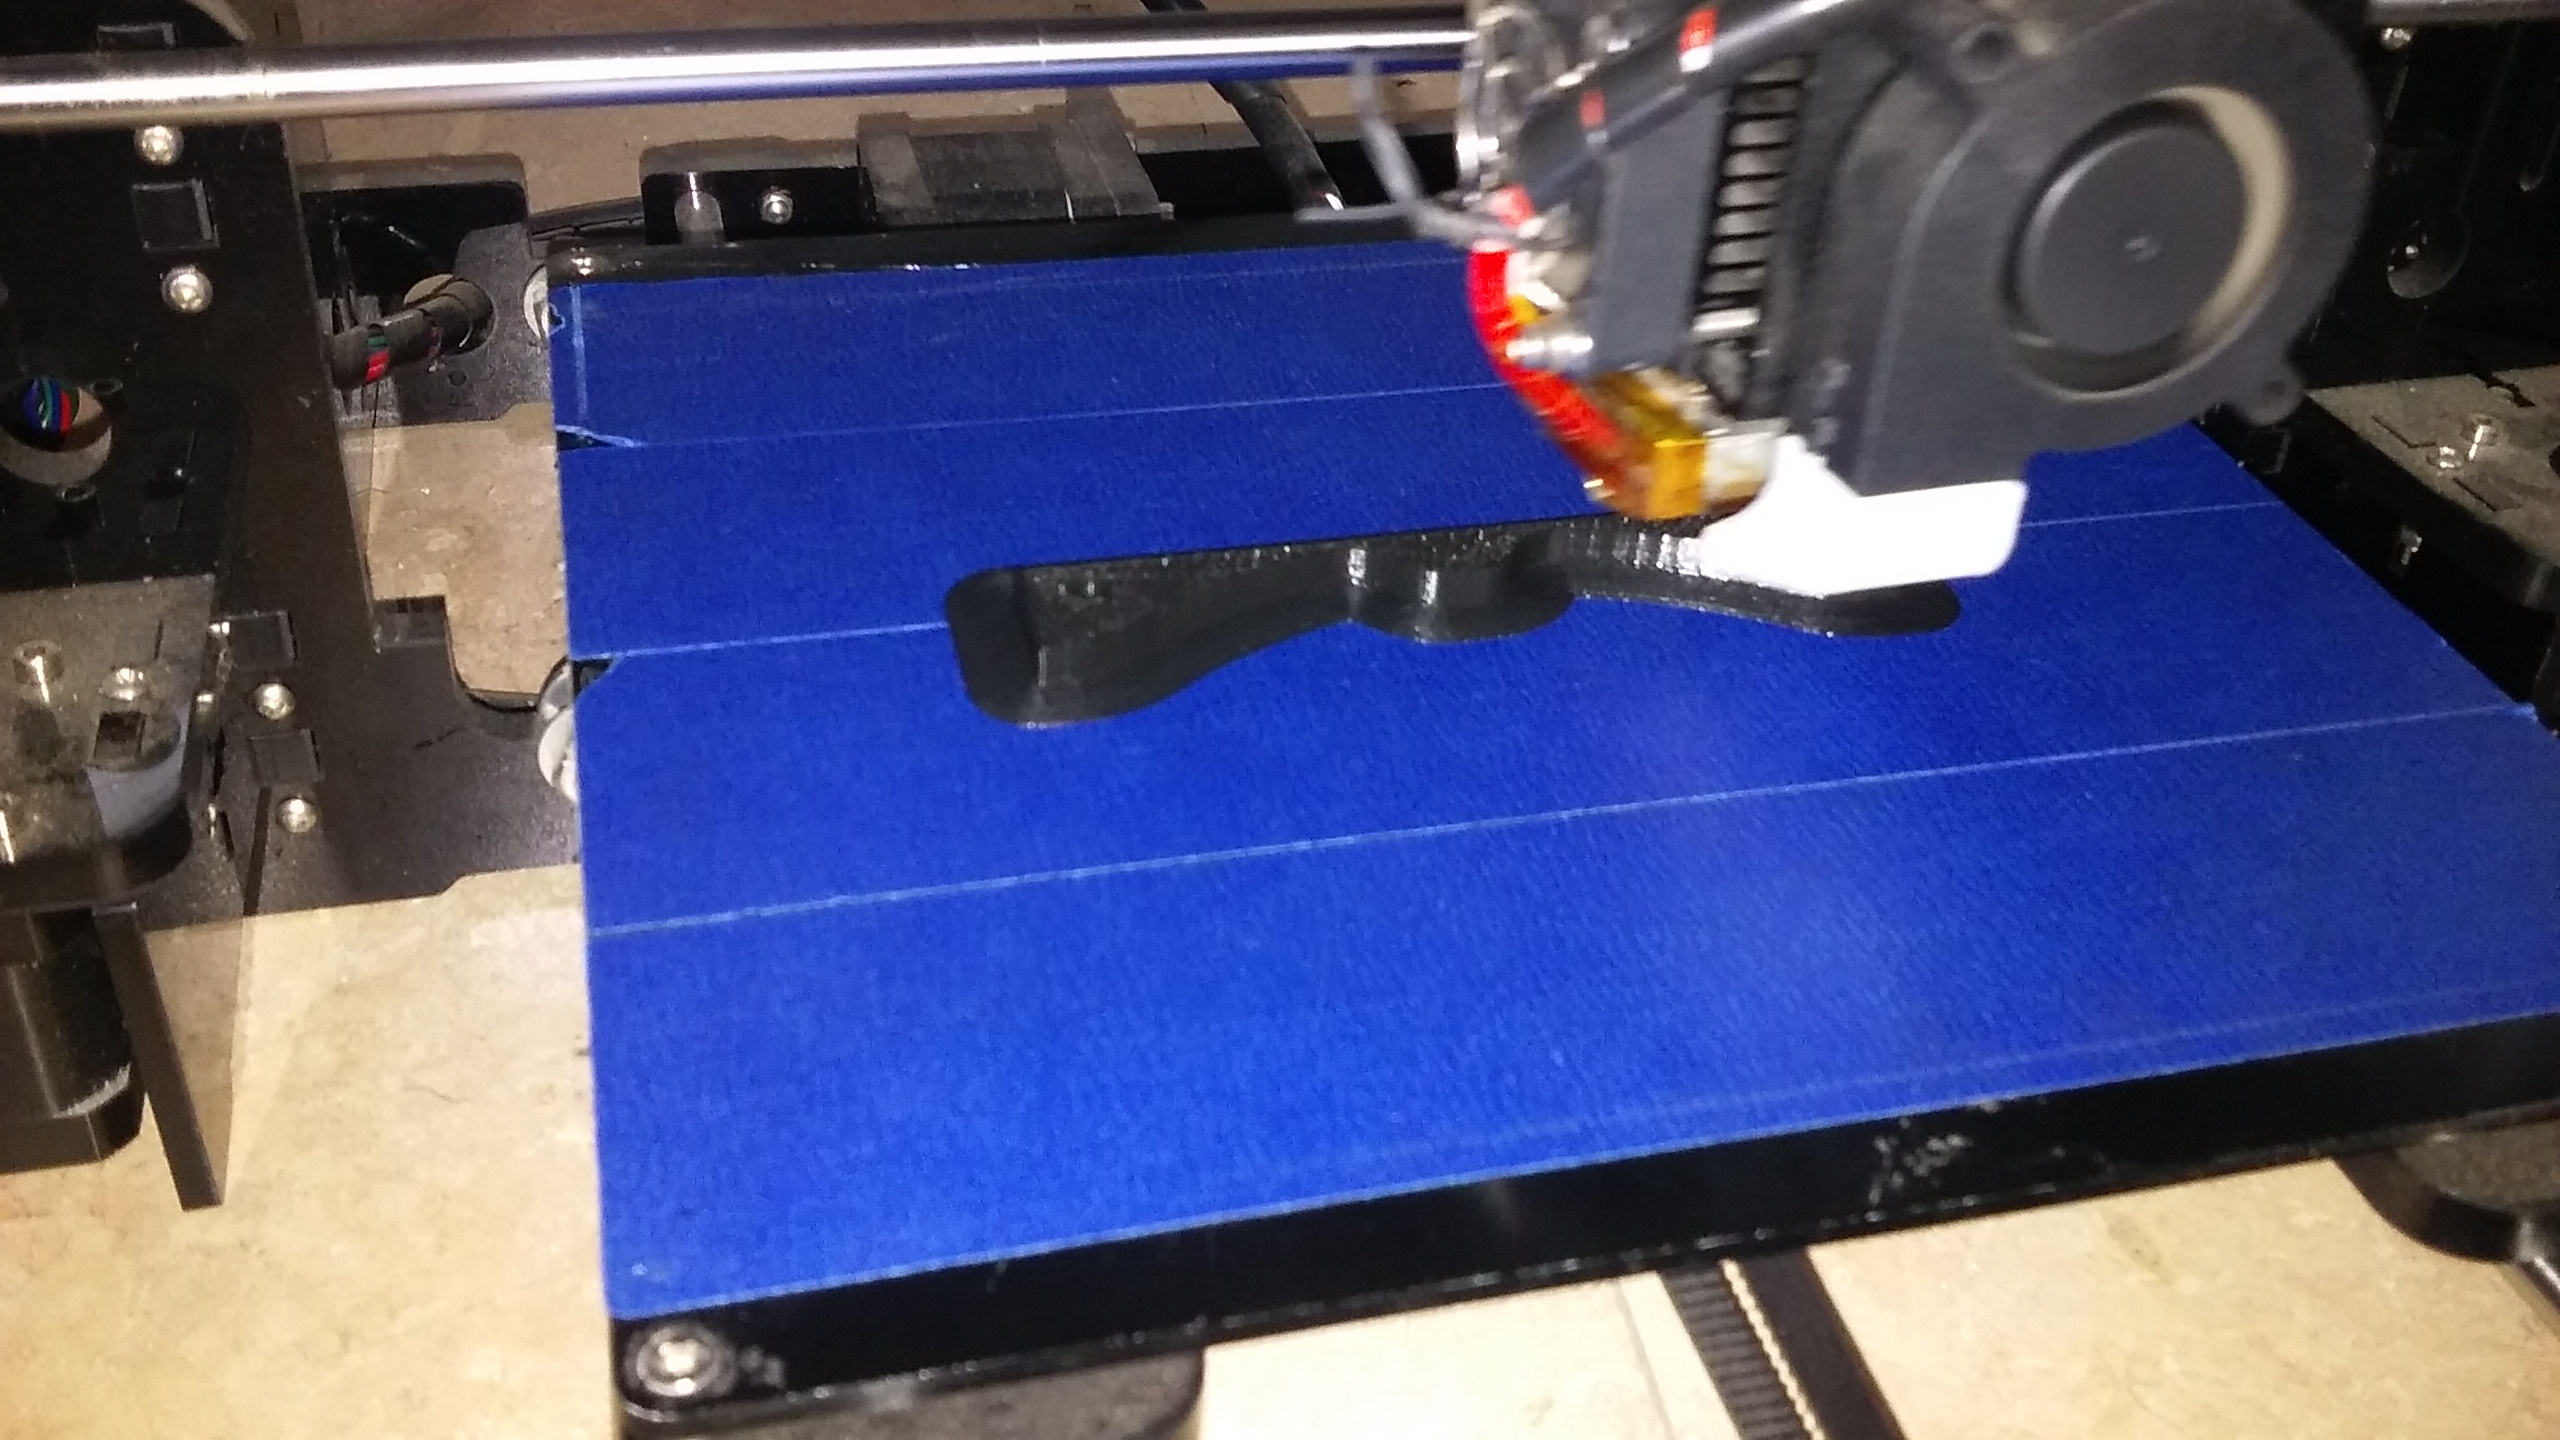
Before I make this from a block of aluminum I figured I would 3D print the part first to check fitment and such. This right here is one of the main reasons I have a 3D printer. It is cheaper to prototype in plastic then metal. The other reasons are to make little trinkets with my kids.
Heck I may just use the 3D printer to make this sensor mount for the real one. Use some additive manufacturing for the subtractive manufacturing machine.
Heck I may just use the 3D printer to make this sensor mount for the real one. Use some additive manufacturing for the subtractive manufacturing machine.
Last edit: 11 Mar 2017 00:09 by chopper79.
Please Log in or Create an account to join the conversation.
- andypugh
-
- Offline
- Moderator
-
Less
More
- Posts: 19875
- Thank you received: 4642
11 Mar 2017 00:40 #89389
by andypugh
It will be non-conductive, which is an advantage.
If I had a 3D printer (and I am often surprised that I don't) then I think I would seriously consider making bolt-on mounts for the sensors that way, at the very least.
Replied by andypugh on topic 1982 Matsuura MC-500v Retrofit
Heck I may just use the 3D printer to make this sensor mount for the real one.
It will be non-conductive, which is an advantage.
If I had a 3D printer (and I am often surprised that I don't) then I think I would seriously consider making bolt-on mounts for the sensors that way, at the very least.
Please Log in or Create an account to join the conversation.
- chopper79
-
Topic Author
- Offline
- Elite Member
-
Less
More
- Posts: 193
- Thank you received: 44
11 Mar 2017 00:49 #89390
by chopper79
Replied by chopper79 on topic 1982 Matsuura MC-500v Retrofit
I just may use the 3D print for the bracket. Most of the time I use it for prototyping so I can make adjustments if needed before any chips fly. I agree that making brackets like this and others is a great use of this type of technology as well. I will post results when the print is finished.
If the bracket works well then I will post the files for it also just in case anyone else wants to make one for their Matsuura Mc-500v2
If the bracket works well then I will post the files for it also just in case anyone else wants to make one for their Matsuura Mc-500v2
Please Log in or Create an account to join the conversation.
Time to create page: 0.425 seconds