Search Results (Searched for: )
- tommylight

01 Jun 2026 01:32
Replied by tommylight on topic Differential encoder hard crashes the PC MESA7i77
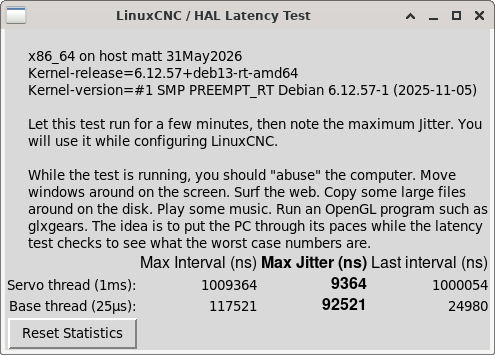
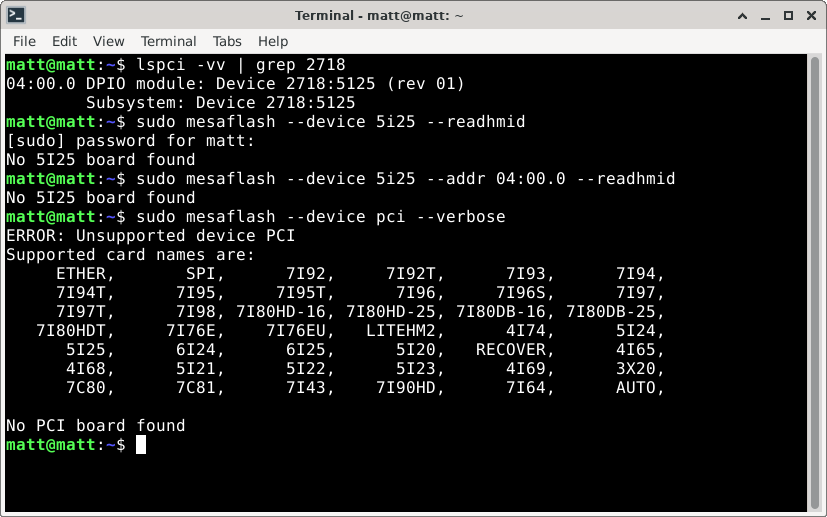
Differential encoder hard crashes the PC MESA7i77
Category: Driver Boards
")
- tommylight
01 Jun 2026 01:28
Replied by tommylight on topic Ethernet connection to Mesa 7i76e disconnecting on its own after one minute
Ethernet connection to Mesa 7i76e disconnecting on its own after one minute
Category: Plasmac
- rodw

01 Jun 2026 01:23
- rodw
01 Jun 2026 00:56
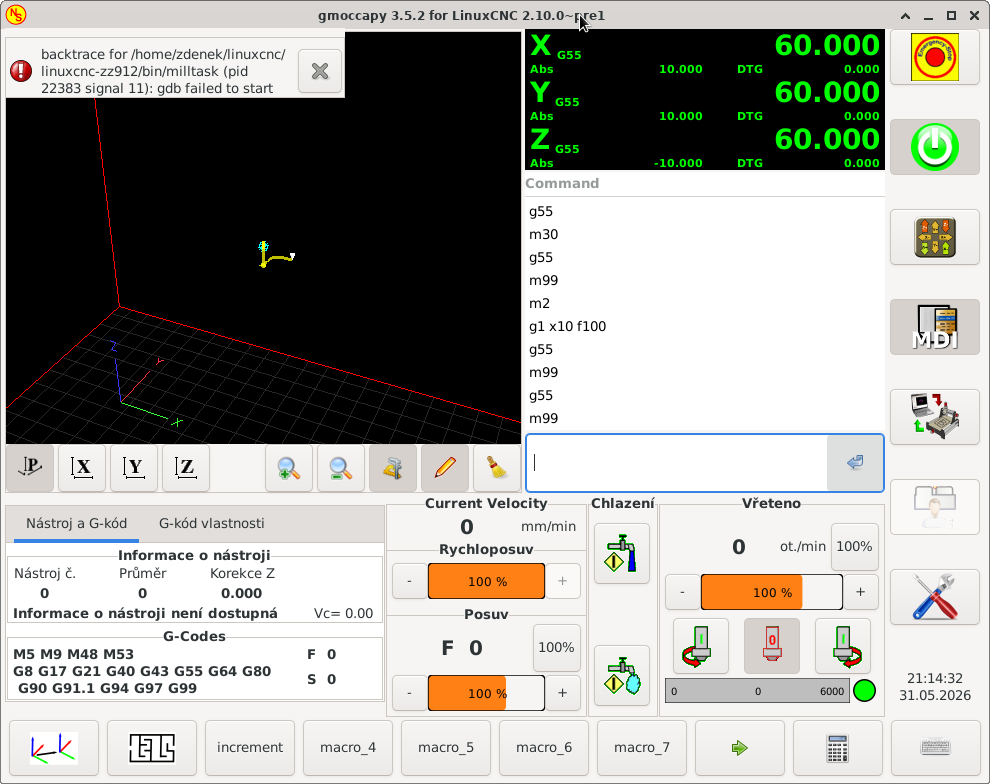
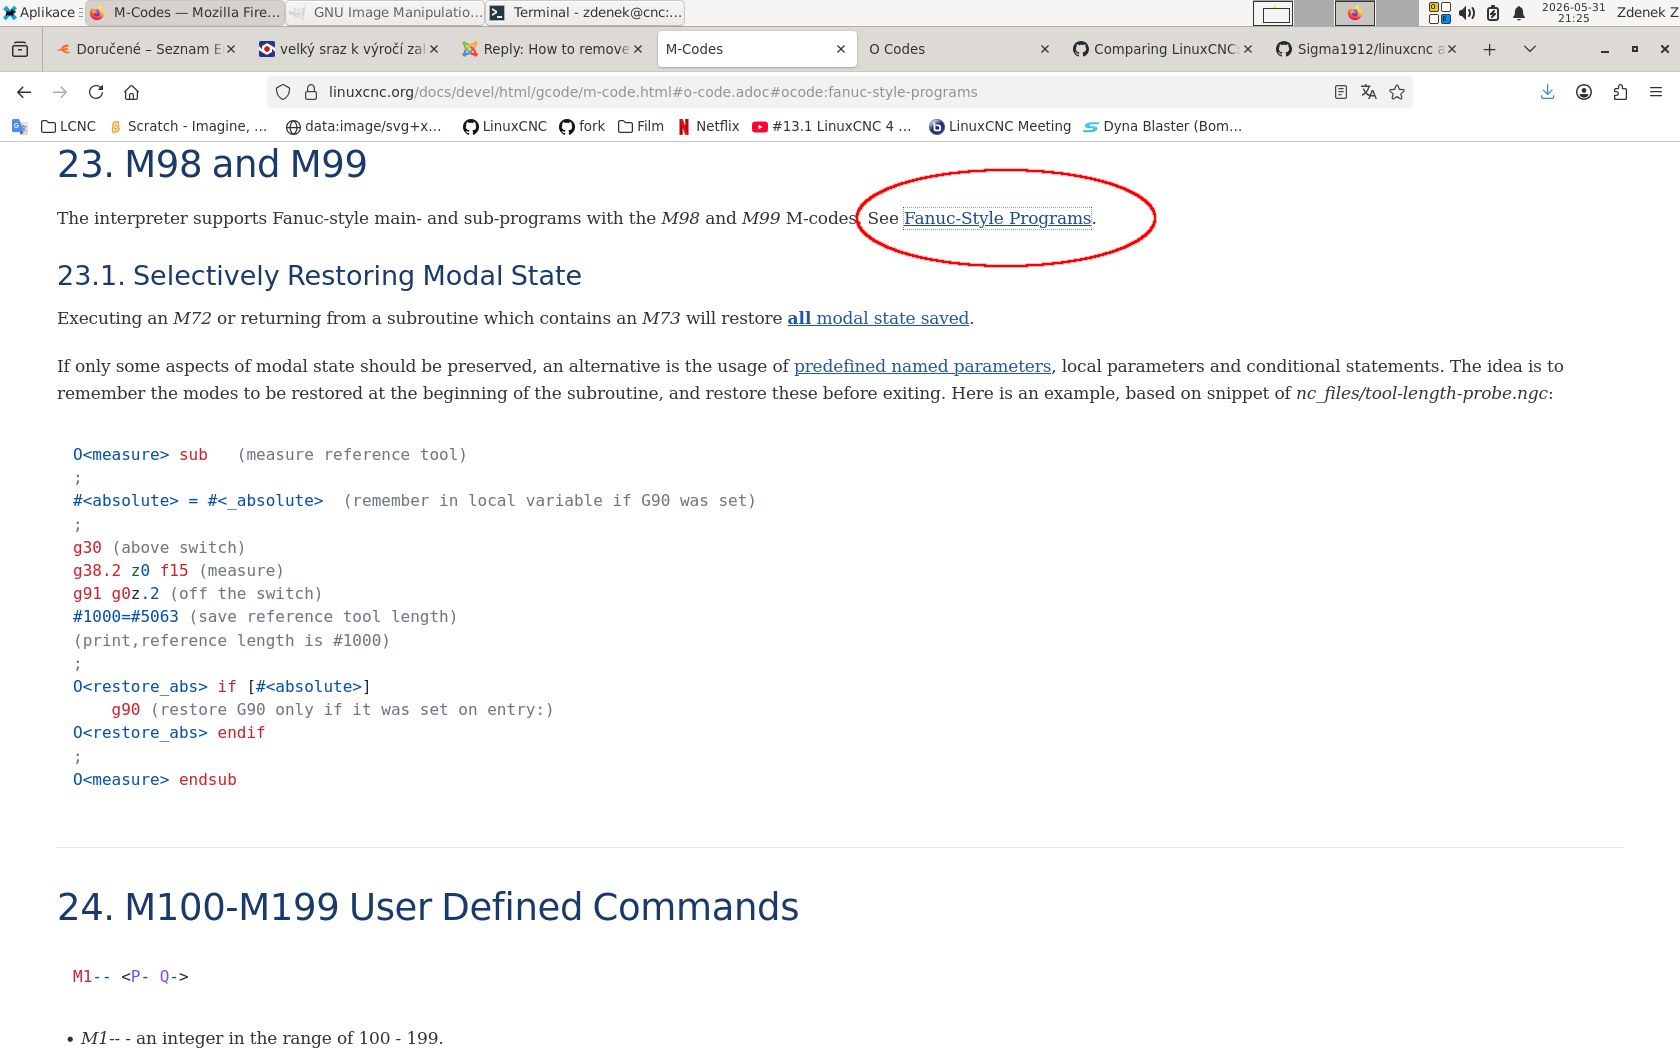
Replied by rodw on topic How to remove automatic g54 after M2/M30 ?
How to remove automatic g54 after M2/M30 ?
Category: General LinuxCNC Questions
- rodw
01 Jun 2026 00:43
Replied by rodw on topic LCEC creating Danfoss VFD config
LCEC creating Danfoss VFD config
Category: EtherCAT
- rodw
01 Jun 2026 00:34
- grossm5000
- grossm5000
31 May 2026 22:10
Replied by grossm5000 on topic Differential encoder hard crashes the PC MESA7i77
Differential encoder hard crashes the PC MESA7i77
Category: Driver Boards
- PCW

31 May 2026 21:18
- grossm5000
- grossm5000
31 May 2026 19:59 - 31 May 2026 20:13
Replied by grossm5000 on topic Differential encoder hard crashes the PC MESA7i77
Differential encoder hard crashes the PC MESA7i77
Category: Driver Boards

- andrax

31 May 2026 19:42
Replied by andrax on topic LinuxCNC 2.9 / Debian 12 RT – EtherCAT Master Setup für 750W Servo gesucht
LinuxCNC 2.9 / Debian 12 RT – EtherCAT Master Setup für 750W Servo gesucht
Category: Deutsch
- Aciera

31 May 2026 19:40
Replied by Aciera on topic How to remove automatic g54 after M2/M30 ?
How to remove automatic g54 after M2/M30 ?
Category: General LinuxCNC Questions
- zz912

31 May 2026 19:28
Replied by zz912 on topic How to remove automatic g54 after M2/M30 ?
How to remove automatic g54 after M2/M30 ?
Category: General LinuxCNC Questions
- Aciera
31 May 2026 19:13 - 31 May 2026 19:16
Replied by Aciera on topic How to remove automatic g54 after M2/M30 ?
How to remove automatic g54 after M2/M30 ?
Category: General LinuxCNC Questions
- Lcvette

31 May 2026 19:02
Replied by Lcvette on topic Probe Basic Fusion360/FreeCAD manaual tool change workfolow?
Probe Basic Fusion360/FreeCAD manaual tool change workfolow?
Category: QtPyVCP
- grossm5000
- grossm5000
31 May 2026 19:01
Replied by grossm5000 on topic Differential encoder hard crashes the PC MESA7i77
Differential encoder hard crashes the PC MESA7i77
Category: Driver Boards
Time to create page: 1.456 seconds