Gmoccapy - A new screen for linuxcnc
- jbunch
- Offline
- Senior Member
-

- Posts: 79
- Thank you received: 3
I vote for the touch screen fix. Also check what you did for the spindle for,rev,stop as these seem to work ok.
jim
Please Log in or Create an account to join the conversation.
- newbynobi
-

- Offline
- Moderator
-

- Posts: 1930
- Thank you received: 393
do you hide the cursor?
On spindle stuff I have not made changes, did you update meanwhile?
Norbert
Please Log in or Create an account to join the conversation.
- verser
-

- Offline
- Senior Member
-

- Posts: 78
- Thank you received: 69
Norbert, thank you so much for the Auto Tool Measurement system! This is a very convenient way of manual tool change!
Please Log in or Create an account to join the conversation.
- Tom_R2E3
- Offline
- Junior Member
-

- Posts: 33
- Thank you received: 1
Think I mentioned it before but it would be useful to see what the "block height" is set to. Sometimes I cant remember if I've set it or not, and Gmoccapy lets you run a program without setting a block height at all. Maybe it could be displayed in the "tool information" box, along side the tool Z offset?
Please Log in or Create an account to join the conversation.
- newbynobi
-

- Offline
- Moderator
-

- Posts: 1930
- Thank you received: 393
Good suggestion, I could hide the label, if no tool measurement is set in the INI.Think I mentioned it before but it would be useful to see what the "block height" is set to. Sometimes I cant remember if I've set it or not, and Gmoccapy lets you run a program without setting a block height at all. Maybe it could be displayed in the "tool information" box, along side the tool Z offset?
What about a hal pin, if TRUE, gmoccapy will force you to enter the block hight on program start?
Default of that Pin would be FALSE. So you may change the behavior using a custom M100 command in your gcode, or do you prefer if I add a check button on the settings page?
I am planing to connect a digital caliper to the PC and just measure the hight Push the send button on the caliper and set this way the block hight. I just have to find out how to get the value through the USB / RS232 connection. Unfortunately I have to many projects at once at the moment, as my wife forced me to build a pool
Norbert
Please Log in or Create an account to join the conversation.
- pippin88
- Offline
- Elite Member
-

- Posts: 261
- Thank you received: 50
I suggest an option in the settings page for Touch screen vs mouse and keyboard.
Touch screen benefits from buttons rather than sliders etc, and needs the different focus behaviour.
I like sliders because I use mouse and keyboard.
Please Log in or Create an account to join the conversation.
- DaBit
- Offline
- Elite Member
-

- Posts: 203
- Thank you received: 19
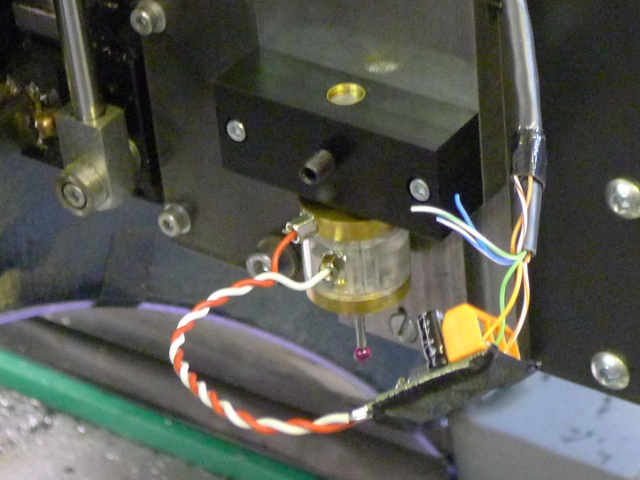
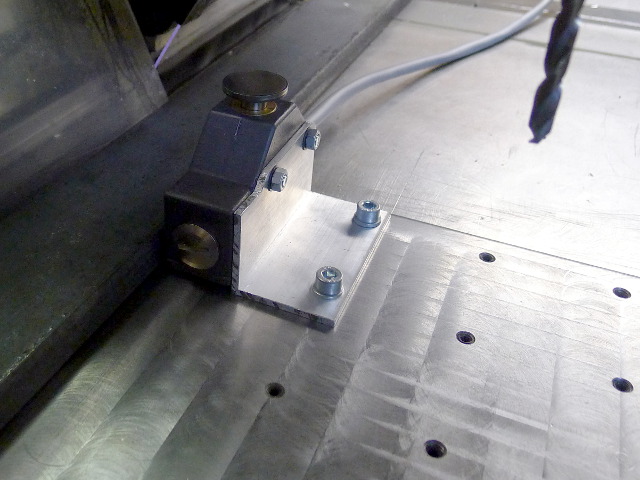
Tool length is currently measured relative from the spindle nose and stored in the tooltable. The M6 remap also uses that information to initially rapid towards the switch; a length variation of more than 30mm is unlikely for the same tool and if that happens it is a high diameter indexed endmill that will survive hitting the tool probe switch at rapid speed. Probing motion is therefore; rapid down to 30mm above switch, 'high' speed (600mm/min or so) downwards until probe triggers, slow up to latch the position, rapid up to most positive Z. One fluent down-up movement.
When I start milling I either first load a tool (either using the gmoccapy interface of by simply entering e.g. T36M6, G43 in MDI) and do a manual touchoff in Z using the 'piece of paper' or 'roll a cylinder between work and mill' method, or I use a touchprobe that also uses the spindle nose as reference to determine workpiece zero. Having to measure and enter a 'block height' sounds like a pain in the ass to me, and inaccurate too.
Old pictures:
Currently working on an all-steel wireless touchprobe that should be much more accurate. Plastic is not stable and stiff enough to be used in a touchprobe imho.
There is one thing that I want to change though: use a reference that results in negative tool lengths. G43 is cancelled at M2/M30/a lot of other reasons and then a rapid to Z=15 crashes the mill into the workpiece with positive compensation lengths. Simply picking the reference to be '100,00mm under the spindle nose' is probably sufficient.
Please Log in or Create an account to join the conversation.
- newbynobi
-

- Offline
- Moderator
-

- Posts: 1930
- Thank you received: 393
That is one of the very big advantages of remap, everybody can modify the code to fit best his needs!I am using the tool height measurement too, but I decided to modify the code quite a bit. I never got that 'block height' idea.
About the accuracy I do not agree at all, that your way is more accurate. The digital caliper I do use has an accuracy of 0.03 mm and one time "calibrated the touch probe height" the accuracy is not worse as the way you do the measurement. The block height solution has the benefit, that you do not need a reference tool. And you zero will change according to the fixture you use. One time in a chuck and next part on the table, is just one block height measurement. That is much faster than doing a touch of with paper.
Would you please send me the code of your touch off macro page? I thing that would be a good beginning to introduce some stuff to standard. Or better, just write a WIKI page about how you did it.
Norbert
Please Log in or Create an account to join the conversation.
- DaBit
- Offline
- Elite Member
-

- Posts: 203
- Thank you received: 19
That is one of the very big advantages of remap, everybody can modify the code to fit best his needs!
That is the advantage of the entire LinuxCNC
About the accuracy I do not agree at all, that your way is more accurate. The digital caliper I do use has an accuracy of 0.03 mm and one time "calibrated the touch probe height" the accuracy is not worse as the way you do the measurement.
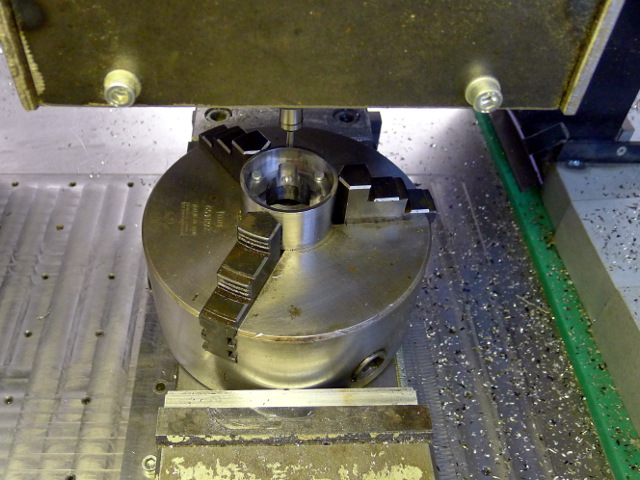
If you have a convenient method to measure that height and if it is indeed a block you are right. But I also often have existing parts that need modification or situations like this:
Hard to fit a caliper anyway, and the Z reference surface I needed to touchoff to is inside the workpiece.
Using a touchprobe is much more versatile. In fact it is the same as 'measuring the block height' since when I know the trigger point in machine-Z I also know the 'block height'. Too bad my current one is not accurate and not reliable. Luckily I got it for about the money I would need to pay for the stylus only so that's not a big issue.
But by not forcing to have a known 'block height' I am flexible in determining how I want to set the Z reference. Touchprobe, manual, helper tool, calipers, etc. If Z is correct with any random tool in the spindle it will be correct with any other tool too.
Anyway, different people, different opinions. The beauty of LinuxCNC is that I can make things work the way I want them to be.
Would you please send me the code of your touch off macro page? I thing that would be a good beginning to introduce some stuff to standard. Or better, just write a WIKI page about how you did it.
It is just a couple of buttons that call O-word subroutines. It is a little inconvenient that gmoccapy stays in MDI mode after the GladeVCP panel called an o-word subroutine BTW.
Maybe that wiki-thing is best. After all it is not gmoccapy specific; it could be embedded into axis just as easily. The only 'problem' is maybe that I stole the icons from that Mach3 touchoff page screenshot shown a few pages back.
Please Log in or Create an account to join the conversation.
- MrFluffy
- Offline
- New Member
-

- Posts: 7
- Thank you received: 0
I noticed the resolution minimum is 976, my monitor is only capable of 800x600 so I have dropped the limits a little in the glade files and its working for me fine but I wont mention any dimensional problems if they occur as they are of my own making but for me its happy at 800x600 even if its not the optimal experience. I will look at tweaking it for myself by removal of a few bits I dont need as per usual.
When I started trying gmoccapy I tried to install onscreen, adding lots of the dependancies and building some components from source, but I got stuck at a late stage when I had a onscreen binary but it had dbus and other errors on startup but I noticed earlier in this thread matchbox-keyboard was supported now (thanks) so took the path of least resistance. Gnoccapy wasnt working at all with this, but I found if I removed onscreen completely, matchbox-keyboard started to work, so if someone else is having problems like this, make sure onscreen is removed as the code will fire up the broken one instead.
Second one, the sound files are hard linked to the ubuntu location, "/usr/share/sounds/ubuntu/stereo/dialog-question.ogg" etc, if sound is wanted the path can be changed in the /usr/bin/gmoccapy file eg. I dont think theres a gui way to do this, but I could have missed it.
self.alert_sound = "/usr/share/sounds/ubuntu/stereo/bell.ogg"
self.error_sound = "/usr/share/sounds/ubuntu/stereo/dialog-question.ogg"
Now i just have to find the sounds somewhere (raid my wifes ubuntu laptop perhaps), and fit a speaker to my machine in the display cabinet
Just tiny comments. Thanks for your work.
Please Log in or Create an account to join the conversation.


