What do you really get for a $350 desk top engraver ?
- machinedude
-
 Topic Author
- Offline
- Platinum Member
-

Less
More
- Posts: 715
- Thank you received: 312
14 Sep 2024 11:02 #310135
by machinedude
Replied by machinedude on topic What do you really get for a $350 desk top engraver ?
i also think there are 2 different versions of the closed loop drives. i see a price change on these.
i think the more expensive of the two has more tuning features and i have the lesser of the two which does not have some of the same settings. I only have 6 settings in the Gain adjustment subcategory. i have a torque feed forward setting that is there to take some of the strain off the PID loops
so all i have in the gain adjustment is
position loop Kp
velocity loop Kp
velocity loop Ki
torque feed forward
position loop filter
velocity loop filter
it seems like the torque feed forward is a % value and taking a guess it looks like it matches closed loop holding current in the extended setup section.
it seems like the closed loop holding current setting is a way to take load off of the PID at the expense of operation temp of the motors and efficiency on the power consumption.
at his point i am not seeing anything that would adjust the following error unless it would be the filter settings? i have no settings in the speed, torque control of the main section? maybe because this dive is not the higher end version?
Please Log in or Create an account to join the conversation.
- machinedude
-
 Topic Author
- Offline
- Platinum Member
-

Less
More
- Posts: 715
- Thank you received: 312
14 Sep 2024 18:22 - 14 Sep 2024 18:30 #310160
by machinedude
Replied by machinedude on topic What do you really get for a $350 desk top engraver ?
i played around and tried my best to scientific but putting my hand on the spindle and jogging things around ended up doing me the most good 
i did not see much of anything adjusting control settings. so the only thing helpful was the max position following error getting reduced and the closed loop holding current percentage getting changed.
i can tell just by the sound of things and the vibration difference things should be a little better than before.
do some test cutting and cross my fingers and hope that was enough
Last edit: 14 Sep 2024 18:30 by machinedude.
The following user(s) said Thank You: tommylight
Please Log in or Create an account to join the conversation.
- machinedude
-
 Topic Author
- Offline
- Platinum Member
-

Less
More
- Posts: 715
- Thank you received: 312
14 Sep 2024 22:00 #310171
by machinedude
Replied by machinedude on topic What do you really get for a $350 desk top engraver ?
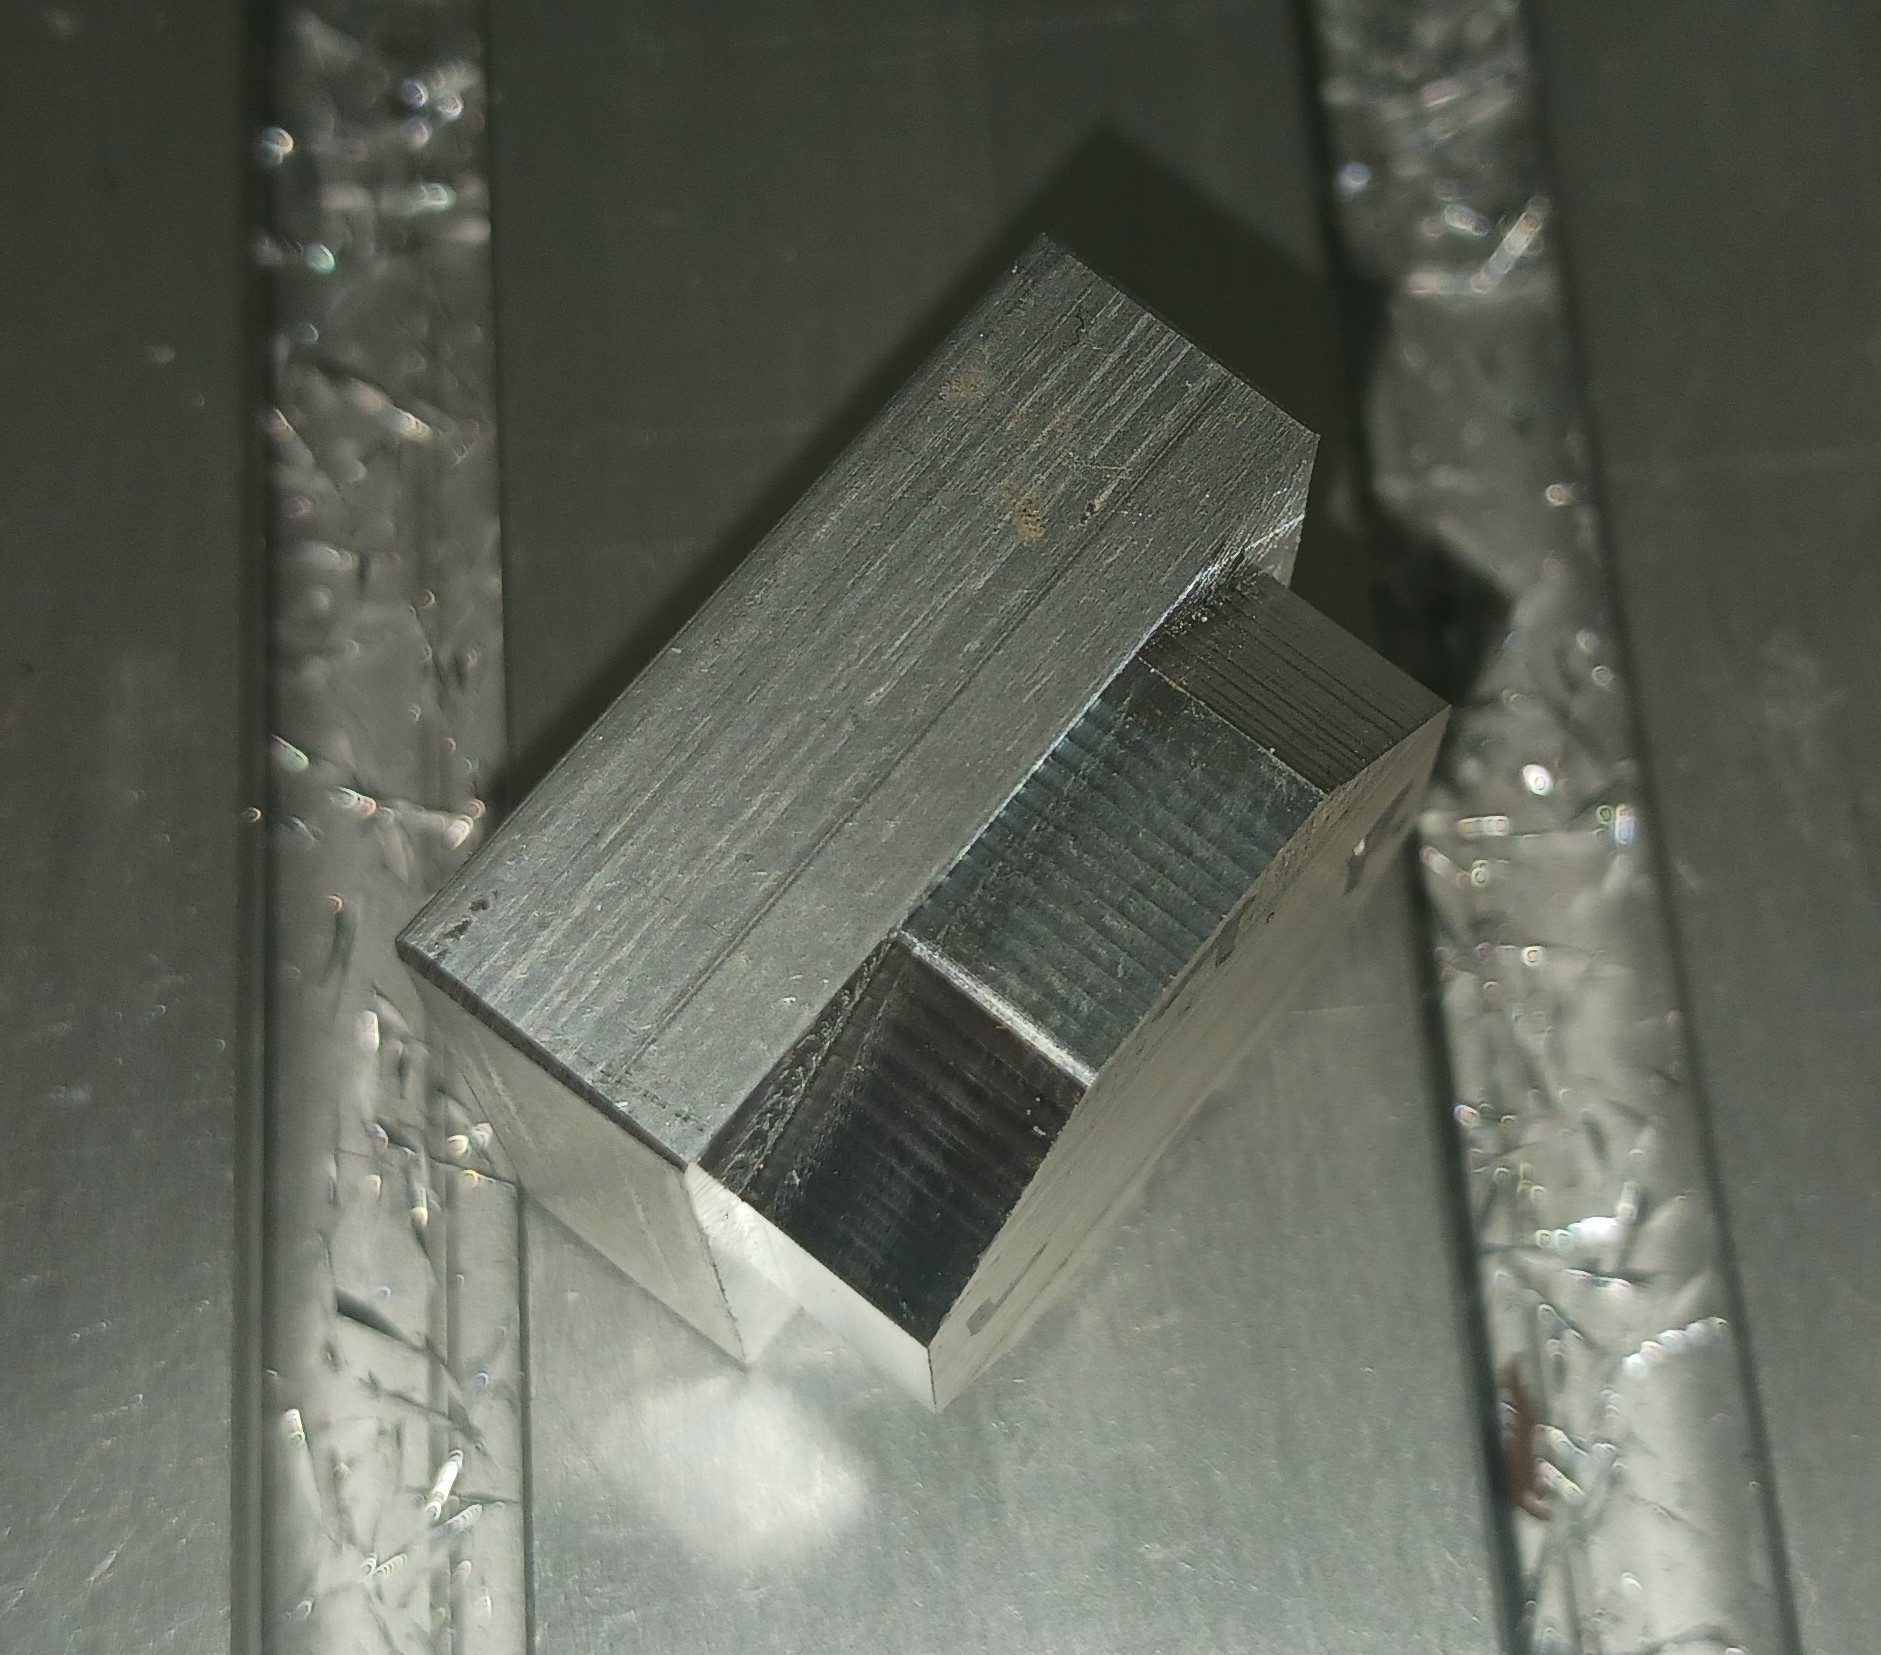
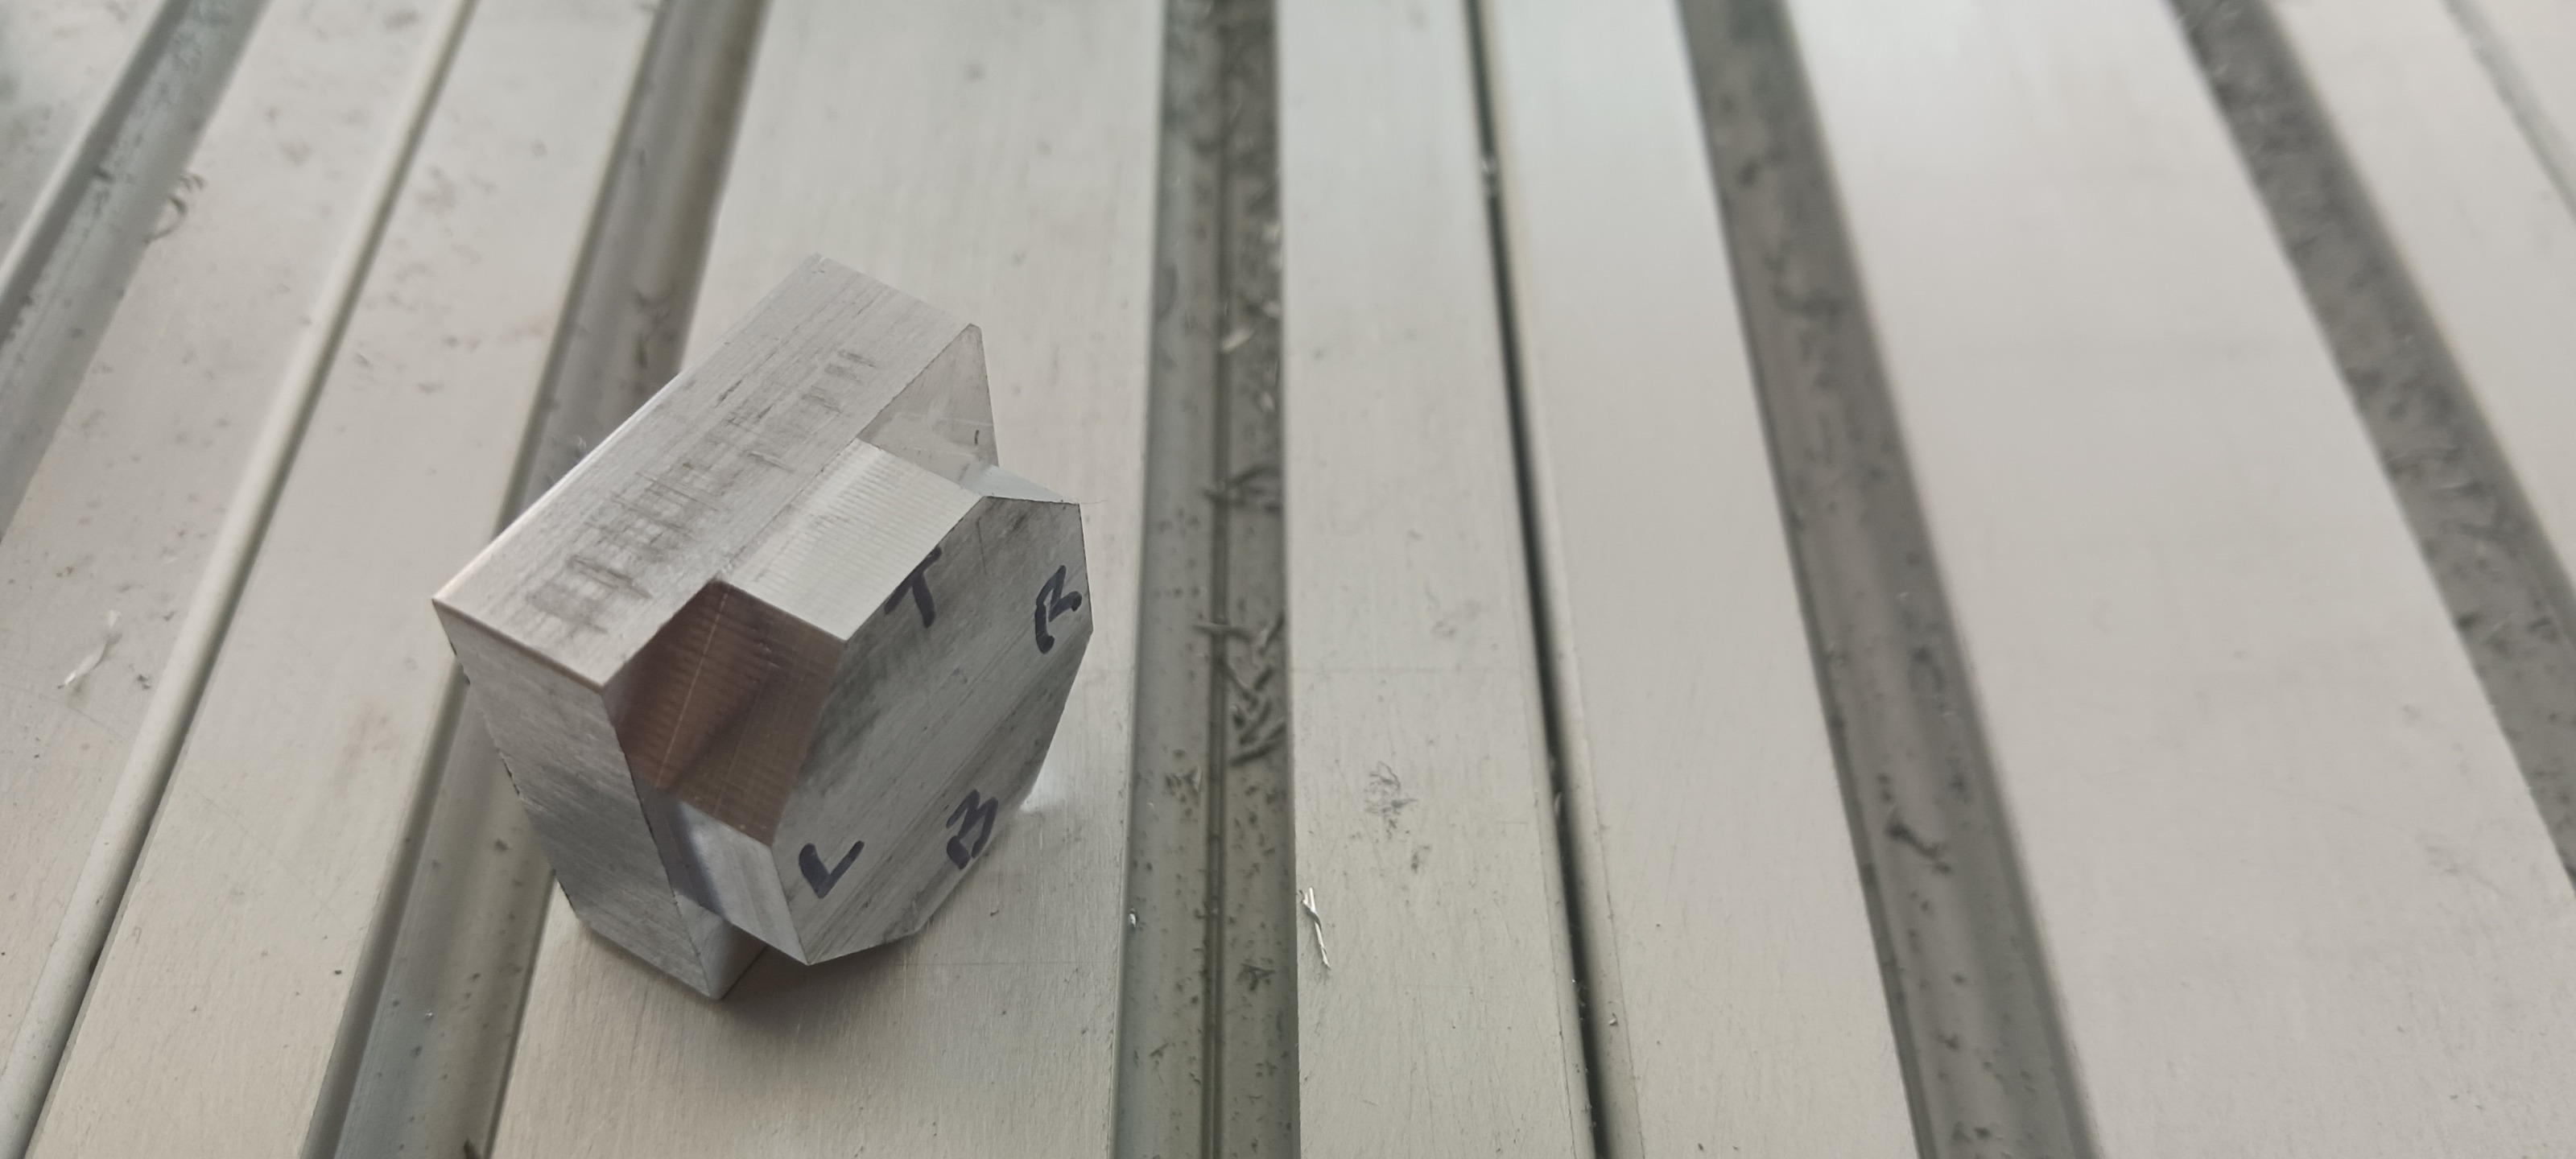
just a quick test. things look a lot more consistent. i just wanted something that would cut the same under different conditions. the cutting was 1/4 deep with a .020 step over at 50 IPM with the final pass @ 40 IPM the starting stock was 1 inch x 1 inch x 1/2 the hex is ,924 and took about a minute flat to cut. I'm' sure I can rough a little bit more aggressive and i light finish pass should help with a better finish.
a step in the right direction for sure, i would think a belt drive machine is going to hit the wall at some point on surface finish.
a step in the right direction for sure, i would think a belt drive machine is going to hit the wall at some point on surface finish.
Attachments:
Please Log in or Create an account to join the conversation.
- spumco
- Offline
- Platinum Member
-

Less
More
- Posts: 1974
- Thank you received: 808
15 Sep 2024 02:55 #310175
by spumco
Replied by spumco on topic What do you really get for a $350 desk top engraver ?
I think if you run the same toolpath at the same RPM but lower feedrate - i.e lower feed per tooth - you'll be able nail down whether the pattern is mechanical or motor/software.
If the pattern is the same - same 'pitch' - then it's probably the belt system that's causing it. Either from the belt pitch, and you've got mechanical 'noise' from the pulley teeth, or you're seeing peaks/valleys from belt resiliance as it stretches and snaps back in to the cut.
That, plus flexibility in other components, will result in chatter and surface finish issues.
Please Log in or Create an account to join the conversation.
- machinedude
-
 Topic Author
- Offline
- Platinum Member
-

Less
More
- Posts: 715
- Thank you received: 312
15 Sep 2024 07:32 #310179
by machinedude
Replied by machinedude on topic What do you really get for a $350 desk top engraver ?
i messed with capture feature but i think i should probably be do that with a motors off the machine. the higher end closed loop systems seem have a inertia ratio feature that you can test under load but these don't seem to have this feature.
without detailed information on the settings and how it relates to the settings in the software i felt like i was flying blind honestly. i never did see a simple wave form and seen what looked like oscillation but i have no idea if i was even close to using things the right way.? i thought i seen something about the jogging with motion studio for only for bench testing with no laod?
without detailed information on the settings and how it relates to the settings in the software i felt like i was flying blind honestly. i never did see a simple wave form and seen what looked like oscillation but i have no idea if i was even close to using things the right way.? i thought i seen something about the jogging with motion studio for only for bench testing with no laod?
Please Log in or Create an account to join the conversation.
- machinedude
-
 Topic Author
- Offline
- Platinum Member
-

Less
More
- Posts: 715
- Thank you received: 312
15 Sep 2024 09:55 #310186
by machinedude
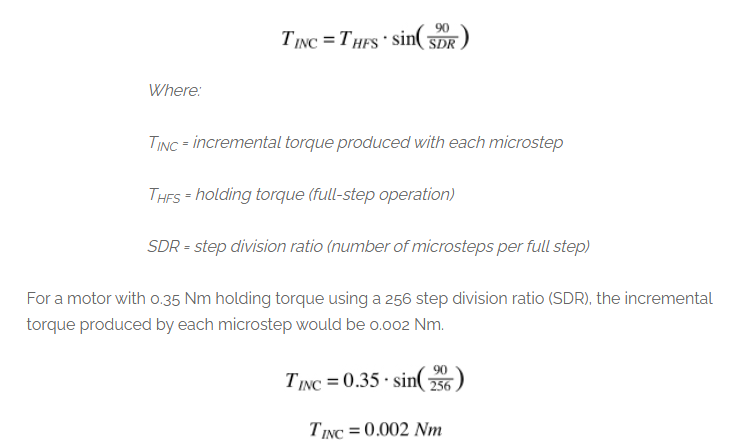
after testing one thing was clear the most improvement came from added torque. i found this formula for torque vs micro stepping. i started with 4,000 and went up to 12,800 to test for resolution problems and did not see any change between to two.
using this formula i would have 3.2 times more the torque running at the 4,000 micro steps setting compared to 12,800
i need to test more with this and see what i figure out.
Replied by machinedude on topic What do you really get for a $350 desk top engraver ?
after testing one thing was clear the most improvement came from added torque. i found this formula for torque vs micro stepping. i started with 4,000 and went up to 12,800 to test for resolution problems and did not see any change between to two.
using this formula i would have 3.2 times more the torque running at the 4,000 micro steps setting compared to 12,800
i need to test more with this and see what i figure out.
Attachments:
Please Log in or Create an account to join the conversation.
- machinedude
-
 Topic Author
- Offline
- Platinum Member
-

Less
More
- Posts: 715
- Thank you received: 312
15 Sep 2024 23:08 #310224
by machinedude
Replied by machinedude on topic What do you really get for a $350 desk top engraver ?
i set everything at @ 2,000 micro steps and cut another test piece. The finish seen no real difference in cut quality, but the current settings were a lot more responsive. so that part makes sense. the X axis seems to work really smooth, and the tandem Y runs better but still needs some more help.
Are there any tip or tricks for getting a tandem axis tuned? it seems like it is a lot harder to get settled into.
Are there any tip or tricks for getting a tandem axis tuned? it seems like it is a lot harder to get settled into.
Please Log in or Create an account to join the conversation.
- spumco
- Offline
- Platinum Member
-

Less
More
- Posts: 1974
- Thank you received: 808
16 Sep 2024 03:58 #310229
by spumco
This will get the inertia in the ballpark, and the values can be copied to the other motor. From then on adjust the same on both motors.
This may be fairly easy, or it could be a royal pain - just depends on how the hardware is assembled.
Replied by spumco on topic What do you really get for a $350 desk top engraver ?
About the only thing I've seen that was reasonably successful was to disconnect the gantry from the motor to be tuned, and attach half the gantry weight to that motor's carriage.Are there any tip or tricks for getting a tandem axis tuned? it seems like it is a lot harder to get settled into.
This will get the inertia in the ballpark, and the values can be copied to the other motor. From then on adjust the same on both motors.
This may be fairly easy, or it could be a royal pain - just depends on how the hardware is assembled.
Please Log in or Create an account to join the conversation.
- machinedude
-
 Topic Author
- Offline
- Platinum Member
-

Less
More
- Posts: 715
- Thank you received: 312
17 Sep 2024 06:25 #310292
by machinedude
Replied by machinedude on topic What do you really get for a $350 desk top engraver ?
i did find a dip switch setting that made a difference. SW8 is a pulse filter on is 10ms off is 1.5ms mine were off. After i turned that on the set point signal smoothed out a lot.
one other thing i found was the control loop sets based on the peak current rotary switch. and even if you want to change those the drive will default back when the power is cycled. i did have mine set at 6 but 9 is a better choice based on what the manual is saying. 9 should tighten up the position error signal.
i think the drive knows the power supply voltage and sets your current based on supply voltage. @ 36V i get 4,8A, the drive has a max of 7A but mine only go to 6A with the 36V supply.
Please Log in or Create an account to join the conversation.
- machinedude
-
 Topic Author
- Offline
- Platinum Member
-

Less
More
- Posts: 715
- Thank you received: 312
17 Sep 2024 13:17 - 17 Sep 2024 13:18 #310308
by machinedude
Replied by machinedude on topic What do you really get for a $350 desk top engraver ?
Attachments:
Last edit: 17 Sep 2024 13:18 by machinedude.
Please Log in or Create an account to join the conversation.
Time to create page: 0.131 seconds


