Rods "Spaceship" Scratch built Plasma Cutter build
- rodw
-
 Topic Author
- Offline
- Platinum Member
-

Less
More
- Posts: 12014
- Thank you received: 4097
25 Jun 2019 01:10 #137768
by rodw
Don't forget there is also O'Toole's Law which states:
"Murphy was an Optimist"
Replied by rodw on topic Rods "Spaceship" Scratch built Plasma Cutter build
Wasted a lot of time checking this dudes theories when i was young !Don't forget about that dude named Murphy...
He was right, kinda painful now thinking about it, should have just trusted the guy !! !
")
")
Don't forget there is also O'Toole's Law which states:
"Murphy was an Optimist"
The following user(s) said Thank You: tommylight
Please Log in or Create an account to join the conversation.
- tommylight
-

- Offline
- Moderator
-

Less
More
- Posts: 21722
- Thank you received: 7424
26 Jun 2019 00:36 #137841
by tommylight
Replied by tommylight on topic Rods "Spaceship" Scratch built Plasma Cutter build
LOL
Wasted a lot of time checking this dudes theories when i was young !Don't forget about that dude named Murphy...
He was right, kinda painful now thinking about it, should have just trusted the guy !! !
Don't forget there is also O'Toole's Law which states:
"Murphy was an Optimist"
The following user(s) said Thank You: rodw
Please Log in or Create an account to join the conversation.
- rodw
-
Topic Author
- Offline
- Platinum Member
-
Less
More
- Posts: 12014
- Thank you received: 4097
31 Aug 2019 11:58 - 31 Aug 2019 12:01 #143720
by rodw
Replied by rodw on topic Rods "Spaceship" Scratch built Plasma Cutter build
It's been a while since I've had an update to the spaceship but with the help of PCW and his new THCAD-5 which he kindly donated for the experiment, I'd like to introduce to you hypersensing which is ohmic sensing on steroids for Linuxcnc!
So PCW wrote some new firmware for the 7i76e and 7i96 especially designed for plasma machines. What he did was to include 3 encoder A's (on the encoder A, encoder B and Index signals). So this means you can add up to 3 THCAD cards to the one Mesa motion control card. The relevant bit files are available for download on the Mesa web site. The file names end in pl.bit
mesanet.com/software/parallel/7i80.zip
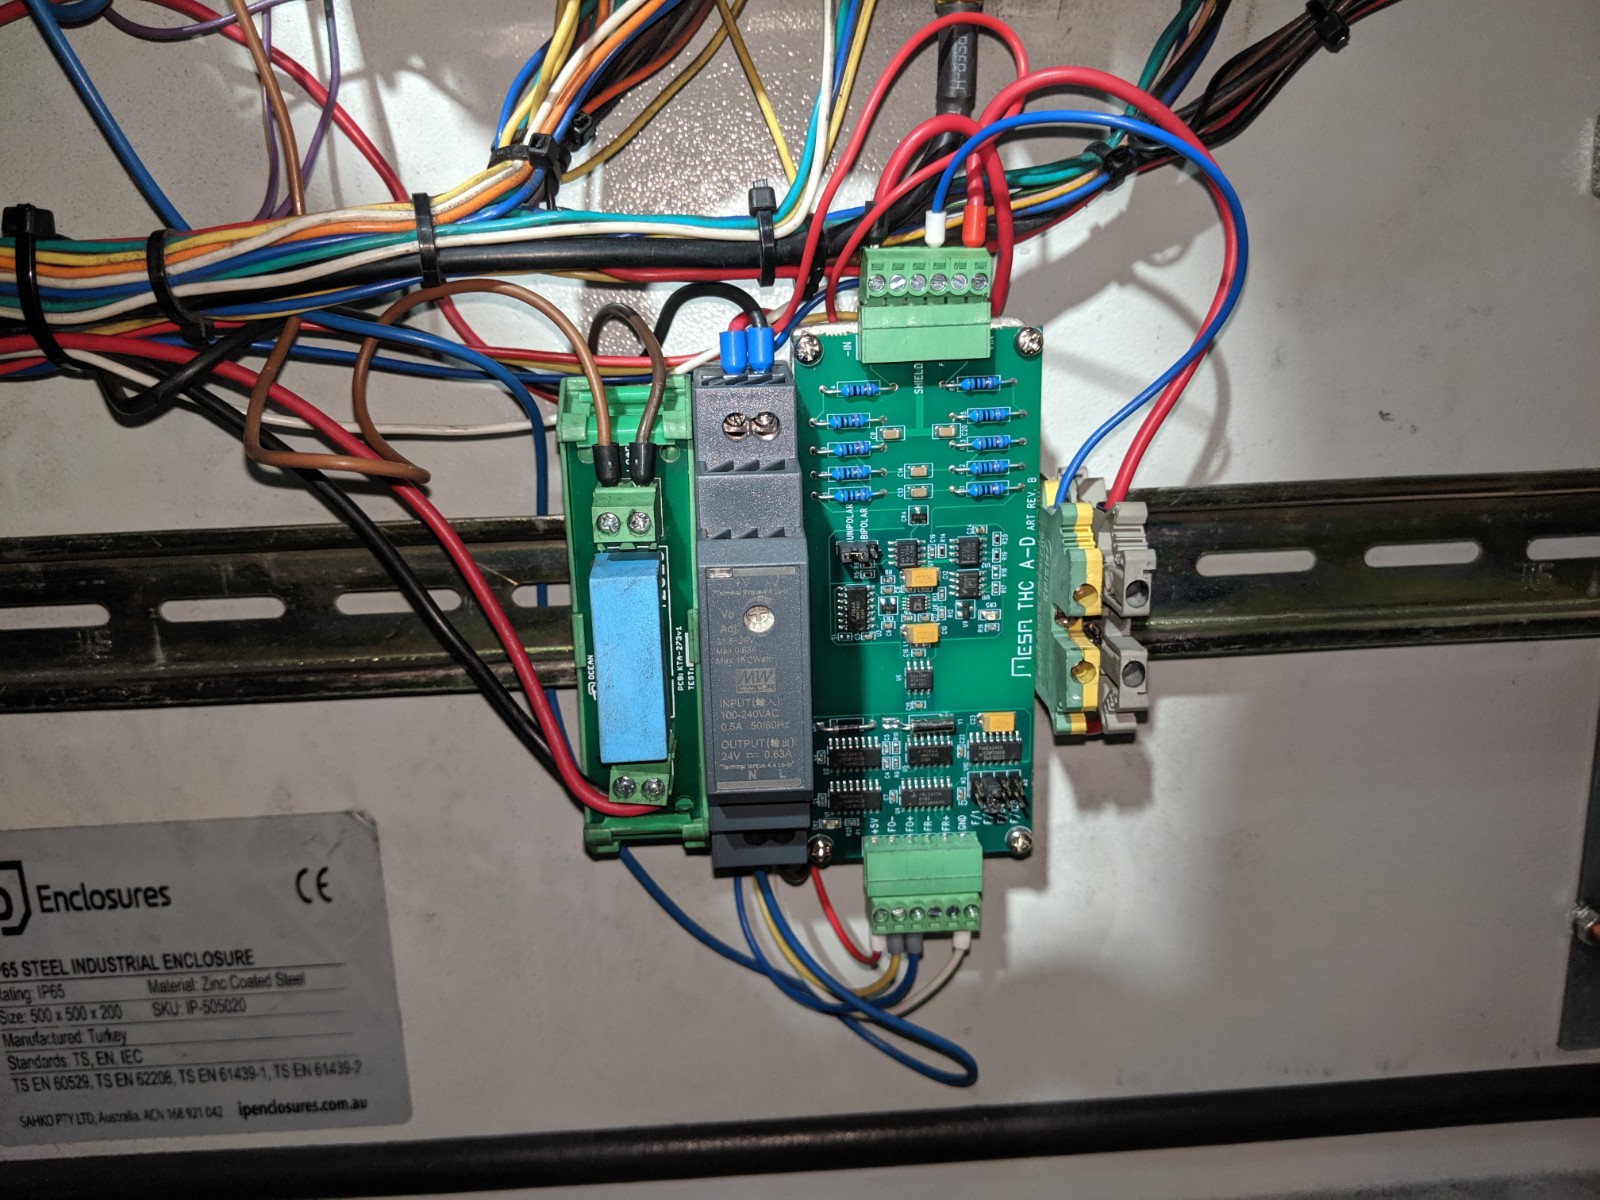
So after a couple of iterations, we came up with a circuit that works perfectly for ohmic/hyper sensing when used with a component I wrote. So we took an isolated 24 volt power supply and connected it to the table star ground. The positive side of the power supply passes through a 390K resistor then onto a THCAD5 like this.

Ooops, that resistor value is wrong.
This circuit with a 390k resistor gives us a 24.5 volt full scale reading, just a bit over the power supply voltage.
Peter's theory was that by using the THCAD, we might be able to see some voltage loss that would allow us to calculate circuit resistance. What I found was that when probing material, the voltage rose from 0 volt through to 24 volts over 0.04mm of Z axis travel. (something like 0v, 12v, 18v, 24V per 0.1mm). Then I tested the 24V relays we were using on a variable power supply and found they turned on at about 7.5 volts and off at about 5 volts and we had some feedback that said this was a bit too sensitive.
So I wrote a component that allowed us to measure the hyper sensing circuit voltage that increased this hysterisis. It uses two pins, one to define an upper threshold that had to be exceeded before the probe signal was triggered. Initially I just had one threshold. I picked 18 volts but I think it could be set as high as 22 volts.
After thinking about this for a while, I concluded the sensing would be more robust if we added a lower threshold of some where between 1 to 5 volts. I figured that by doing this , the wide hysteresis gap from 5-18 volts would mean that there would be no chance of spurious probing triggers. So I got this wired in pretty much permanently today and I am very happy with the results.
I did quite a bit of cutting yesterday and it worked very well and today I added the lower threshold which I set 5 volts and it still worked perfectly. I think the THCAD is much more responsive then my relay based ohmic sensing and it was not going to such.
So back to the photo from left we have:
So its early days but the THCAD seems to be much more responsive than my old relay style output, Its also much easier to wire in and is more responsive than just relays.
So PCW wrote some new firmware for the 7i76e and 7i96 especially designed for plasma machines. What he did was to include 3 encoder A's (on the encoder A, encoder B and Index signals). So this means you can add up to 3 THCAD cards to the one Mesa motion control card. The relevant bit files are available for download on the Mesa web site. The file names end in pl.bit
mesanet.com/software/parallel/7i80.zip
So after a couple of iterations, we came up with a circuit that works perfectly for ohmic/hyper sensing when used with a component I wrote. So we took an isolated 24 volt power supply and connected it to the table star ground. The positive side of the power supply passes through a 390K resistor then onto a THCAD5 like this.
Ooops, that resistor value is wrong.
This circuit with a 390k resistor gives us a 24.5 volt full scale reading, just a bit over the power supply voltage.
Peter's theory was that by using the THCAD, we might be able to see some voltage loss that would allow us to calculate circuit resistance. What I found was that when probing material, the voltage rose from 0 volt through to 24 volts over 0.04mm of Z axis travel. (something like 0v, 12v, 18v, 24V per 0.1mm). Then I tested the 24V relays we were using on a variable power supply and found they turned on at about 7.5 volts and off at about 5 volts and we had some feedback that said this was a bit too sensitive.
So I wrote a component that allowed us to measure the hyper sensing circuit voltage that increased this hysterisis. It uses two pins, one to define an upper threshold that had to be exceeded before the probe signal was triggered. Initially I just had one threshold. I picked 18 volts but I think it could be set as high as 22 volts.
After thinking about this for a while, I concluded the sensing would be more robust if we added a lower threshold of some where between 1 to 5 volts. I figured that by doing this , the wide hysteresis gap from 5-18 volts would mean that there would be no chance of spurious probing triggers. So I got this wired in pretty much permanently today and I am very happy with the results.
I did quite a bit of cutting yesterday and it worked very well and today I added the lower threshold which I set 5 volts and it still worked perfectly. I think the THCAD is much more responsive then my relay based ohmic sensing and it was not going to such.
So back to the photo from left we have:
- 240 V AC relay (optional)
- 24V isolated power supply
- THCAD-5
- Grounding point
- modified terminal block including THCAD scaling relay
So its early days but the THCAD seems to be much more responsive than my old relay style output, Its also much easier to wire in and is more responsive than just relays.
Last edit: 31 Aug 2019 12:01 by rodw.
The following user(s) said Thank You: chimeno, tommylight
Please Log in or Create an account to join the conversation.
- pl7i92
-

- Offline
- Platinum Member
-
Less
More
- Posts: 1872
- Thank you received: 358
31 Aug 2019 14:34 #143723
by pl7i92
Replied by pl7i92 on topic Rods "Spaceship" Scratch built Plasma Cutter build
why is this a wild cabeling only to get things going
lots of cables

lots of cables
Attachments:
Please Log in or Create an account to join the conversation.
- rodw
-
Topic Author
- Offline
- Platinum Member
-
Less
More
- Posts: 12014
- Thank you received: 4097
01 Sep 2019 23:16 #143820
by rodw
Replied by rodw on topic Rods "Spaceship" Scratch built Plasma Cutter build
Yes, the photo may have been confusing on first glance. There are a lot of wires but not that many to the Hypersensing/Ohmic circuit. Most of them go to hardware on the rail above.
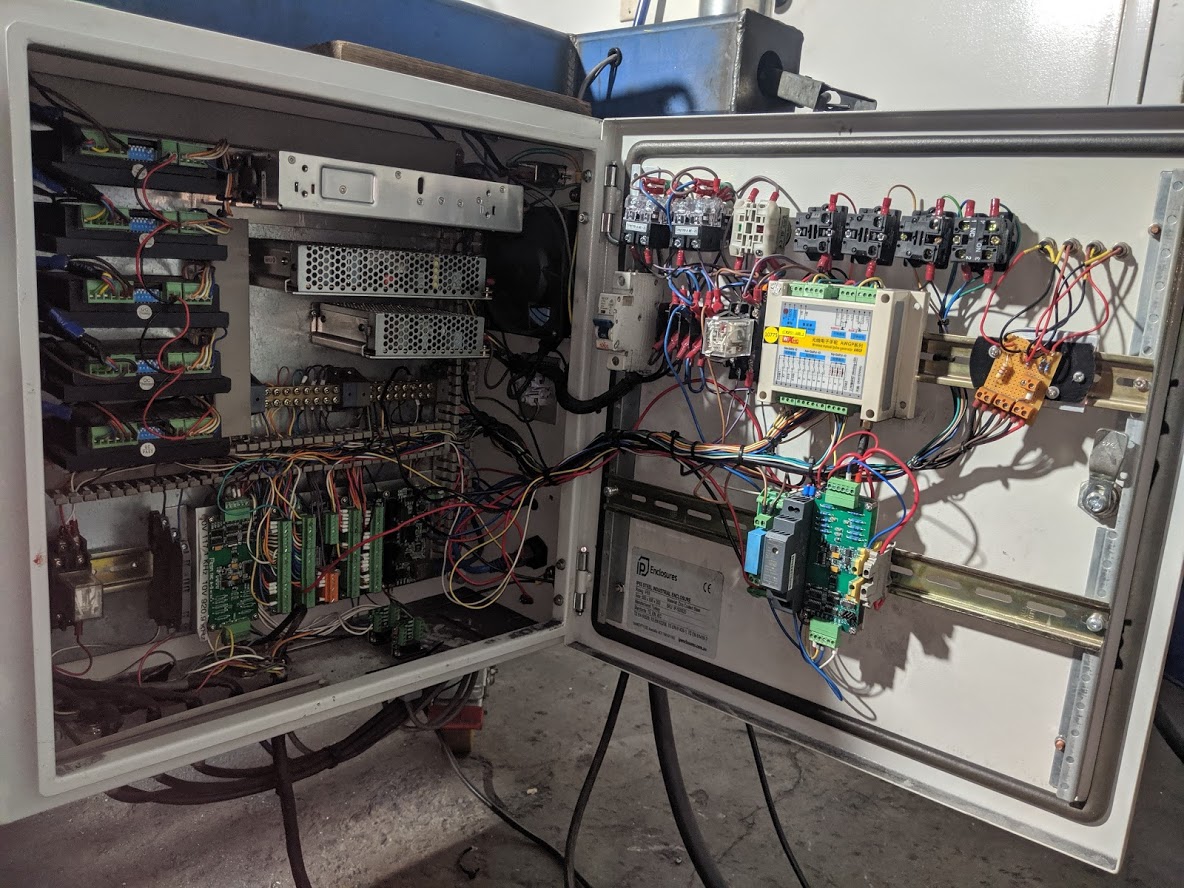
I still need to tidy it all up again now all of the ohmic sensing experiments are completed. My original cutter did not have the feature so there has been a fair bit of hacking done to get the circuitry there,
I still need to tidy it all up again now all of the ohmic sensing experiments are completed. My original cutter did not have the feature so there has been a fair bit of hacking done to get the circuitry there,
Please Log in or Create an account to join the conversation.
- Leon82
- Offline
- Platinum Member
-
Less
More
- Posts: 592
- Thank you received: 79
04 Sep 2019 01:50 #144109
by Leon82
Replied by Leon82 on topic Rods "Spaceship" Scratch built Plasma Cutter build
Seeing the Mesa card with the other electronics I never realized how big it was
Please Log in or Create an account to join the conversation.
- rodw
-
Topic Author
- Offline
- Platinum Member
-
Less
More
- Posts: 12014
- Thank you received: 4097
04 Sep 2019 05:25 #144122
by rodw
Leon, I do have a THCAD board mounted right beside the Mesa 7i76e which might confuse you (There is another THCAD on the door as well for a size reference).
But yes, the 7i76e reeks of being a quality industrial board and it does have a bit of size to it.
Replied by rodw on topic Rods "Spaceship" Scratch built Plasma Cutter build
Seeing the Mesa card with the other electronics I never realized how big it was
Leon, I do have a THCAD board mounted right beside the Mesa 7i76e which might confuse you (There is another THCAD on the door as well for a size reference).
But yes, the 7i76e reeks of being a quality industrial board and it does have a bit of size to it.
The following user(s) said Thank You: Leon82
Please Log in or Create an account to join the conversation.
- andypugh
-

- Offline
- Moderator
-
Less
More
- Posts: 19875
- Thank you received: 4642
04 Sep 2019 11:53 #144147
by andypugh
The 7i76E is the orange terminal block + the two other rows of terminals each side (5 rows in total).
There are other boards on the same rail, I think.
Replied by andypugh on topic Rods "Spaceship" Scratch built Plasma Cutter build
Seeing the Mesa card with the other electronics I never realized how big it was
The 7i76E is the orange terminal block + the two other rows of terminals each side (5 rows in total).
There are other boards on the same rail, I think.
The following user(s) said Thank You: rodw
Please Log in or Create an account to join the conversation.
- rodw
-
Topic Author
- Offline
- Platinum Member
-
Less
More
- Posts: 12014
- Thank you received: 4097
04 Sep 2019 13:16 #144151
by rodw
Yes, there is really only the THCAD mounted at the left hand end.
I did not know what I Was doing back then so I did not use a rail but instead folded up a mount that accepts the 7i76e and the THCAD that is held on by just 2 bolts in keyholes so it was easy to remove the boards. eg. Just loosen the bolts and slide the mount out boards and all. I'll have to take a closeup for Leon.
Replied by rodw on topic Rods "Spaceship" Scratch built Plasma Cutter build
The 7i76E is the orange terminal block + the two other rows of terminals each side (5 rows in total).
There are other boards on the same rail, I think.
Yes, there is really only the THCAD mounted at the left hand end.
I did not know what I Was doing back then so I did not use a rail but instead folded up a mount that accepts the 7i76e and the THCAD that is held on by just 2 bolts in keyholes so it was easy to remove the boards. eg. Just loosen the bolts and slide the mount out boards and all. I'll have to take a closeup for Leon.
Please Log in or Create an account to join the conversation.
- rodw
-
Topic Author
- Offline
- Platinum Member
-
Less
More
- Posts: 12014
- Thank you received: 4097
24 Sep 2019 10:00 - 24 Sep 2019 10:00 #146049
by rodw
Replied by rodw on topic Rods "Spaceship" Scratch built Plasma Cutter build
I changed my mind. I should have done this ages ago.
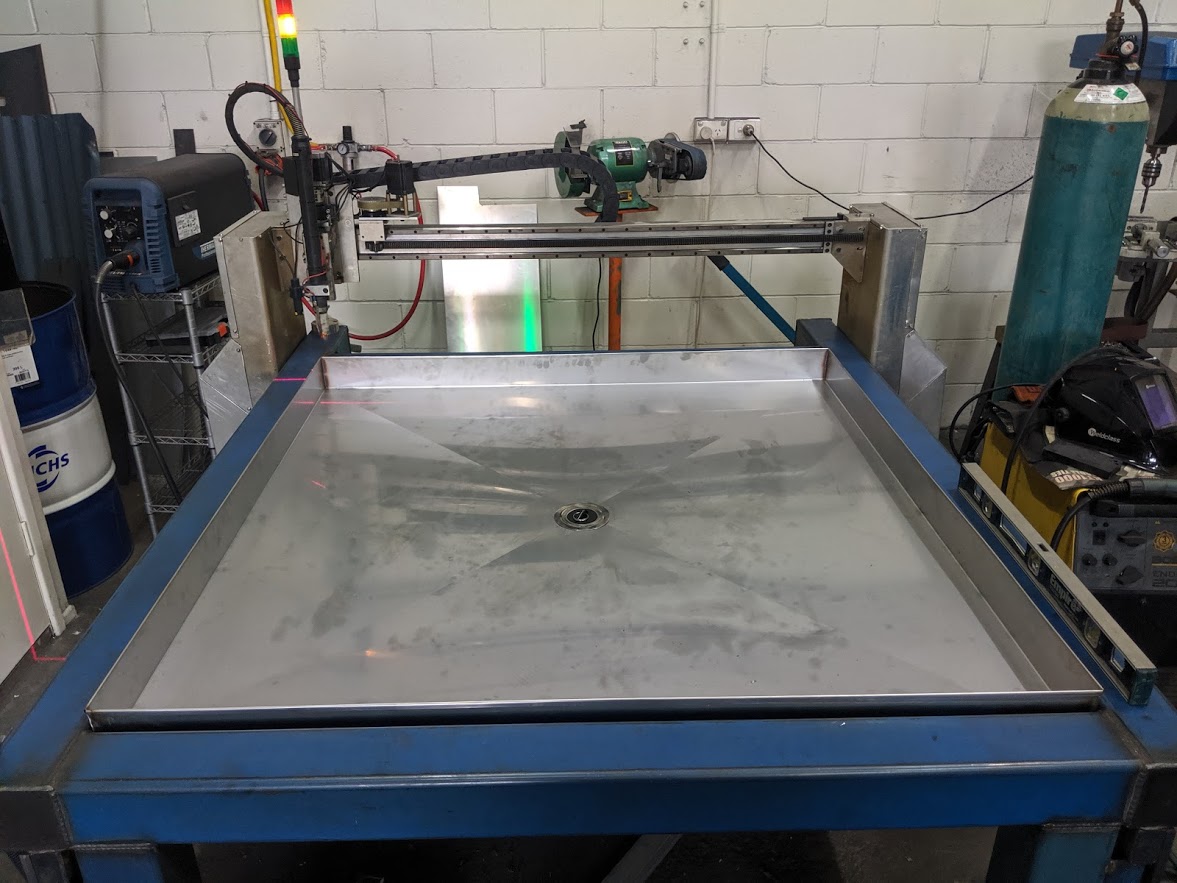
Once the slats go back in they will be about 85mm above the bottom and the pan might be 3-5mm higher.
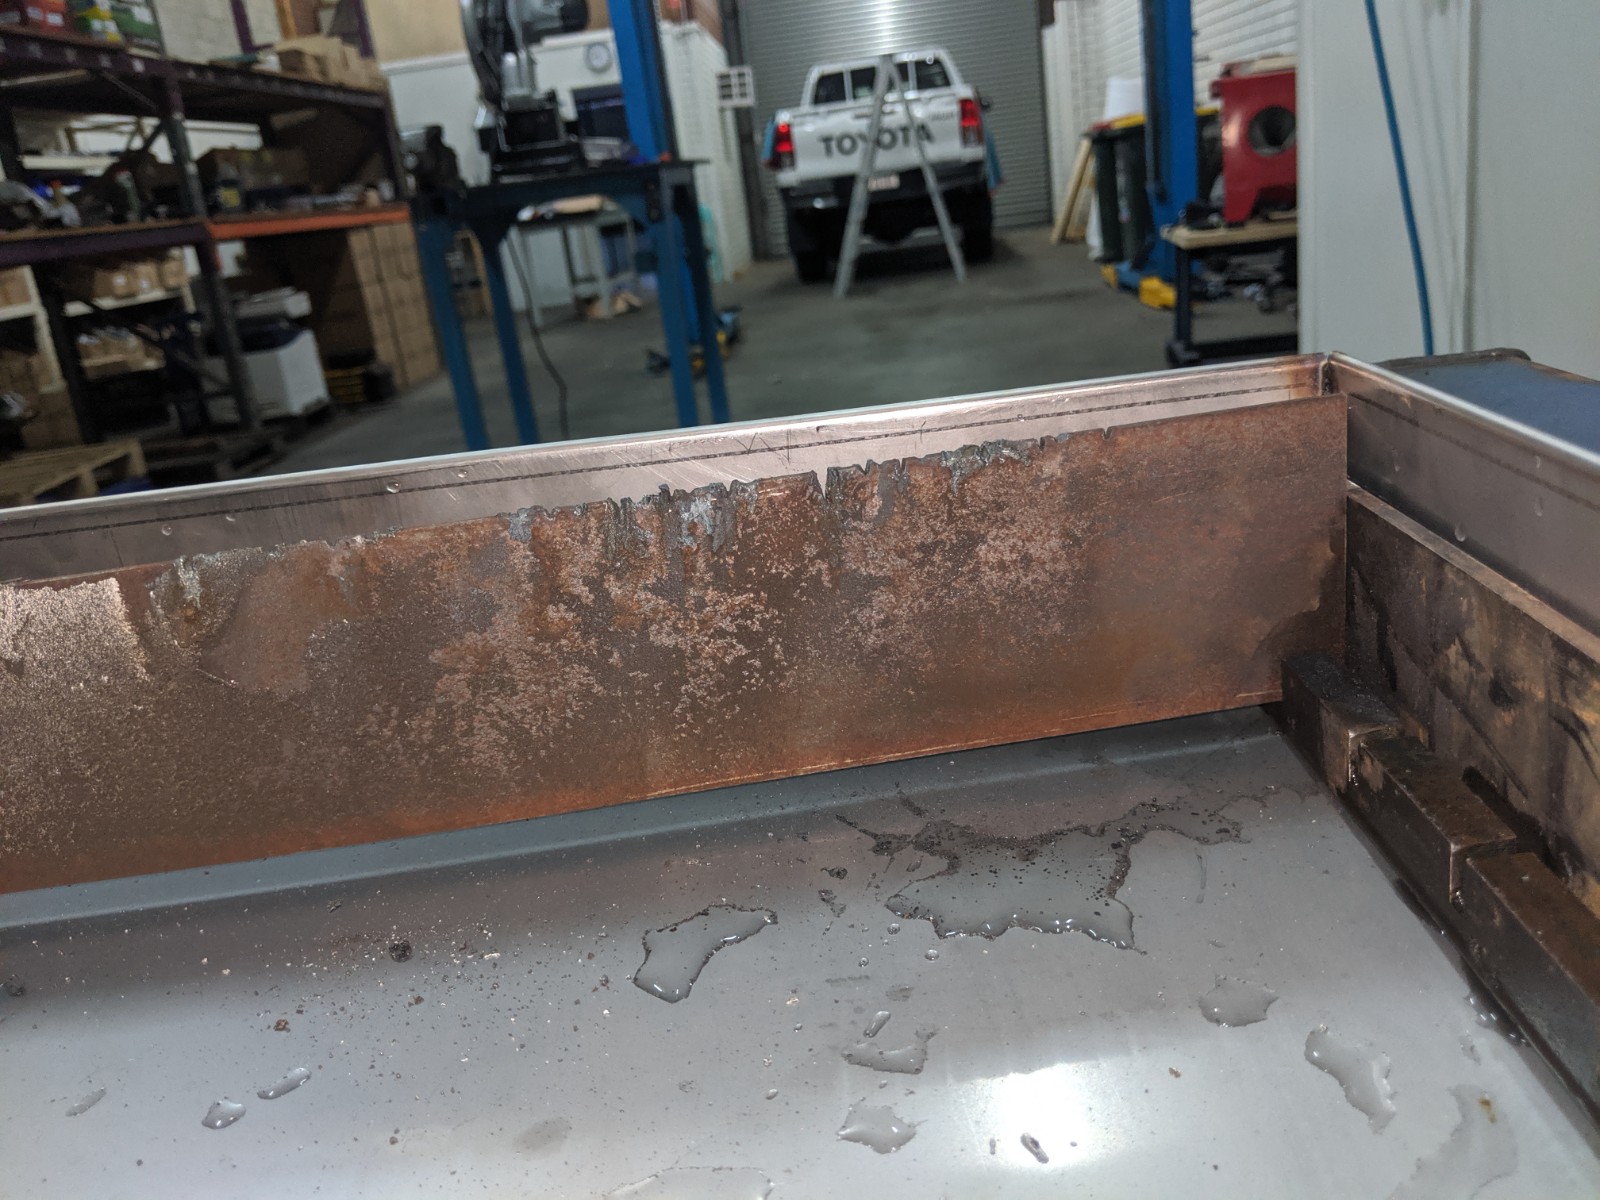
The largest sheet we get here is 1500mm x 3000mm and the flat pattern was exactly 1500mm wide. I got my sheetmetal worker who folds parts for me on his press brake to make this out of 0.9mm stainless steel. It was an awful job peeling off the plastic laser film.
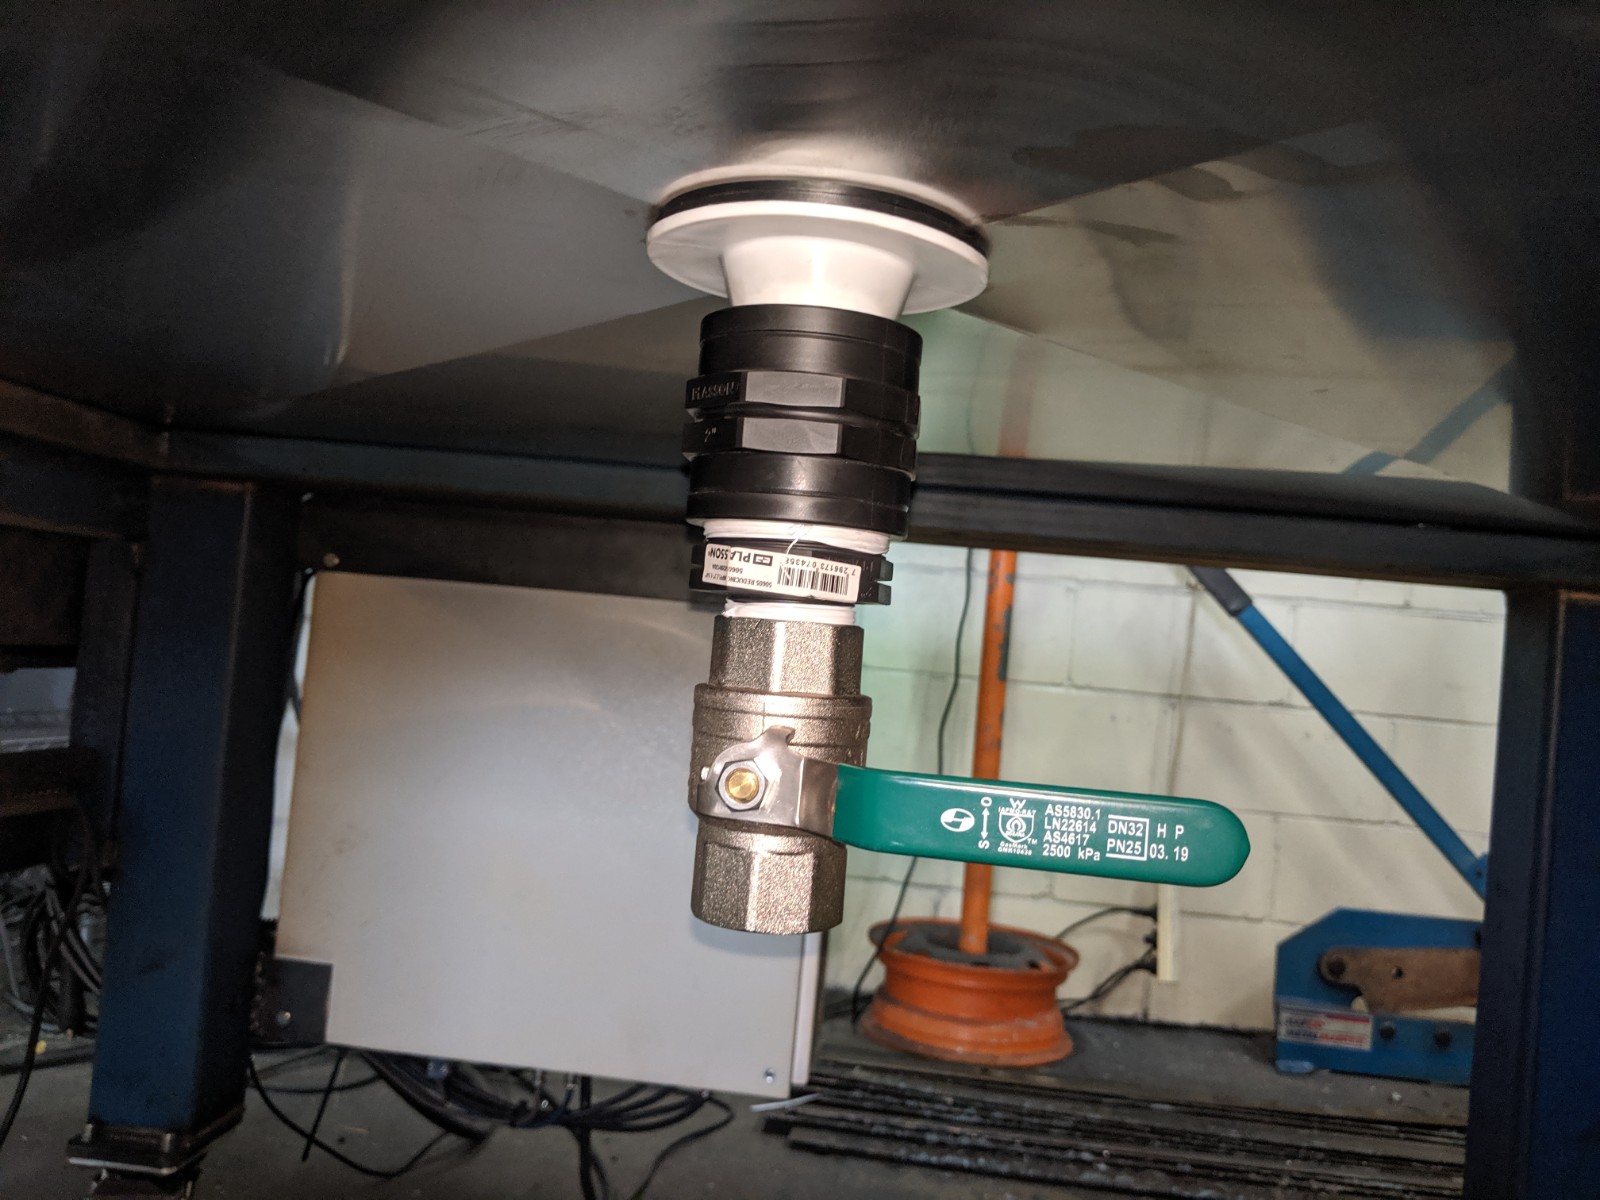
Now I just have to get some sikaflex and seal around the drain plug. But my arms are not long enough so I need to recruit a helper.The plug itself is 50mm (2") and the ball valve is reduced down to 32mm (1 1/4").
I grabbed a 4 litre bottle of additive from from Hare and Forbes but I think I need to grab another one. They say to add 5-10% and I think it will hold about 130 litres so 2 bottles will be about 6%.
I thought I might need to support the base but Paul thought it would be alright with an even load and I think it will be fine, now I put some water in it.
Once the slats go back in they will be about 85mm above the bottom and the pan might be 3-5mm higher.
The largest sheet we get here is 1500mm x 3000mm and the flat pattern was exactly 1500mm wide. I got my sheetmetal worker who folds parts for me on his press brake to make this out of 0.9mm stainless steel. It was an awful job peeling off the plastic laser film.
Now I just have to get some sikaflex and seal around the drain plug. But my arms are not long enough so I need to recruit a helper.The plug itself is 50mm (2") and the ball valve is reduced down to 32mm (1 1/4").
I grabbed a 4 litre bottle of additive from from Hare and Forbes but I think I need to grab another one. They say to add 5-10% and I think it will hold about 130 litres so 2 bottles will be about 6%.
I thought I might need to support the base but Paul thought it would be alright with an even load and I think it will be fine, now I put some water in it.
Attachments:
Last edit: 24 Sep 2019 10:00 by rodw.
Please Log in or Create an account to join the conversation.
Time to create page: 1.195 seconds