Rods "Spaceship" Scratch built Plasma Cutter build
- Mike_Eitel
-

- Offline
- Platinum Member
-

Less
More
- Posts: 1052
- Thank you received: 183
13 Jun 2020 12:18 #171414
by Mike_Eitel
Replied by Mike_Eitel on topic Rods "Spaceship" Scratch built Plasma Cutter build
He writes over the red bridges inside the clamps.
Sorry bbsr_5a that i think this small adding might help some not nerds")
Mike
Sorry bbsr_5a that i think this small adding might help some not nerds
Mike
Please Log in or Create an account to join the conversation.
- rodw
-
 Topic Author
- Offline
- Platinum Member
-
Less
More
- Posts: 12035
- Thank you received: 4107
13 Jun 2020 12:25 #171415
by rodw
Replied by rodw on topic Rods "Spaceship" Scratch built Plasma Cutter build
YEs, all will be revealed in due course.
Please Log in or Create an account to join the conversation.
- bbsr_5a
- Offline
- Platinum Member
-
Less
More
- Posts: 544
- Thank you received: 106
13 Jun 2020 13:55 #171451
by bbsr_5a
Replied by bbsr_5a on topic Rods "Spaceship" Scratch built Plasma Cutter build
im not that master and english parts are different
but it looks nice and clear at low cost 45cent eatch
but it looks nice and clear at low cost 45cent eatch
Please Log in or Create an account to join the conversation.
- rodw
-
Topic Author
- Offline
- Platinum Member
-
Less
More
- Posts: 12035
- Thank you received: 4107
13 Jun 2020 20:43 #171486
by rodw
Replied by rodw on topic Rods "Spaceship" Scratch built Plasma Cutter build
When I first started this off, it was hard to find DIN rail terminals here and they were pretty expensive or needed large quantity buys. Plus I had no clue what I was doing! A lot of the parts I bought were from a local electronics shop. eg like the brass BUS bars I use for +24V and 0 24V field power. so I just made do with what they had.
Even the power supplies are way oversized. If I did it today I would use much smaller DIN rail power supplies and replace the BUS bars with one of Mesa's common blocks highlighted here
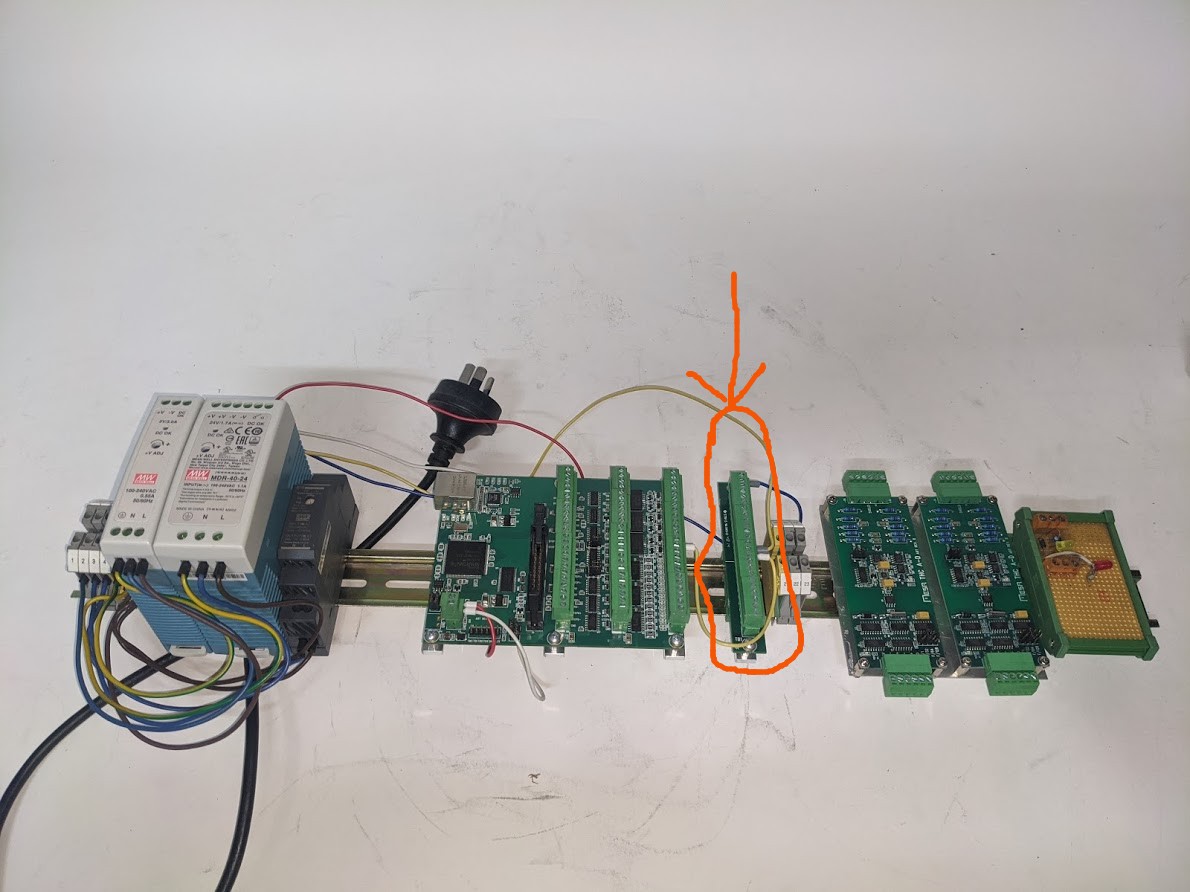
I think they are much more efficient space wise than the DIN Rail terminals bridged together. I would recommend you always buy one or two of these if you are buying a mesa card..
And yes, you can see I now do use the terminal strips and the AC ones in this pic are bridged together. Thats why say all will be revealed once its back together.
So anyway, I'm not going back to redo the whole control box for this project. Once tidied up and the caps for the conduit are back on, it should look neat again. Its hard to keep things tidy when you have done as much experimentation as I have...
So yes, thats why I say once the toroids are i
Even the power supplies are way oversized. If I did it today I would use much smaller DIN rail power supplies and replace the BUS bars with one of Mesa's common blocks highlighted here
I think they are much more efficient space wise than the DIN Rail terminals bridged together. I would recommend you always buy one or two of these if you are buying a mesa card..
And yes, you can see I now do use the terminal strips and the AC ones in this pic are bridged together. Thats why say all will be revealed once its back together.
So anyway, I'm not going back to redo the whole control box for this project. Once tidied up and the caps for the conduit are back on, it should look neat again. Its hard to keep things tidy when you have done as much experimentation as I have...
So yes, thats why I say once the toroids are i
Attachments:
Please Log in or Create an account to join the conversation.
- Grotius
-

- Offline
- Platinum Member
-
Less
More
- Posts: 2419
- Thank you received: 2348
13 Jun 2020 21:37 #171500
by Grotius
Replied by Grotius on topic Rods "Spaceship" Scratch built Plasma Cutter build
Nice setup Rod.
One thing to mention, something i could worry about.
Often you see plasic shields at the back of a print circuits. If you open up plasma inverters, you will see them.
If the print touches the din rail per accident, it could be a problem. Attaching a plastic shield at the back solves this.
One thing to mention, something i could worry about.
Often you see plasic shields at the back of a print circuits. If you open up plasma inverters, you will see them.
If the print touches the din rail per accident, it could be a problem. Attaching a plastic shield at the back solves this.
The following user(s) said Thank You: rodw
Please Log in or Create an account to join the conversation.
- rodw
-
Topic Author
- Offline
- Platinum Member
-
Less
More
- Posts: 12035
- Thank you received: 4107
13 Jun 2020 21:53 #171503
by rodw
Thanks, thats not really an issue here. The 7i96 is mounted to the DIN rail using mesa's mounting hardware so while it does not look like it, there is a lot of space between it and the rail. (15-20 mm) The THCAD's have a different bolt hole pitch so they are mounted via 10mm standoffs to a plate I made that in turn attaches to the DIN Rail.
I do see what you mean though. If I was worried I could get a rubber or plastic sheet cut on a waterjet cutter next time I get some parts cut by them.
I'll see how I go with costs once I get the box powdercoated. I had in mind to build a reference designed control box in a plasma cutable case but those pieces have been mounted that way for a very long time...
Replied by rodw on topic Rods "Spaceship" Scratch built Plasma Cutter build
Nice setup Rod.
One thing to mention, something i could worry about.
Often you see plasic shields at the back of a print circuits. If you open up plasma inverters, you will see them.
If the print touches the din rail per accident, it could be a problem. Attaching a plastic shield at the back solves this.
Thanks, thats not really an issue here. The 7i96 is mounted to the DIN rail using mesa's mounting hardware so while it does not look like it, there is a lot of space between it and the rail. (15-20 mm) The THCAD's have a different bolt hole pitch so they are mounted via 10mm standoffs to a plate I made that in turn attaches to the DIN Rail.
I do see what you mean though. If I was worried I could get a rubber or plastic sheet cut on a waterjet cutter next time I get some parts cut by them.
I'll see how I go with costs once I get the box powdercoated. I had in mind to build a reference designed control box in a plasma cutable case but those pieces have been mounted that way for a very long time...
Please Log in or Create an account to join the conversation.
- machinedude
-

- Offline
- Platinum Member
-
Less
More
- Posts: 715
- Thank you received: 312
15 Jun 2020 08:04 #171698
by machinedude
Replied by machinedude on topic Rods "Spaceship" Scratch built Plasma Cutter build
i was wonder about how to do field power or more what others were doing. Din terminal blocks with jumpers work too or at least that was how i solved the problem. the mesa option looks like a compact solution and better probably.
The following user(s) said Thank You: joekline9
Please Log in or Create an account to join the conversation.
- rodw
-
Topic Author
- Offline
- Platinum Member
-
Less
More
- Posts: 12035
- Thank you received: 4107
22 Jun 2020 08:15 #172302
by rodw
Replied by rodw on topic Rods "Spaceship" Scratch built Plasma Cutter build
Some small projects seem to attract Murphy!
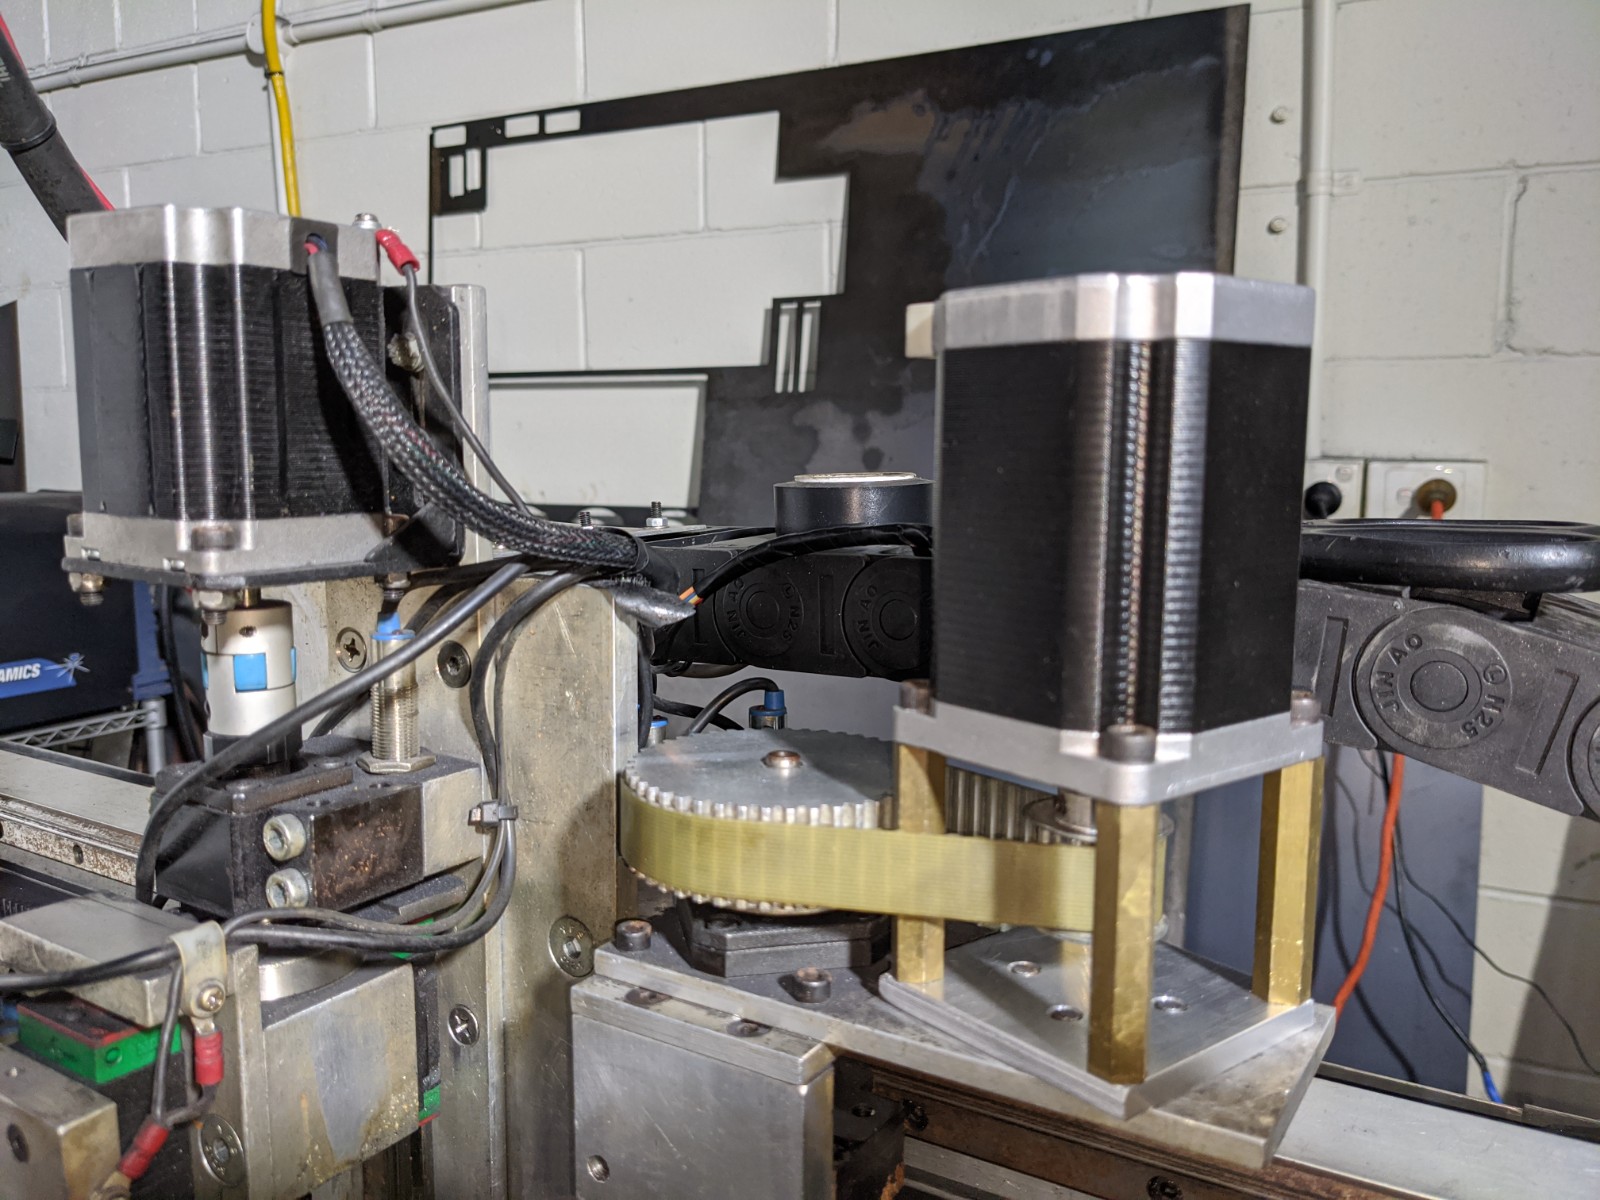
I bought 5 Sanyo Denki 60mm x 60mm stepper motors for $100 from ebay when they sell for $200 each. Then I had to find some wiring harnesses for them. They finally arrived. So a few days ago I thought I'd fit the easy one up so I pulled off the pulley and drilled it out to an 8mm bore and enlarged the mounting holes on the motor.
Very shortly afterwards I found out that the Sanyos had a different mounting pitch on the bolt holes to a normal NEMA 23 and it did not fit!
I never really got my little Seig SX3 set up after relocating it from home to my workshop and I had a bit of work on it so I could use it again.
Friday, I dug out the CAD drawings and redesigned the mounting plate. Then I went up the road to buy 1 metre 60mm x 6mm flat bar material when I only needed 60mm of it! While I was there, I bought an offcut of 6mm aluminum plate so that next time I can cut out mounting plates and spot the drill holes..
Anyway after drilling and tapping 8 holes in my 60mm square of Ally, its back together.
I guess that one advantage of building your own machine. You can upgrade it.
This is quite massive compared to what was on it before
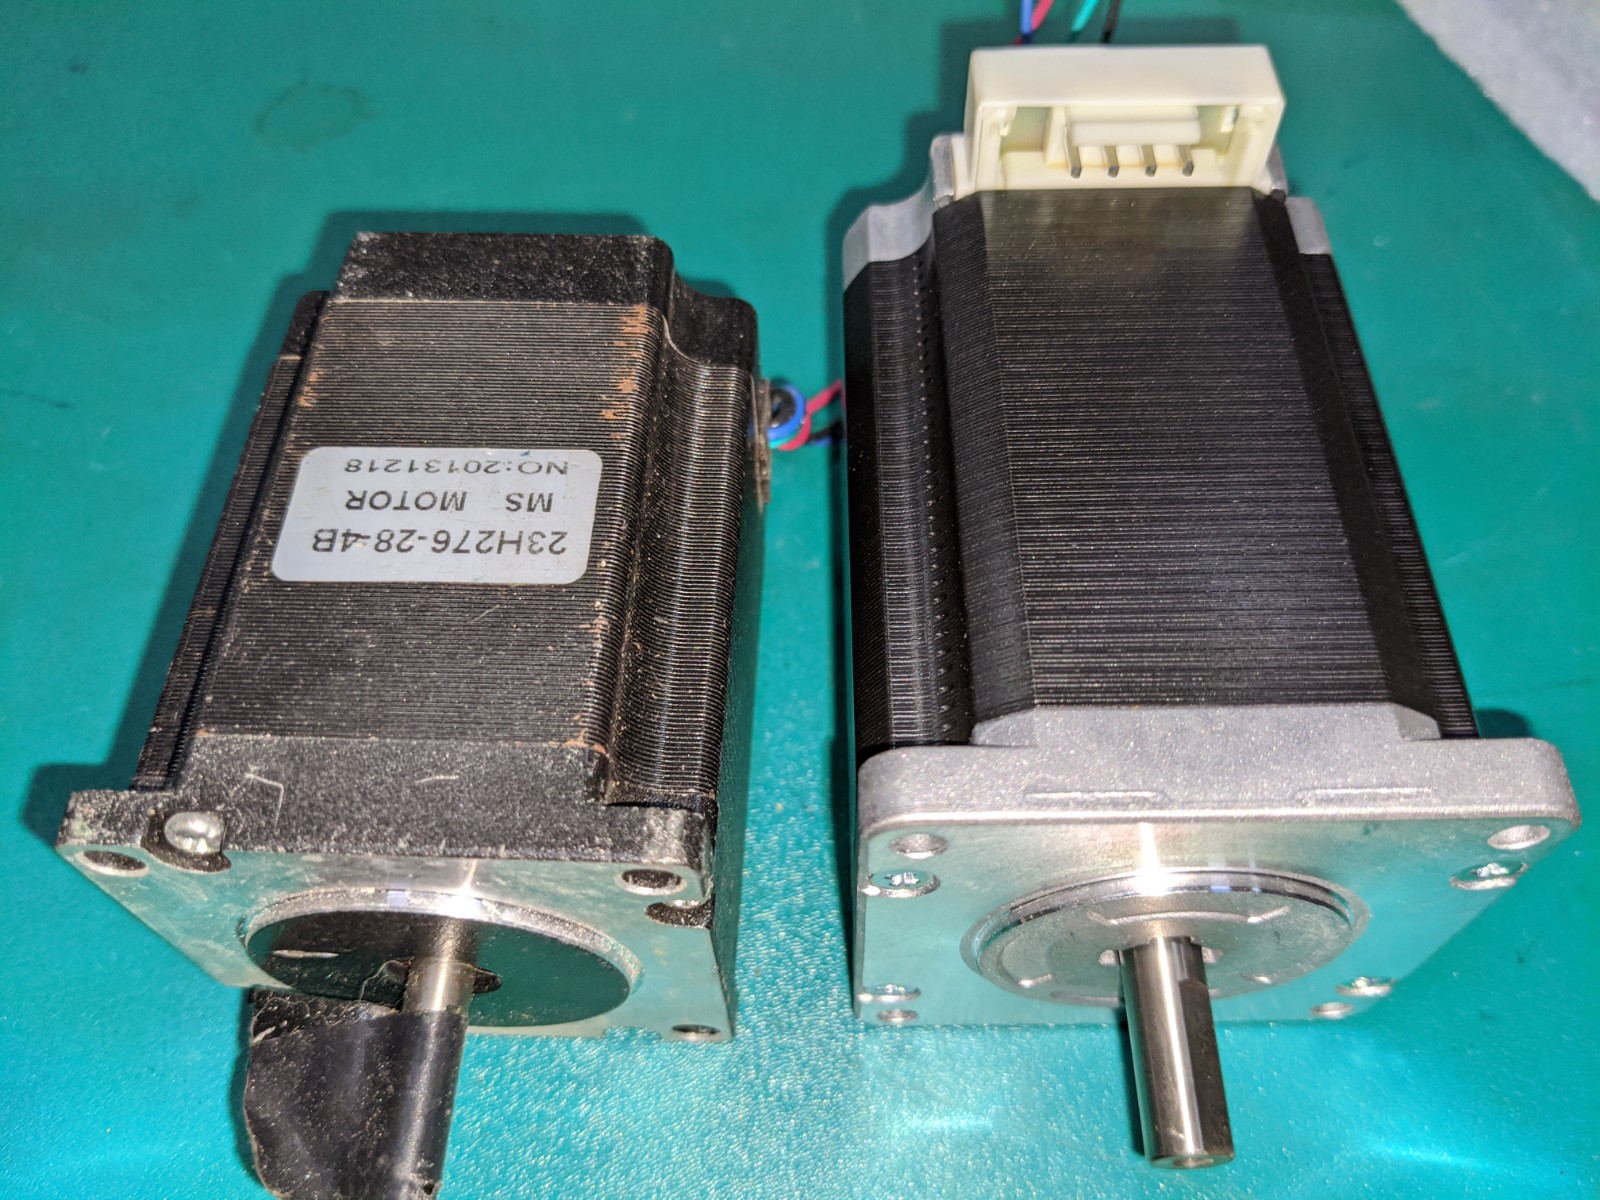
The old motor was 1.9 Nm (269 oz/in) and the new one is 2.7 Nm (382 oz/in). It will be interesting to see if I get any better performance once I get my machine back together with the Lam drivers.. So now I have to work out how to fit one up on the Z axis!
I bought 5 Sanyo Denki 60mm x 60mm stepper motors for $100 from ebay when they sell for $200 each. Then I had to find some wiring harnesses for them. They finally arrived. So a few days ago I thought I'd fit the easy one up so I pulled off the pulley and drilled it out to an 8mm bore and enlarged the mounting holes on the motor.
Very shortly afterwards I found out that the Sanyos had a different mounting pitch on the bolt holes to a normal NEMA 23 and it did not fit!
I never really got my little Seig SX3 set up after relocating it from home to my workshop and I had a bit of work on it so I could use it again.
Friday, I dug out the CAD drawings and redesigned the mounting plate. Then I went up the road to buy 1 metre 60mm x 6mm flat bar material when I only needed 60mm of it! While I was there, I bought an offcut of 6mm aluminum plate so that next time I can cut out mounting plates and spot the drill holes..
Anyway after drilling and tapping 8 holes in my 60mm square of Ally, its back together.
I guess that one advantage of building your own machine. You can upgrade it.
This is quite massive compared to what was on it before
The old motor was 1.9 Nm (269 oz/in) and the new one is 2.7 Nm (382 oz/in). It will be interesting to see if I get any better performance once I get my machine back together with the Lam drivers.. So now I have to work out how to fit one up on the Z axis!
Attachments:
Please Log in or Create an account to join the conversation.
- thefabricator03
-

- Visitor
-

22 Jun 2020 08:54 - 22 Jun 2020 08:54 #172305
by thefabricator03
Replied by thefabricator03 on topic Rods "Spaceship" Scratch built Plasma Cutter build
Now Rod, you do remember that anything to do with CNC plasma cutters is not suppose to be easy dont you 
Last edit: 22 Jun 2020 08:54 by thefabricator03.
Please Log in or Create an account to join the conversation.
- tommylight
-

- Away
- Moderator
-

Less
More
- Posts: 21741
- Thank you received: 7430
22 Jun 2020 09:56 #172312
by tommylight
Replied by tommylight on topic Rods "Spaceship" Scratch built Plasma Cutter build
Nema 23 = 56mm frame, Nema 24 = 60mm frame ! ")
Please Log in or Create an account to join the conversation.
Time to create page: 0.280 seconds