Rods "Spaceship" Scratch built Plasma Cutter build
- tommylight
-

- Away
- Moderator
-

Less
More
- Posts: 21162
- Thank you received: 7226
14 Dec 2020 11:49 #191956
by tommylight
Replied by tommylight on topic Rods "Spaceship" Scratch built Plasma Cutter build
Coronavirus found a way to infect THCAD's !!! 
Check the ground clamp as you are using ohmic sensing and that may corrode easily. Both ends, at the plasma source also.
Check the ground clamp as you are using ohmic sensing and that may corrode easily. Both ends, at the plasma source also.
The following user(s) said Thank You: rodw
Please Log in or Create an account to join the conversation.
- thefabricator03
-

- Visitor
-

14 Dec 2020 22:48 - 14 Dec 2020 22:48 #191992
by thefabricator03
Replied by thefabricator03 on topic Rods "Spaceship" Scratch built Plasma Cutter build
I had the same issue, I had funky cut edges when the voltage fluctuated. I still have not traced the issue down but it only occurs when the ambient temp in the workshop is over 35 degrees.
Last edit: 14 Dec 2020 22:48 by thefabricator03.
Please Log in or Create an account to join the conversation.
- rodw
-
 Topic Author
- Online
- Platinum Member
-

Less
More
- Posts: 11619
- Thank you received: 3911
15 Dec 2020 00:38 #192002
by rodw
Replied by rodw on topic Rods "Spaceship" Scratch built Plasma Cutter build
Thanks I remember someone else had the problem but could not remember who. It was fairly cool yesterday with rain about but around here it was probably in the 30's. Man, my weather station at home peaked at 25.7 deg C outdoors and 100% humidity yesterday!
Tommy, I don't think its a ground clamp issue. I still had a good arc and I could cut fine if I turned the THC off.
Tommy, I don't think its a ground clamp issue. I still had a good arc and I could cut fine if I turned the THC off.
Please Log in or Create an account to join the conversation.
- PCW
-

- Offline
- Moderator
-

Less
More
- Posts: 17581
- Thank you received: 5142
15 Dec 2020 00:59 #192005
by PCW
Replied by PCW on topic Rods "Spaceship" Scratch built Plasma Cutter build
I would measure the voltage at the THCAD input to see if the issue
is in the electronics or perhaps wiring or divider connections.
If the THCAD reads 0 V accurately that suggests a problem
with the divided voltage getting to the THCAD
is in the electronics or perhaps wiring or divider connections.
If the THCAD reads 0 V accurately that suggests a problem
with the divided voltage getting to the THCAD
Please Log in or Create an account to join the conversation.
- rodw
-
 Topic Author
- Online
- Platinum Member
-

Less
More
- Posts: 11619
- Thank you received: 3911
15 Dec 2020 01:15 #192011
by rodw
Thanks Peter. It ended up with a 0 reading for the encoder velocity which I thought implied a poor connection back to the 7i76e as there was nothing for it to count. It seems perfect this morning but I have not cut with it.
This wiring is long standing but I have prodded in the control box so much to get to where I am now.
Its up around 29 C (84 F) this morning when the sun comes out and only 71% humidity.
Replied by rodw on topic Rods "Spaceship" Scratch built Plasma Cutter build
I would measure the voltage at the THCAD input to see if the issue
is in the electronics or perhaps wiring or divider connections.
If the THCAD reads 0 V accurately that suggests a problem
with the divided voltage getting to the THCAD
Thanks Peter. It ended up with a 0 reading for the encoder velocity which I thought implied a poor connection back to the 7i76e as there was nothing for it to count. It seems perfect this morning but I have not cut with it.
This wiring is long standing but I have prodded in the control box so much to get to where I am now.
Its up around 29 C (84 F) this morning when the sun comes out and only 71% humidity.
Please Log in or Create an account to join the conversation.
- rodw
-
 Topic Author
- Online
- Platinum Member
-

Less
More
- Posts: 11619
- Thank you received: 3911
17 Dec 2020 09:36 #192234
by rodw
Replied by rodw on topic Rods "Spaceship" Scratch built Plasma Cutter build
Well today, I had a chance to look at the thcad wiring while Dean took my ute (pickup truck for our US friends) to grab a couple of sheets of material. I wanted to add bootlace ferrules where I was not using them The ground wire on the encoder side had a soldered end and it seemed to be a bit loose so I added a ferrule and tightened it up. So to test it out, we set up to cut down two 1200x2400 sheets of parts and the THCAD did not miss a beat
BUT
We changed out the consumables before we started, electrode, nozzle and shield and we had terrible cut quality. We managed to get a result with a 80% feed override but it was still pretty awful. so we grabbed some scrap and played around for a while and still were not happy. I dug out a little part I cut earlier in the week and it looked like it should be.
So after a bit of a think, I realised that every cut quality issue I had experienced were due to torch related issues. So I swapped out the Thermal Dynamics start cartridge and quality improved, Spurred on by this we also replaced the shield cup which looked a bit tired and quality improved again. So then we cut non stop for a few hours with perfect quality and no faults.
So I guess I can't complain as I got 2 years out of those parts.
So then we ended up with 20 flanges to fold up with 6 folds each. I have to say I just can't believe how quick my Amada NC press brake is at stuff like this. Found the drawing and retrieved the program we had done last time, swapped out the tooling and smashed through it in no time!
By the end of the day despite some setbacks, we had a stack of parts I used to pay about $1k for cut, folded and welded. It cost $150 in material and a bit of time. Tomorrow they can go off for powdercoating.
The following user(s) said Thank You: tommylight, thefabricator03, pinder
Please Log in or Create an account to join the conversation.
- pinder
-

- Offline
- Elite Member
-

Less
More
- Posts: 196
- Thank you received: 128
18 Dec 2020 04:43 #192302
by pinder
Cheers
Pinder
Replied by pinder on topic Rods "Spaceship" Scratch built Plasma Cutter build
Happy for you.Well today, I had a chance to look at the thcad wiring while Dean took my ute (pickup truck for our US friends) to grab a couple of sheets of material. I wanted to add bootlace ferrules where I was not using them The ground wire on the encoder side had a soldered end and it seemed to be a bit loose so I added a ferrule and tightened it up. So to test it out, we set up to cut down two 1200x2400 sheets of parts and the THCAD did not miss a beat
BUT
We changed out the consumables before we started, electrode, nozzle and shield and we had terrible cut quality. We managed to get a result with a 80% feed override but it was still pretty awful. so we grabbed some scrap and played around for a while and still were not happy. I dug out a little part I cut earlier in the week and it looked like it should be.
So after a bit of a think, I realised that every cut quality issue I had experienced were due to torch related issues. So I swapped out the Thermal Dynamics start cartridge and quality improved, Spurred on by this we also replaced the shield cup which looked a bit tired and quality improved again. So then we cut non stop for a few hours with perfect quality and no faults.
So I guess I can't complain as I got 2 years out of those parts.
So then we ended up with 20 flanges to fold up with 6 folds each. I have to say I just can't believe how quick my Amada NC press brake is at stuff like this. Found the drawing and retrieved the program we had done last time, swapped out the tooling and smashed through it in no time!
By the end of the day despite some setbacks, we had a stack of parts I used to pay about $1k for cut, folded and welded. It cost $150 in material and a bit of time. Tomorrow they can go off for powdercoating.
Cheers
Pinder
Please Log in or Create an account to join the conversation.
- thefabricator03
-

- Visitor
-

19 Dec 2020 08:37 - 19 Dec 2020 08:38 #192436
by thefabricator03
Replied by thefabricator03 on topic Rods "Spaceship" Scratch built Plasma Cutter build
A lot of business types like to extol the virtues of outsourcing. But when you have the ability to get things done in house, unless you need to spend mega bucks or its very time consuming, I think doing jobs yourself can be very profitable as well as the assurance of knowing when you can have the finished parts.
As long as I have material and consumables I can cut a great deal of parts and have them finished in a very short amount of time. CNC machines really are great!
As long as I have material and consumables I can cut a great deal of parts and have them finished in a very short amount of time. CNC machines really are great!
Last edit: 19 Dec 2020 08:38 by thefabricator03.
Please Log in or Create an account to join the conversation.
- phillc54
-

- Offline
- Platinum Member
-

Less
More
- Posts: 5711
- Thank you received: 2093
19 Dec 2020 11:31 #192448
by phillc54
Outsourcing is fine in theory but if everyone outsourced then nothing would ever get done.
Replied by phillc54 on topic Rods "Spaceship" Scratch built Plasma Cutter build
A lot of business types like to extol the virtues of outsourcing. But when you have the ability to get things done in house, unless you need to spend mega bucks or its very time consuming, I think doing jobs yourself can be very profitable as well as the assurance of knowing when you can have the finished parts.
As long as I have material and consumables I can cut a great deal of parts and have them finished in a very short amount of time. CNC machines really are great!
Outsourcing is fine in theory but if everyone outsourced then nothing would ever get done.
The following user(s) said Thank You: thefabricator03
Please Log in or Create an account to join the conversation.
- rodw
-
 Topic Author
- Online
- Platinum Member
-

Less
More
- Posts: 11619
- Thank you received: 3911
22 Jan 2021 09:58 - 22 Jan 2021 10:15 #196189
by rodw
Replied by rodw on topic Rods "Spaceship" Scratch built Plasma Cutter build
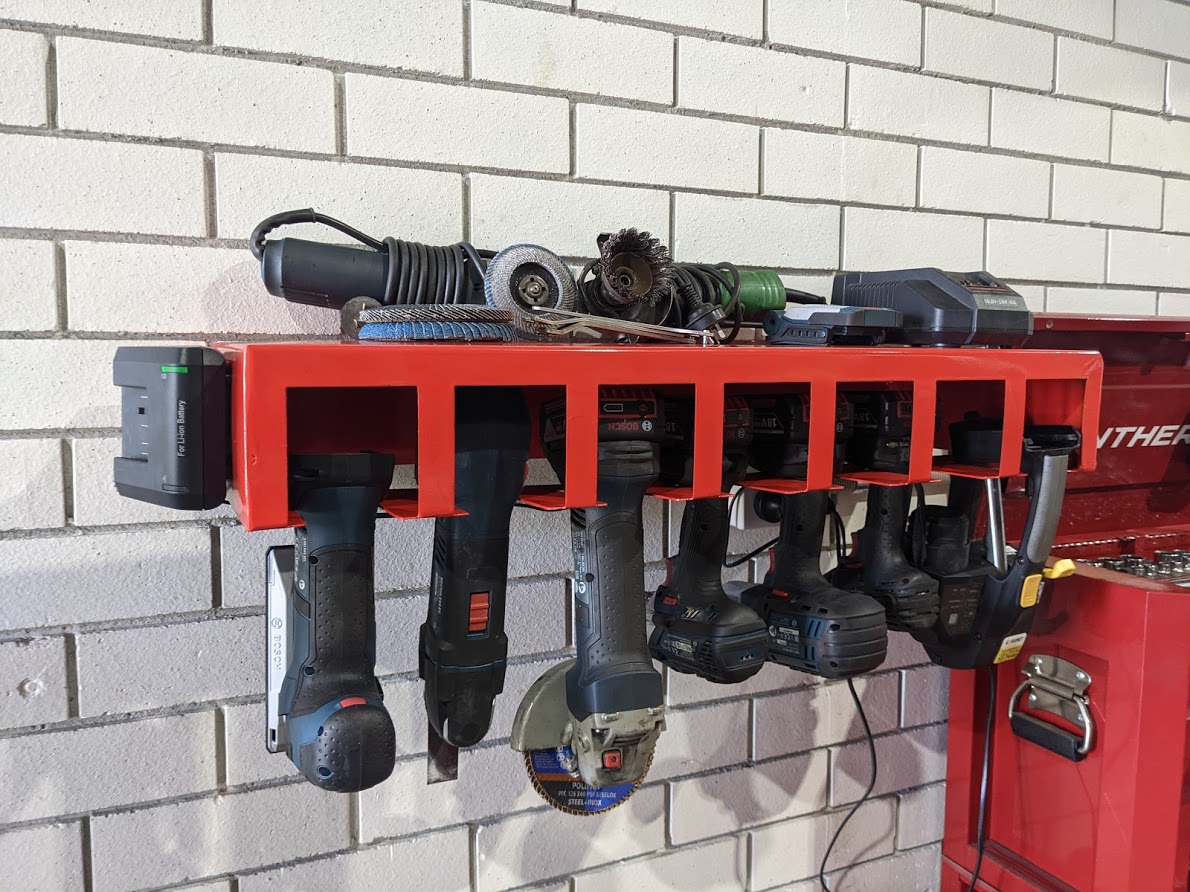
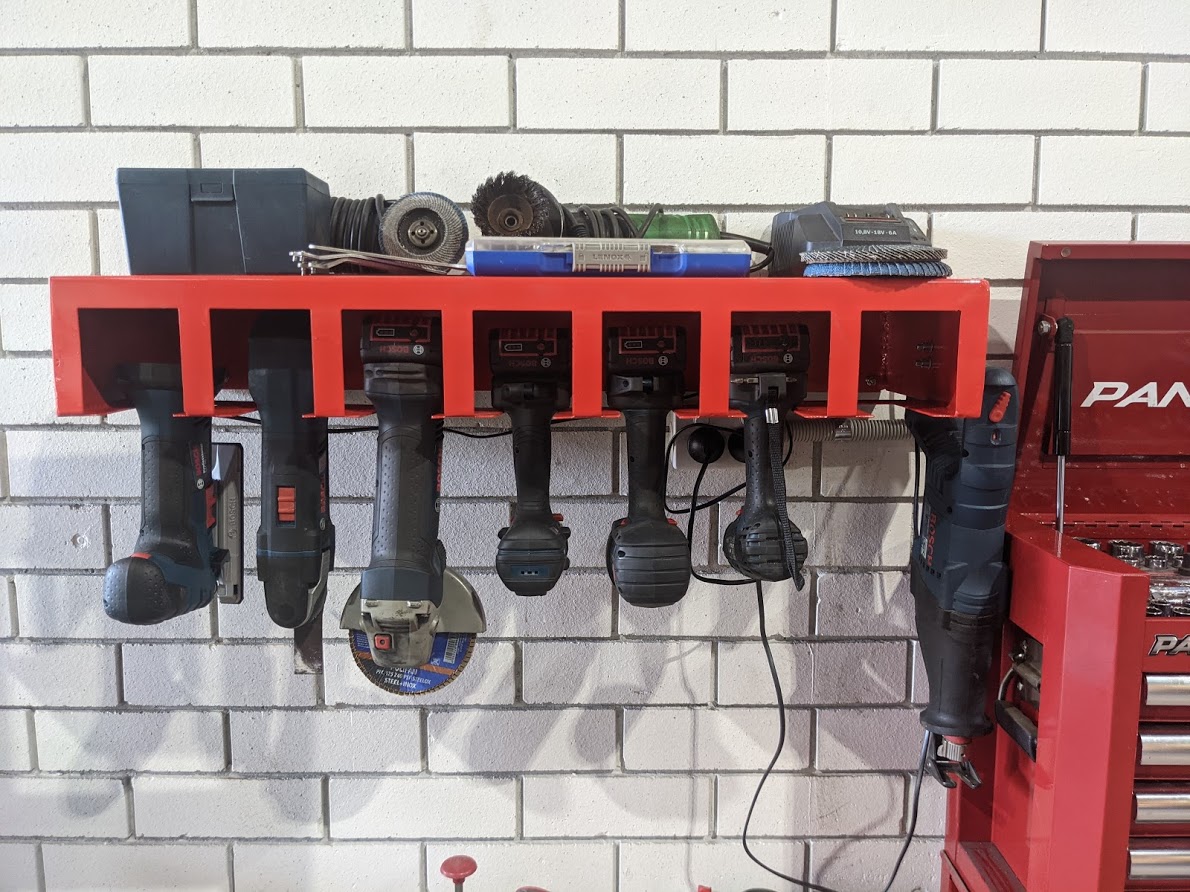
This idea had been in my mind for a couple of years and this last two days, we finally cut and folded it!
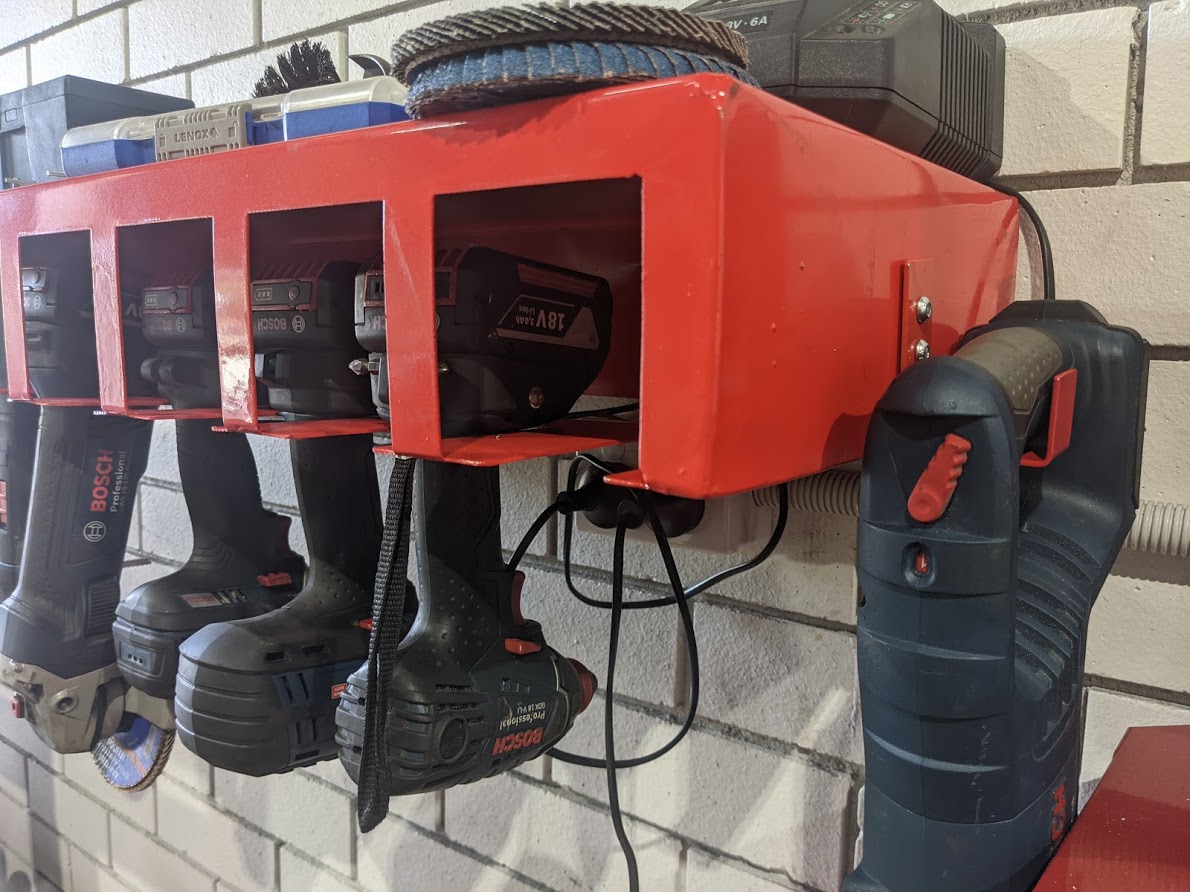
This is designed for Bosch cordless tools, complete with a rattle gun paint job. Not sure how it will go with other brands of tools. Some tools need a wider slot than others if you look closely.
I have two battery chargers and one of them had screw mounting slots so we mounted that to one end using M5 nutserts. The other one will have to sit on top.
Then I thought If made sense to hang the demolition saw from the other side so its with its mate and the chargers.
I have to say if you have some spare room on a sheet, its worth cutting some random strips to have on hand for hooks and things!
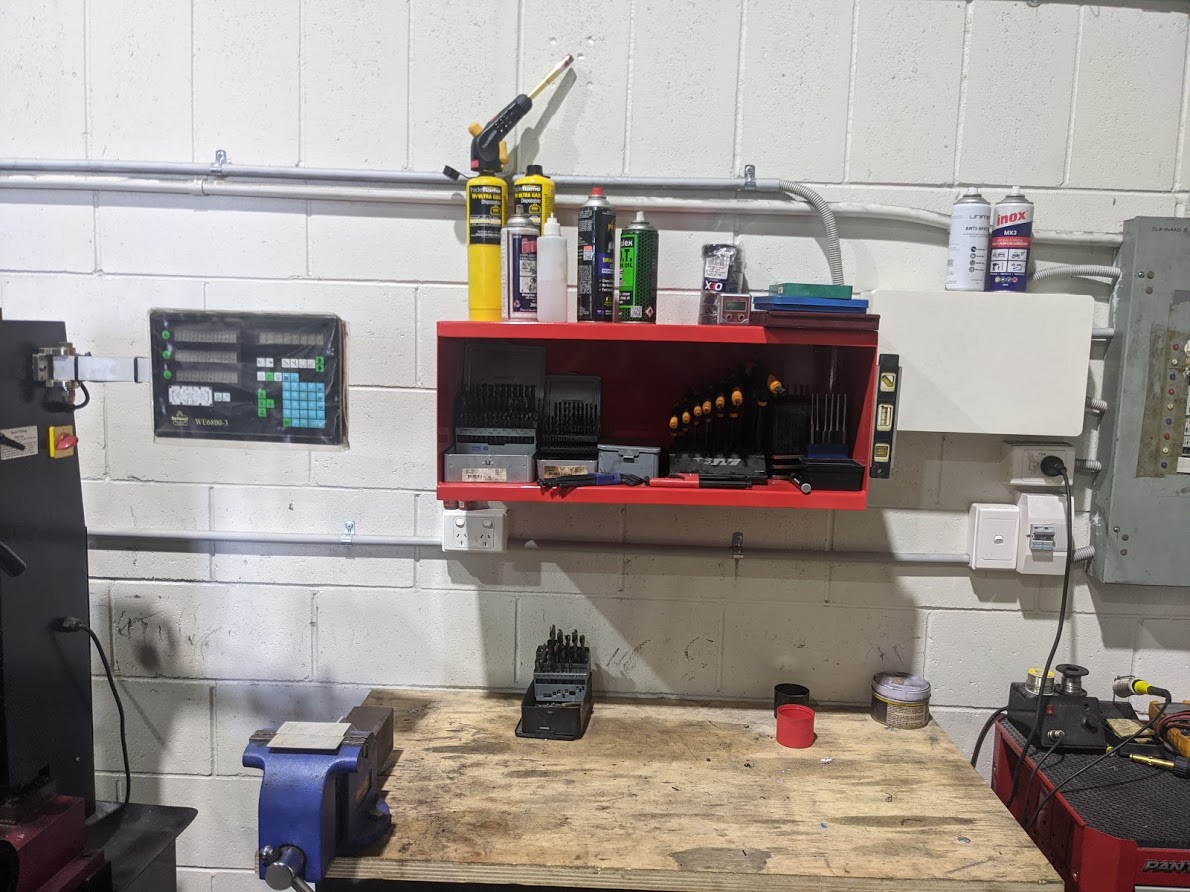
While we were at it, we made a similar storage shelf over our little work bench.
The DRO belongs to my Seig SX3 (Super X3) manual Mill I think Grizzly also sell a green version!
This was actually a bonus becasue my original plan was to have the tools hanging here, but we had added a power point in a handier place so the tools went there and I still did not have any storage at the work bench. We had to design this one around the size of our plasma table. But it was the simplest part to make in F360. Draw a rectangle, convert to sheet metal, select 4 edges, add a folded flange the depth of your shelves and then add flanges to the top and bottom to stiffen it up.
So its a good trial run with a bit more folding. The box is really a bit too deep for our press brake but we got there in the end. (eg. Don't look too close!)
I've attached a zip file containing the tool shelf DXF if you want to have a go at it. Fold the ends in last. Ignore the mounting holes and drill your own. (hint, you can move them to another layer in Sheetcam and not cut them). We used four M8 x 40mm ramset fasteners.The fold at the bottom edge of the hangers would not have been possible on the brake so we cut some slots and folded it by hand and welded it up. That worked very well!
You have no idea how much bench space the tool shelf freed up and the other shelf gave us our work bench back. It just goes to show that an organised workshop requires good storage!
So I have a sheet of 1.6mm steel sitting on the table now so I think the next job will be my long standing HMI box that according to Tommy, will turn a cheap arse touch screen into a heavy duty industrial version! (On steroids in true Spaceship style!)
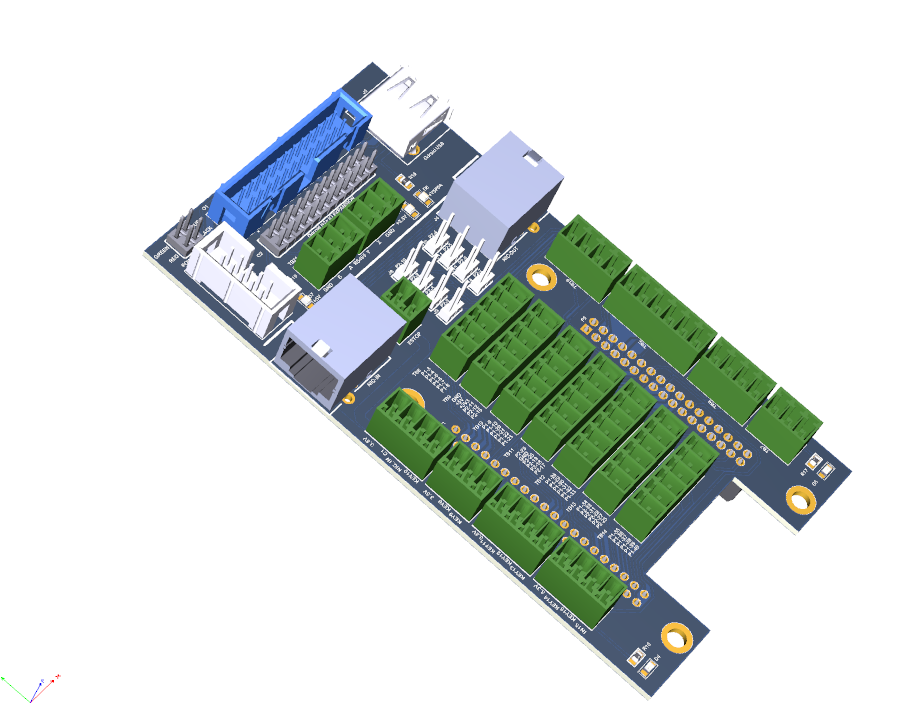
Here is a taste of whats coming... A shield to plug into a 7i73 and Odroid H2+
Attachments:
Last edit: 22 Jan 2021 10:15 by rodw.
The following user(s) said Thank You: tommylight, thefabricator03
Please Log in or Create an account to join the conversation.
Time to create page: 0.195 seconds

