Rods "Spaceship" Scratch built Plasma Cutter build
- tommylight
-

- Online
- Moderator
-

Less
More
- Posts: 21699
- Thank you received: 7416
13 May 2017 09:08 #93126
by tommylight
Replied by tommylight on topic Rods "Spaceship" Scratch built Plasma Cutter build
More toys! ")
Table looks nice.
Table looks nice.
The following user(s) said Thank You: rodw
Please Log in or Create an account to join the conversation.
- rodw
-
 Topic Author
- Offline
- Platinum Member
-

Less
More
- Posts: 11990
- Thank you received: 4084
13 May 2017 09:23 - 13 May 2017 09:23 #93127
by rodw
Replied by rodw on topic Rods "Spaceship" Scratch built Plasma Cutter build
Thanks Tommy, time will tell if it does the job.
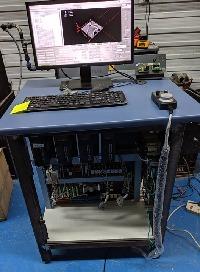
I forgot to say I also purchased a touchscreen on Friday as well. I grabbed an Acer T232HL and it just worked in Linux Mint with no configuration at all. And perfect calibration too!
I forgot to say I also purchased a touchscreen on Friday as well. I grabbed an Acer T232HL and it just worked in Linux Mint with no configuration at all. And perfect calibration too!
Last edit: 13 May 2017 09:23 by rodw.
Please Log in or Create an account to join the conversation.
- rodw
-
Topic Author
- Offline
- Platinum Member
-
Less
More
- Posts: 11990
- Thank you received: 4084
14 May 2017 03:27 #93171
by rodw
Replied by rodw on topic Rods "Spaceship" Scratch built Plasma Cutter build
Hmm, note to self... Never hit a CNC machine with a hammer. To fit the gantry to the end pieces, it was pretty tight so gave it a good few belts with a heavy copper dead blow hammer. It loosened every bolt in the whole assembly so I spent an hour or so reassembling it last night when all I wanted to do was do a little bit of wiring.
This morning, I got the remote pendant jogging all axes.
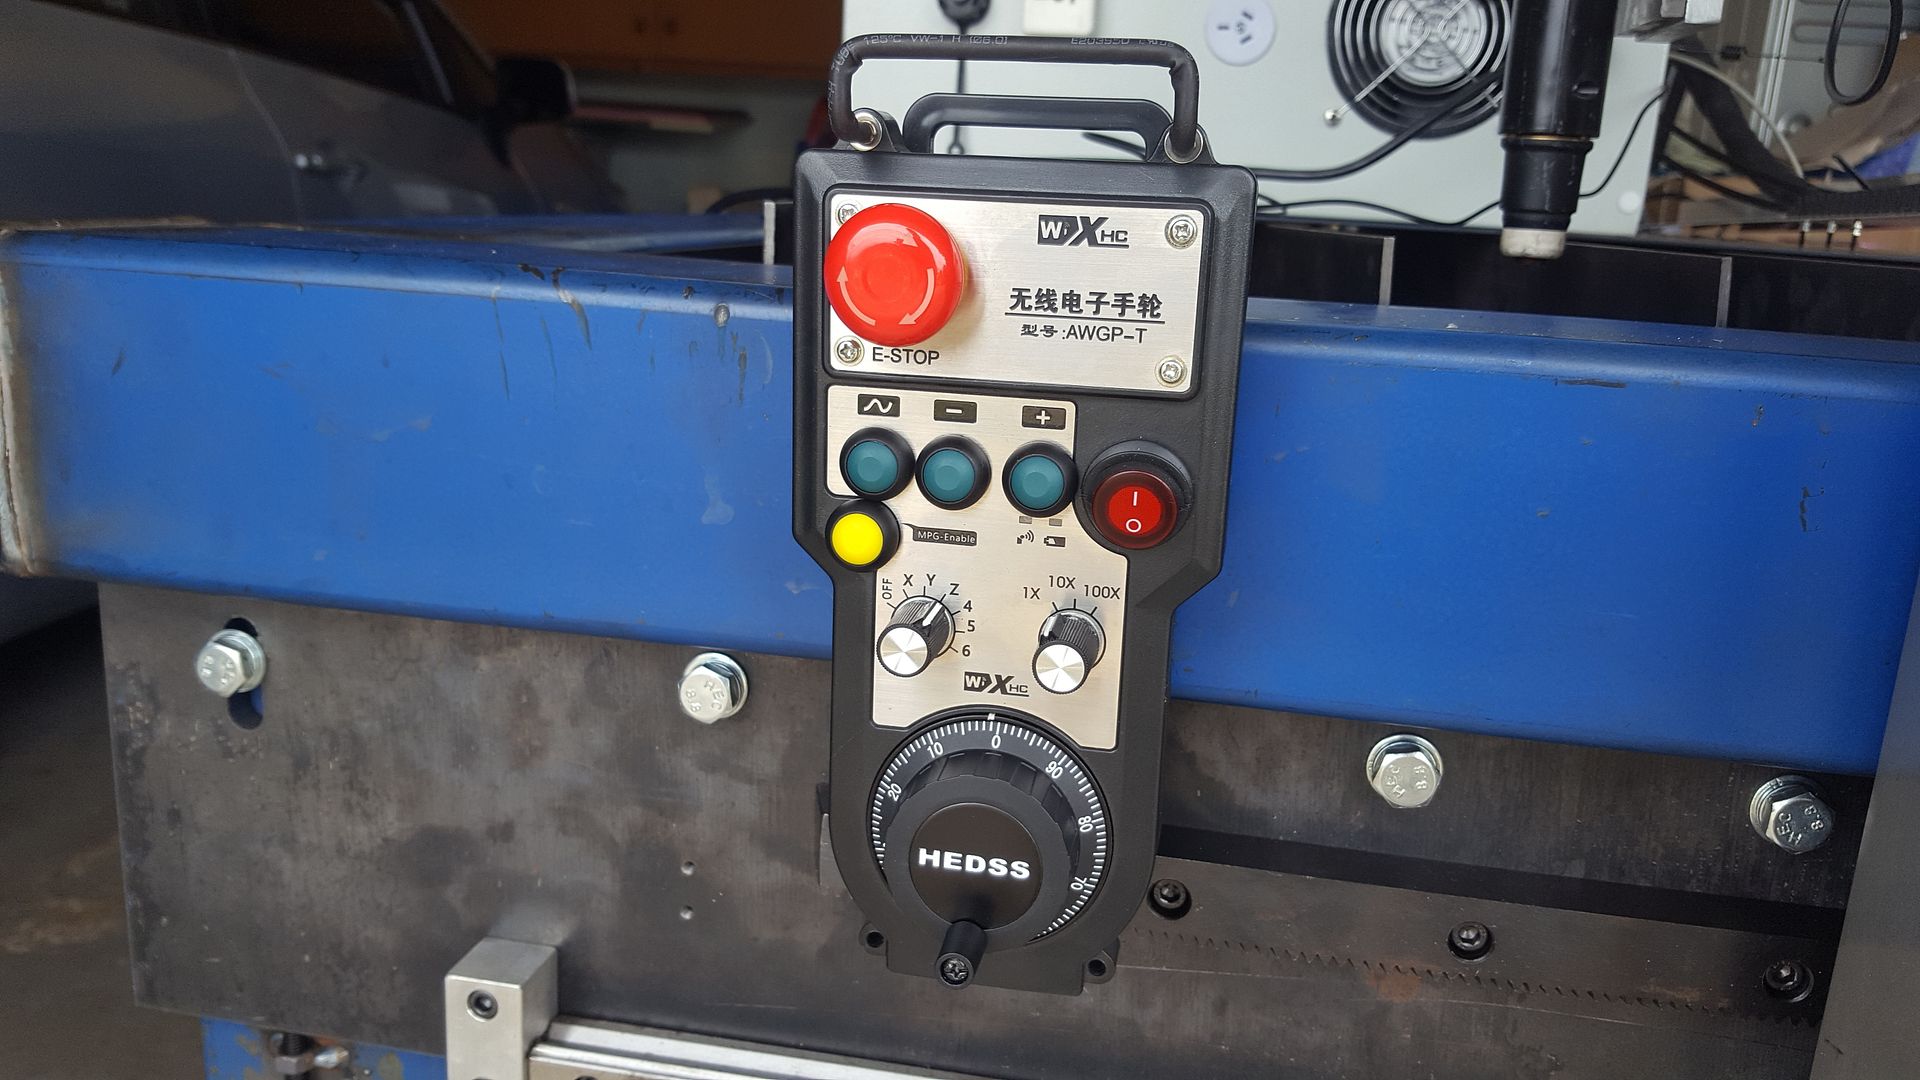
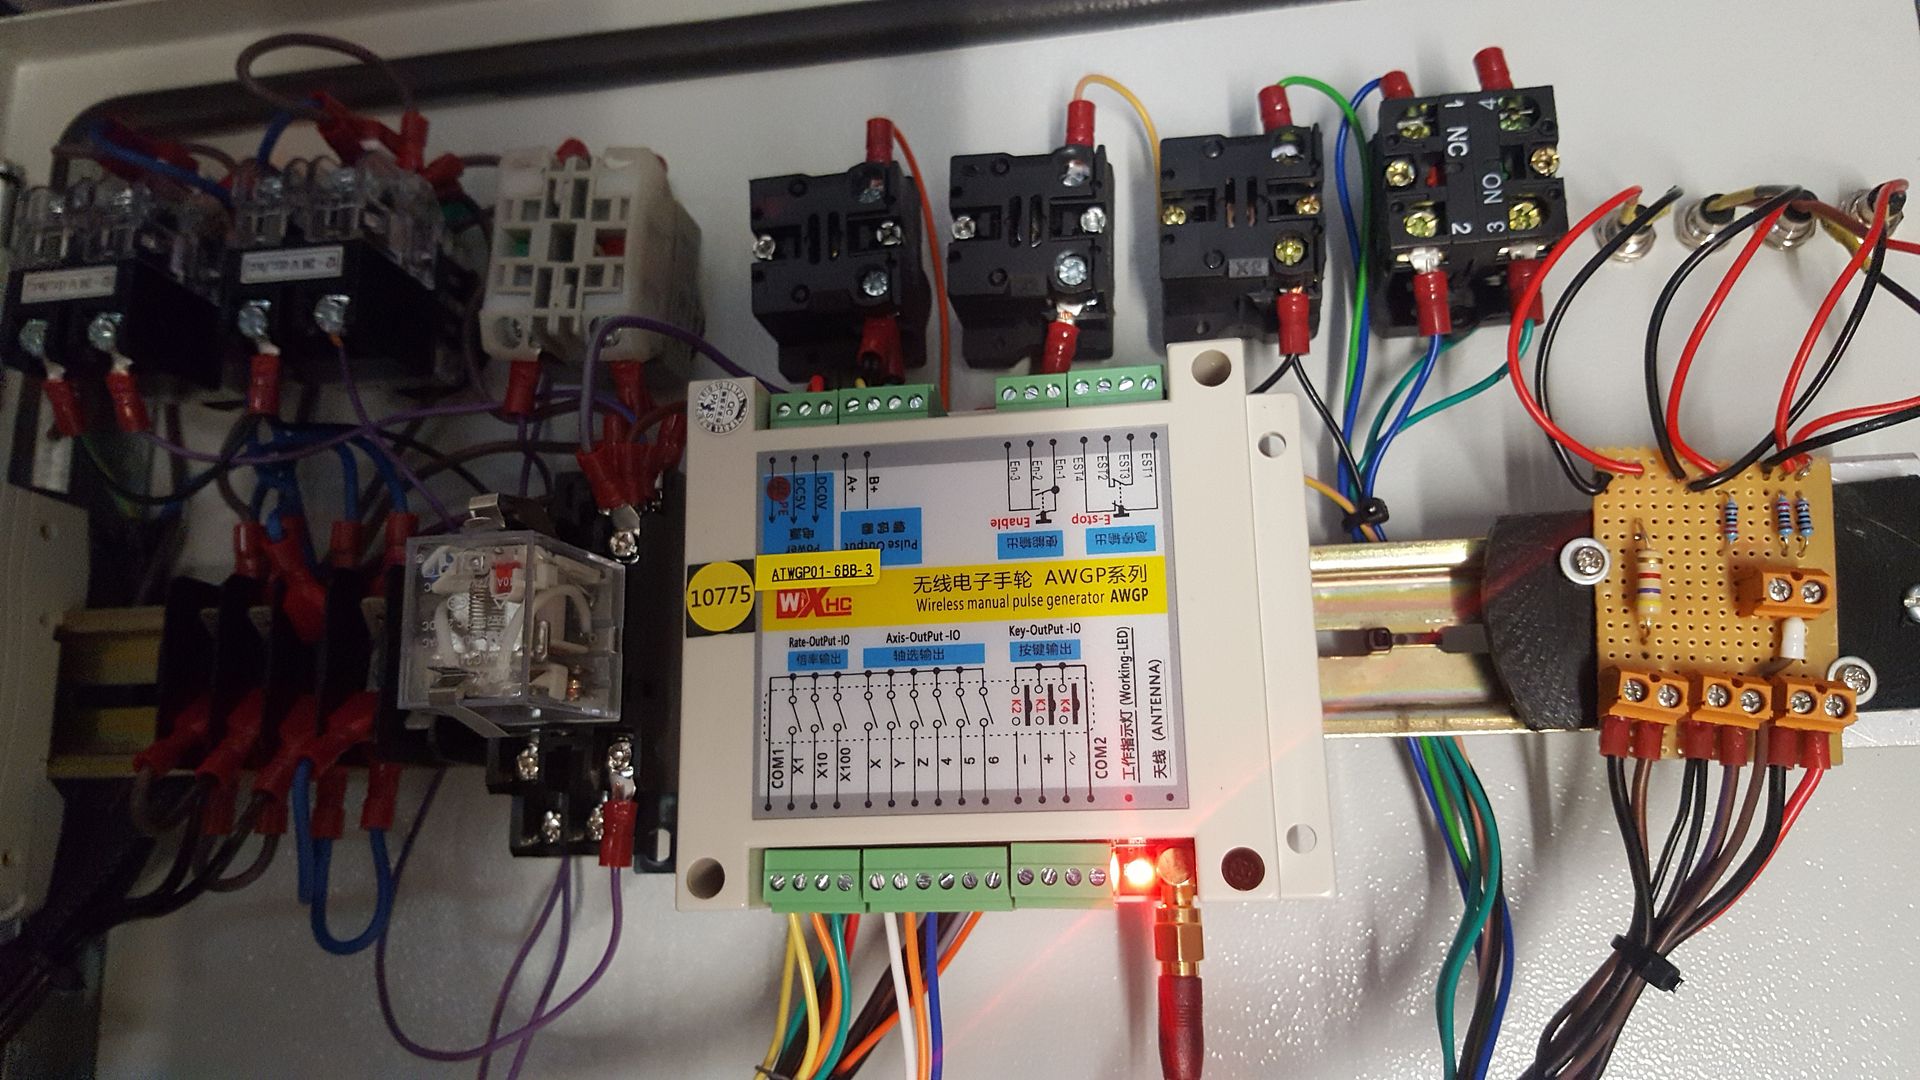
This is a bit of a cut above the wired and USB ones as it has a dedicated receiver and external antenna that wires in to the control box.
I specified that the axis selection and scale switches use binary outputs and the scale switch slotted straight into my mux4 code posted earlier in this thread. That code does not use an axis selection switch though. Whilst I could have used another mux4 to select just the X, Y & Z axes, to get the full 6 axis selection, I needed 3 bits of input. I was not really sure how to take this from 3 bits to a single enable bit per axis but after a bit of reading, I came up with a pretty simple solution. select8 is a component that does exactly that. It takes an S32 input (from 0-7) and turns on a bit output for that number which can be used for axis.n.jog-enable. So I used a mux8 component to decode the switch into a number between 0 and 7. Then convert the output from float to S32 and send the result to select8 which in turn enables the relevant axis.
Anyway it all worked perfect. I am going to play with ilowpass as the motion is a bit jerky but there is an example in the docs on how to do that.
Who would have thought I could work out a solution on my own a few months ago?
I still have to connect up a few more pendant switches and the estop button but that should be relatively easy from here. There are 3 custom buttons, and the estop relay.
One thing I don't understand is an e-stop chain and how hal treats it. I need to get my head around that.
This morning, I got the remote pendant jogging all axes.
This is a bit of a cut above the wired and USB ones as it has a dedicated receiver and external antenna that wires in to the control box.
I specified that the axis selection and scale switches use binary outputs and the scale switch slotted straight into my mux4 code posted earlier in this thread. That code does not use an axis selection switch though. Whilst I could have used another mux4 to select just the X, Y & Z axes, to get the full 6 axis selection, I needed 3 bits of input. I was not really sure how to take this from 3 bits to a single enable bit per axis but after a bit of reading, I came up with a pretty simple solution. select8 is a component that does exactly that. It takes an S32 input (from 0-7) and turns on a bit output for that number which can be used for axis.n.jog-enable. So I used a mux8 component to decode the switch into a number between 0 and 7. Then convert the output from float to S32 and send the result to select8 which in turn enables the relevant axis.
Anyway it all worked perfect. I am going to play with ilowpass as the motion is a bit jerky but there is an example in the docs on how to do that.
Who would have thought I could work out a solution on my own a few months ago?
I still have to connect up a few more pendant switches and the estop button but that should be relatively easy from here. There are 3 custom buttons, and the estop relay.
One thing I don't understand is an e-stop chain and how hal treats it. I need to get my head around that.
Please Log in or Create an account to join the conversation.
- racedirector
- Offline
- Elite Member
-

Less
More
- Posts: 231
- Thank you received: 42
14 May 2017 04:21 #93175
by racedirector
Replied by racedirector on topic Rods "Spaceship" Scratch built Plasma Cutter build
Nice work matey, you'll be cutting in no time.
Do you have a link to that pendant? Love the look of it and might replace my other wireless one.
Do you have a link to that pendant? Love the look of it and might replace my other wireless one.
Please Log in or Create an account to join the conversation.
- bevins
-
- Offline
- Platinum Member
-
Less
More
- Posts: 1942
- Thank you received: 338
18 May 2017 14:02 #93349
by bevins
Replied by bevins on topic Rods "Spaceship" Scratch built Plasma Cutter build
Nice work.
I like that pendant!!
I like that pendant!!
The following user(s) said Thank You: rodw
Please Log in or Create an account to join the conversation.
- rodw
-
Topic Author
- Offline
- Platinum Member
-
Less
More
- Posts: 11990
- Thank you received: 4084
24 Jun 2017 11:31 #94883
by rodw
Replied by rodw on topic Rods "Spaceship" Scratch built Plasma Cutter build
Geez, its been about 6-7 weeks since I have done anything to my table. I've been unwell and have had a couple of stints of day surgery. Last weeks exercise was to do a biopsy of something on my vocal chords and I'm sure it was just an exercise where the doctors pass you round among their mates until they shake all the money out of your pockets. It wsw benign of course! I've also been exceedingly flat out with my online store that started as a hobby 8 years ago and has recently taken off so I've been building new strategies for it to keep it pushing along.
Anyway, I spent the morning machining some parts for a customer so I thought I might as well make a day of it so I spent the afternoon working on my plasma table again.
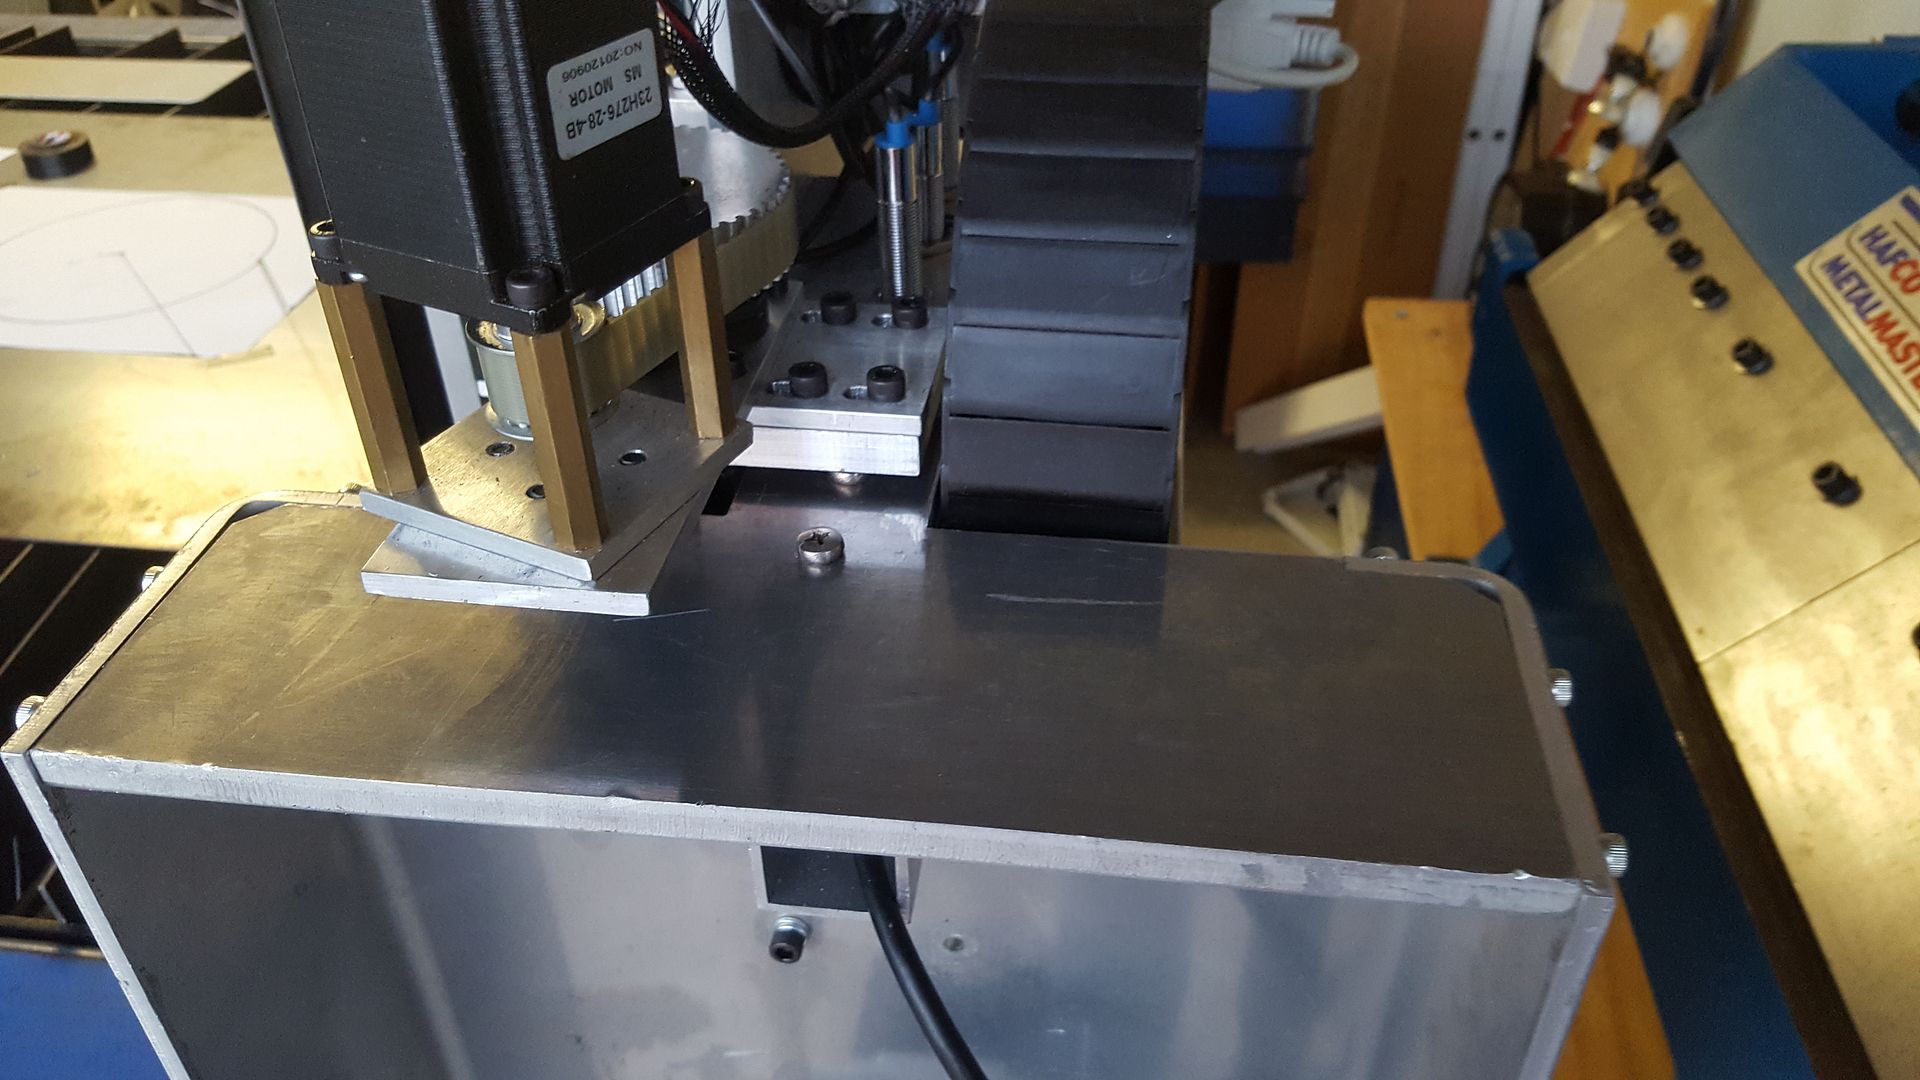
I shortened and refitted the cable tray at the rear of the gantry, Added a metal cable cover for the half that is not in a cable cage
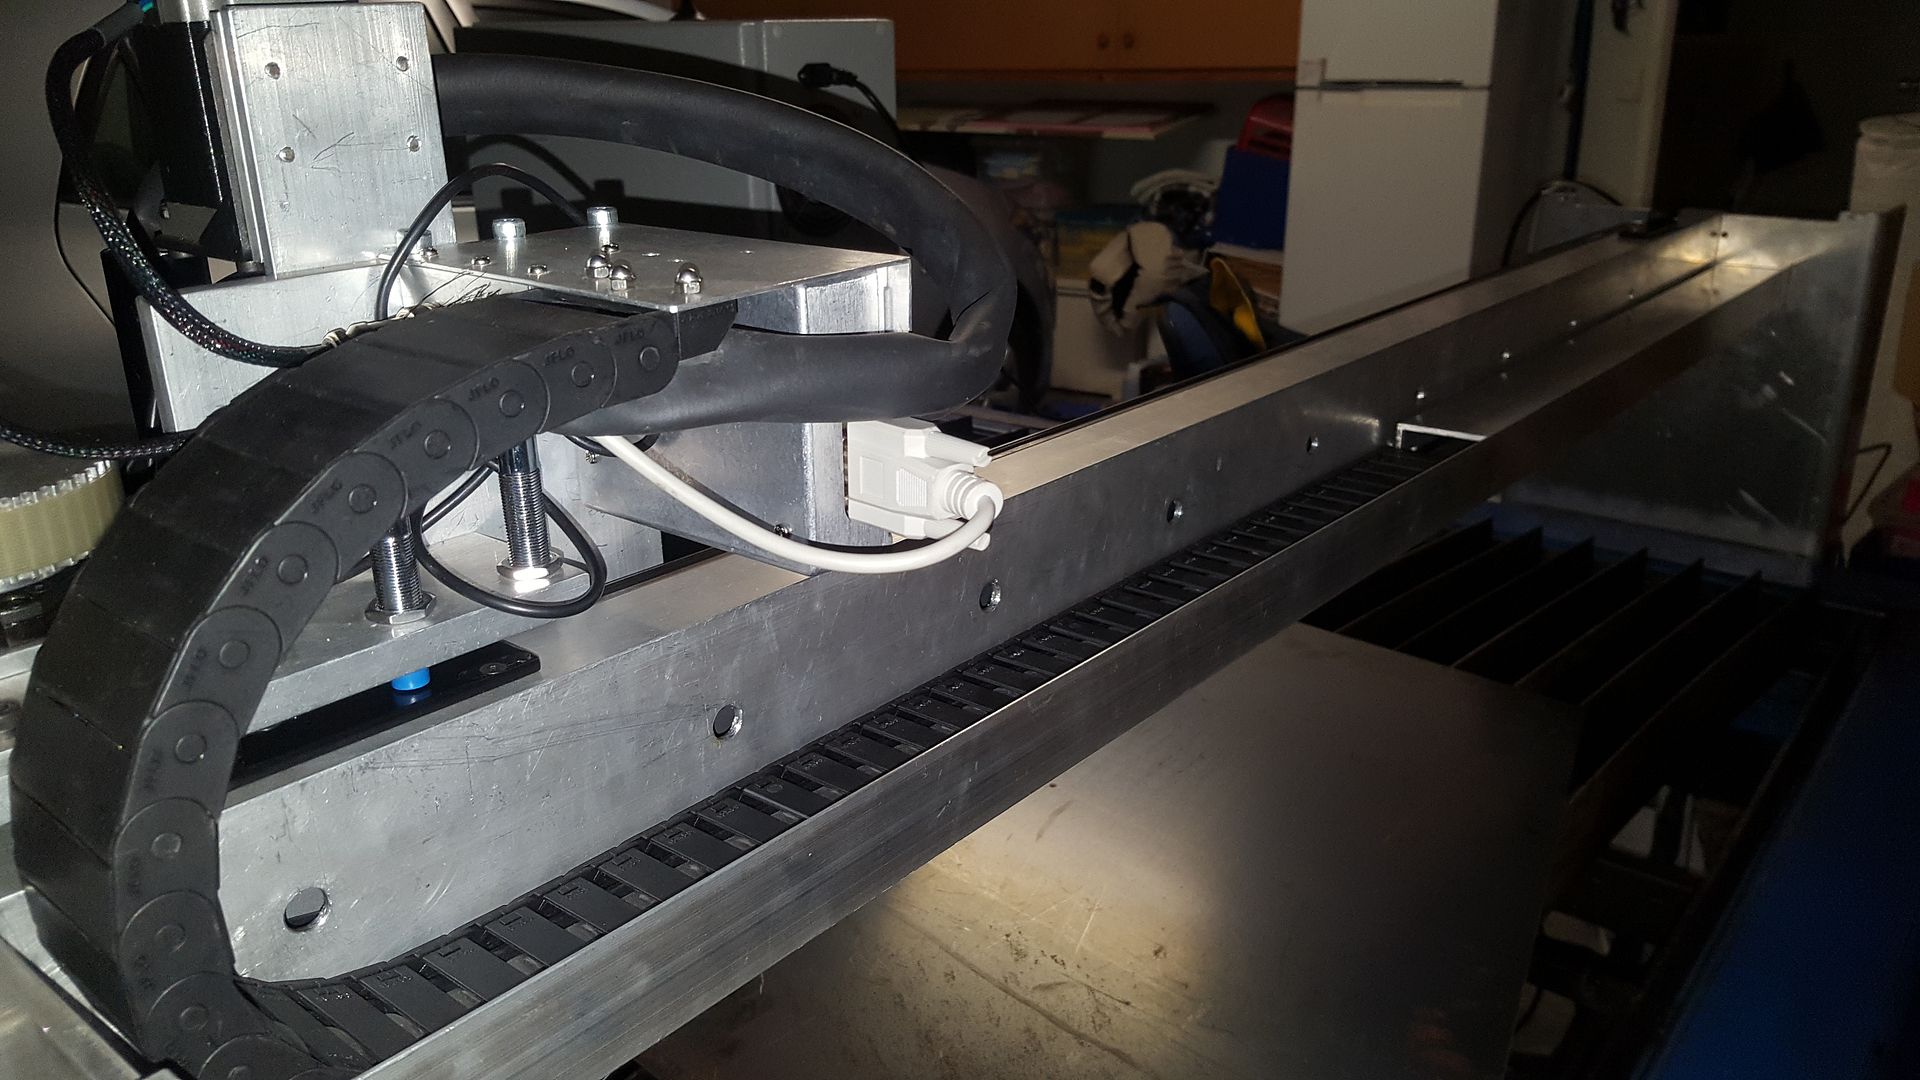
I also got the two gantry motors fitted up on the linear rails and tracks. I had to get some parts powdercoated during the month so I sent out my limit switches and adjustable feet while I was at it. A real Henry Ford Affair. Any colour as long as its black!
Anyway, it moves:
It did not move far as I had the electronics enclosure sitting on the table and I don't have the limit switches wired up yet.
Of course, with all of the stuffing around with wiring, I had knocked one of the wires off a stepper controller and it took a little while to work out where the trouble was so I nearly broke it on the first attempt.
So about the only thing left to do is to mount up the 6 limit and home switches for the table. Only 18 wires to go! There is still an enormous amount to do as I have not added any connectors to the control box yet. I also have to mount up the laser cut braces that will connect the gantry ends to the gantry rail. Some of those have not worked out exactly as I expected so I'm not sure how that will go.
Anyway, I spent the morning machining some parts for a customer so I thought I might as well make a day of it so I spent the afternoon working on my plasma table again.
I shortened and refitted the cable tray at the rear of the gantry, Added a metal cable cover for the half that is not in a cable cage
I also got the two gantry motors fitted up on the linear rails and tracks. I had to get some parts powdercoated during the month so I sent out my limit switches and adjustable feet while I was at it. A real Henry Ford Affair. Any colour as long as its black!
Anyway, it moves:
It did not move far as I had the electronics enclosure sitting on the table and I don't have the limit switches wired up yet.
Of course, with all of the stuffing around with wiring, I had knocked one of the wires off a stepper controller and it took a little while to work out where the trouble was so I nearly broke it on the first attempt.
So about the only thing left to do is to mount up the 6 limit and home switches for the table. Only 18 wires to go! There is still an enormous amount to do as I have not added any connectors to the control box yet. I also have to mount up the laser cut braces that will connect the gantry ends to the gantry rail. Some of those have not worked out exactly as I expected so I'm not sure how that will go.
The following user(s) said Thank You: tommylight
Please Log in or Create an account to join the conversation.
- rodw
-
Topic Author
- Offline
- Platinum Member
-
Less
More
- Posts: 11990
- Thank you received: 4084
25 Jun 2017 07:41 #94911
by rodw
Replied by rodw on topic Rods "Spaceship" Scratch built Plasma Cutter build
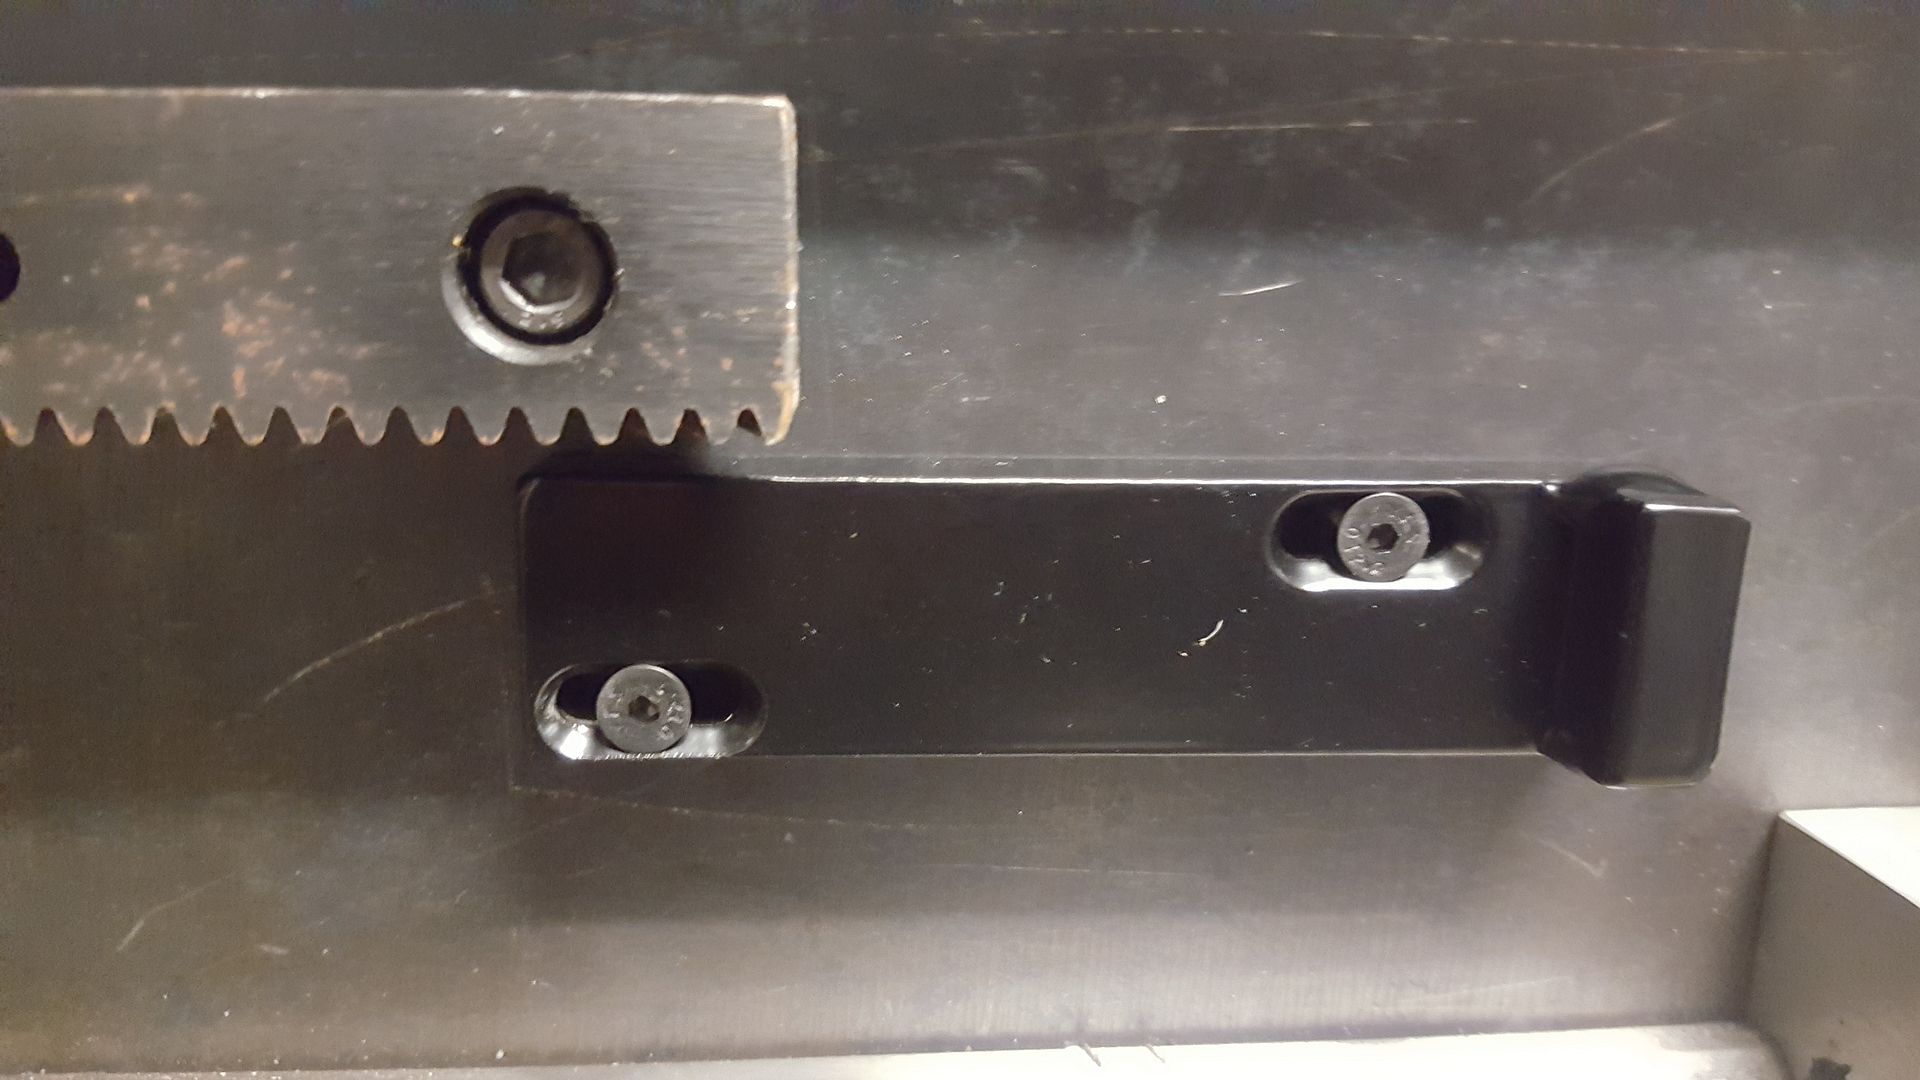
I got a bit more done today. Got the Gantry ends braced up.

I tested the movement of the gantry ends with a dial indicator under acceleration and it seemed OK. Then I taped a felt pen onto the torch and drew a circle. Not perfect but the pen was flexing like crazy so I am sure it is going to work out nice and accurate.
I've got one more part to modify and the limit switches to wire in and I might even be able to cut something!.
Somehow I've lost 3 proximity sensors so I am short on limit switches which is very annoying. Hopefully they will turn up.
The following user(s) said Thank You: tommylight
Please Log in or Create an account to join the conversation.
- rodw
-
Topic Author
- Offline
- Platinum Member
-
Less
More
- Posts: 11990
- Thank you received: 4084
02 Jul 2017 12:36 - 02 Jul 2017 12:42 #95275
by rodw
Replied by rodw on topic Rods "Spaceship" Scratch built Plasma Cutter build
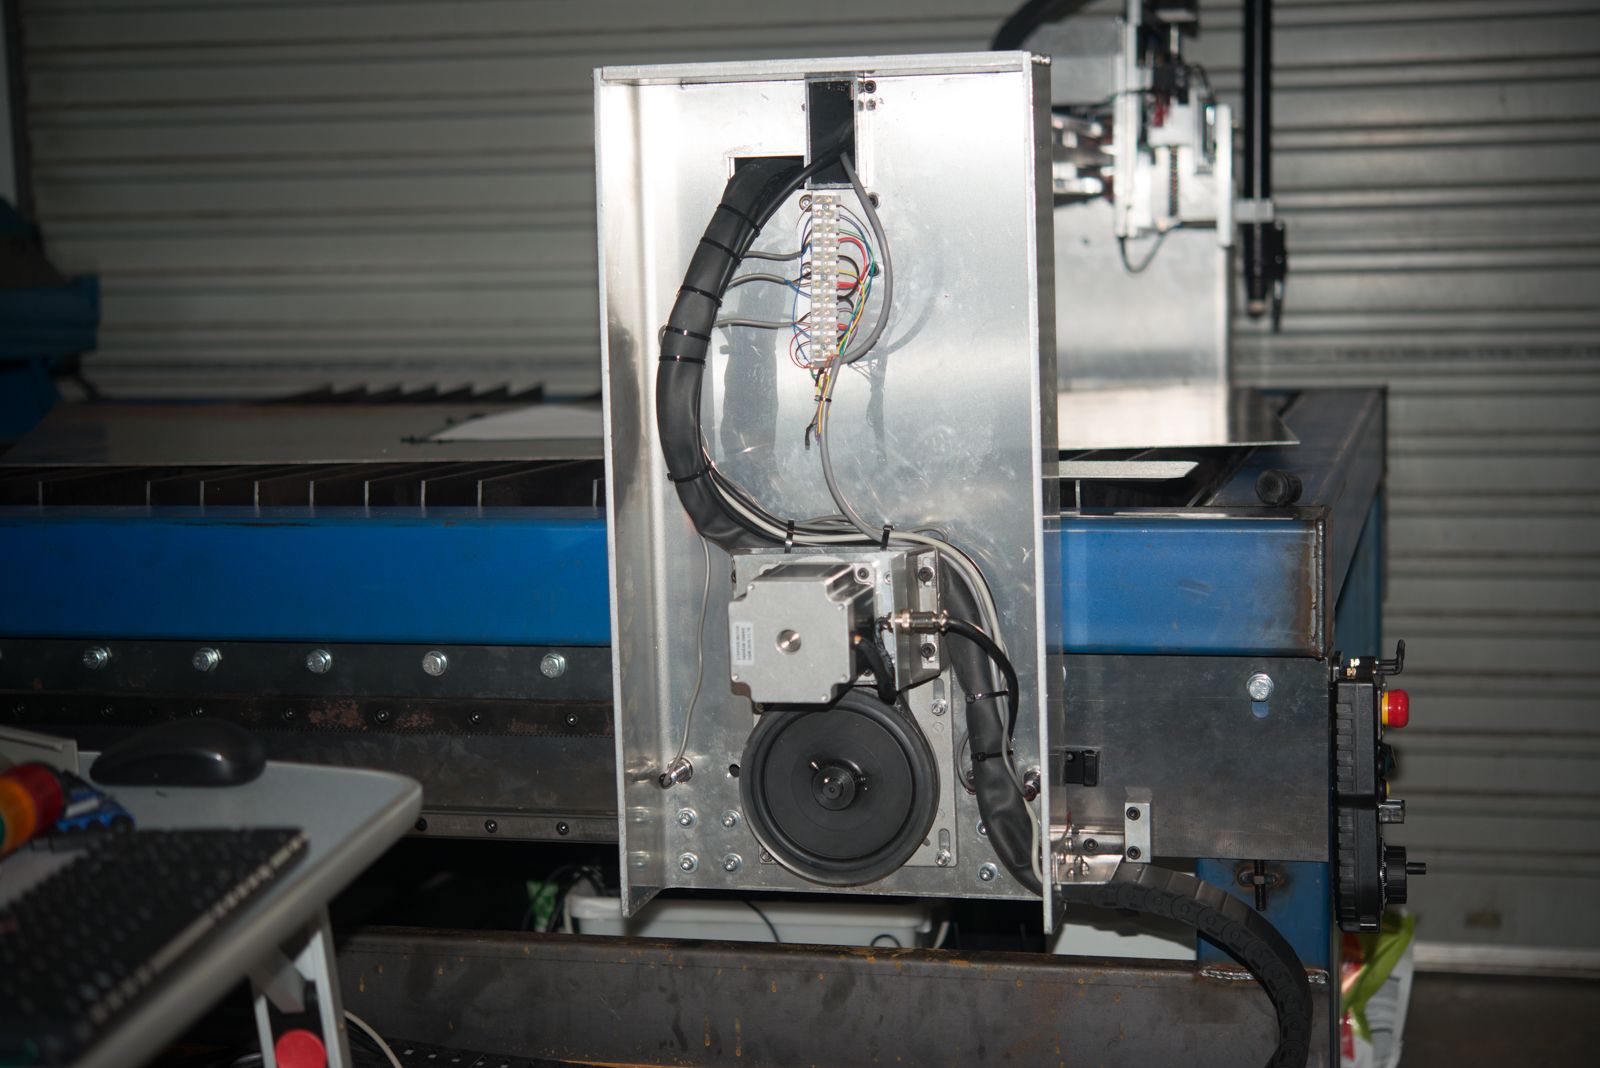
I don't seem to have achieved much this weekend but I spent a fair bit of time on this.
First off I shortened the Z axis torch mount to gain more clearance under the gantry. This was a bigger job then expected as my brand new bimetal blade had the teeth facing backwards so it did not cut very well at all. So I eneded up having to swap it out again for an old school blade.
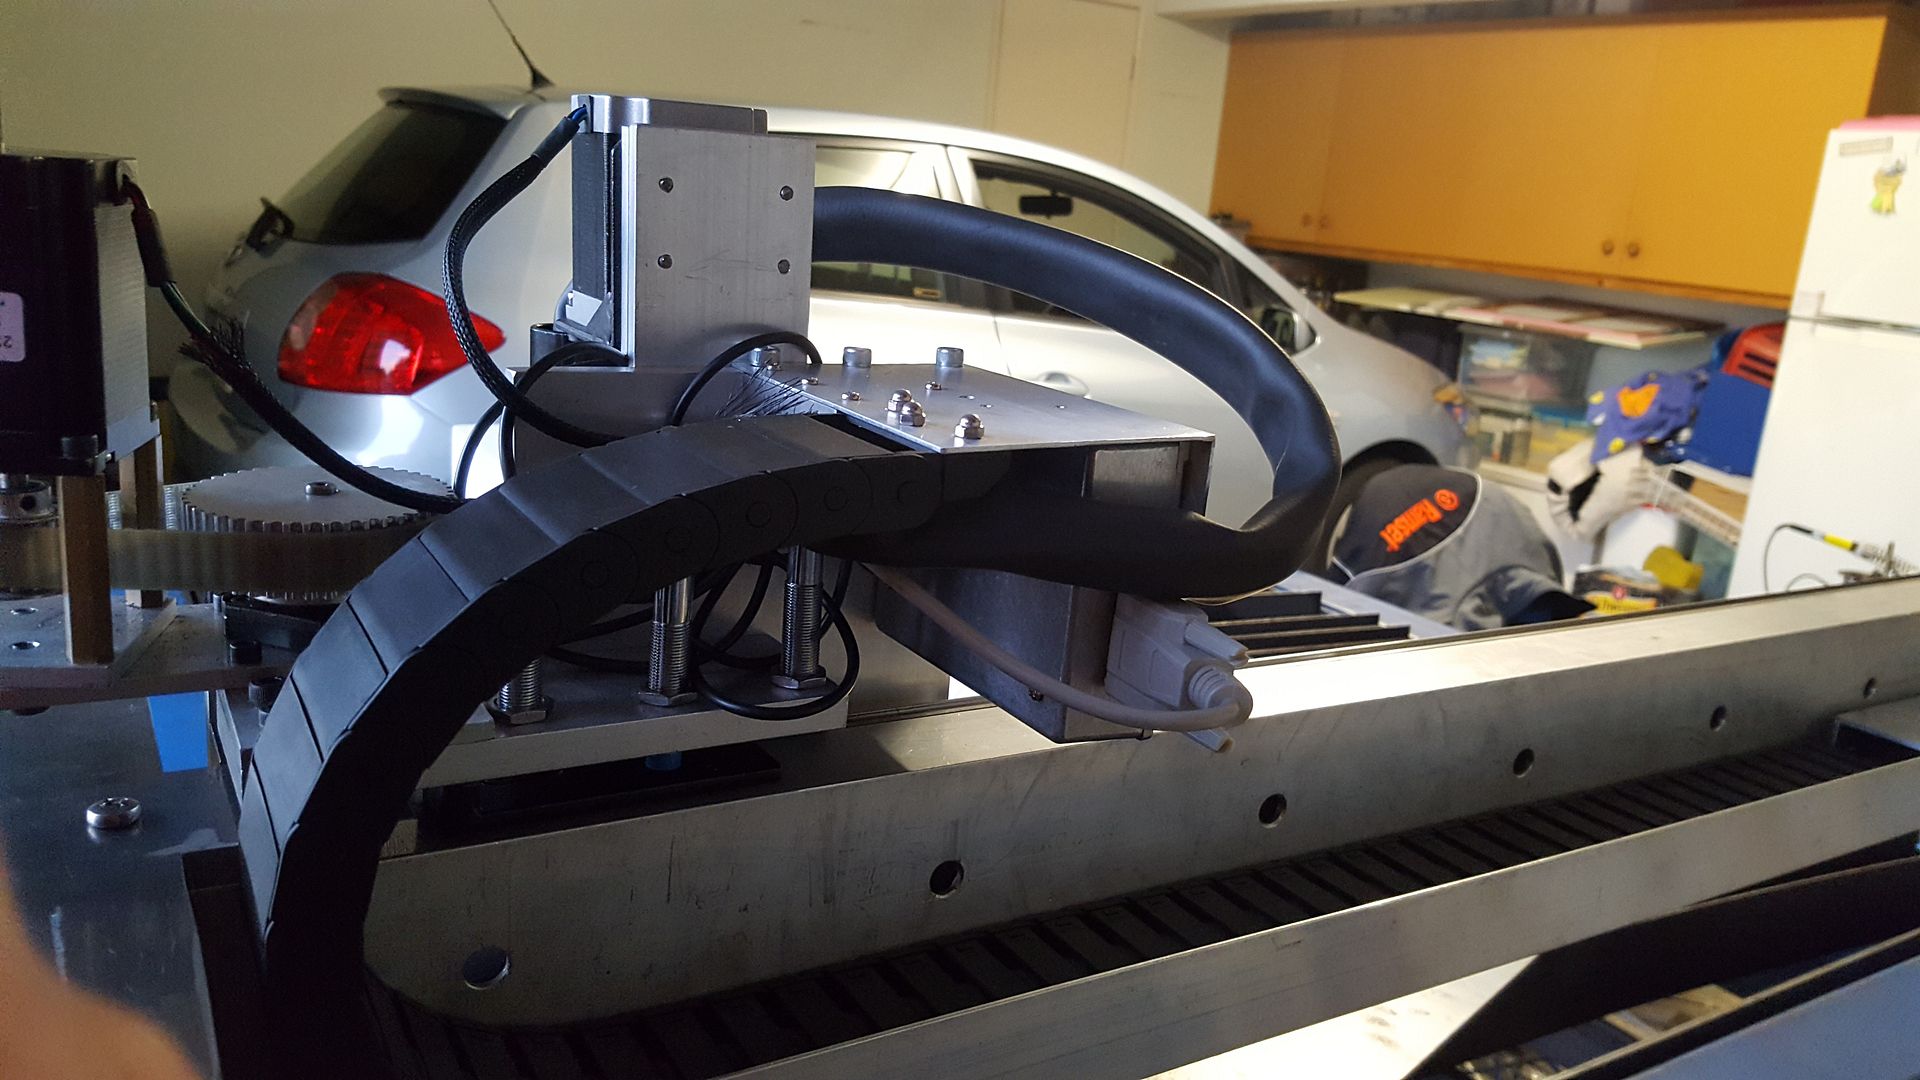
I'm using a 9 core shielded cable for the gantry limit switches. Allowing for +24v and - 24v signals, that gives me 7 signal wires and I need 6 to handle the limit switches and home switch for each side of the gantry.
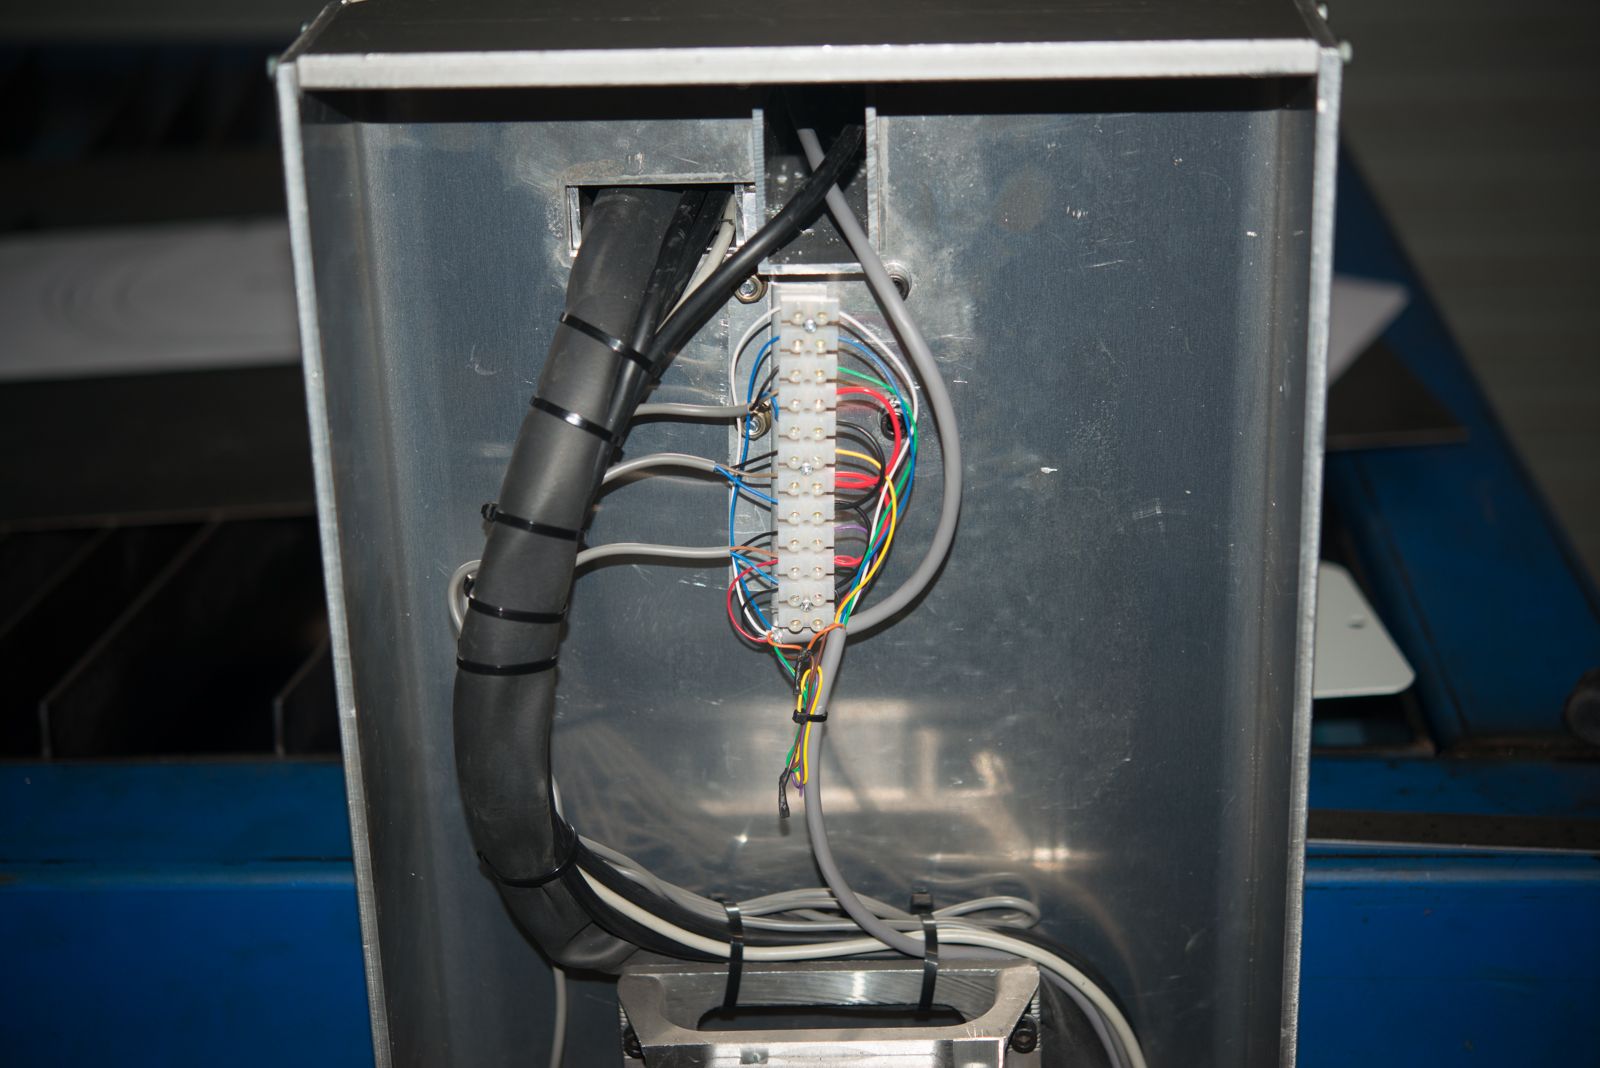
You can see the plasma torch lead and the three proximity sensor cables in this pic. The remaining 4 signal wires are routed to the other side of the machine where the sensors are repeated.
Sorting out the drag chain was quite time consuming and I'm a bit worried I have packed in too many wires for the available space

I still have not got the limit switches wired up into the control cabinet but
I have got far enough to play with the machine. So I taped a felt pen to the torch and let her rip a few tiems
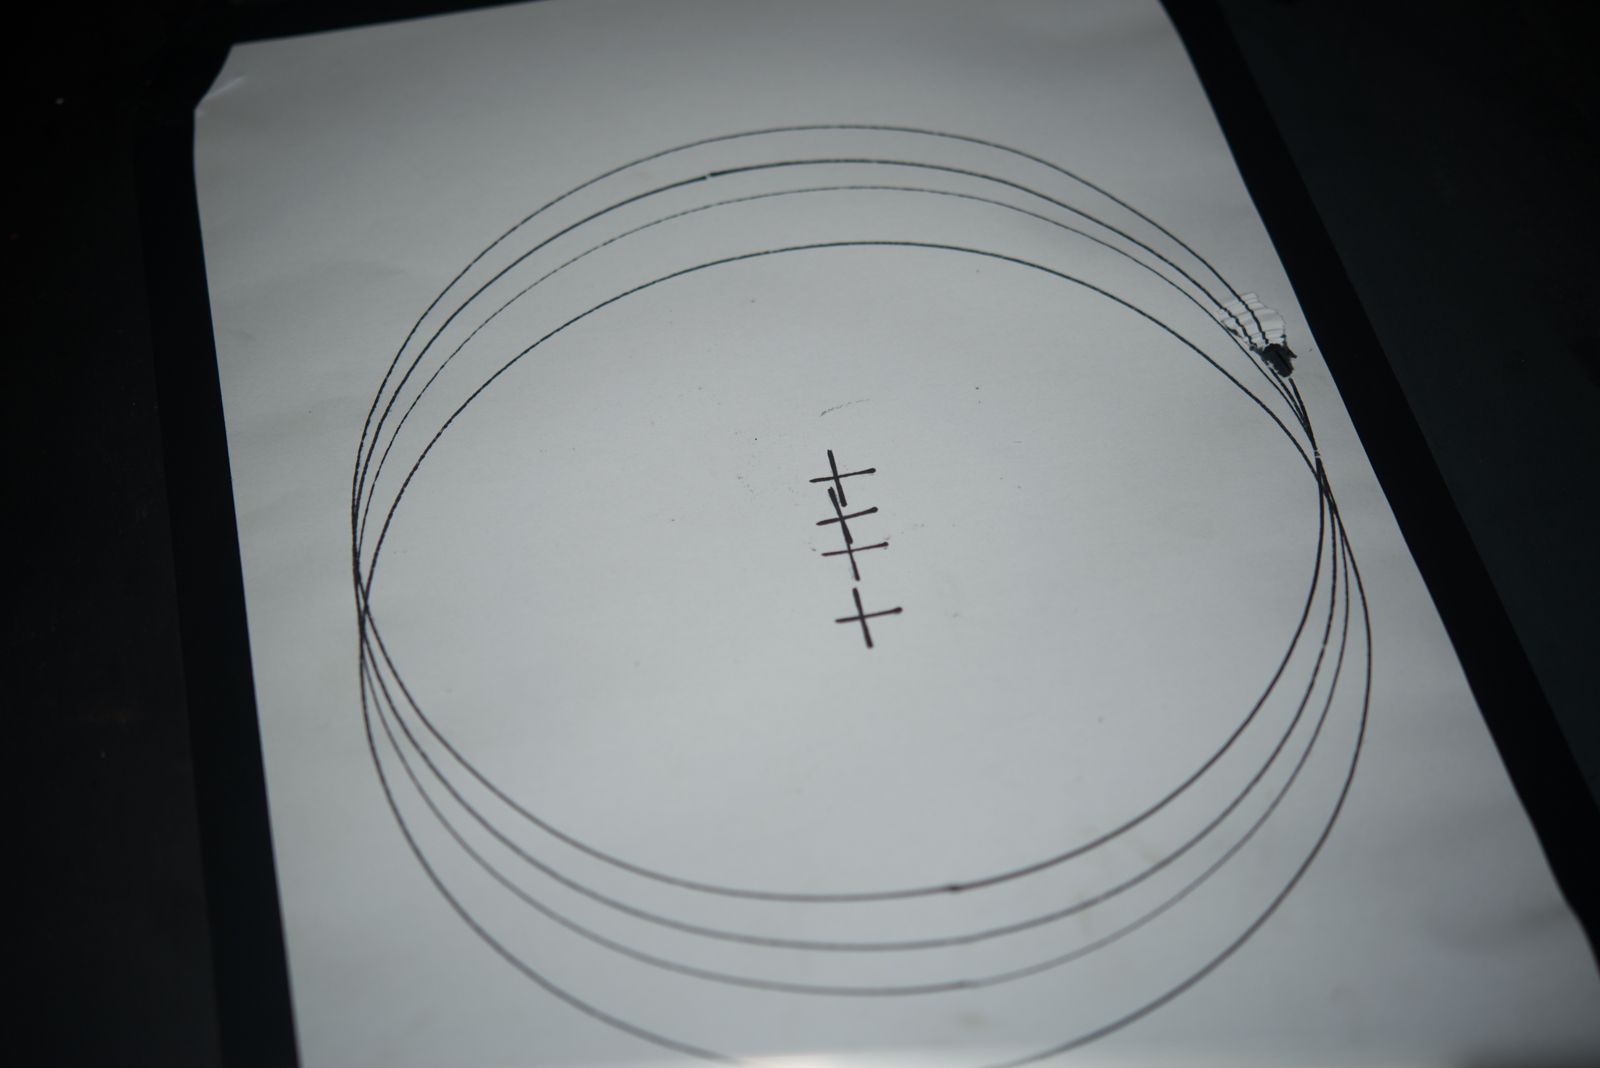
The pen ha s a bit of a wobble to it but it seems the dimensions of the circle are in the ball park.
Anyway, thats as far sas I go today so I'm feeling pretty good about progress this weekend.
First off I shortened the Z axis torch mount to gain more clearance under the gantry. This was a bigger job then expected as my brand new bimetal blade had the teeth facing backwards so it did not cut very well at all. So I eneded up having to swap it out again for an old school blade.
I'm using a 9 core shielded cable for the gantry limit switches. Allowing for +24v and - 24v signals, that gives me 7 signal wires and I need 6 to handle the limit switches and home switch for each side of the gantry.
You can see the plasma torch lead and the three proximity sensor cables in this pic. The remaining 4 signal wires are routed to the other side of the machine where the sensors are repeated.
Sorting out the drag chain was quite time consuming and I'm a bit worried I have packed in too many wires for the available space
I still have not got the limit switches wired up into the control cabinet but
I have got far enough to play with the machine. So I taped a felt pen to the torch and let her rip a few tiems
The pen ha s a bit of a wobble to it but it seems the dimensions of the circle are in the ball park.
Anyway, thats as far sas I go today so I'm feeling pretty good about progress this weekend.
Last edit: 02 Jul 2017 12:42 by rodw.
Please Log in or Create an account to join the conversation.
- rodw
-
Topic Author
- Offline
- Platinum Member
-
Less
More
- Posts: 11990
- Thank you received: 4084
09 Jul 2017 07:08 #95529
by rodw
Replied by rodw on topic Rods "Spaceship" Scratch built Plasma Cutter build
Well it been 12 months since I bought my first part but this machine is nearly done. I'm really happy to actually see this machine running Gcode.
Once finished, this will be quite a landmark machine for the LinuxCNC community as I will be using the external offset branch. Despite some talk, I have yet to see any one else implement the external offset
Now its moving, I've spent a fair bit of time debugging and double checking HAL and .INI files. I've done as much testing as I can without cutting stuff. But before I can do that I will have to make sure that I have a Sheetcam post processor that works.
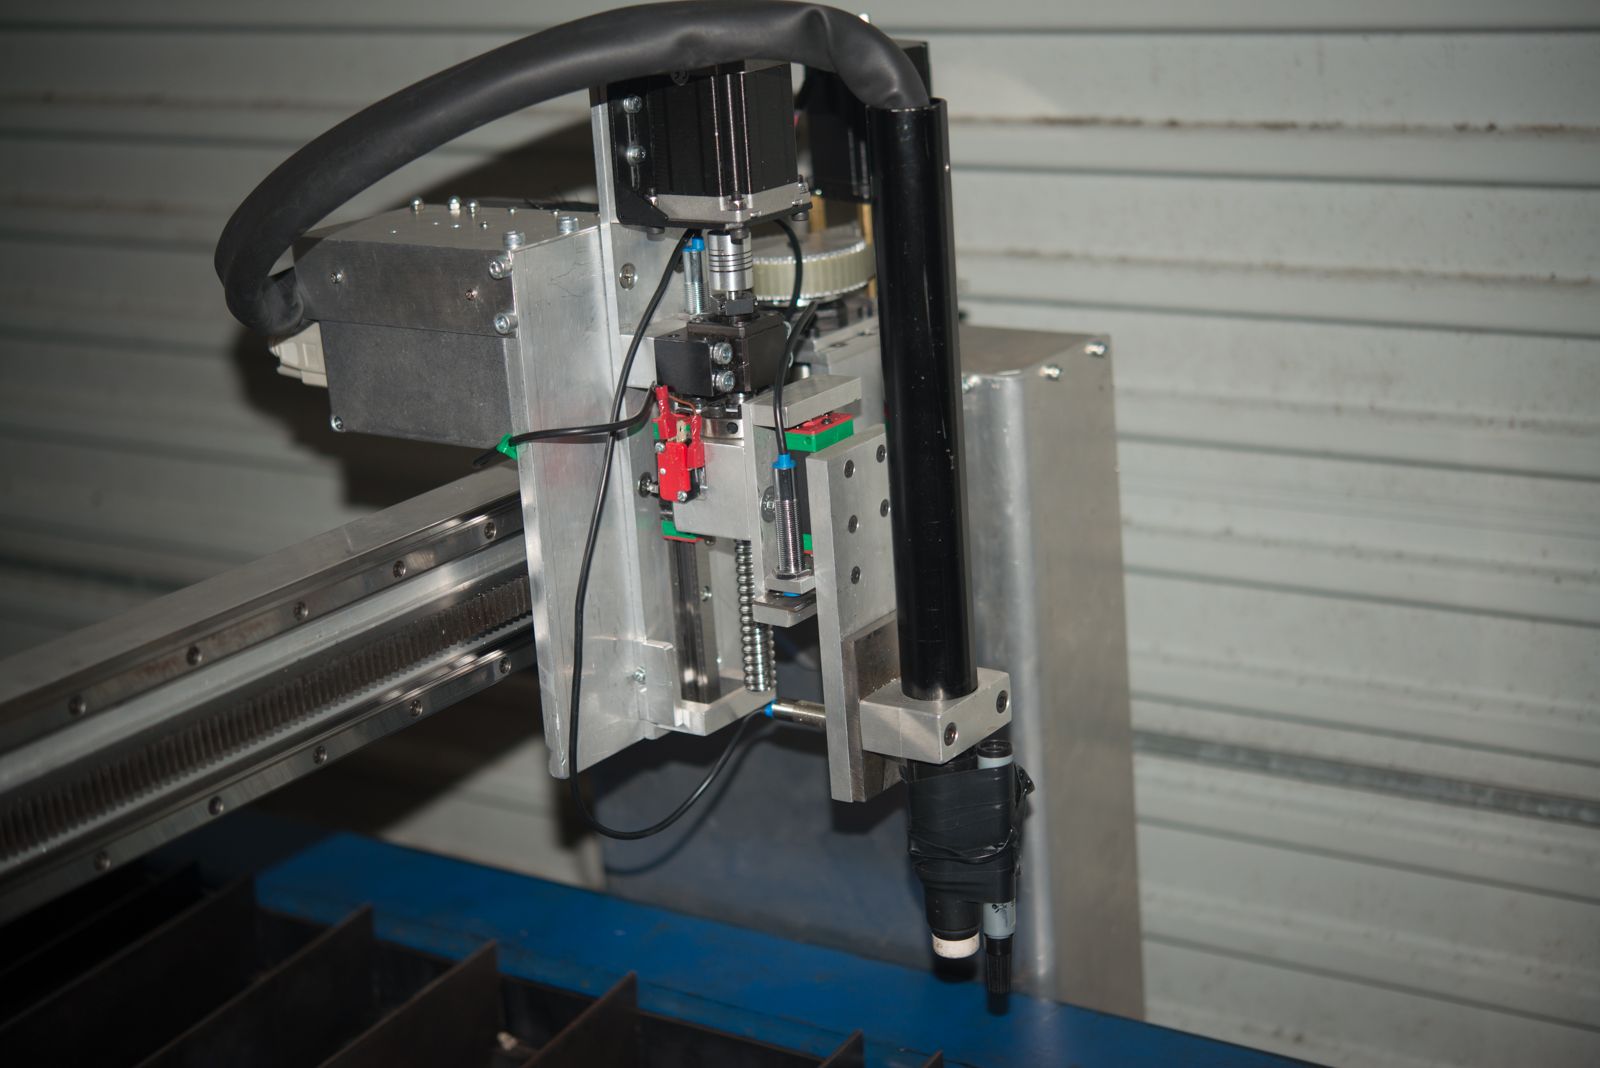
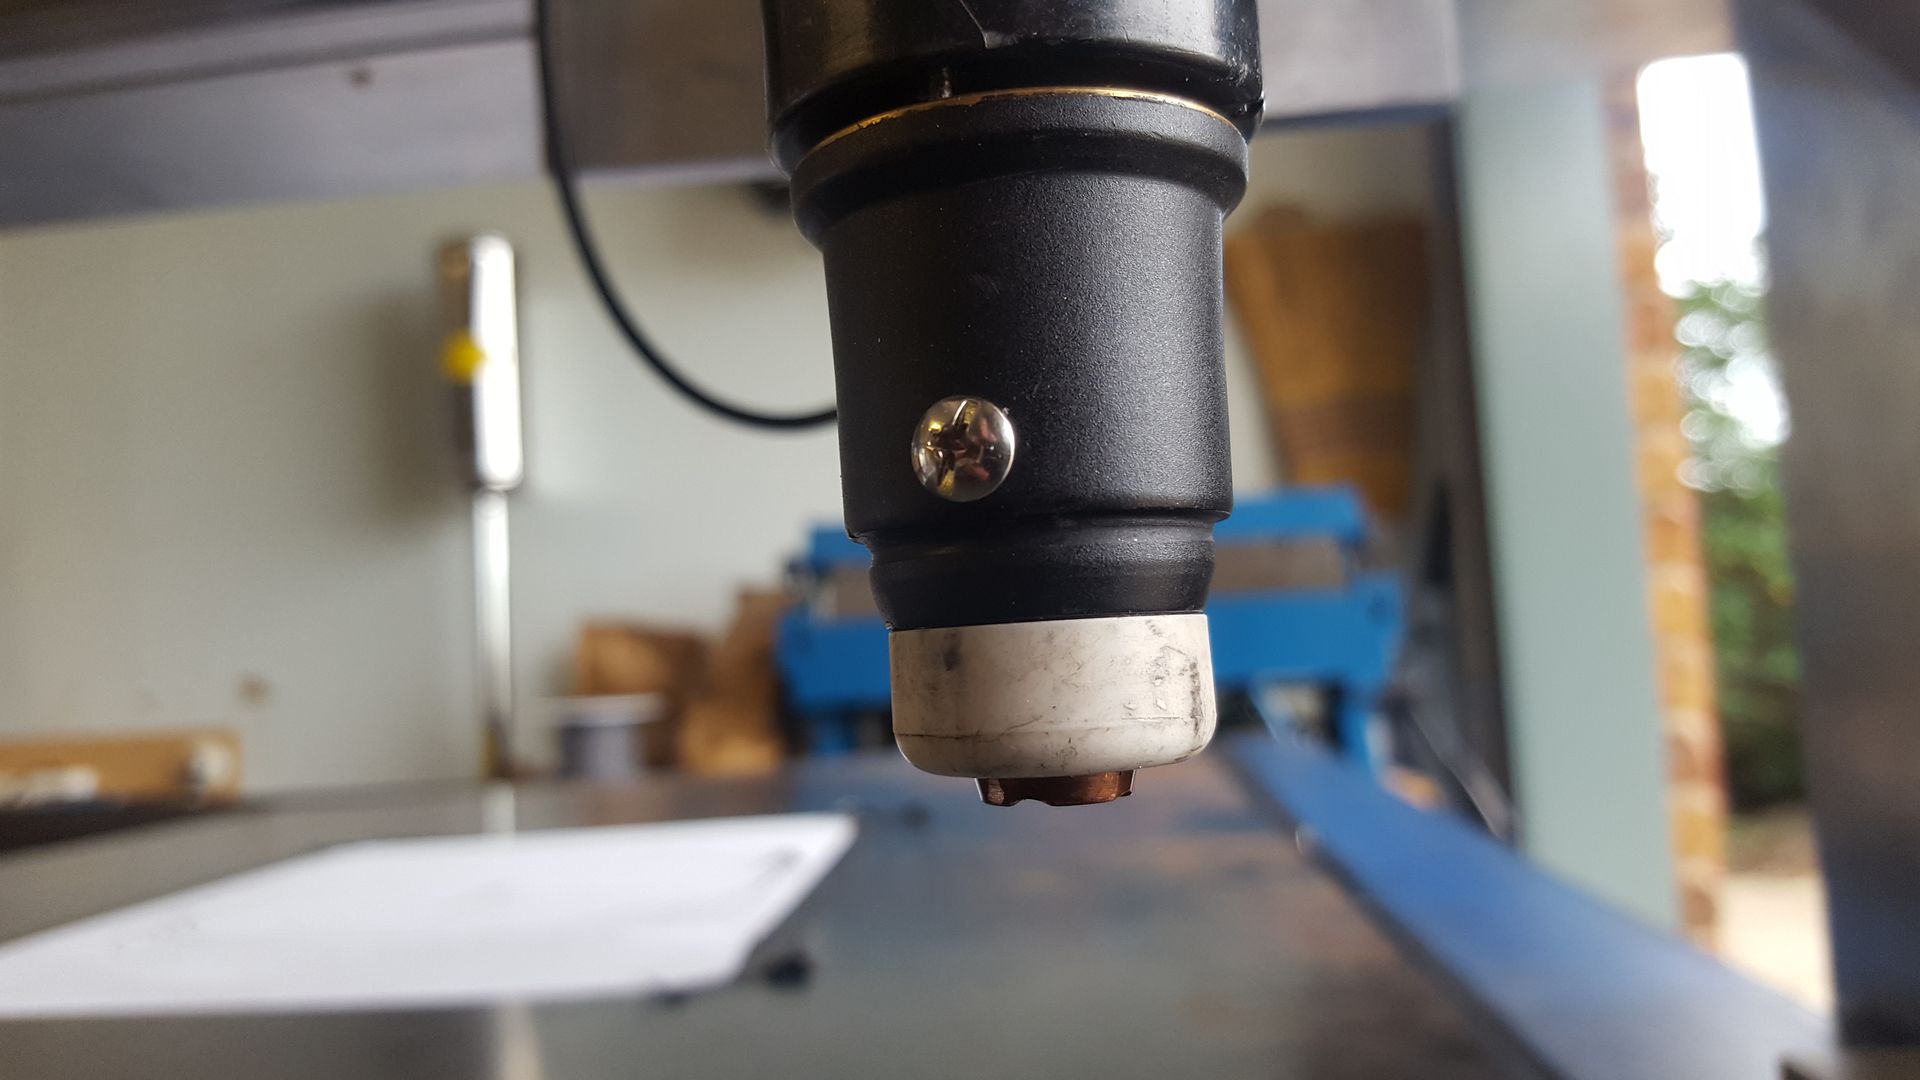
I did find out why people use Ohmic sensing. Here is some 2mm plate during a mock touch off and you can see the plate springing down before the probe triggers and follow the torch up.
My Traffimet torch does not have provision for an ohmic sensor so I drilled and tapped the cup so I can attach a wire as there is now an electrical connection between the screw and the tip.
My torch has a connection to the earth clamp on the plasma in the CNC port and previously I found a relay circuit for a sensing circuit which I've modified a bit
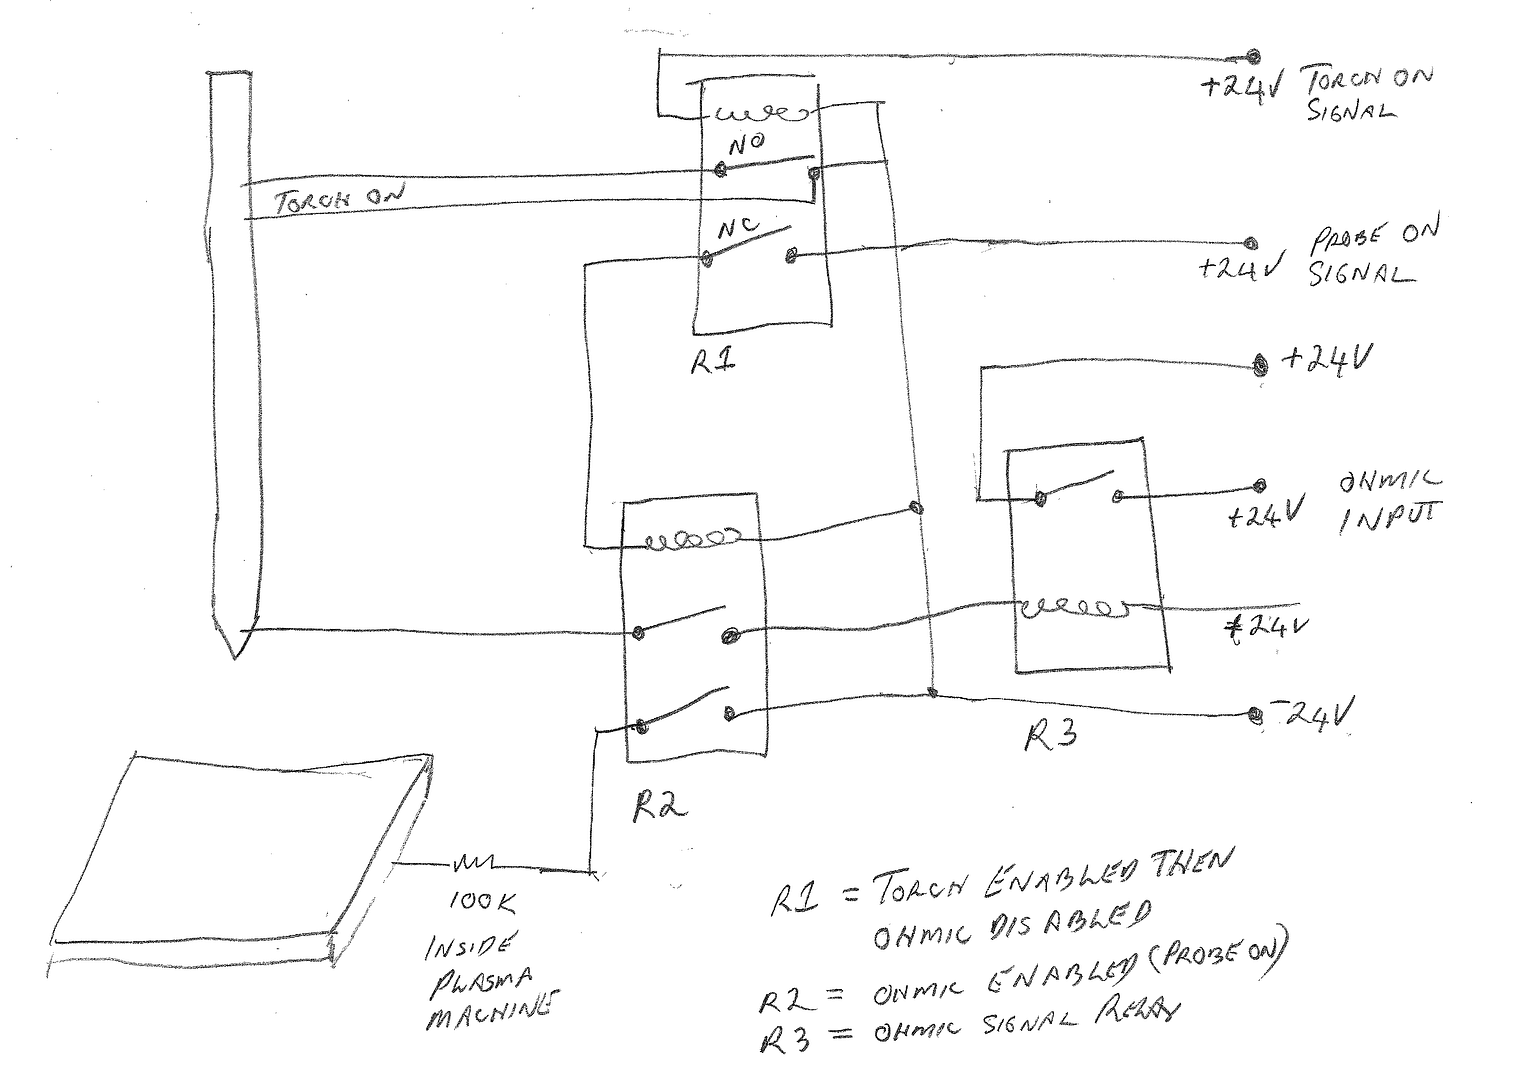
So I bought a couple of relays today so I can build this circuit. I am sure the questions will begin now I've got this far and here is the first one.
I think the bottom two 24 volt lines that go to the workpiece and the torch should be from an isolated power supply so there is no chance of blowing up my Mesa 7i76e. What is the cheapest and/or best way to to do this? WIll a simple buck power supply off the 48 volt rail do the job or should I get a small DIN rail power supply?
Once finished, this will be quite a landmark machine for the LinuxCNC community as I will be using the external offset branch. Despite some talk, I have yet to see any one else implement the external offset
Now its moving, I've spent a fair bit of time debugging and double checking HAL and .INI files. I've done as much testing as I can without cutting stuff. But before I can do that I will have to make sure that I have a Sheetcam post processor that works.
I did find out why people use Ohmic sensing. Here is some 2mm plate during a mock touch off and you can see the plate springing down before the probe triggers and follow the torch up.
My Traffimet torch does not have provision for an ohmic sensor so I drilled and tapped the cup so I can attach a wire as there is now an electrical connection between the screw and the tip.
My torch has a connection to the earth clamp on the plasma in the CNC port and previously I found a relay circuit for a sensing circuit which I've modified a bit
So I bought a couple of relays today so I can build this circuit. I am sure the questions will begin now I've got this far and here is the first one.
I think the bottom two 24 volt lines that go to the workpiece and the torch should be from an isolated power supply so there is no chance of blowing up my Mesa 7i76e. What is the cheapest and/or best way to to do this? WIll a simple buck power supply off the 48 volt rail do the job or should I get a small DIN rail power supply?
Please Log in or Create an account to join the conversation.
- islander261
- Offline
- Platinum Member
-
Less
More
- Posts: 757
- Thank you received: 216
10 Jul 2017 00:19 #95567
by islander261
Replied by islander261 on topic Rods "Spaceship" Scratch built Plasma Cutter build
Rod
I'm happy to see your progress. I am stuck in production so I can't finish my machine until the fall. I have connected the controller to my table and can home and jog X&Y axis. The new Z axis appears to be working correctly on the bench so far.
I figured you'd get to the point of wanting ohmic sensing once you start cutting thinner sheet. I just use plain 12VDC out wall warts on both my present working system and my unfinished LinuxCNC controller for isolated power supplies. I disconnect the ohmic sensing with relays when not probing and use an Opto22 module for isolation to protect the 7I76e. I also use steering diodes to protect from actual plasma power supply voltages. I have extensively tested my LinuxCNC ohmic probing and it appears to work better than my present setup. I can post circuit if you want.
Also very important to provide a way to test the ohmic sensing for a shorted torch (dross or slag where you don't want it). LinuxCNC G38.xx probing is much more robust than Mach 3 or Flashcut in this respect but you still need error recovery code. I probe down to contact and then probe up to break so I get to the other side of the backlash and sheet deflection.
John
Please Log in or Create an account to join the conversation.
Time to create page: 0.171 seconds