"Origami" CNC Plasma Build - folding 1200 x 600mm cut area
- Joco
-
 Topic Author
- Offline
- Platinum Member
-

Less
More
- Posts: 532
- Thank you received: 327
30 Jul 2021 23:29 #216412
by Joco
Replied by Joco on topic "Origami" CNC Plasma Build - folding 1200 x 600mm cut area
Rod - I'm not sure its needed or necessarily useful. But just exploring it from a design angle.
The design I have at the moment is actually good enough to run with I think. Now I need to have another look over your's and Tomy's builds to see how you fixed the gantry beam to the Y axis sides. Then finish off my design for that so I can get the blanks cut up and get things processed on the CNC mill.
Cheers - J.
Please Log in or Create an account to join the conversation.
- Joco
-
Topic Author
- Offline
- Platinum Member
-
Less
More
- Posts: 532
- Thank you received: 327
21 Aug 2021 01:32 #218286
by Joco
Replied by Joco on topic "Origami" CNC Plasma Build - folding 1200 x 600mm cut area
Bit of a question today for those with more experience in this. I'm looking at the gantry sides and how they will connect to the beam that will support the X axis. I think I need to change things to allow for adjustment and probable a little more ridgidity.
So here's my hacky idea. Views, improvements and better approaches welcome!
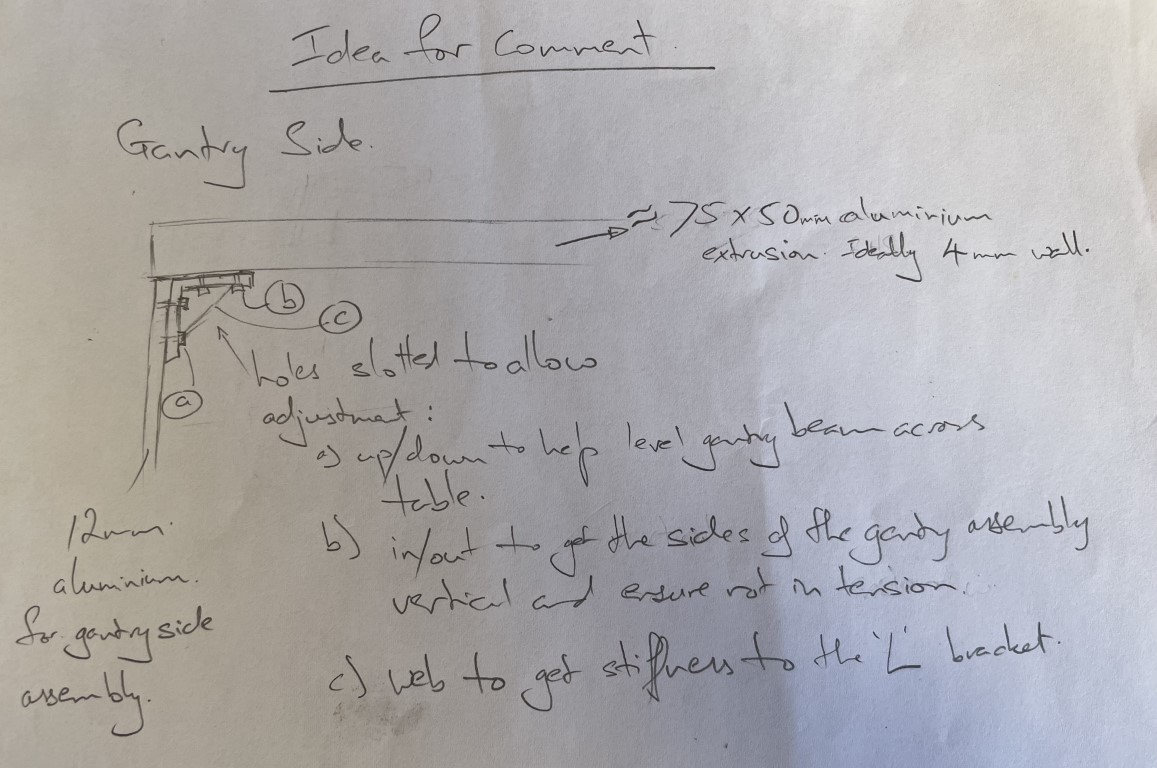
Thanks - James.
So here's my hacky idea. Views, improvements and better approaches welcome!
Thanks - James.
Attachments:
Please Log in or Create an account to join the conversation.
- Joco
-
Topic Author
- Offline
- Platinum Member
-
Less
More
- Posts: 532
- Thank you received: 327
25 Aug 2021 09:08 #218690
by Joco
Replied by Joco on topic "Origami" CNC Plasma Build - folding 1200 x 600mm cut area
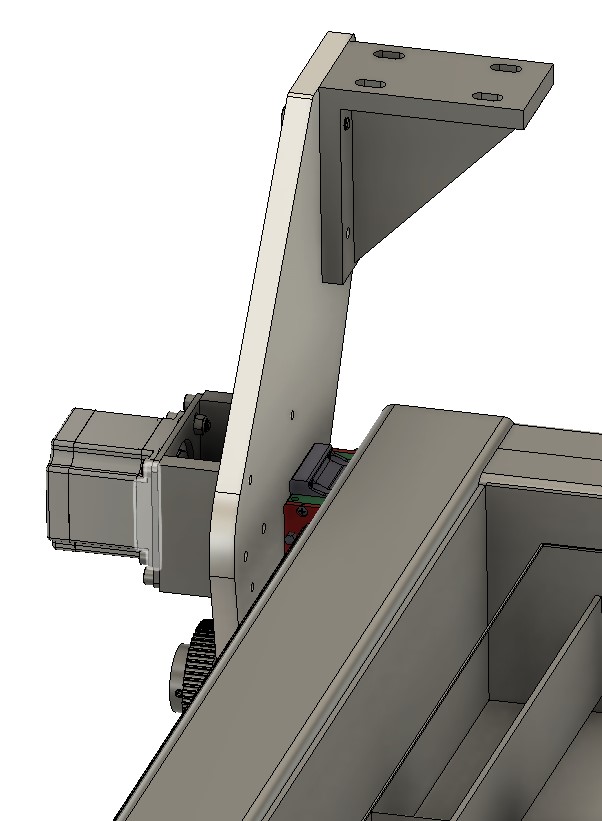
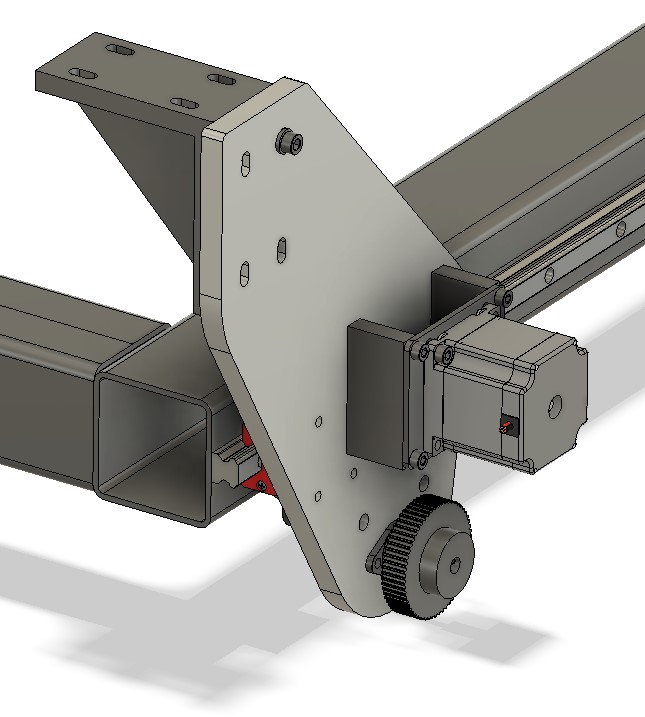
CAD designs on my take of this paper sketch. I understand this type of adjustment concept does exist on some commercial machines so I can't be too far off the mark.
Cheers - J.

Cheers - J.
Attachments:
Please Log in or Create an account to join the conversation.
- RNJFAB
- Offline
- Elite Member
-

Less
More
- Posts: 250
- Thank you received: 58
28 Aug 2021 09:35 #218976
by RNJFAB
Replied by RNJFAB on topic "Origami" CNC Plasma Build - folding 1200 x 600mm cut area
Looks good James.
you could also make the side plates bigger and have a l bracket on the top also.
If you checkout my gantry I welded nuts (M12) into the x axis, then slotted the y axis end plates so I had the up down adjustment to level the x axis with the table.
Cheers James
you could also make the side plates bigger and have a l bracket on the top also.
If you checkout my gantry I welded nuts (M12) into the x axis, then slotted the y axis end plates so I had the up down adjustment to level the x axis with the table.
Cheers James
The following user(s) said Thank You: Joco
Please Log in or Create an account to join the conversation.
- Joco
-
Topic Author
- Offline
- Platinum Member
-
Less
More
- Posts: 532
- Thank you received: 327
29 Aug 2021 23:43 #219132
by Joco
Replied by Joco on topic "Origami" CNC Plasma Build - folding 1200 x 600mm cut area
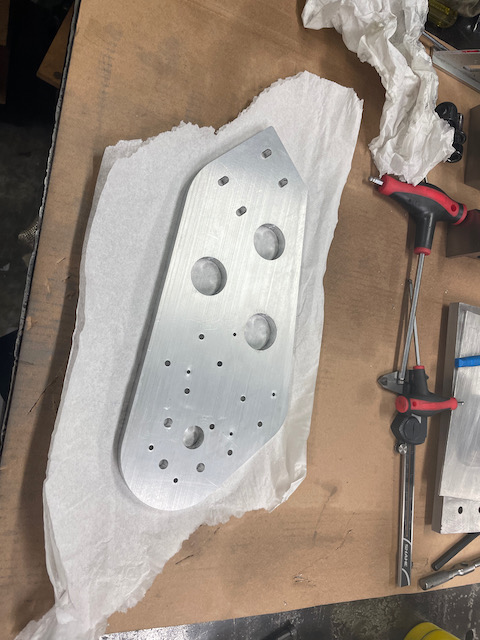
Getting prepped for some CNC milling action on the gantry sides.
Laying out the design on the fixture palette. In the Y it's a very tight fit and having to do this to this to the mm.
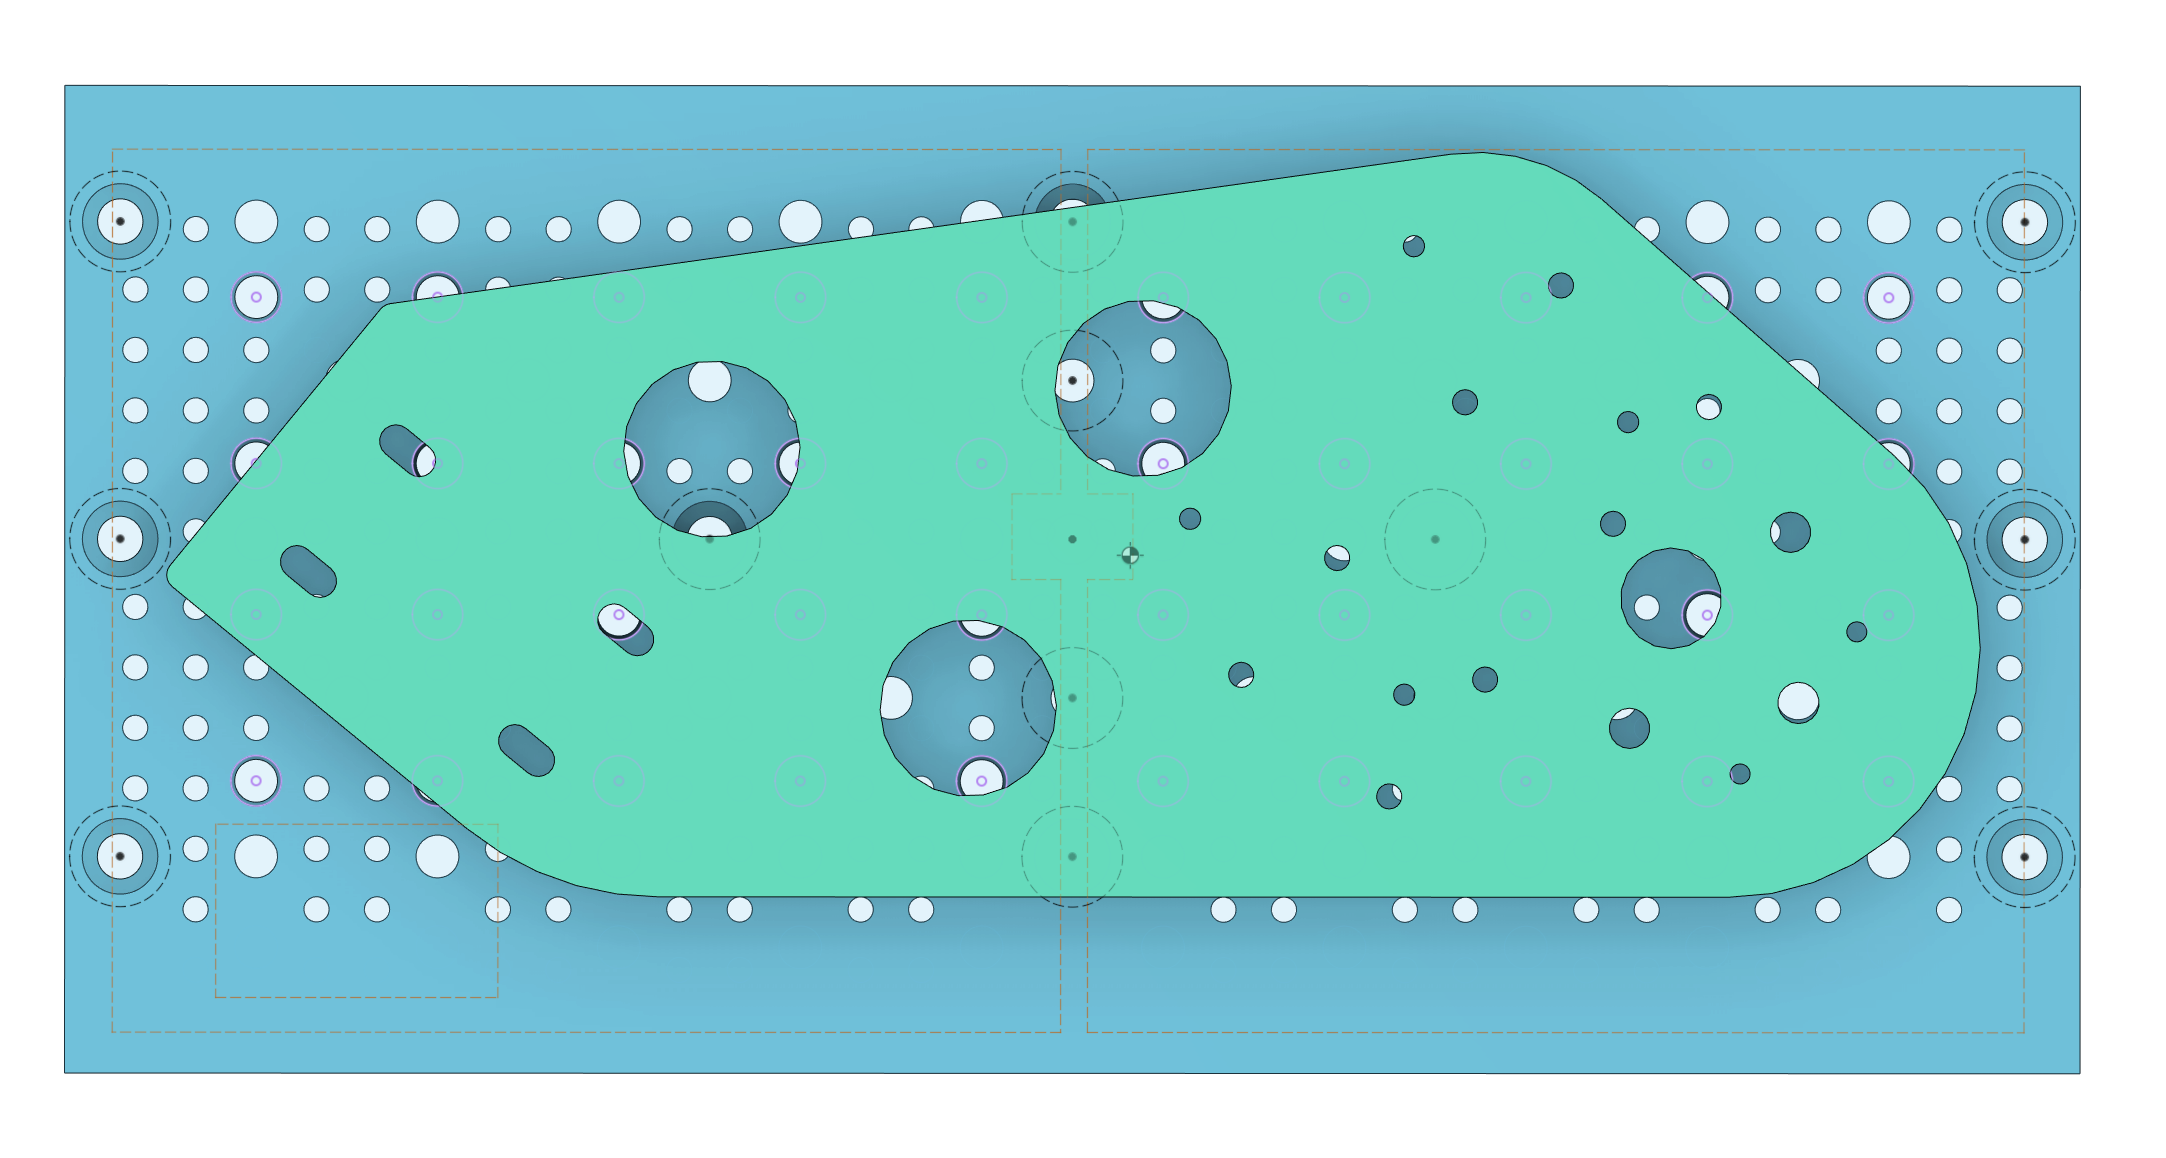
Working out where the internal clamping holes will be and laying spaces to support the blank off the pallet.
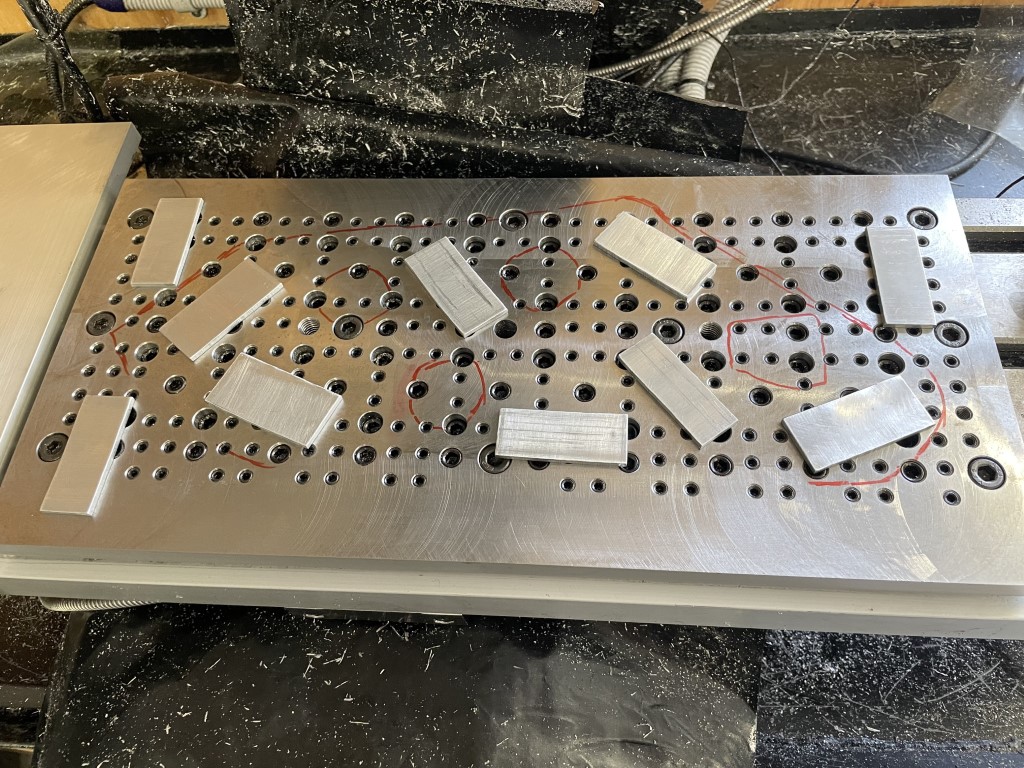
Some quick and "hacky" clamps. Even though not pretty they are very effective and quick to setup. Plan will be to make some a bunch of nicer looking ones for future use.
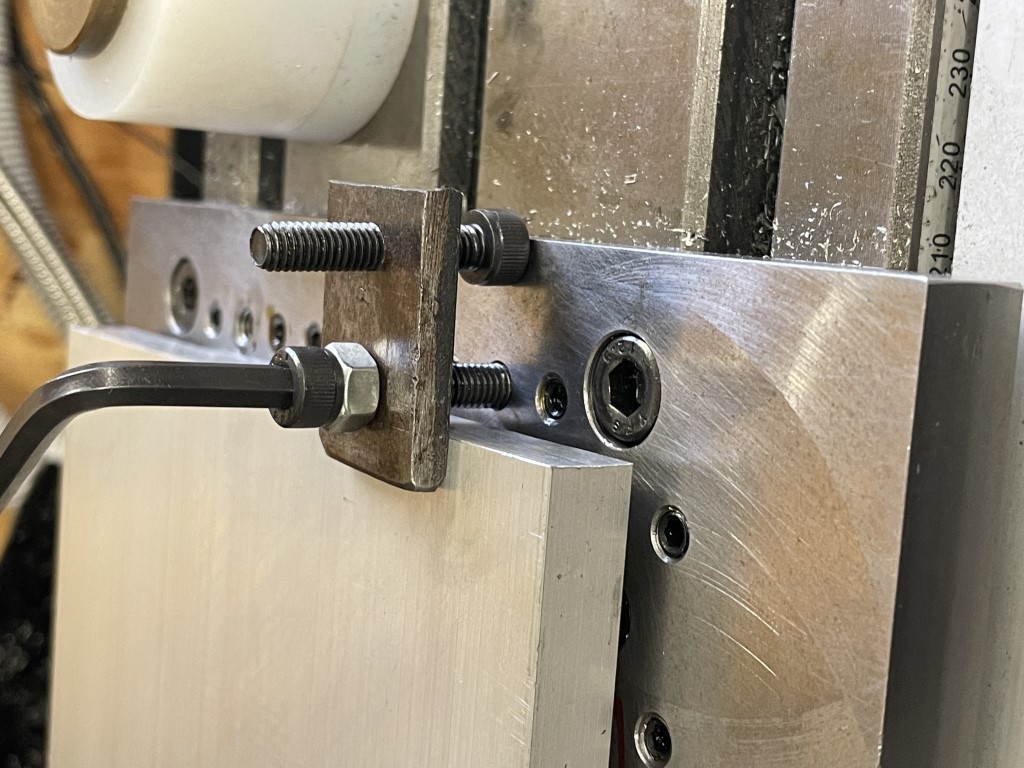
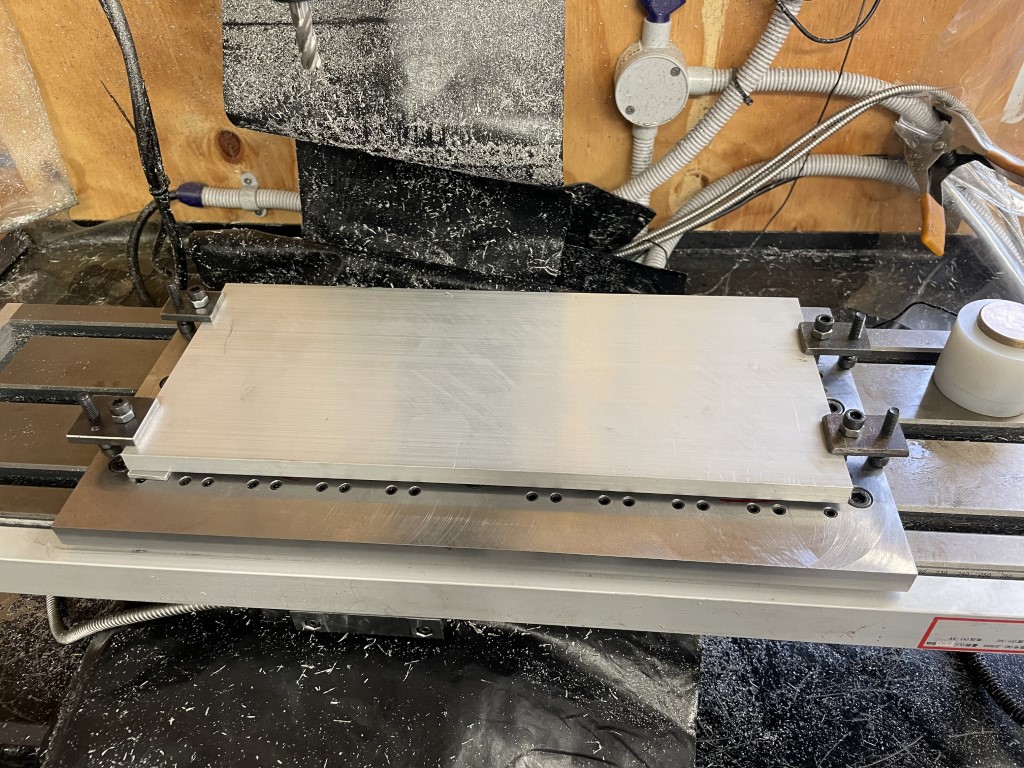
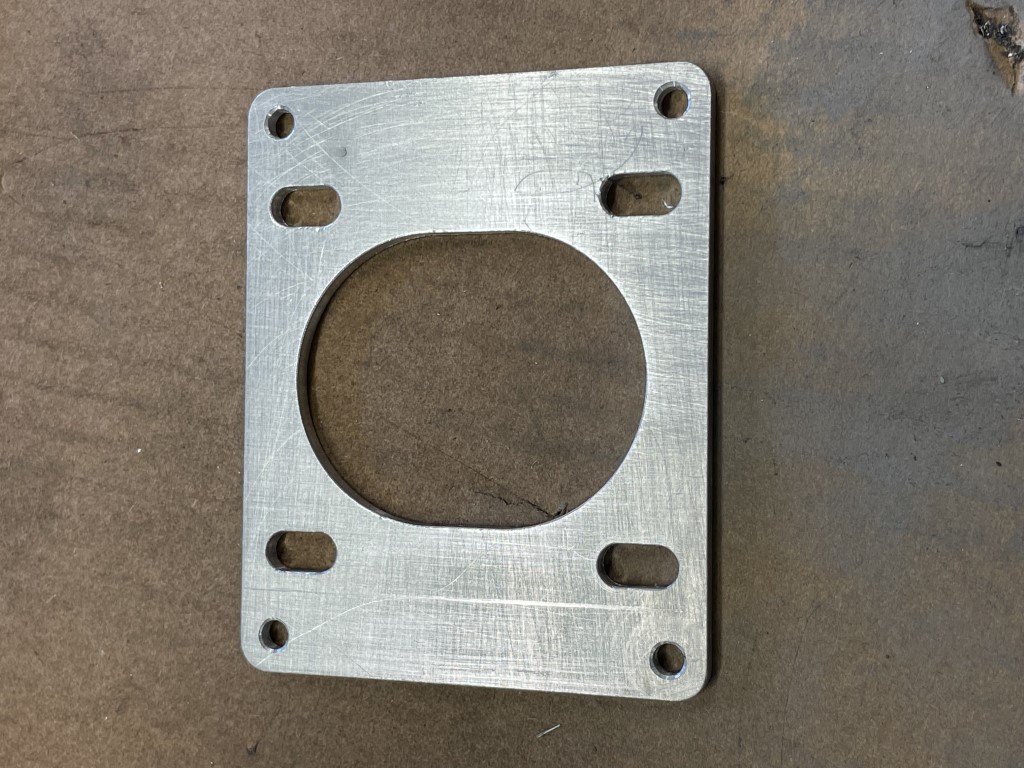
The blank in all its glory ready to be chewed up into a (hopefully) working part.
Cheers - J.
Laying out the design on the fixture palette. In the Y it's a very tight fit and having to do this to this to the mm.
Working out where the internal clamping holes will be and laying spaces to support the blank off the pallet.
Some quick and "hacky" clamps. Even though not pretty they are very effective and quick to setup. Plan will be to make some a bunch of nicer looking ones for future use.
The blank in all its glory ready to be chewed up into a (hopefully) working part.
Cheers - J.
Attachments:
The following user(s) said Thank You: tommylight, snowgoer540
Please Log in or Create an account to join the conversation.
- tommylight
-

- Away
- Moderator
-

Less
More
- Posts: 21640
- Thank you received: 7394
29 Aug 2021 23:57 #219135
by tommylight
Replied by tommylight on topic "Origami" CNC Plasma Build - folding 1200 x 600mm cut area
Just when it was about to get interesting, you stopped ! 
Please Log in or Create an account to join the conversation.
- Joco
-
Topic Author
- Offline
- Platinum Member
-
Less
More
- Posts: 532
- Thank you received: 327
30 Aug 2021 07:05 - 30 Aug 2021 07:06 #219147
by Joco
Replied by Joco on topic "Origami" CNC Plasma Build - folding 1200 x 600mm cut area
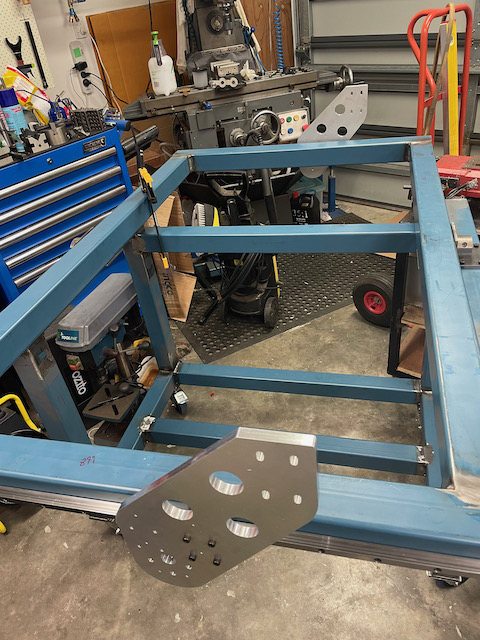
Sorry Tommy, work got in the way. But first gantry side machined on the wee BF20-CNC. Rather pleased with how it has come out.
Op1 completed with all the internal holes drilled, bored and pocket cleared.
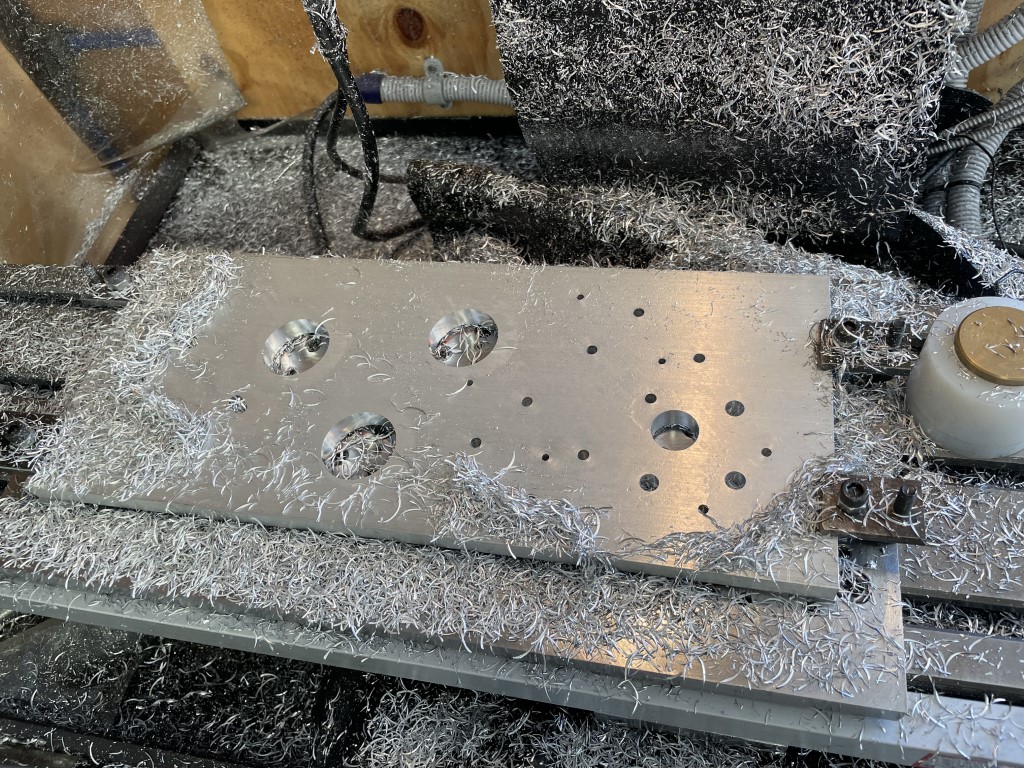
Op2 completed. We have a completed part!!

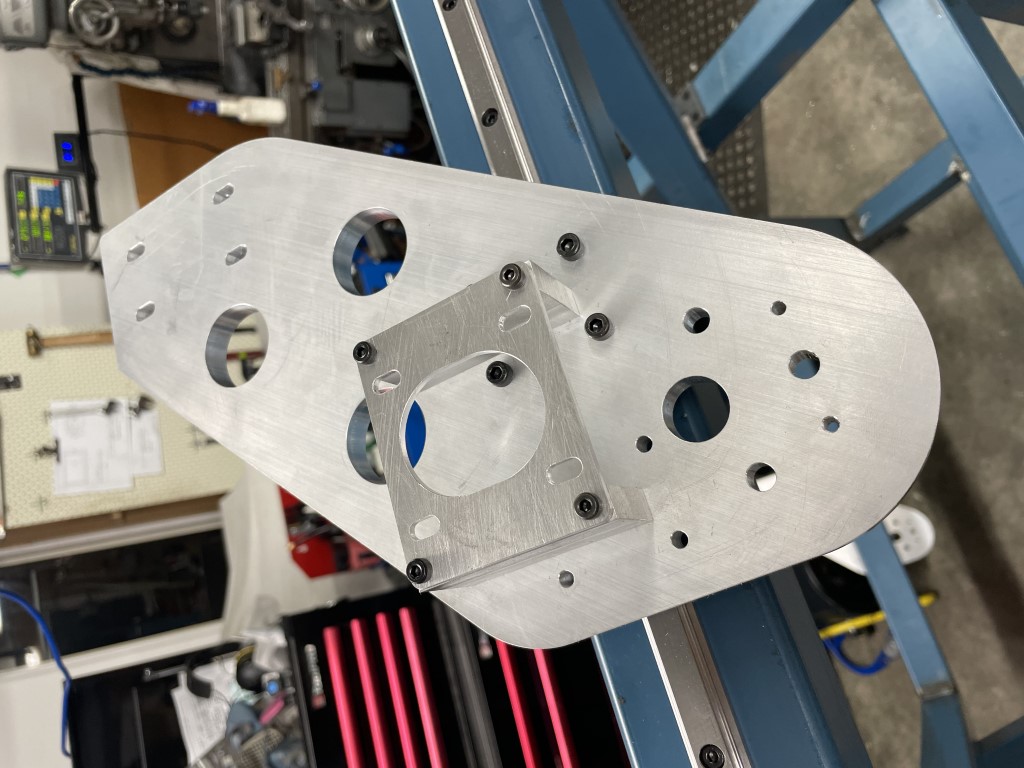
Test fit on the table, perfect alignment with the linear rail truck. Very happy camper. Guess I need to get on to the otherside. Now I have working gcode files its really just rinse and repeat.
Op1 completed with all the internal holes drilled, bored and pocket cleared.
Op2 completed. We have a completed part!!
Test fit on the table, perfect alignment with the linear rail truck. Very happy camper. Guess I need to get on to the otherside. Now I have working gcode files its really just rinse and repeat.
Attachments:
Last edit: 30 Aug 2021 07:06 by Joco.
The following user(s) said Thank You: phillc54, tommylight, Clive S, snowgoer540
Please Log in or Create an account to join the conversation.
- Joco
-
Topic Author
- Offline
- Platinum Member
-
Less
More
- Posts: 532
- Thank you received: 327
31 Aug 2021 09:33 #219232
by Joco
Replied by Joco on topic "Origami" CNC Plasma Build - folding 1200 x 600mm cut area
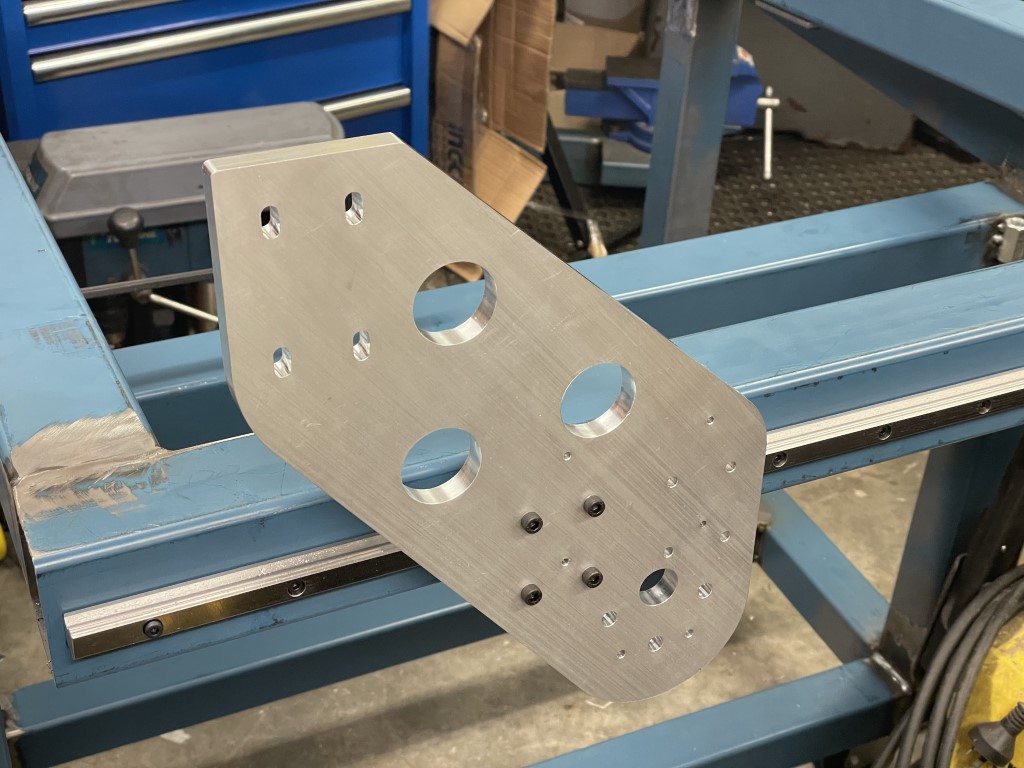
One of the obvious joys of cnc is that once you have a working recipe it really is just rinse and repeat. So easy to see why industry has jumped into automated manufacturing for high volume repeatable processes. Anyway, back on topic, the "other side".

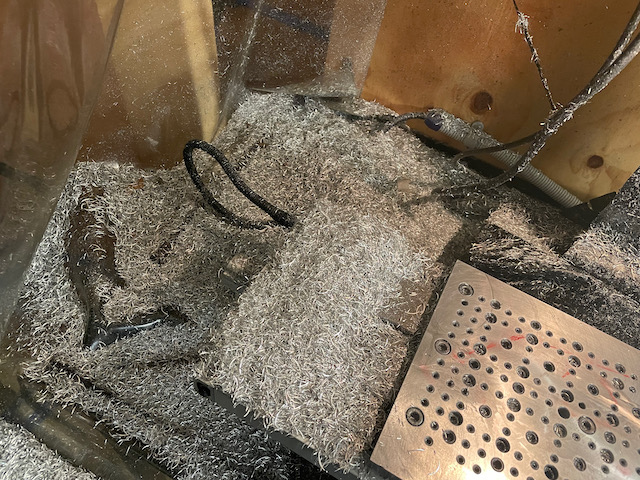
I moved to IPA for coolant/lubricant on my DIY fogbuster. It's great as there is no residue. The chips are all dry and clean. BUT it atomises much easier than soluable oil. I'm going to have to do some design adjustments cose PHEW - smell. Fortunately the weather was good enough to be able to pop the garage door! So after a lot of IPA fumes (wearing a fume mask with painters filters) and a LOT of chips
We have ... the SECOND SIDE
And of course nothing is complete without showing it mounted
Now to move on to the deciding final orientation and then sorting out the motor mounts and drive pulleys.
Cheers - J.
Attachments:
The following user(s) said Thank You: tommylight, RNJFAB
Please Log in or Create an account to join the conversation.
- Joco
-
Topic Author
- Offline
- Platinum Member
-
Less
More
- Posts: 532
- Thank you received: 327
04 Sep 2021 22:00 #219629
by Joco
Replied by Joco on topic "Origami" CNC Plasma Build - folding 1200 x 600mm cut area
A little more work over this weekend. Not as fast as would like as hitting a few minor snags.
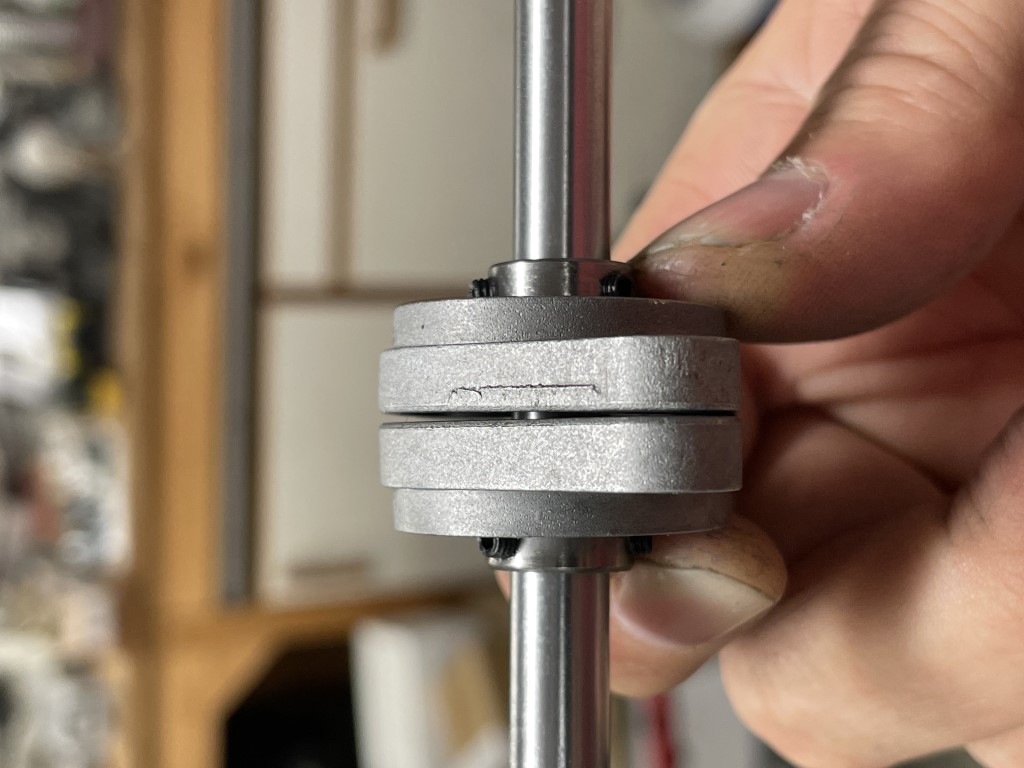
First off (which I have still not fully solved) is the bearings are reallt siff from an alignment angle. These are self aligning but they are VERY stiff in the housing meaning when clamped on either side of the plate with the shaft in them the alignment aspect does not move and the shaft wont rotate. I think I am going to need to use some pentatrating oil and get them wiggled enough to have a bit more motion.
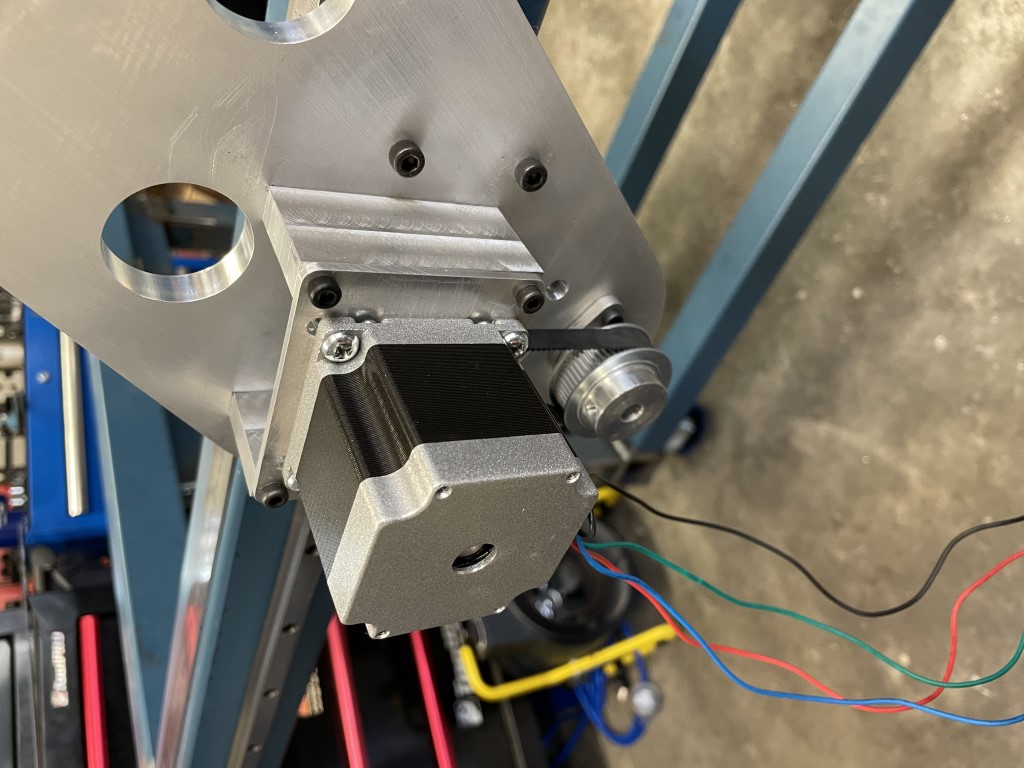
Other than the above little issue I have made some progress in making the motor mounts and the stand-offs.
The moving on to proving my CAD was not a disaster and the pulley centre and belt lengths for the gearing ratios all work. Spoiler - seems to be perfect.
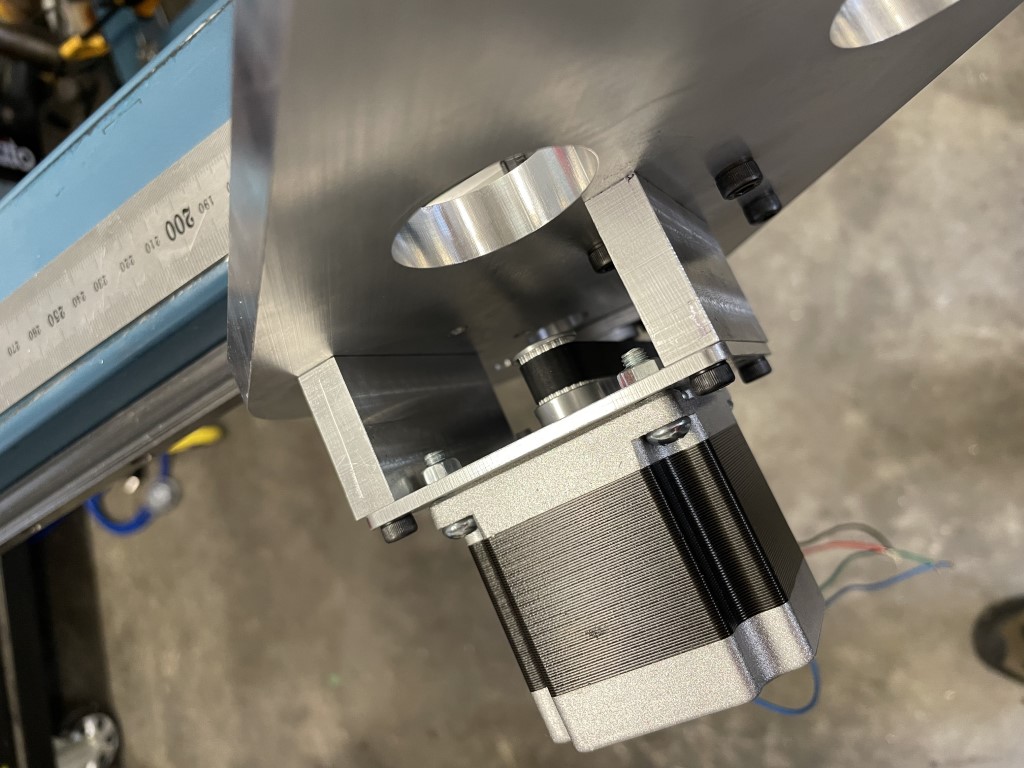
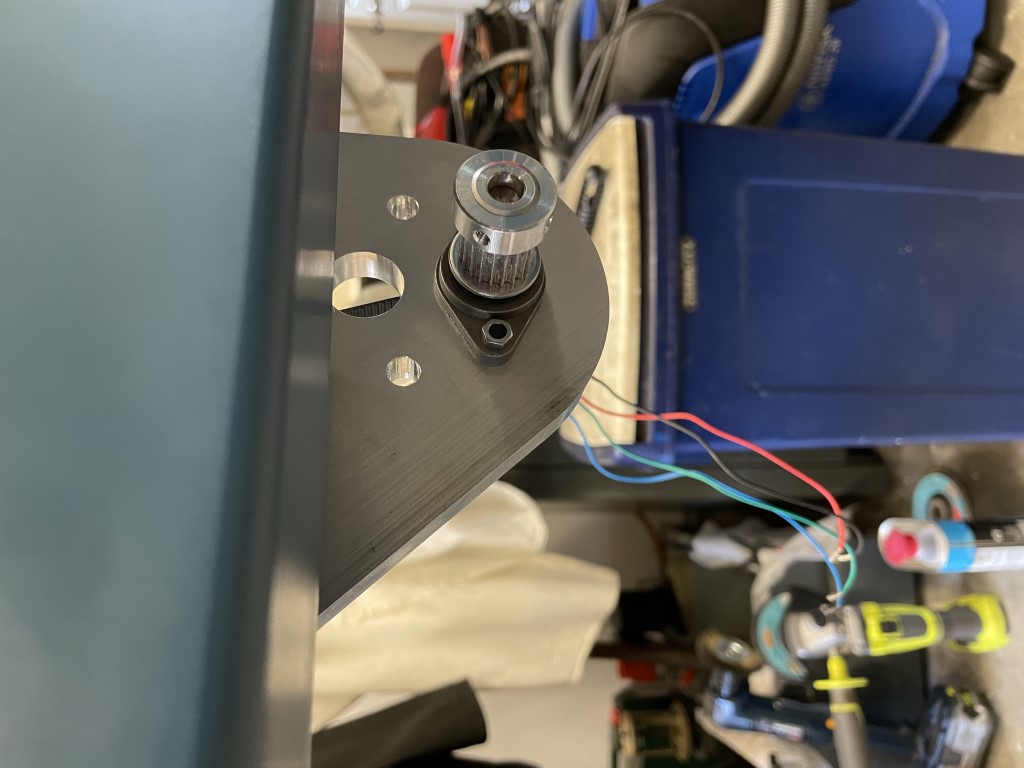
Slowly winning.
Cheers - J.
First off (which I have still not fully solved) is the bearings are reallt siff from an alignment angle. These are self aligning but they are VERY stiff in the housing meaning when clamped on either side of the plate with the shaft in them the alignment aspect does not move and the shaft wont rotate. I think I am going to need to use some pentatrating oil and get them wiggled enough to have a bit more motion.
Other than the above little issue I have made some progress in making the motor mounts and the stand-offs.
The moving on to proving my CAD was not a disaster and the pulley centre and belt lengths for the gearing ratios all work. Spoiler - seems to be perfect.
Slowly winning.
Cheers - J.
Attachments:
The following user(s) said Thank You: tommylight
Please Log in or Create an account to join the conversation.
- tommylight
-
- Away
- Moderator
-
Less
More
- Posts: 21640
- Thank you received: 7394
04 Sep 2021 23:10 #219634
by tommylight
Replied by tommylight on topic "Origami" CNC Plasma Build - folding 1200 x 600mm cut area
Very nice, indeed ! ")
Soon all that will be covered in black dust !
Soon all that will be covered in black dust !
Please Log in or Create an account to join the conversation.
Time to create page: 0.554 seconds