"Origami" CNC Plasma Build - folding 1200 x 600mm cut area
- tommylight
-

- Offline
- Moderator
-

Less
More
- Posts: 21719
- Thank you received: 7422
13 Sep 2021 23:25 #220530
by tommylight

Blatantly stole that picture from the internet!
On last two builds i used two of these for each belt on the Y axis, so total of 4.
Used just the U part, ditched to bolts and got some nice shiny covered bolts instead, drilled holes on each side and voila! Now i have about 4 cm of slack and it also looks like a feature on the black painted legs.
Reminds me, i need more of those.
There are plenty of sizes to choose from.
Replied by tommylight on topic "Origami" CNC Plasma Build - folding 1200 x 600mm cut area
Blatantly stole that picture from the internet!
On last two builds i used two of these for each belt on the Y axis, so total of 4.
Used just the U part, ditched to bolts and got some nice shiny covered bolts instead, drilled holes on each side and voila! Now i have about 4 cm of slack and it also looks like a feature on the black painted legs.
Reminds me, i need more of those.
There are plenty of sizes to choose from.
Attachments:
Please Log in or Create an account to join the conversation.
- Joco
-
 Topic Author
- Offline
- Platinum Member
-

Less
More
- Posts: 532
- Thank you received: 327
14 Sep 2021 01:40 - 14 Sep 2021 01:41 #220540
by Joco
Replied by Joco on topic "Origami" CNC Plasma Build - folding 1200 x 600mm cut area
It might work. Will need to do some mearasurements.
The "Challenge" I have is since the table needs to fold I can't have a system that creats any ocverhang on the edge that will interfere with the table pivot. I also have very limited space to play with as a result of design choices made. (see below).
Why I did custome designed fittings: I might be over thinking it, but I thought I was supposed to keep the belts in line with the idlers at each fixed end. To do that I have limited room and I do not believe these U bolt systems will allow me to get up inline with the plane of the belt idler unless they are off the edge of the table where they will stop the pivot function.
The reason the belts are close to the underside of the frame is I was minimsing the amount of gantry side overhang below the level of the tavke top frame. By doing this I am able to increase the vertical tilt angle so as to reduce the overall bottom foorprint when the table is in the storage position. And floor space is a premium so I was looking to get EVERY cm back that I could.
The above is why I went down the custom path. Poop - another case of wishing I have a tripple garage I could spread out in. Then I could have had a perm setup table which would have made things much simpler. But then I probably would have a CNC lathe project and a T&C Grinder competing for the plasma table space. lol
Last edit: 14 Sep 2021 01:41 by Joco.
The following user(s) said Thank You: tommylight
Please Log in or Create an account to join the conversation.
- Joco
-
Topic Author
- Offline
- Platinum Member
-
Less
More
- Posts: 532
- Thank you received: 327
15 Sep 2021 09:10 - 15 Sep 2021 09:24 #220683
by Joco
Replied by Joco on topic "Origami" CNC Plasma Build - folding 1200 x 600mm cut area
First proof of synchronised motion on the independently controlled Y-Axis gantry sides. Each side is its own joint in LinuxCNC. The intent being that the joints will home independently at the same time. With correctly set home points they will automatically square the gantry on homing.
Of course everyone here knows that.

Of course everyone here knows that.
Last edit: 15 Sep 2021 09:24 by Joco.
The following user(s) said Thank You: tommylight, CNCFred
Please Log in or Create an account to join the conversation.
- tommylight
-
- Offline
- Moderator
-
Less
More
- Posts: 21719
- Thank you received: 7422
15 Sep 2021 10:17 #220691
by tommylight
Replied by tommylight on topic "Origami" CNC Plasma Build - folding 1200 x 600mm cut area
No sparks yet ???
")
Please Log in or Create an account to join the conversation.
- Joco
-
Topic Author
- Offline
- Platinum Member
-
Less
More
- Posts: 532
- Thank you received: 327
15 Sep 2021 18:45 #220730
by Joco
Replied by Joco on topic "Origami" CNC Plasma Build - folding 1200 x 600mm cut area
Sparks? I wish. Hope to get the aluminium this weekend for gantry beam and to allow construction of the Z axis. The machine torch which “should” fit me power source is still sitting in Singapore airport. And I need to get the metal control cabinet ordered to support proper grounding and dust safety for the electronics.
BUT after tackling those things I might be in a position to do a test cut. Even without THCAD. Just to get some proof before moving on to tackle the water table construction and associated plumbing.
soooo much to do. But gaining real encouragement from seeing these early movement wins.
BUT after tackling those things I might be in a position to do a test cut. Even without THCAD. Just to get some proof before moving on to tackle the water table construction and associated plumbing.
soooo much to do. But gaining real encouragement from seeing these early movement wins.
The following user(s) said Thank You: tommylight
Please Log in or Create an account to join the conversation.
- Joco
-
Topic Author
- Offline
- Platinum Member
-
Less
More
- Posts: 532
- Thank you received: 327
19 Sep 2021 10:01 #221074
by Joco
Replied by Joco on topic "Origami" CNC Plasma Build - folding 1200 x 600mm cut area
Short progress update. Major win this weekend was getting the aluminum (6061) for the next stage of the build.
1. gantry beam is RHS 75x50 with a 4mm wall.
2. 65x6 flat bar to create the Z assembly and gantry brackets from. I was after 60mm wide but they didn't have any so I got what I could get.
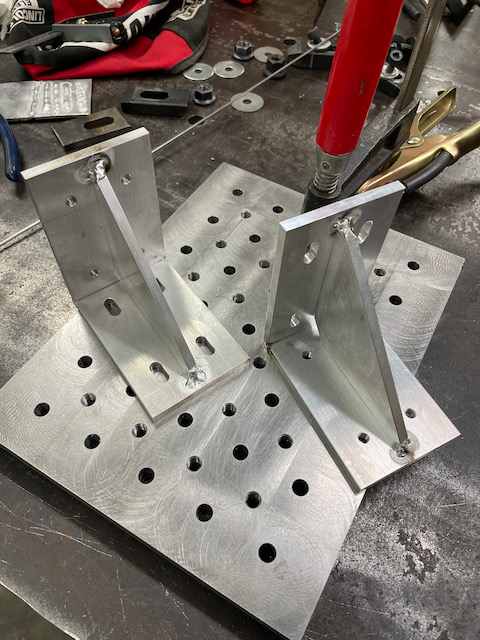
I started on the two brackets, This was a a little intimidating as I planned to make these a weldment and I Haven't welded ali for probably over a year. So this is as much a relearning exercise as it is creating a part for the project.
First off here is an image of the a dry fit up pf the bracket.
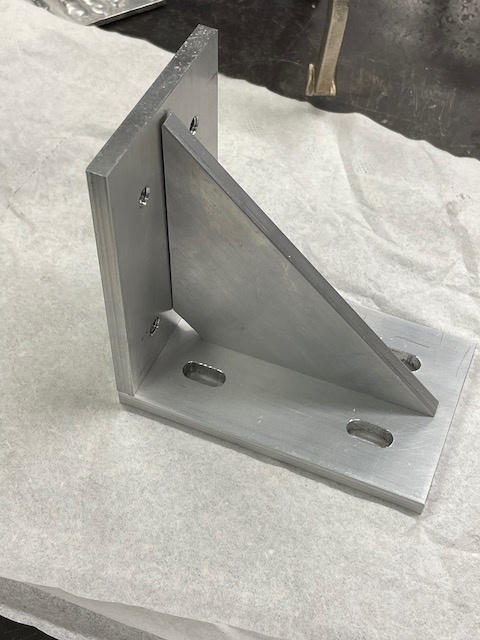
I then went on to investigate how I was going to hold this all in correct shape/alignment during welding. I needed to control potential warping. So I tried a setup and then starting thinking about the nature of the outside corner joint I had. The more I thought about it the less I liked the idea. I could do a weld down the seam but it would not have very good fusion. I could bevel one or both plates. But if doing that why not just do an edge-to-edge corner joint. That would give a space to put a lot of weld metal into.
So I trialed such a setup on some test pieces and had a crack welding it up.
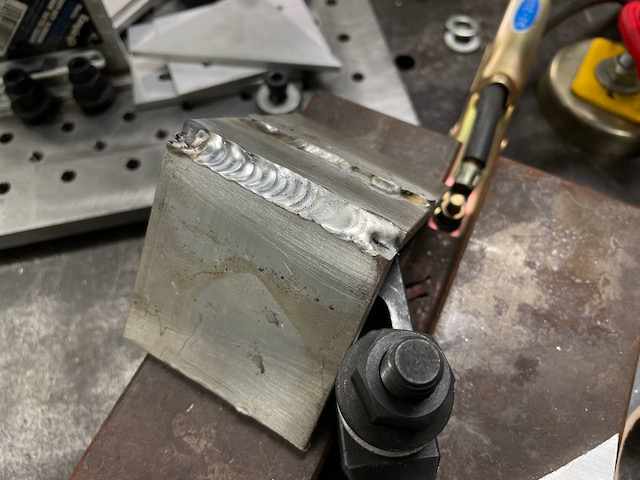
Okayish. Other than when I tried to increase the strength by adding tungsten at one end.
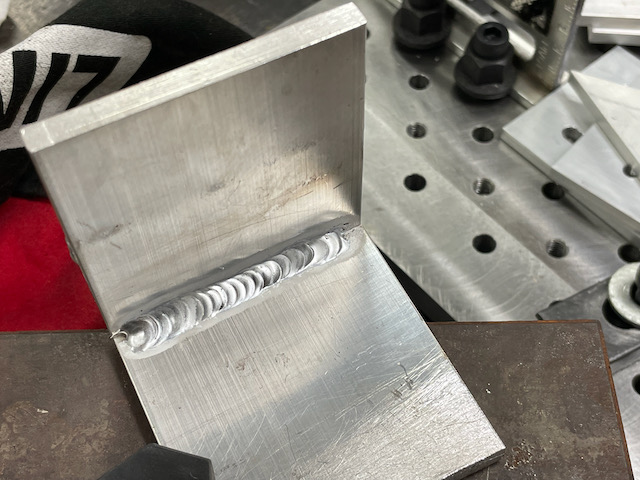
Then had a go at welding the inside corner. Better, think this could work.
I think I will setup for this style edge-to-edge corner joint and give it a crack. Worse comes to worse I have to remake some bits.
Cheers - J.
1. gantry beam is RHS 75x50 with a 4mm wall.
2. 65x6 flat bar to create the Z assembly and gantry brackets from. I was after 60mm wide but they didn't have any so I got what I could get.
I started on the two brackets, This was a a little intimidating as I planned to make these a weldment and I Haven't welded ali for probably over a year. So this is as much a relearning exercise as it is creating a part for the project.
First off here is an image of the a dry fit up pf the bracket.
I then went on to investigate how I was going to hold this all in correct shape/alignment during welding. I needed to control potential warping. So I tried a setup and then starting thinking about the nature of the outside corner joint I had. The more I thought about it the less I liked the idea. I could do a weld down the seam but it would not have very good fusion. I could bevel one or both plates. But if doing that why not just do an edge-to-edge corner joint. That would give a space to put a lot of weld metal into.
So I trialed such a setup on some test pieces and had a crack welding it up.
Okayish. Other than when I tried to increase the strength by adding tungsten at one end.
Then had a go at welding the inside corner. Better, think this could work.
I think I will setup for this style edge-to-edge corner joint and give it a crack. Worse comes to worse I have to remake some bits.
Cheers - J.
The following user(s) said Thank You: tommylight
Please Log in or Create an account to join the conversation.
- Joco
-
Topic Author
- Offline
- Platinum Member
-
Less
More
- Posts: 532
- Thank you received: 327
20 Sep 2021 08:56 #221180
by Joco
Replied by Joco on topic "Origami" CNC Plasma Build - folding 1200 x 600mm cut area
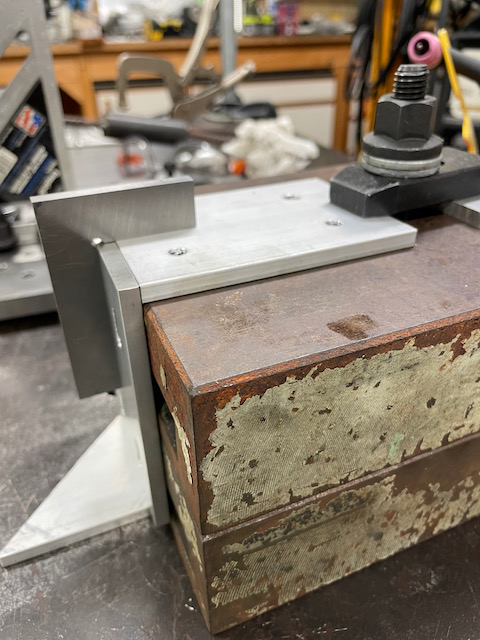
Back to work but managed to get the brackets tacked up and checked for still being square. So far so good. Of course the real fun starts when I lay down some weld bead.
Attachments:
Please Log in or Create an account to join the conversation.
- Joco
-
Topic Author
- Offline
- Platinum Member
-
Less
More
- Posts: 532
- Thank you received: 327
21 Sep 2021 09:16 - 21 Sep 2021 09:18 #221256
by Joco
Replied by Joco on topic "Origami" CNC Plasma Build - folding 1200 x 600mm cut area
Got one welded up tonight. Seems to be pretty square for a weldment. Will get the second one done, do a final skim in the mill on one face that has a weld and mount them up. Then on to the gantry.
The welds are functional and not pretty. Its what happens when you don't weld enough to get good practice. But they are stuck and for the forces they will be dealing with should do the job just fine.
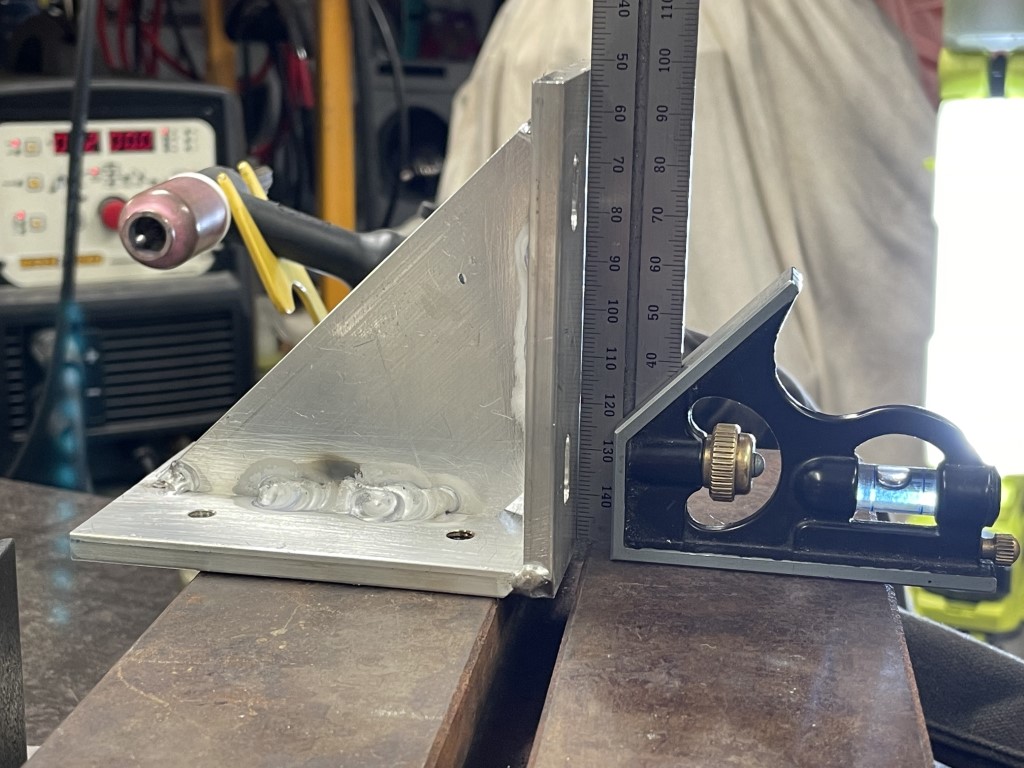
The welds are functional and not pretty. Its what happens when you don't weld enough to get good practice. But they are stuck and for the forces they will be dealing with should do the job just fine.
Attachments:
Last edit: 21 Sep 2021 09:18 by Joco.
The following user(s) said Thank You: tommylight, RNJFAB
Please Log in or Create an account to join the conversation.
- RNJFAB
- Offline
- Elite Member
-

Less
More
- Posts: 251
- Thank you received: 59
24 Sep 2021 00:29 #221472
by RNJFAB
Replied by RNJFAB on topic "Origami" CNC Plasma Build - folding 1200 x 600mm cut area
Great work James,
Its all coming along nicely.
Not long now...
Its all coming along nicely.
Not long now...
Please Log in or Create an account to join the conversation.
- RNJFAB
- Offline
- Elite Member
-
Less
More
- Posts: 251
- Thank you received: 59
24 Sep 2021 00:54 #221478
by RNJFAB
Replied by RNJFAB on topic "Origami" CNC Plasma Build - folding 1200 x 600mm cut area
Hey James,
Have you started n the Z axis yet?
I'm about to make the 3 hour round trip to get some ally sheets for a few jobs and was going to pickup a bunch of plate to start on the new Z axis.
Have you started n the Z axis yet?
I'm about to make the 3 hour round trip to get some ally sheets for a few jobs and was going to pickup a bunch of plate to start on the new Z axis.
Please Log in or Create an account to join the conversation.
Time to create page: 0.391 seconds